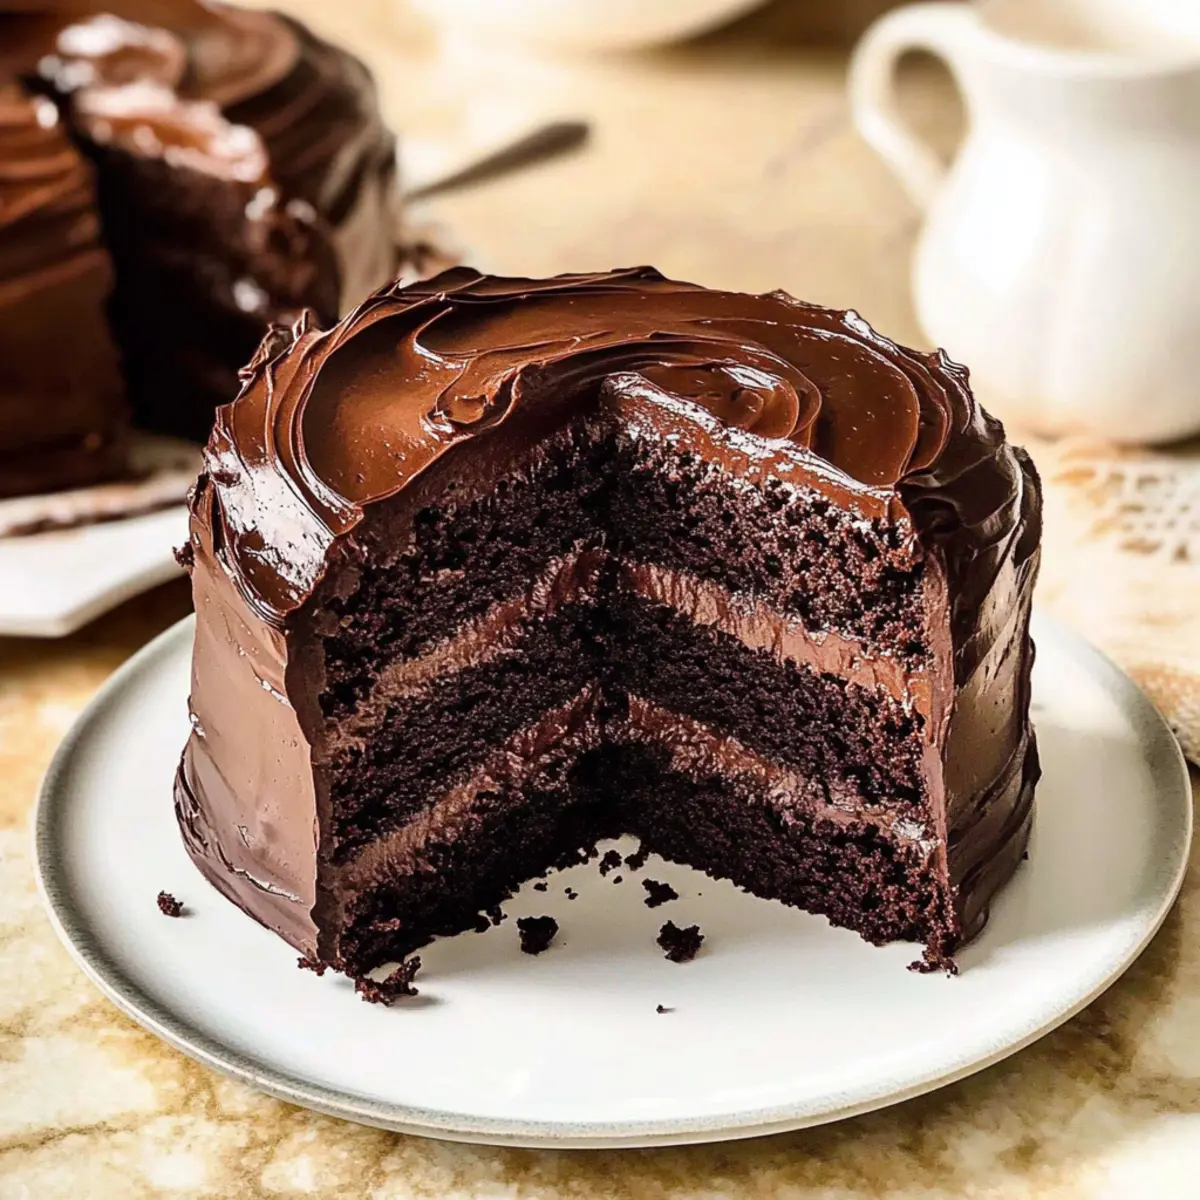
The aroma of fresh chocolate cake wafting through the house evokes memories of childhood magic, and that’s exactly what you’ll experience with Matilda’s Chocolate Cake. This moist, rich dessert isn’t just inspired by the beloved film; it’s a celebration of delicious excess that brings joy to any occasion. With its stunning glossy fudge frosting and no-mixer preparation, this cake is perfect for both novice bakers and seasoned pros alike. Plus, it offers the flexibility to cater to various dietary needs, making it a truly crowd-pleasing option. Whether you’re planning a birthday, an anniversary, or simply want to indulge in a sweet treat, this recipe has you covered. Are you ready to create a showstopper that steals the spotlight? Let’s dive into the delightful world of Matilda’s Chocolate Cake!
Why is Matilda’s Chocolate Cake a Must-Try?
Decadent Flavor: Your taste buds will thank you for this ultra-rich dessert, beautifully enhanced with glossy fudge frosting that’s just as delightful to look at as it is to eat.
Simple Process: No complicated techniques are required; just mix your ingredients and let the oven do the magic. Perfect for cooks of all skill levels!
Versatile Options: Whether you’re in need of an egg-free, dairy-free, or gluten-free treat, this recipe has got you covered without sacrificing taste.
Crowd-Pleasing Delight: Watch as everyone swoons over each slice, making it the ideal centerpiece for birthdays or festive gatherings. For added sweetness, consider serving it alongside a scoop of vanilla ice cream or a dollop of whipped cream!
Storing Made Easy: Not going to finish it all at once? No worries! Store your cake in an airtight container for up to 5 days or freeze it for longer enjoyment, just like our Pistachio Blackberry Cake does!
Matilda’s Chocolate Cake Ingredients
For the Cake
- All-Purpose Flour – Provides essential structure to hold the fudgy crumb together.
- Granulated Sugar – Sweetens the cake while contributing to its tender texture.
- Baking Powder & Baking Soda – Key leaveners for lift, interacting with buttermilk for that perfect rise.
- Fine Sea Salt – Enhances the chocolate flavor and balances out the sweetness beautifully.
- Dutch-Processed Cocoa Powder – Imparts a rich, smooth chocolate flavor; use half for dry mixing and half bloomed in hot coffee.
- Buttermilk – Adds acidity to create that melt-in-your-mouth tenderness you’ll love.
- Vegetable Oil – Keeps the cake moist longer than butter could.
- Large Eggs – Binds all the ingredients together while adding richness.
- Hot Brewed Coffee – Blooms cocoa, boosting its flavor without leaving any coffee taste.
- Pure Vanilla Extract – Complements the chocolate, adding delightful depth to every bite.
For the Frosting
- Semi-Sweet Chocolate – Use high-quality chocolate (60% to 70% cocoa) for a smoother frosting consistency; steer clear of chocolate chips.
- Unsalted Butter – Adds rich texture to the frosting for that luscious mouthfeel.
- Heavy Cream – Creates a glossy finish that’s oh-so-smooth for your frosting.
- Powdered Sugar – Ensures a velvety frosting; remember to sift before use for the best results.
Dive into the enchanting world of Matilda’s Chocolate Cake with these simple yet essential ingredients! Happy baking!
Step‑by‑Step Instructions for Matilda’s Chocolate Cake
Step 1: Preheat and Prepare
Begin by preheating your oven to 350°F (175°C). While the oven warms up, grease two 8-inch round cake pans with butter or vegetable oil, ensuring even coverage to prevent sticking. For added assurance, line the bottoms with parchment paper, pressing down gently and allowing the sides to remain bare. This preparation sets the stage for a seamless release of your luscious Matilda’s Chocolate Cake after baking.
Step 2: Bloom the Cocoa
In a medium mixing bowl, whisk together half of the Dutch-processed cocoa powder and the hot brewed coffee. Allow this mixture to sit for about 10 minutes, enabling the cocoa to bloom. This crucial step intensifies the chocolate flavor, making your cake even richer without any coffee taste lingering. Set aside this fragrant cocoa brew while you work on the dry ingredients.
Step 3: Mix the Dry Ingredients
In a large mixing bowl, sift together the all-purpose flour, remaining cocoa powder, granulated sugar, baking powder, baking soda, and fine sea salt. Use a whisk to thoroughly combine these ingredients, ensuring an even distribution. This mixture will be the foundation of your Matilda’s Chocolate Cake, so give it a good mix until you see no lumps, resulting in a beautifully airy dry mix.
Step 4: Combine Wet Ingredients
Add the large eggs, buttermilk, vegetable oil, and pure vanilla extract into the bowl with the dry ingredients. With a whisk, mix these wet ingredients until the batter is smooth and well combined. This process should take about 2 minutes, yielding a thick and creamy consistency that shows no dry patches. This blend is essential for achieving your cake’s moist texture and rich flavor.
Step 5: Incorporate the Cocoa Mixture
Gently stir in the bloomed coffee-cocoa mixture into the batter, ensuring all components are well incorporated. You’ll notice the batter becoming darker and more luscious. Continue mixing until fully combined, taking care not to overwork the batter as this can affect the cake’s texture. This rich chocolate mixture is the heart of your Matilda’s Chocolate Cake!
Step 6: Bake the Cakes
Divide the batter evenly between the prepared cake pans, smoothing the tops with a spatula. Place both pans in the preheated oven and bake for 30 to 35 minutes, or until a toothpick inserted in the center comes out clean. The cakes should spring back when lightly touched on top, signaling they’re ready. This is the moment to savor the lovely chocolate aroma filling your kitchen!
Step 7: Cool the Cakes
Once baked, remove the cake pans from the oven and let them cool for about 10 minutes on a wire rack. After that, carefully turn them out of the pans onto the rack to cool completely. Allowing the cakes to cool thoroughly is vital before frosting, ensuring that the rich texture of your Matilda’s Chocolate Cake is preserved when you add that luscious topping.
Step 8: Prepare the Frosting
In a saucepan over low heat, combine the semi-sweet chocolate, unsalted butter, heavy cream, and sifted powdered sugar. Stir continuously until the mixture is completely melted and smooth, which should take about 5 minutes. This decadent frosting will create a glossy finish for your cake and bring that luxurious touch to every slice you serve from your Matilda’s Chocolate Cake.
Step 9: Chill the Frosting
Once the frosting is smooth, strain it through a fine-mesh sieve to remove any lumps, ensuring a velvety consistency. Then, let it chill in the refrigerator until it thickens, about 15 to 20 minutes. Chilling helps the frosting firm up slightly, making it easier to spread between layers and over the top of your cake.
Step 10: Assemble the Cake
When the cakes are completely cool, place one layer on a serving plate. Spread a generous amount of frosting on top, then gently place the second layer over it. Spread remaining frosting over the top and sides of the cake. Allow it to sit at room temperature for about 15 minutes, letting the frosting set slightly and enhancing the rich indulgence of your Matilda’s Chocolate Cake before slicing into it.
Make Ahead Options
These delicious Matilda’s Chocolate Cake components are perfect for meal prep, saving you time on busy days! You can bake the cake layers up to 3 days in advance; simply cool them completely, wrap them well in plastic wrap, and refrigerate. The frosting can be made up to 24 hours ahead; store it in an airtight container in the fridge, then re-whip it briefly to restore its smoothness before frosting the cake. When you’re ready to serve, let the layers come to room temperature, assemble the cake with the chilled frosting, and enjoy a decadent, restaurant-quality dessert with minimal effort. Just follow these steps for an irresistibly tasty treat!
Expert Tips for Matilda’s Chocolate Cake
-
Room Temperature Ingredients: Ensure your eggs and buttermilk are at room temperature for even mixing and optimal rise in your Matilda’s Chocolate Cake.
-
Avoid Over-Mixing: Mix your batter just until combined to prevent gluten development, which could lead to a tough texture.
-
Check Cake Doneness: Use a digital thermometer; the cake should reach around 205°F (96°C) for the perfect bake without being dry.
-
Frosting Temperature Control: Keep the heat low when melting frosting ingredients to prevent separation; high heat can ruin that luscious texture.
-
Sifting is Key: Always sift your powdered sugar for frosting; this ensures a smooth, lump-free consistency that enhances the final presentation.
How to Store and Freeze Matilda’s Chocolate Cake
Airtight Container: Store your Matilda’s Chocolate Cake in an airtight container at room temperature for up to 5 days to maintain its delicious moisture.
Freezer: For longer storage, tightly wrap the cake in plastic wrap and aluminum foil, then freeze for up to 3 months. Thaw slowly at room temperature for the best texture.
Frosting Storage: If you have leftover frosting, store it in an airtight container in the fridge for up to a week. Rewhip before using to restore its lovely consistency.
Reheating: To enjoy a slice warm, simply microwave for 10-15 seconds. Pair it with a scoop of ice cream or whipped cream for an extra treat!
What to Serve with Matilda’s Chocolate Cake
Indulging in a slice of this rich, chocolatey delight invites a world of flavors and textures that can elevate any gathering.
-
Vanilla Ice Cream: The creamy, cool scoop contrasts wonderfully with the rich cake, balancing its decadent sweetness.
-
Fresh Berries: Strawberries, raspberries, or blackberries add a burst of fresh tartness, cutting through the rich chocolate flavor beautifully.
-
Whipped Cream: Light and airy, a dollop of freshly whipped cream adds a luscious softness that complements the cake’s fudge frosting.
Pairing the cake with different textures and flavors enhances your dessert experience. Whether you like a simple scoop of ice cream or a plate of fresh berries, each addition offers a unique twist to your celebration.
-
Espresso: A shot of strong espresso enhances the cake’s chocolate flavor, making for a decadent after-dinner treat that coffee lovers will adore.
-
Chocolate Sauce: For those who want to go all-in on chocolate, drizzling warm chocolate sauce over the cake creates an indulgent presentation.
-
Chardonnay: This white wine’s fruity undertones and crisp finish pair nicely with the richness of the cake, making it an elegant companion for special occasions.
Matilda’s Chocolate Cake Variations
Feel free to explore these delightful twists to customize your cake experience, ensuring every bite is just as magical as Matilda herself!
-
Egg-Free: Substitute each egg with ¼ cup unsweetened applesauce for a moist texture without the eggs. This swap keeps the cake fluffy and rich, perfect for anyone with egg allergies.
-
Dairy-Free: Use oat milk mixed with vinegar as a buttermilk substitute and vegan butter for the frosting. You’ll still enjoy all that creamy richness minus the dairy.
-
Gluten-Free: Swap in a high-quality 1-to-1 gluten-free flour blend for a cake that everyone can enjoy. The texture will remain delightfully moist and fudgy, perfect for a crowd.
-
Cupcakes: Transform this cake into cupcakes by baking the batter in a muffin tin for 18-22 minutes. Each cupcake is a sweet little indulgence that’s easy to share!
-
Three Layers: For an impressive presentation, divide the batter between three 8-inch pans and reduce the baking time to 22-26 minutes. A triple-layer cake always steals the show!
-
Chocolate Chips: Fold in semi-sweet chocolate chips into the batter for extra pockets of melted chocolate bliss. Each bite becomes a delightful surprise that chocolate lovers won’t resist.
-
Spicy Twist: Add a pinch of cayenne pepper or a dash of cinnamon to the batter for a warm, subtle heat that pairs surprisingly well with rich chocolate.
-
Nutty Addition: Stir in chopped nuts, like walnuts or pecans, for a crunchy texture that adds depth to the moist cake. Not only does this elevate the flavor, but it also provides a beautiful contrast.
These variations allow you to craft a personalized version of Matilda’s Chocolate Cake, ensuring it delights your family and friends with every decadent slice! If you’re looking for something equally indulgent, try this Chocolate Raspberry Cheesecake for a fruit-flavored twist or some Dark Chocolate Almond Clusters for an easy snack!
Matilda’s Chocolate Cake Recipe FAQs
What is the best way to select ripe ingredients for Matilda’s Chocolate Cake?
Absolutely! When choosing your ingredients, select all-purpose flour that feels smooth and powdery to the touch. For the cocoa powder, pick a brand that is labeled Dutch-processed for that rich flavor. Make sure your eggs are fresh, as the freshness contributes to the cake’s lift and texture. If using buttermilk, look for one that has a thick consistency. Always opt for semi-sweet chocolate that is high-quality (60% to 70% cocoa) to ensure the best frosting flavor.
How should I store Matilda’s Chocolate Cake?
To keep your Matilda’s Chocolate Cake fresh, wrap it in plastic wrap or place it in an airtight container. Store it at room temperature for up to 5 days. If you want to keep it around for longer, consider freezing it. Just ensure it’s well-wrapped in plastic wrap and aluminum foil to prevent freezer burn. It will stay delicious for up to 3 months! When ready to enjoy, simply thaw it at room temperature.
Can I freeze Matilda’s Chocolate Cake?
Yes! To freeze your Matilda’s Chocolate Cake, first let it cool completely. Then, wrap each layer tightly in plastic wrap, followed by a layer of aluminum foil for extra protection. This will keep the cake fresh for up to 3 months. When you’re ready to indulge, remove it from the freezer and allow it to thaw gently at room temperature until it reaches your desired consistency.
What are some common troubleshooting tips if my cake doesn’t turn out as expected?
If your cake turns out dense or heavy, it may be due to over-mixing the batter. To avoid this, mix just until combined! If your cake sinks in the middle, it is likely underbaked. I recommend using a digital thermometer; the internal temperature should reach around 205°F (96°C) for proper doneness. If your frosting is too runny, try chilling it longer until it thickens to the perfect spreadable consistency.
Are there any dietary considerations for Matilda’s Chocolate Cake regarding allergies?
Very! If you’re catering to allergies, this Matilda’s Chocolate Cake is highly adaptable. For egg allergies, swap each egg with ¼ cup unsweetened applesauce. For dairy-free, use oat milk mixed with vinegar in place of buttermilk and replace the butter in the frosting with vegan options. Those avoiding gluten can happily use a high-quality 1-to-1 gluten-free flour blend, ensuring that everyone can enjoy this decadent treat.
Indulge in Matilda's Chocolate Cake: Decadent & Moist Delight
Ingredients
Equipment
Method
- Preheat your oven to 350°F (175°C) and grease two 8-inch round cake pans.
- In a medium bowl, whisk together half the cocoa powder and hot coffee. Let it sit for 10 minutes.
- Sift together flour, remaining cocoa powder, sugar, baking powder, baking soda, and salt in a large bowl.
- Add eggs, buttermilk, vegetable oil, and vanilla to the dry ingredients and mix until smooth.
- Stir in the cocoa-coffee mixture until fully combined.
- Divide the batter into the prepared pans and bake for 30 to 35 minutes.
- Let the cakes cool for 10 minutes in the pans, then invert onto a wire rack.
- For frosting, melt chocolate, butter, cream, and sifted powdered sugar in a saucepan over low heat.
- Chill the frosting until it thickens (15-20 minutes) then frost the cooled cake layers.
- Assemble the cake by layering with frosting and let it sit at room temperature for 15 minutes.
Leave a Reply