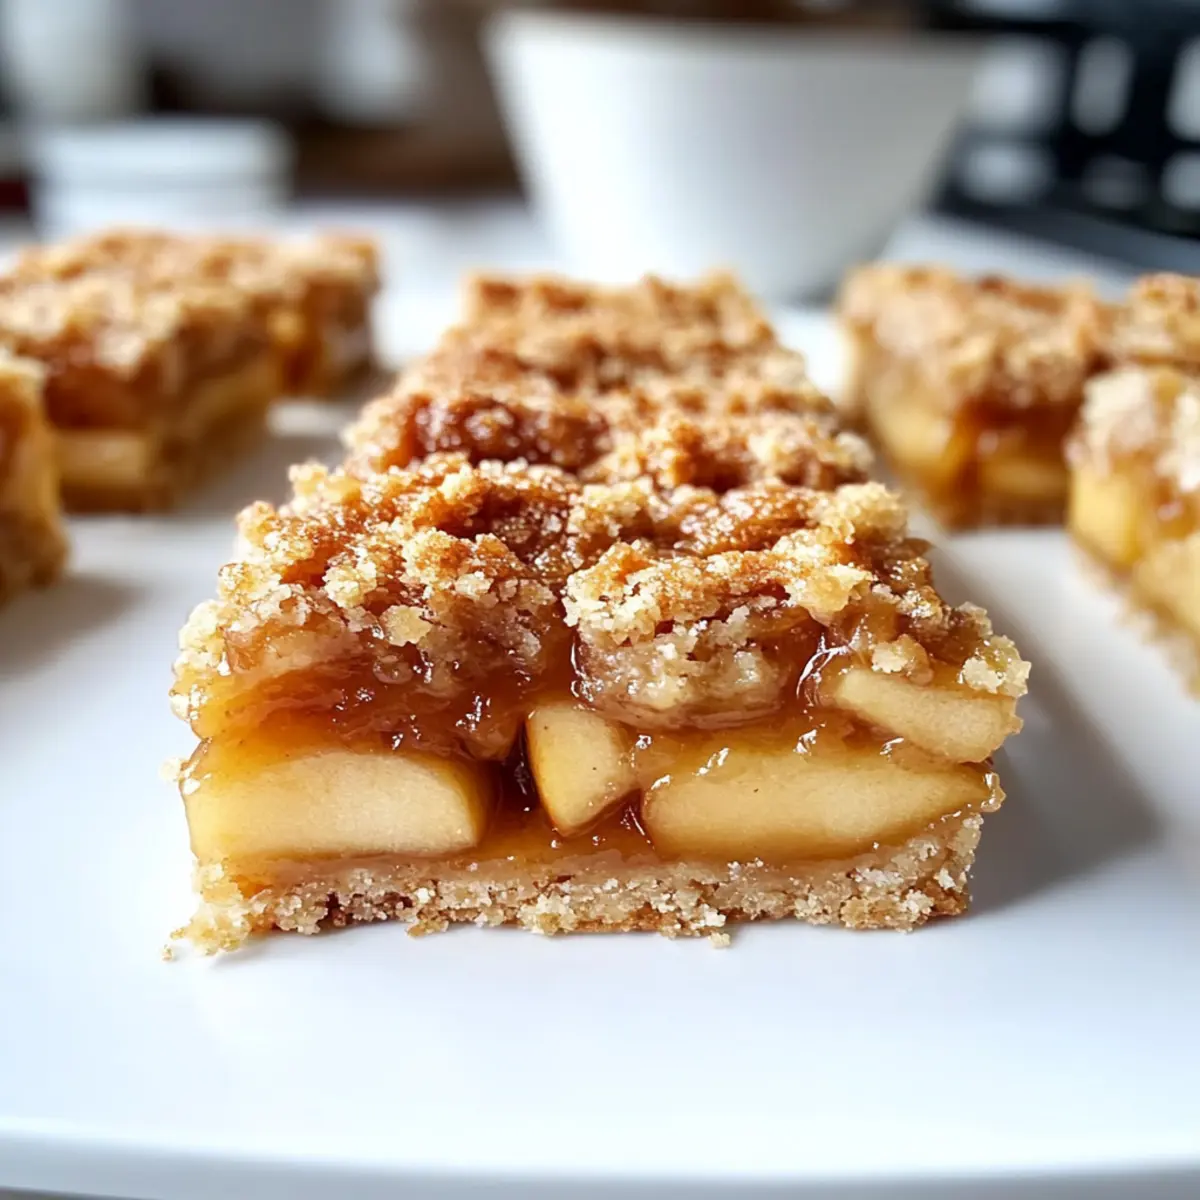
As the leaves outside turn to vibrant shades of amber and gold, there’s nothing more comforting than the smell of fresh-baked apple treats wafting through the kitchen. These Easy Apple Pie Bars capture the heartwarming essence of fall in every delicious bite. With their golden, crumbly topping and a sweet, spiced apple filling, they combine the best of homemade pie with the ease of a simple dessert. Not only are they a hit for gatherings, but they also make for a delightful afternoon snack ready to fuel your creativity in the kitchen. Best of all? You can make them ahead of time and even freeze them for later enjoyment! Ready to treat yourself and your loved ones with this cozy creation? Let’s dive in!
Why are these Apple Pie Bars must-try?
Comforting and Cozy: These Apple Pie Bars evoke the warmth of fall, making them perfect for family gatherings and cozy nights in.
Simplicity at its Finest: With just a handful of ingredients, this recipe is straightforward, allowing even novice bakers to shine.
Flavorful Filling: A blend of sweet and tart apples, kissed with cinnamon and vanilla, provides an irresistible taste in every bite.
Versatile and Make-Ahead: These bars are freezer-friendly, so you can bake a batch ahead of time and enjoy them when the craving strikes, just like with these delicious Key Lime Pie treats!
Perfect for Sharing: Ideal for parties, treats, or even a coffee break, they’re easy to cut and serve. Your friends and family will be begging for the recipe!
Apple Pie Bars Ingredients
• Here’s everything you need to create delightful Apple Pie Bars!
For the Crust & Topping
- All-Purpose Flour – Provides structure for the crust and crumble. Substitution: Use gluten-free all-purpose flour for a gluten-free version.
- Granulated Sugar – Sweetens the crust.
- Salt – Enhances the flavor of the crust.
- Cold Butter – Creates a flaky texture in the crust and crumble topping. Tip: Chill butter beforehand for best results.
For the Apple Filling
- Brown Sugar – Adds sweetness and a rich, caramel flavor to the apple filling.
- Cinnamon – Brings warmth and depth to the apple filling.
- Nutmeg – Offers additional warmth and complexity.
- Cornstarch – Thickens the apple filling for the right consistency.
- Lemon Juice – Brightens the flavors of the apples.
- Vanilla Extract – Adds sweetness and aroma to the filling.
- Mixed Apples – A blend of Granny Smith (for tartness) and Honeycrisp (for sweetness). Recommendation: A mix enhances flavor complexity in your Apple Pie Bars.
Step‑by‑Step Instructions for Apple Pie Bars
Step 1: Preheat the Oven and Prepare the Pan
Begin by preheating your oven to 350°F (175°C). While it warms, line a 9×13 inch baking pan with parchment paper, making sure it hangs over the edges for easy removal later. This step is crucial for achieving that perfect base for your Apple Pie Bars.
Step 2: Make the Crust and Topping Mixture
In a large mixing bowl, combine all-purpose flour, granulated sugar, and salt. Next, cut in the cold butter using a pastry cutter or your hands, until the mixture resembles coarse crumbs. This creates the flaky texture that will elevate the crust and crumble topping of your Apple Pie Bars.
Step 3: Form the Base Layer
Take about two-thirds of the crumb mixture and evenly press it into the bottom of the prepared baking pan. Ensure it creates a solid crust layer. Bake this crust in the preheated oven for 15 minutes, until it turns lightly golden, then remove it and let it cool slightly while you prepare the filling.
Step 4: Prepare the Apple Filling
In a separate bowl, toss your sliced mixed apples with brown sugar, cinnamon, nutmeg, cornstarch, lemon juice, and vanilla extract. Combine thoroughly until all the apple slices are well-coated. This flavorful filling is the heart of your Apple Pie Bars, creating a delicious contrast with the crust.
Step 5: Assemble the Bars
Once your crust has cooled slightly, layer the apple mixture evenly over the baked crust. It’s important to distribute the apples well for even cooking. After this, crumble the remaining flour-butter mixture on top, creating a delightful topping that enhances the texture of your Apple Pie Bars.
Step 6: Bake to Perfection
Place the assembled Apple Pie Bars back into the oven and bake for an additional 35–40 minutes. You’ll know they’re done when the topping is golden brown and the apples are tender. The tantalizing aroma wafting through your kitchen will surely make your mouth water!
Step 7: Cool and Slice
Once baked, remove the pan from the oven and let the bars cool completely in the pan. This is important for clean slicing later. Once cooled, use the parchment overhang to lift the Apple Pie Bars out of the pan, slice them into squares, and prepare to enjoy this delicious treat with family and friends.
Make Ahead Options
These Easy Apple Pie Bars are a fantastic option for busy home cooks looking to simplify meal planning! You can prepare the crust and crumble topping up to 24 hours ahead of time by mixing them and storing in an airtight container in the refrigerator. For the apple filling, slice and toss the apples with the sugar and spices, then refrigerate the mixture for up to 3 days. To maintain that fresh taste, keep it in a sealed bowl to prevent browning. When you’re ready to bake, simply press the crust into the pan, layer the chilled apple mixture, crumble the topping, and bake as directed. This way, you’ll have delicious, homemade dessert ready with minimal last-minute effort!
Apple Pie Bars: Customizable Delight
Feel free to make these Apple Pie Bars your own with these delightful twists and swaps that elevate every bite!
- Different Apples: Explore various apple types to customize flavors—consider tart Granny Smith or sweet Fuji for a unique taste.
- Nutty Crunch: Add chopped walnuts or pecans to the topping, creating a delightful crunch that compliments the soft apple filling. Just remember, a little extra texture can always enhance the experience.
- Bourbon Infusion: For an adult twist, incorporate a splash of bourbon into the filling. This adds warm complexity and a hint of richness, perfect for cozy gatherings with friends.
- Spices Galore: Experiment with spices like cardamom or ginger to amplify the warmth of the filling. By adding just a hint of these spices, your Apple Pie Bars can take on a unique and personal flavor profile.
- Dairy-Free: Substitute cold butter with coconut oil for a dairy-free version that maintains flakiness and flavor while catering to those with dietary restrictions.
- Sweet Swaps: Use maple syrup instead of brown sugar for a different kind of sweetness that lends a wonderful depth to the apple filling. It’s a natural fit, especially if you love the rich flavor of maple!
- Freezer-Friendly: Prepare an extra batch and freeze before baking—enjoy freshly baked bars anytime by simply popping them in the oven later! If you’re in the mood for another equally delicious dessert, give these Pistachio Dream Bars a try!
- Coconut Flakes: Add unsweetened coconut flakes to the topping for an exotic twist and extra chewiness. Coconut pairs beautifully with apples, creating a delightful flavor experience.
No matter how you choose to customize your Apple Pie Bars, they’re sure to bring comfort and joy to your kitchen!
What to Serve with Easy Apple Pie Bars
Imagine savoring the sweet, spiced aroma of freshly baked goodies while indulging in this delightful dessert—perfect for any gathering!
- Vanilla Ice Cream: A scoop adds creaminess and balances the warm spiced flavors of the bars beautifully.
- Caramel Sauce: Drizzling this luscious sauce over the bars elevates the experience with a rich sweetness that compliments the apples.
- Coffee or Tea: A warm beverage brings out the cozy flavors of the Apple Pie Bars, making for a perfect afternoon treat.
- Whipped Cream: A dollop of fluffy whipped cream enhances the dessert’s richness, completing the sweet experience.
- Crisp Salad: A light, tangy salad with apples and walnuts adds a refreshing contrast to the sweet bars.
- Spiced Cider: This warm drink echoes the flavors of fall, making it a lovely pairing for your cozy gatherings.
- Chocolate Drizzle: For an unexpected twist, drizzle melted chocolate on top for a sweet, luxurious finish.
- Cheese Platter: A selection of sharp cheeses offers a savory counterbalance to the sweetness of the bars, creating a delightful snack spread.
- Fruit Salad: A vibrant bowl of fresh fruit can cleanse the palate and add a refreshing touch alongside the indulgence of the Apple Pie Bars.
Helpful Tricks for Apple Pie Bars
- Chill the Butter: Ensure your butter is cold before cutting it into the dry ingredients. This helps achieve the flaky texture you desire in your Apple Pie Bars.
- Mix Apples: Using a combination of sweet and tart apples, like Granny Smith and Honeycrisp, elevates the flavor complexity and balances sweetness in the filling.
- Exact Cooling Time: Allow the bars to cool completely in the pan before slicing. This prevents them from falling apart and ensures nice, clean cuts.
- Freezing Tips: For easy storage, wrap the cooled Apple Pie Bars tightly in plastic wrap and then place in an airtight container. They can be frozen for up to 3 months.
- Serving Suggestions: Consider warming the bars before serving, paired with vanilla ice cream or a drizzle of caramel for an extra touch of indulgence.
How to Store and Freeze Apple Pie Bars
Fridge: Store leftover Apple Pie Bars in an airtight container for up to 3 days. This helps maintain their fresh taste and texture.
Freezer: For long-term storage, wrap the bars tightly in plastic wrap, then place them in a freezer-safe container. They can be frozen for up to 3 months without losing flavor.
Thawing: To enjoy, simply thaw the bars in the fridge overnight or at room temperature for about an hour before serving.
Reheating: Warm individual bars in the microwave for about 15-20 seconds for a cozy treat, perfect with a scoop of ice cream!
Apple Pie Bars Recipe FAQs
How do I select the right apples for my Apple Pie Bars?
Absolutely! For the best flavor in your bars, I recommend using a mix of sweet and tart apples. Granny Smith apples contribute a nice tartness, while Honeycrisp adds sweetness. Choose apples that are firm and free from dark spots to ensure they hold up well during baking.
How should I store leftover Apple Pie Bars?
Very! To keep your Apple Pie Bars fresh, store them in an airtight container in the fridge for up to 3 days. This helps preserve their delicious taste and texture. If you need to keep them longer, consider the freezing option below.
Can I freeze Apple Pie Bars? If so, how?
Absolutely! To freeze, first let the bars cool completely. Wrap them tightly in plastic wrap and then place them in an airtight freezer-safe container. They’ll last up to 3 months. When you’re ready to enjoy, simply thaw them overnight in the fridge or at room temperature for about an hour. You can warm them up in the microwave for about 15-20 seconds for that cozy touch!
What should I do if my crust becomes too hard or crumbly?
Oh no! If your crust turns out too hard, it might be due to overmixing the butter or baking it too long. For best results, mix the cold butter with the dry ingredients until just combined—aim for a crumbly texture rather than a doughy one. If the crust is already too tough, try serving it warm with ice cream to help soften the experience.
Are Apple Pie Bars suitable for people with gluten allergies?
Yes, absolutely! To make these bars gluten-free, simply swap the all-purpose flour with a gluten-free all-purpose blend. This way, everyone can enjoy this delightful treat without any worries! Always check ingredient labels to ensure they meet dietary needs.
How do I add extra flavor to my Apple Pie Bars?
Very! You can elevate the flavor by incorporating chopped nuts like walnuts or pecans into the crumble topping or even a splash of bourbon into the apple filling for a rich twist. Experiment with some lemon zest for a refreshing brightness or consider adding more spices like allspice or cardamom to warm things up even more.
Irresistibly Sweet Apple Pie Bars for Your Cozy Gatherings
Ingredients
Equipment
Method
- Preheat your oven to 350°F (175°C) and line a 9x13 inch baking pan with parchment paper.
- In a large mixing bowl, combine all-purpose flour, granulated sugar, and salt. Cut in the cold butter until the mixture resembles coarse crumbs.
- Press about two-thirds of the crumb mixture into the bottom of the prepared baking pan. Bake for 15 minutes until lightly golden.
- In a separate bowl, toss sliced mixed apples with brown sugar, cinnamon, nutmeg, cornstarch, lemon juice, and vanilla extract.
- Layer the apple mixture evenly over the baked crust. Crumble the remaining flour-butter mixture on top.
- Bake for an additional 35–40 minutes until the topping is golden brown and the apples are tender.
- Let the bars cool completely in the pan before slicing.
Leave a Reply