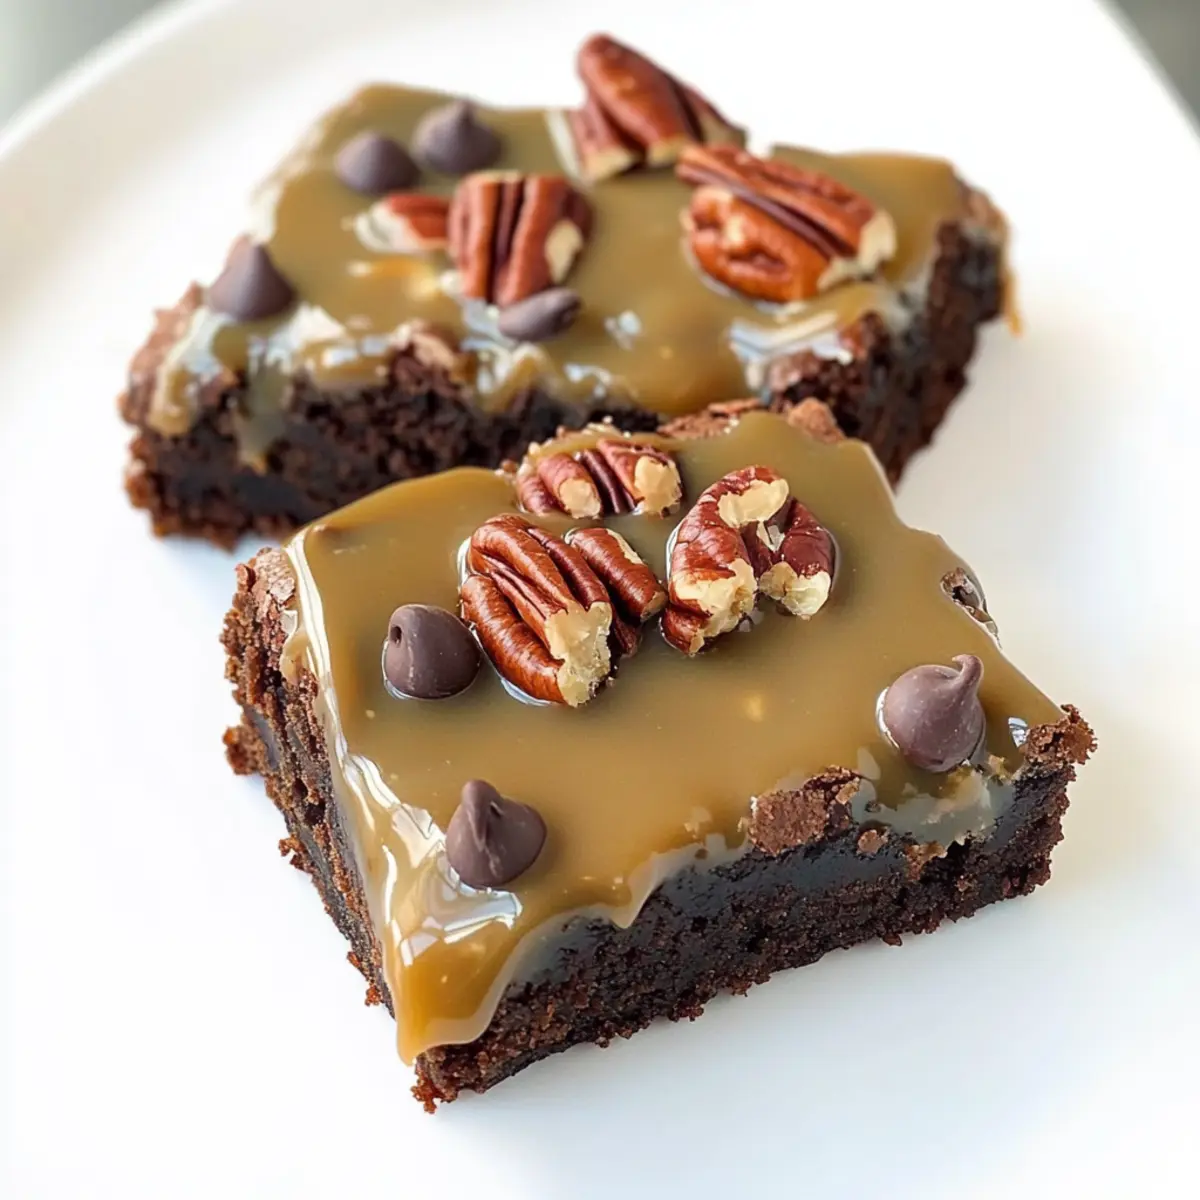
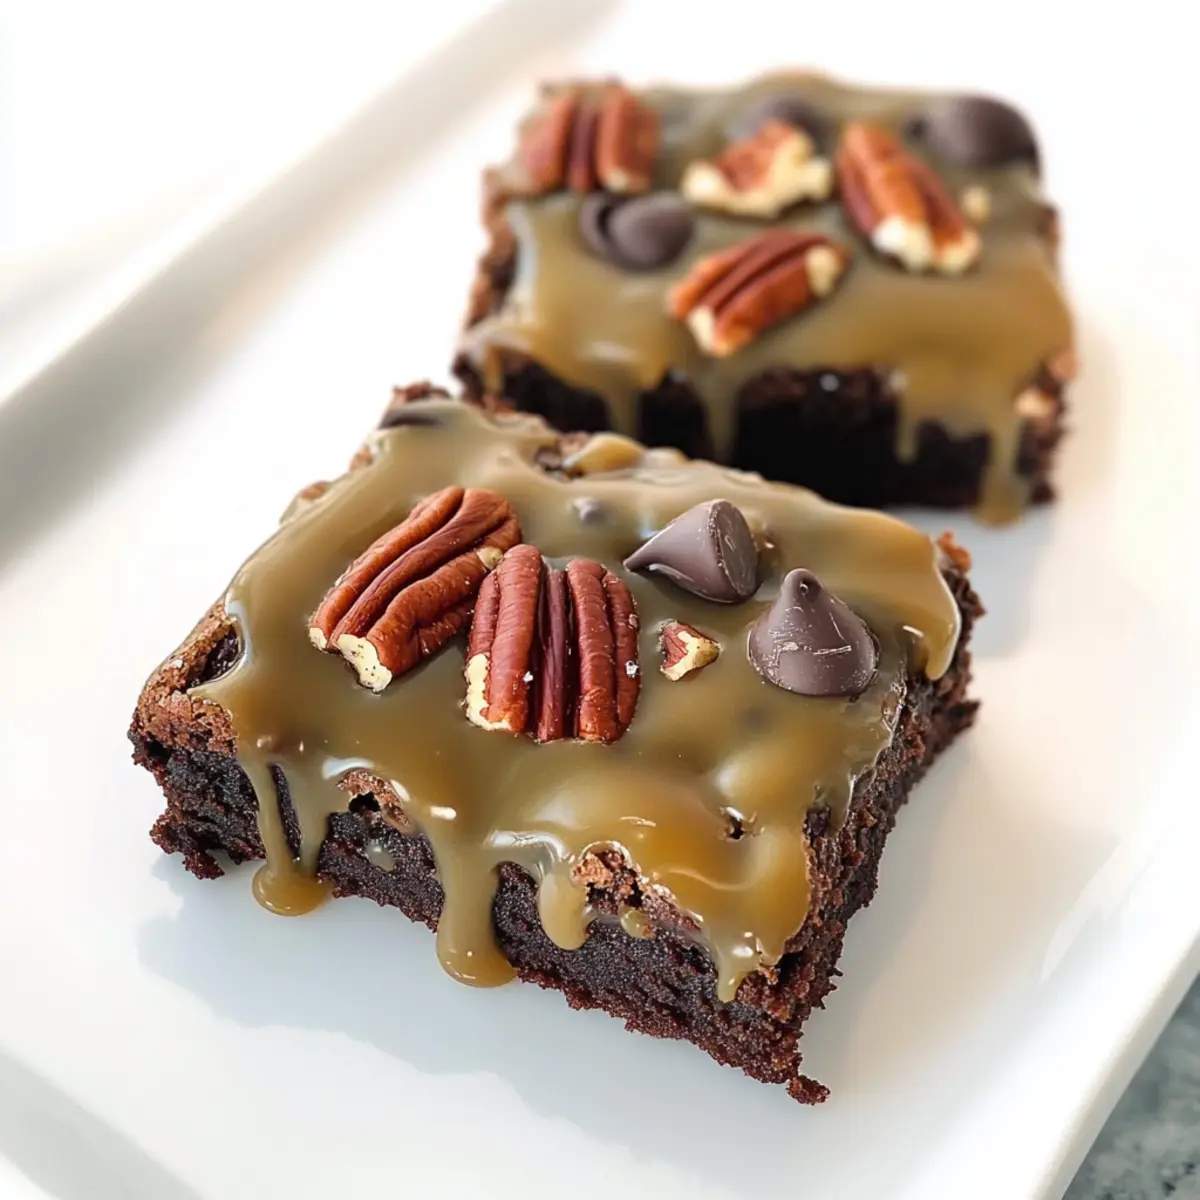
As I stood in my kitchen, the rich aroma of brown sugar heating on the stove quickly took me back to childhood memories of candy-making with my grandmother. That delicious warmth inspired this decadent Turtle Brownies recipe, a delightful creation featuring thick, fudge-like brownies topped with a homemade caramel sauce. With each bite, the satisfying crunch of pecans and the luscious melted chocolate chips carry you to dessert heaven. One of the best parts? These Turtle Brownies are not just indulgent; they’re a home-baked wonder that’s truly simple to whip up, making them an ideal crowd-pleaser for any gathering. Curious to find out how to create this irresistible chocolatey treat at home? Let’s dive into the magic of Turtle Brownies!

Why Are Turtle Brownies Perfect?
Irresistible Taste: The blend of rich chocolate and homemade caramel creates an unforgettable flavor explosion in every bite.
Simple Process: With just a few straightforward steps, you’ll have delicious Turtle Brownies that look and taste gourmet.
Crowd-Pleasing Delight: These fudgy treats are guaranteed to satisfy both chocolate lovers and dessert aficionados alike at any gathering.
Versatile Options: You can easily customize by swapping pecans or using dark chocolate chips to match your preferences.
Memorable Experience: The aroma of baking caramel and chocolate will fill your kitchen with nostalgia, making this a cherished family recipe.
Turtle Brownies Ingredients
Get ready to whip up a delicious treat that’s rich and chocolatey!
For the Brownies
- Unsalted Butter – Adds richness and flavor to the brownies. For a richer taste, try using browned butter.
- Granulated Sugar – Provides sweetness and moisture to the brownies.
- Light Brown Sugar – Enhances sweetness and adds moisture with a slight caramel flavor.
- Unsweetened Cocoa Powder – Supplies a deep chocolate flavor. For a more intense chocolate taste, consider using dark cocoa powder.
- Salt – Balances the sweetness and enhances overall flavor.
- Instant Coffee Granules – Intensifies the chocolate flavor without imparting coffee taste. Omit if desired for a pure chocolate flavor.
- Baking Powder – Helps the brownies rise, contributing to their texture.
- Large Eggs – Binds ingredients and retains moisture, adding to chewiness.
- Vanilla Extract – Adds aromatic flavor enhancing the chocolate.
- All-Purpose Flour – Provides structure to the brownies. For a gluten-free option, use a 1:1 gluten-free flour blend.
- Semi-Sweet Chocolate Chips – Adds pockets of melted chocolate throughout. Use dark chocolate chips for a richer flavor.
- Chopped Pecans – Contributes a crunchy texture and nutty flavor. For a nut-free alternative, simply omit the pecans.
For Caramel Sauce
- Light Brown Sugar – Base for caramel, providing sweetness and flavor.
- Unsalted Butter – Adds richness to the caramel.
- Heavy Cream – Creates a smooth texture in the caramel sauce.
- Vanilla Extract – Enhances the flavor of the caramel.
Now that you have all the ingredients, let’s move on to the fun part—making those Turtle Brownies!
Step‑by‑Step Instructions for Turtle Brownies
Step 1: Preheat and Prepare
Begin by preheating your oven to 350°F (175°C) while you prepare your baking pan. Line an 8×8 or 9×9 inch pan with aluminum foil, ensuring it hangs over the edges for easy removal later. Lightly grease the foil with cooking spray or butter for perfect brownie release, setting the stage for your rich Turtle Brownies.
Step 2: Brown the Butter
In a medium saucepan over medium heat, melt the unsalted butter. Stir occasionally until it becomes a beautiful light golden brown and emits a nutty aroma, about 5–7 minutes. This browning process enhances the flavor of your Turtle Brownies, creating a richer base for your batter. Remove from heat and let it cool slightly.
Step 3: Mix the Sugars and Cocoa
In a large mixing bowl, combine the browned butter with granulated sugar, light brown sugar, unsweetened cocoa powder, salt, instant coffee granules, and baking powder. Stir thoroughly until the mixture is smooth, ensuring there are no lumps. Allow this mixture to cool for about 5 minutes, which will help maintain the integrity of the eggs you’ll add next.
Step 4: Incorporate Eggs and Vanilla
Once your mixture has cooled slightly, stir in the cold eggs and vanilla extract. Mix until you achieve a shiny, glossy batter; this step is crucial for achieving that fudgy texture characteristic of Turtle Brownies. This luscious batter will be the canvas for a delightful treat, packed with layers of flavor.
Step 5: Fold in Dry Ingredients
Gently fold in the all-purpose flour, taking care not to overmix. This folding technique helps retain air and creates that beautiful fudgy texture. Then, sprinkle in the semi-sweet chocolate chips and chopped pecans, mixing just until they’re evenly distributed throughout the batter.
Step 6: Bake the Brownies
Pour the brownie batter into the prepared pan, spreading it evenly with a spatula. Bake in your preheated oven for 20 to 25 minutes, or until the top appears set and a toothpick inserted in the center comes out with a few moist crumbs. The aroma of these Turtle Brownies will fill your kitchen, tempting everyone around!
Step 7: Cool and Drizzle
Allow the Turtle Brownies to cool completely in the pan on a wire rack. Once cooled, prepare your homemade caramel sauce, drizzling it generously over the brownies. Enhance with extra pecans and chocolate chips on top, creating both visual appeal and delightful flavors that blend beautifully.
Step 8: Chill and Slice
For the best texture and clean edges, chill the Turtle Brownies in the refrigerator for at least 30 minutes. This chilling time allows the caramel to firm up and makes cutting them into 9 pieces a breeze. Now you’re ready to indulge in a rich and chocolaty treat that’s simply irresistible!
Make Ahead Options
These Turtle Brownies are perfect for busy home cooks looking to save time! You can prepare the brownie batter up to 24 hours in advance; simply mix all the ingredients and store it in an airtight container in the refrigerator. Additionally, the caramel sauce can be made up to 3 days ahead and stored in the fridge—just make sure to rewarm it gently before drizzling. When you’re ready to bake, pour the chilled batter into the prepared pan and bake as directed. This way, you’ll have decadent Turtle Brownies with homemade caramel that are just as delicious as if you made them fresh, all while saving precious time for your busy weeknights!
Turtle Brownies: Customize Your Treats
Feel free to get creative with these Turtle Brownies, tailoring them to your taste and dietary needs while enhancing that decadent experience.
- Nut-Free: Simply omit the pecans for a delicious nut-free treat that still retains all that rich, gooey goodness.
- Dark Chocolate: Substitute semi-sweet chocolate chips with dark chocolate chips for an even deeper chocolate flavor that satisfies every chocolate lover.
- Salted Caramel: Add a sprinkle of sea salt on top of the caramel drizzle for a sweet and savory twist that elevates the flavors beautifully.
- Spice It Up: Incorporate a dash of cinnamon or cayenne pepper into the brownie batter for a warm, spicy kick that surprises your taste buds.
- Caramel Swirl: Instead of drizzling the caramel, swirl it into the brownie batter before baking for pockets of gooey caramel goodness throughout.
- Coffee Lovers: Enhance the chocolate flavor even more by adding a tablespoon of espresso powder to the batter for that extra depth of flavor.
- Vegan Option: Swap in a flax egg and use dairy-free butter along with plant-based chocolate for a scrumptious vegan twist on these brownies.
- Fruit Boost: Add chopped cherries or raspberries before baking for a fruity contrast that pairs wonderfully with rich chocolate and caramel.
Feel free to pair your turtle brownies with a scoop of vanilla ice cream for an extra indulgent dessert. This classic combination never disappoints! If you want to try a different dessert, consider making Chocolate Chip Cookies for a family favorite.
Expert Tips for Turtle Brownies
- Butter Matters: Make sure to brown the unsalted butter carefully; too much heat can burn it and affect the flavor of your Turtle Brownies.
- Chill Time: Resist the urge to cut into the brownies right away! Chilling them for 30 minutes creates clean edges and helps set the caramel.
- Caramel Consistency: If the homemade caramel doesn’t thicken, try increasing the heat slightly while whisking constantly. Patience is key for that luscious drizzle!
- Egg Temperature: Always use cold eggs after combining the cooled batter; this helps ensure the perfect fudgy texture in your Turtle Brownies.
- Mix It Gently: While folding in the flour and other ingredients, mix just until combined. Overmixing can lead to a denser brownie instead of the light, fudgy texture we’re aiming for.
- Add Extra Crunch: For added texture, sprinkle some extra chopped pecans on top after drizzling with caramel. They’ll enhance the nutty flavor and add a delightful crunch!
How to Store and Freeze Turtle Brownies
Room Temperature: Store your Turtle Brownies in an airtight container at room temperature for up to 3 days. This keeps them soft and fudgy for your sweet cravings.
Fridge: For extended freshness, you can refrigerate the brownies in an airtight container for up to 3 days. Just note that they may become a bit firmer in texture.
Freezer: If you want to save some for later, wrap the brownies tightly in plastic wrap and place them in a freezer-safe bag or container. They can be frozen for up to 3 months.
Reheating: To enjoy frozen Turtle Brownies, thaw them in the fridge overnight and gently reheat in the microwave for a warm and gooey treat.
What to Serve with Decadent Turtle Brownies
Indulging in these fudgey delights is only the beginning; let’s create an unforgettable dessert experience together!
-
Velvety Vanilla Ice Cream: A scoop of creamy vanilla ice cream offers a balanced contrast to the rich chocolate and caramel, enhancing the overall experience.
-
Fresh Berries: A handful of tart raspberries or strawberries adds a refreshing pop of color and acidity, perfect for cutting through the sweetness of the brownies.
-
Espresso or Coffee: A steaming cup of espresso complements the chocolate richness, helping to highlight the flavors of the brownies while providing a delightful pick-me-up.
-
Whipped Cream: Light and airy whipped cream creates a fluffy texture that pairs beautifully with the dense fudginess of the brownies, adding a touch of elegance to your dessert.
-
Chocolate Sauce Drizzle: For those who crave extra decadence, a drizzle of warm chocolate sauce over the brownies magnifies the indulgence and makes each bite even more irresistible.
-
Chopped Nuts Mix: A sprinkle of additional chopped pecans and walnuts introduces a lovely crunch, enhancing the nutty flavors that resonate throughout your Turtle Brownies.
-
Mint Tea or Light Herbal Tea: Refreshing mint tea lends a soothing finish to your dessert experience, providing a calming contrast to the rich chocolate flavors.
Let your creativity flow as you delight in your homemade Turtle Brownies paired with these amazing accompaniments!
Turtle Brownies Recipe FAQs
How do I select the right pecans for my Turtle Brownies?
Absolutely! Look for pecans that are plump and have a fresh, nutty smell. Avoid any that appear shriveled or have dark spots; they are likely stale. If you can, buy them whole and chop them yourself for better flavor and texture.
What’s the best way to store leftover Turtle Brownies?
You can keep your Turtle Brownies in an airtight container at room temperature for up to 3 days. If you’d like them to stay soft and fudgy, make sure to store them away from direct sunlight. Alternatively, refrigerate them for the same amount of time, but note that they may become a bit firmer.
Can I freeze Turtle Brownies? If so, how?
Very much so! To freeze your brownies, first, let them cool completely. Then, wrap them tightly in plastic wrap and place them in a freezer-safe bag or container. They can be frozen for up to 3 months. When you’re ready to enjoy them, thaw overnight in the refrigerator and reheat gently in the microwave for that fresh-out-of-the-oven warmth.
What if my homemade caramel isn’t thickening?
No worries! If your caramel isn’t thickening, simply increase the heat slightly while whisking constantly. This process should help it reach the desired consistency. If it continues to be runny, simmer it a bit longer, stirring to ensure it doesn’t stick to the pan. Patience is key in this sweet endeavor!
Are there any dietary considerations I should keep in mind with Turtle Brownies?
Absolutely! These Turtle Brownies contain gluten (from wheat flour) and nuts (pecans), making them unsuitable for those with gluten intolerance or nut allergies. For a gluten-free version, I recommend using a 1:1 gluten-free flour blend, and for a nut-free treat, simply omit the pecans altogether. Always check ingredient labels, especially for allergy considerations!
How can I tell when my Turtle Brownies are done baking?
The best method to check is to look for a slightly set top and to insert a toothpick into the center. It should come out with a few moist crumbs; this indicates that the brownies are perfectly fudgey and not overbaked. Remember, they will continue to cook a bit while cooling—so it’s better to underbake slightly than overbake!
Irresistibly Fudgy Turtle Brownies with Homemade Caramel
Ingredients
Equipment
Method
- Preheat your oven to 350°F (175°C) and line an 8x8 or 9x9 inch baking pan with aluminum foil, then lightly grease it.
- In a medium saucepan over medium heat, melt the unsalted butter until it turns light golden brown, about 5–7 minutes.
- In a large mixing bowl, combine the browned butter with granulated sugar, light brown sugar, cocoa powder, salt, coffee granules, and baking powder. Stir until smooth, then cool for 5 minutes.
- Stir in the cold eggs and vanilla extract until you have a glossy batter.
- Gently fold in the all-purpose flour, then add the chocolate chips and chopped pecans, mixing until evenly distributed.
- Pour the batter into the prepared pan and bake for 20 to 25 minutes or until a toothpick comes out with a few moist crumbs.
- Let the brownies cool completely on a wire rack, then prepare the caramel sauce and drizzle over the brownies.
- Chill the brownies in the refrigerator for at least 30 minutes before slicing.
Leave a Reply