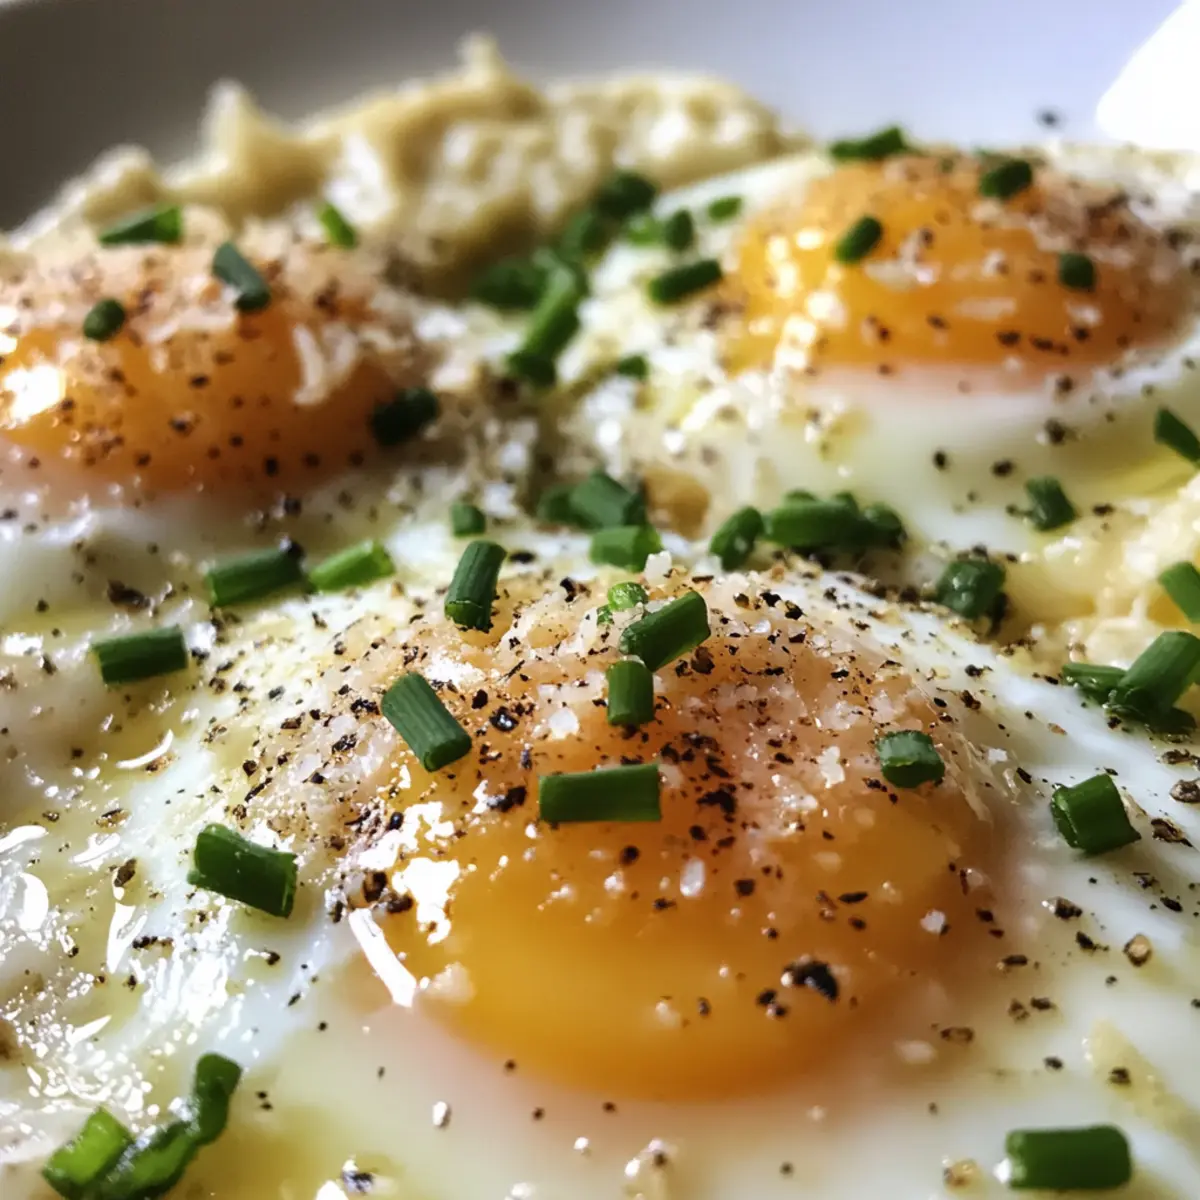
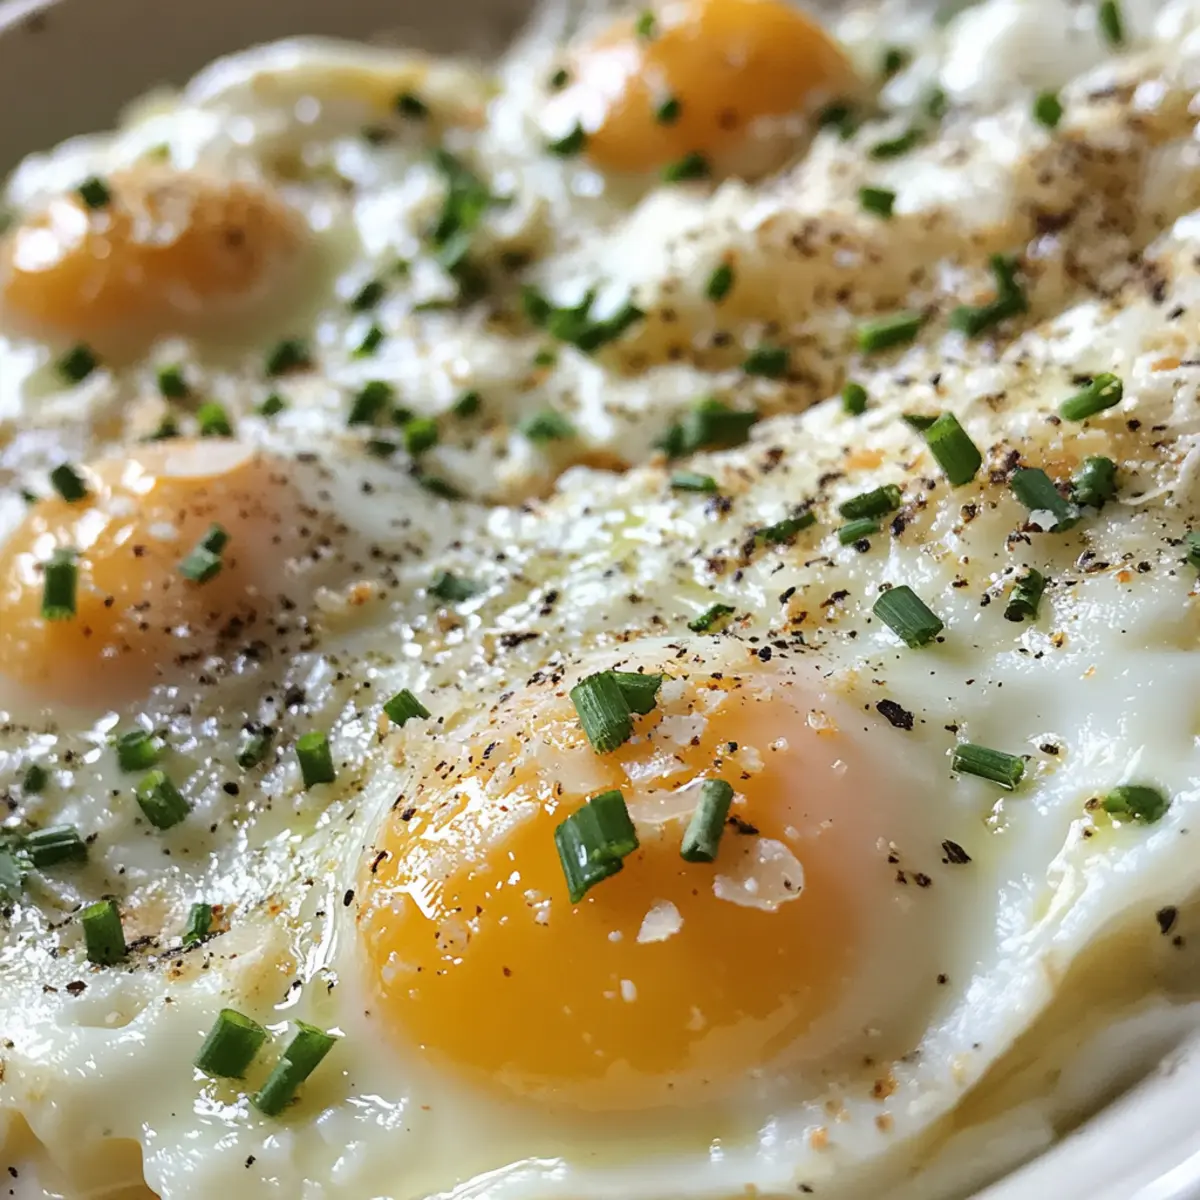
The aroma of freshly baked eggs wafts through the kitchen, instantly brightening my morning mood. These Easy Shirred Eggs with Parmesan and Chives are the perfect solution for anyone seeking an elegant yet uncomplicated brunch option. In just a few minutes, you can serve up runny yolks surrounded by silky whites, all topped with savory cheese and vibrant herbs. Not only is this recipe quick to prepare, but it’s also adaptable to suit a variety of dietary needs—making it a fantastic choice for gatherings with family and friends. Whether you’re looking to impress or simply want a cozy start to your day, this dish delivers comfort and flair in every bite. What will you pair with these delicious eggs?
Why Choose Shirred Eggs for Brunch?
Versatile and Adaptable: Whether you’re dairy-free or vegetarian, this recipe can easily be tailored to meet your dietary needs.
Effortless Elegance: Impress your guests with a fancy dish that takes minimal time to prepare—perfect for brunch gatherings.
Rich, Creamy Flavor: The combination of creamy Parmesan and fresh chives elevates these eggs to a new level of deliciousness.
Quick-to-Make: In just 15 minutes, you can have a stunning meal ready to serve.
Comforting Textures: Enjoy the delightful mix of soft, runny yolks and silky whites, making each bite a comfort food dream.
Pair it with Air-Fryer Toast or even a side of Spanish Beans Eggs for a hearty brunch experience!
Shirred Eggs Ingredients
For the Base
- Unsalted Butter – Prevents sticking and adds richness; use non-dairy butter for a dairy-free version.
- Heavy Cream – Adds creaminess and richness; swap for high-fat oat milk or vegan cream for dairy-free.
- Large Eggs – The star ingredient providing protein; for best results, use local, farm-fresh eggs.
- Salt – Enhances the flavor of the eggs; use to taste.
- Freshly Ground Black Pepper – Adds warmth and depth; adjust to personal preference.
For the Topping
- Minced Fresh Chives – Delivers a fresh, mild onion flavor; can substitute with green onions if needed.
- Grated Parmesan Cheese – Provides savory richness; omit for a dairy-free recipe or use a vegan cheese alternative.
Enjoy these delightful Shirred Eggs—the perfect way to start your brunch!
Step‑by‑Step Instructions for Shirred Eggs
Step 1: Preheat the Oven
Begin by preheating your oven to 375°F (190°C). This temperature ensures the shirred eggs cook evenly and achieve that perfectly set white while keeping the yolk luxuriously runny. A good preheat can take about 10 minutes, so use this time to prepare your ramekin and ingredients.
Step 2: Prepare the Ramekin
Take a 6-ounce ramekin and generously grease it with unsalted butter, making sure to cover the bottom and sides thoroughly. This will prevent the eggs from sticking and add a wonderful richness to the dish. Your ramekin should be ready by the time your oven reaches the desired temperature.
Step 3: Add the Cream and Eggs
Pour a splash of heavy cream into the buttered ramekin, spreading it across the bottom. Carefully crack two large eggs on top of the cream, ensuring you keep the yolks intact. This creamy layer is what makes the shirred eggs delightfully rich, so take your time to position them just right.
Step 4: Season Your Eggs
Sprinkle a pinch of salt and freshly ground black pepper over the eggs to enhance their natural flavors. Then, add a handful of minced fresh chives and a generous sprinkle of grated Parmesan cheese on top. These toppings not only add flavor but also a lovely finishing touch, elevating your shirred eggs to an elegant brunch dish.
Step 5: Bake to Perfection
Carefully place the ramekin on a baking sheet to catch any spills, then slide it into the preheated oven. Bake for 12 to 15 minutes, monitoring closely until the egg whites are set, but the yolks should still be softly runny. This stage is crucial for achieving that perfect texture in your shirred eggs.
Step 6: Rest and Serve
Once baked, remove the ramekin from the oven and let it rest for a couple of minutes. This brief resting time allows the eggs to finish setting while also making it easier to handle. Serve your shirred eggs warm, garnished with additional chives or cheese if desired, and watch as everyone enjoys this cozy brunch delight.

Shirred Eggs Variations & Substitutions
Feel free to mix and match these ideas to create your perfect version of shirred eggs!
-
Dairy-Free: Replace heavy cream with high-fat oat milk or a vegan cream alternative for an equally creamy texture. You won’t miss the dairy at all!
-
Cheese Alternatives: Swap Parmesan for crumbled feta or goat cheese to introduce a tangy twist. Each cheese brings its unique character, enhancing your dish deliciously.
-
Herb Up: Try adding fresh herbs like dill or basil in place of chives for a fresh take. These aromatic additions will bring bright flavors to each bite.
-
Veggie Packed: Incorporate sautéed spinach, bell peppers, or sun-dried tomatoes for a flavor boost. Not only do they add substance, but they also make your meal more colorful!
-
Smoky Flavor: For a deeper taste, sprinkle smoked paprika on top before baking or serve alongside crispy bacon. The smoky notes will elevate your brunch experience to new heights.
-
Flavor Explosion: Add a few dashes of hot sauce or finely chopped jalapeños for a spicy kick. This adds a delightful warmth that complements the richness of the eggs beautifully.
-
Protein Power-Up: Mix in cooked sausage or diced ham for a heartier meal. The savory meat contrasts perfectly with the creaminess of the shirred eggs.
-
Global Twist: Consider adding a touch of za’atar or curry powder to introduce international flavors. These spices can bring a whole new dimension to this comforting dish.
Don’t forget to pair these delightful Shirred Eggs with some Air-Fryer Toast or even a side of Spanish Beans Eggs to complete your brunch feast!
What to Serve with Easy Shirred Eggs with Parmesan and Chives?
Pair these delicious eggs with a variety of accompaniments to create a complete and satisfying meal.
-
Crusty Air-Fryer Toast: Perfect for mopping up those golden yolks, providing a delightful crunch with every bite.
-
Zesty Breakfast Potatoes: Crispy on the outside and tender inside, these seasoned potatoes add a hearty base that complements the richness of the eggs.
-
Garden Fresh Salad: Light and vibrant, a simple salad of mixed greens and cherry tomatoes adds a refreshing crunch and balances the meal beautifully.
-
Savory Crispy Bacon: The smoky, salty flavor of bacon pairs perfectly with shirred eggs, enhancing the savory notes of the dish.
-
Sautéed Spinach: This quick side adds a healthy, green element, while its slight bitterness contrasts wonderfully with the creamy eggs.
-
Homemade Avocado Toast: Creamy avocado on whole-grain bread creates a delightful contrast in texture and flavor, making for a filling addition.
These pairings elevate your brunch experience, ensuring each bite of shirred eggs is complemented with exciting flavors and textures.
Expert Tips for Shirred Eggs
High-Quality Eggs: Opt for farm-fresh, organic eggs to enhance flavor and nutrition. The quality truly makes a difference in this simple dish.
Monitor Cooking Time: Keep a close eye on your baking time. Overcooking can turn the yolks hard; aim for that ideal runny texture.
Use Proper Ramekins: Smaller ramekins (6 ounces) are perfect for even cooking. If using a larger dish, you’ll need to adjust the cooking time accordingly.
Season Generously: Don’t be shy with salt and pepper. A well-seasoned egg dish, like these shirred eggs, brings out the best in flavors.
Experiment with Variations: Feel free to try different toppings, such as crumbled feta or sautéed veggies, to customize your shirred eggs to your taste.
How to Store and Freeze Shirred Eggs
Freshness is Best: Shirred eggs are best enjoyed immediately after baking for optimal texture and flavor.
Fridge: If you have leftovers, store them in an airtight container in the fridge for up to 2 days. Reheat gently to avoid overcooking the yolks.
Freezer: While freezing is not recommended due to the delicate texture, if necessary, you can freeze baked shirred eggs for up to 1 month. Thaw in the fridge overnight and reheat carefully.
Reheating: To reheat, warm gently in the oven at 325°F (163°C) until just heated through, about 10–15 minutes.
Make Ahead Options
These Shirred Eggs are perfect for meal prep enthusiasts! You can prepare the ramekins with the butter and cream up to 24 hours in advance. Simply grease each ramekin, pour in the cream, and crack the eggs on top. Cover them tightly with plastic wrap and refrigerate. When you’re ready to bake, just remove the wrap, season with salt, pepper, chives, and Parmesan, and pop them in the oven. This approach helps you save precious time on busy mornings while ensuring your Shirred Eggs are just as delicious and decadent. Trust me, this little prep magic will make your brunch a breeze!
Shirred Eggs Recipe FAQs
How do I choose the best eggs for shirred eggs?
Absolutely! For the best results, opt for local, farm-fresh eggs. Look for eggs with clean, uncracked shells and a vibrant orange yolk, which indicates high quality. If you can, organic eggs often have richer flavors and better nutrition, making your shirred eggs even more delightful.
How should I store leftover shirred eggs?
If you have any leftovers, store them in an airtight container in the fridge for up to 2 days. Simply reheat them gently in the oven to preserve the delicate texture of the eggs. Avoid microwaving, as it can lead to rubbery yolks that lose their charm.
Can I freeze shirred eggs?
While I recommend enjoying shirred eggs fresh, you can freeze them if needed! To do this, allow the baked eggs to cool completely. Then, wrap them tightly in plastic wrap or place them in an airtight container. They can be frozen for up to 1 month. When you’re ready to enjoy, thaw them in the fridge overnight, and to reheat, place them in a 325°F (163°C) oven for about 10-15 minutes or until warmed through.
What can I do if I overbake my shirred eggs?
Very! If you find that your shirred eggs have been overbaked and the yolks are firm instead of runny, don’t fret. If possible, try to salvage them by serving them with a drizzle of olive oil or a dollop of your favorite sauce—like hollandaise or even Sriracha—to add some moisture back and elevate those flavors!
Are shirred eggs suitable for dietary restrictions?
Absolutely! Shirred eggs can easily be adapted to meet various dietary needs. Use non-dairy butter and heavy cream for a dairy-free version, and feel free to skip the cheese altogether if you wish. Make sure to always check ingredient labels for potential allergens, especially when serving guests.
How do I know when my shirred eggs are done baking?
Keep a close eye on your eggs as they bake. You’ll know they’re done when the whites are set and opaque, while the yolks should still appear slightly jiggly and soft. Baking typically takes between 12-15 minutes, depending on your oven; just remember, you can always bake a bit longer, but it’s hard to reverse overcooking!

Delicious Shirred Eggs with Chives for a Cozy Brunch
Ingredients
Equipment
Method
- Preheat your oven to 375°F (190°C).
- Grease a 6-ounce ramekin with unsalted butter.
- Pour a splash of heavy cream into the buttered ramekin and add two large eggs on top.
- Sprinkle salt, pepper, chives, and Parmesan cheese over the eggs.
- Bake for 12 to 15 minutes until the egg whites are set but yolks are runny.
- Let the ramekin rest for a couple of minutes before serving warm.
Leave a Reply