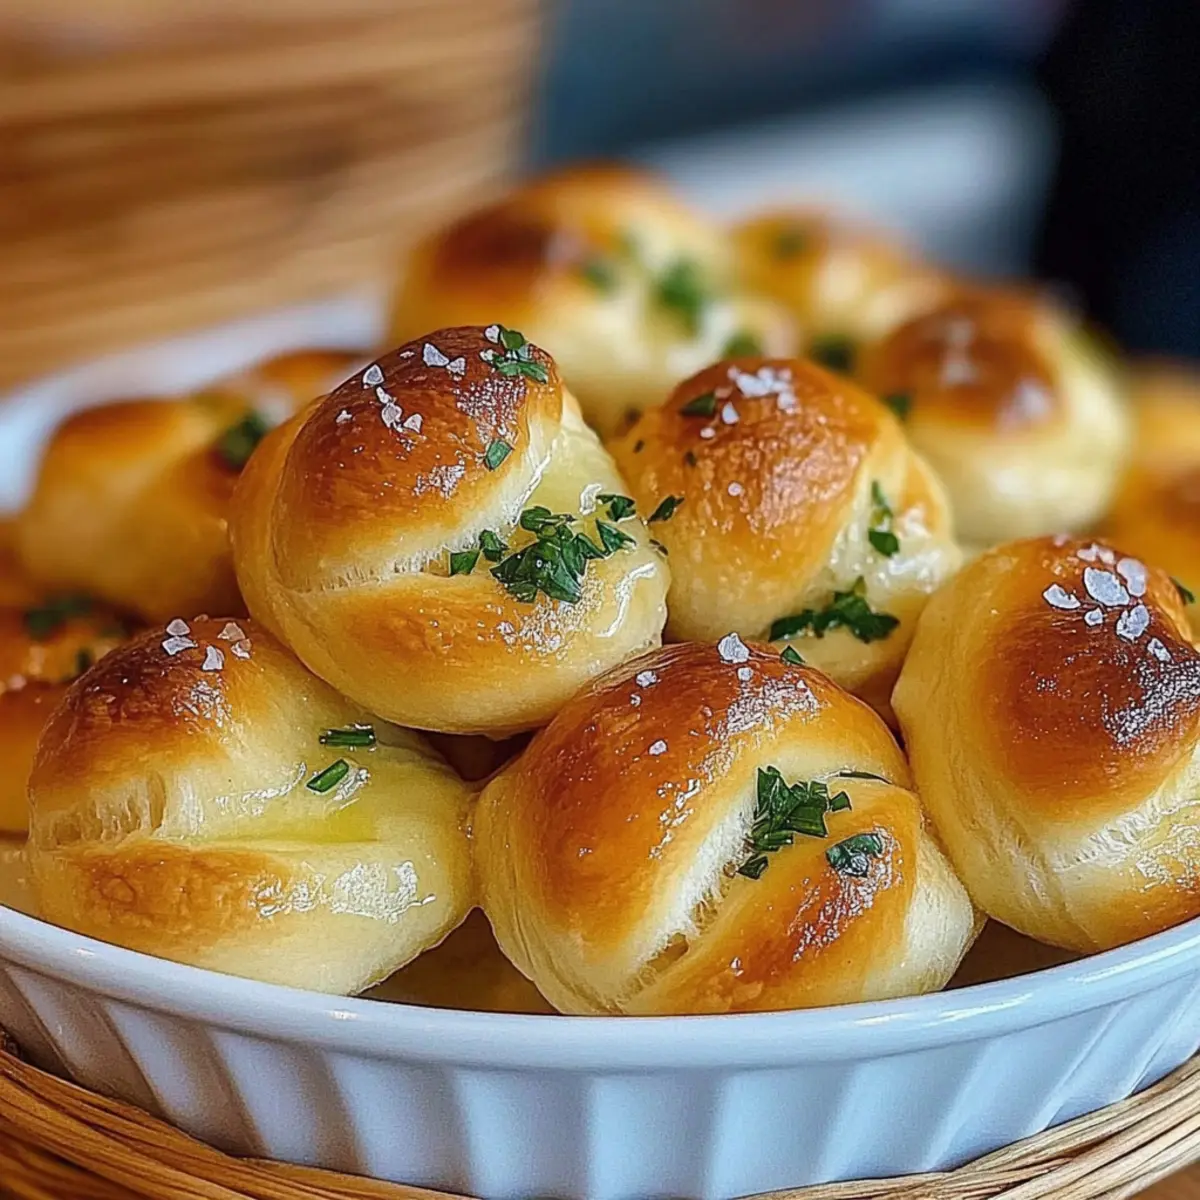
The alluring scent of garlic wafts through the air, inviting you to gather in the kitchen. Today, I’m excited to share my go-to recipe for Gluten Free Garlic Knots—soft, fluffy bites that are not just a fantastic appetizer, but also a perfect treat for any gathering. With effortless preparation and crowd-pleasing appeal, these knots allow you to indulge without the gluten. Each knot is a comforting morsel that evokes memories of friendly get-togethers and warm family dinners, making it hard to eat just one. Whether you’re pairing them with marinara sauce or serving them alongside your favorite pasta, these garlic knots are sure to become a staple in your home. Ready to discover how to make these fluffy delights? Let’s dive in!
Why Are Garlic Knots So Irresistible?
Fluffy, Soft Texture: Each knot is crafted to perfection, creating a delightfully chewy bite that rivals traditional options.
Elevated Flavor: Infused with garlic powder and parsley, these knots deliver a delicious burst of flavor that enhances any meal.
Perfect for Sharing: Ideal for gatherings, they serve as a crowd-pleasing appetizer or a fun side dish alongside your favorite entrees, like Garlic Butter Lobster.
Easy Preparation: With minimal steps, even novice bakers can whip these up in no time.
Gluten-Free Delight: Offers a guilt-free indulgence for those with gluten sensitivities without sacrificing taste.
Prepare to impress your friends and family—these knots are destined to become a beloved recipe at your next get-together!
Garlic Knots Ingredients
• Discover the essentials for gluten-free goodness!
For the Dough
- Gluten-Free All-Purpose Flour – Provides the necessary structure for a delightful texture; feel free to use your favorite homemade gluten-free blend.
- Yeast – Active dry yeast is essential for fluffy, airy knots; ensure it’s fresh for the best rise.
- Warm Water (110°F/43°C) – Activates the yeast efficiently; getting the temperature just right is crucial for success.
- Olive Oil – Keeps the dough moist and adds rich flavor; opt for extra virgin for that robust finish.
- Garlic Powder – This ingredient infuses the dough with a savory garlic essence that’s simply irresistible.
- Salt – Balances and enhances the flavor; a sprinkle of flaky sea salt on top enhances the overall taste experience!
For the Topping
- Butter (for brushing) – Adding a melted butter glaze before baking ensures a glossy finish and mouthwatering richness.
- Fresh Parsley – Provides a burst of color and freshness to contrast the savory garlic flavor; it can also be swapped for other herbs to customize your knots!
By gathering these ingredients, you’re on your way to crafting mouthwatering gluten-free garlic knots that will become the star of your gathering!
Step‑by‑Step Instructions for Garlic Knots
Step 1: Prepare Dough
Begin by preheating your oven to 400°F (200°C). In a mixing bowl, combine warm water (110°F/43°C) and yeast, allowing it to sit for about 5 minutes until frothy. This step activates the yeast, essential for creating fluffy garlic knots.
Step 2: Mix Ingredients
Once the yeast is frothy, stir in gluten-free all-purpose flour, olive oil, garlic powder, and salt. Mix until you achieve a sticky dough that pulls away from the sides of the bowl but remains soft to the touch. This mixture will be the foundation of your delicious garlic knots.
Step 3: Knead
Transfer the dough onto a floured surface with gluten-free flour. Knead the dough gently for about 2 minutes until it becomes smooth and cohesive. Be careful not to over-knead, as this can lead to denser garlic knots. You’ll know it’s ready when it holds its shape well.
Step 4: Shape Knots
Divide the dough into approximately ten equal pieces. Roll each piece into a rope about six inches long and tie it into a knot. Place the formed knots on a greased baking sheet, ensuring they have ample space to rise without touching each other.
Step 5: Let Rise
Cover the baking sheet with a clean kitchen towel and let the knots rise in a warm area for about 20 minutes. Watch as they puff up, becoming airy and ready for baking. This is a crucial step for achieving soft, fluffy garlic knots.
Step 6: Add Flavor & Bake
Before baking, brush the risen knots generously with melted butter, then sprinkle them with chopped fresh parsley and flaky sea salt. Place the baking sheet in the oven and bake for approximately 15 minutes, or until the garlic knots are golden brown and enticingly fragrant.
What to Serve with Gluten Free Garlic Knots
Transform your simple garlic knots into a memorable feast with delightful accompaniments that elevate every bite.
-
Marinara Sauce: A classic pairing, the tangy, savory sauce provides a perfect dip that complements the garlic flavor beautifully.
-
Fresh Salad: Crisp greens tossed with vinaigrette balance the soft texture and richness of the knots. Consider a refreshing cucumber and tomato salad for vibrant colors and flavors.
-
Creamy Garlic Alfredo Pasta: Indulge in a creamy dish that echoes the garlic in the knots while creating a comforting and satisfying meal experience.
-
Roasted Vegetables: A medley of seasonal veggies adds a wholesome crunch and earthy flavors, offering a delightful contrast to the soft, tender knots.
-
Cheesy Garlic Bread: For a carb lover’s dream, serve these knots alongside melted cheesy goodness. The layers of garlic flavor unify the meal beautifully!
-
Chilled White Wine: A crisp, chilled varietal like Sauvignon Blanc pairs exquisitely, while its acidity cuts through the richness for a refreshing sip.
-
Chocolate Lava Cake: Finish your meal with a warm, gooey chocolate treat that offers a sweet contrast to the garlic knots—pure indulgence!
Storage Tips for Garlic Knots
- Room Temperature: Store leftover garlic knots in an airtight container at room temperature for up to 2 days to maintain their delightful texture and flavor.
- Fridge: If you need to keep them longer, refrigerate in an airtight container for up to 4 days; simply reheat in the oven for a few minutes to revive their fluffiness.
- Freezer: For longer storage, wrap garlic knots individually in plastic wrap or aluminum foil, then place them in a freezer bag. They can last for up to 3 months.
- Reheating: When ready to enjoy, reheat frozen knots in the oven at 350°F (about 10-15 minutes) until heated through, ensuring they remain soft and delicious.
Make Ahead Options
These Gluten Free Garlic Knots are perfect for meal prep, allowing you to save time on busy weeknights! You can prepare the dough, shape the knots, and refrigerate them for up to 24 hours before baking. Simply wrap the formed knots tightly in plastic wrap to prevent drying out. When you’re ready to serve, just remove them from the refrigerator, let them rise for about 30 minutes, brush with melted butter, sprinkle with parsley and salt, and bake as directed. This way, you’ll enjoy fresh, warm garlic knots that are just as delicious as if you made them from scratch on the spot! You can also freeze shaped knots for longer storage—just thaw and let rise before baking.
Expert Tips for Garlic Knots
- Fresh Yeast Check: Always use fresh, active dry yeast to ensure perfect bubbling and rise; stale yeast could lead to dense knots.
- Right Dough Consistency: Make sure your dough is sticky but not overly wet; it should hold together without crumbling for the best texture in your garlic knots.
- Gentle Kneading: Knead just until smooth—over-kneading can create a tough texture, so keep it light and gentle!
- Proper Rising: Allow your knots enough time to rise in a warm spot—rushing this step could result in less fluffy garlic knots.
- Flavor Boost: Don’t skip the melted butter brushing; it adds richness and enhances the garlic flavor beautifully in each knot.
Garlic Knots: Customization Options
Feel free to get creative with these delightful garlic knots and make them uniquely yours!
- Herb Variations: Swap fresh parsley with rosemary, thyme, or oregano for a fragrant twist. Each herb brings a distinct flavor, transforming your knots into a herb garden delight.
- Cheesy Surprise: Add shredded cheese (e.g., mozzarella) inside the knots for a gooey, cheesy center. This delightful addition elevates your knots to a comforting, melty treasure.
- Spicy Kick: For a touch of heat, sprinkle chili flakes into the dough or sprinkle on top before baking. The fusion of garlic and spice will awaken your taste buds in the most exhilarating way!
- Dairy-Free: Substitute melted butter with olive oil or dairy-free margarine for a vegan version. You won’t miss the butter, and the knots will still be delightful.
- Whole Grain Option: Use a gluten-free whole grain flour blend for added texture and a nutty flavor. This not only enriches the taste but also boosts the nutritional profile of your snacks.
- Garlic Lovers’ Dream: Increase the garlic powder amount for a stronger taste or add minced fresh garlic into the dough for an extra punch. Garlic fanatics will appreciate this mouthwatering enhancement!
- Herbed Butter: Instead of plain butter, mix in minced garlic and fresh herbs to the melted butter before brushing on the knots. This elevates the flavor profile, making each bite bursting with taste.
- Serving Suggestions: Pair with marinara sauce or a creamy dip for added excitement! These knots go wonderfully alongside dishes like Garlic Paprika Shrimp or Cheesy Garlic Chicken for a complete meal experience.
Gluten Free Garlic Knots Recipe FAQs
What type of gluten-free flour should I use?
Absolutely! To achieve the best texture, I recommend using a high-quality gluten-free all-purpose flour that contains a blend of starches and protein, such as tapioca flour or brown rice flour. If you prefer a homemade option, you can make your own blend by combining almond flour, tapioca flour, and a bit of xanthan gum to mimic the elasticity of traditional wheat flour.
How should I store leftover garlic knots?
Very simple! After they cool completely, keep your garlic knots in an airtight container at room temperature for up to 2 days. If you’d like to keep them longer, follow these steps: Wrap each knot in plastic wrap or aluminum foil and place them in a freezer bag. They can last up to 3 months in the freezer! Just remember to let them thaw at room temperature and reheat in the oven for optimal taste and texture.
Can I freeze garlic knots?
Absolutely! Freezing garlic knots is a fantastic way to prepare ahead. After baking and cooling them down, wrap each garlic knot tightly in plastic wrap or aluminum foil, then transfer them to a freezer-safe bag. This ensures they won’t get freezer burn. When ready to enjoy, simply reheat from frozen in a preheated oven at 350°F for about 10-15 minutes until warmed through.
What do I do if my dough doesn’t rise?
If your dough fails to rise, don’t fret! Check if your yeast is fresh—if it wasn’t frothy when mixed, it may be stale. You can also ensure the warm water temperature is around 110°F (43°C) when activating the yeast. If all else fails, gently knead in a bit more gluten-free flour to adjust the dough consistency. Then, find a warm environment, like near a sunny window, for rising—this can make a world of difference!
Are these garlic knots safe for people with allergies?
That’s a great question! These gluten-free garlic knots are perfect for those with gluten sensitivities; however, always be mindful of cross-contamination if you’re cooking for someone with severe allergies. Ensure all ingredients and surfaces are certified gluten-free, and watch out for any allergens in your specific flour blends. For those with dairy allergies, you can substitute the butter with a dairy-free alternative, like vegan butter or olive oil.
How long can I keep garlic knots in the fridge?
You can safely store leftover garlic knots in an airtight container in the fridge for up to 4 days. A quick reheat in the oven at 350°F for about 5-10 minutes will help restore their original soft texture and warmth, truly bringing them back to their delightful state!
Melt-In-Your-Mouth Garlic Knots: Gluten-Free Indulgence
Ingredients
Equipment
Method
- Preheat your oven to 400°F (200°C). Combine warm water and yeast in a mixing bowl, allowing it to sit for about 5 minutes until frothy.
- Once the yeast is frothy, stir in gluten-free all-purpose flour, olive oil, garlic powder, and salt until you achieve a sticky dough.
- Transfer the dough onto a floured surface and knead gently for about 2 minutes until smooth.
- Divide the dough into approximately ten equal pieces, roll into ropes and tie into knots. Place on a greased baking sheet.
- Cover the baking sheet with a kitchen towel and let the knots rise in a warm area for about 20 minutes.
- Brush knots with melted butter, sprinkle with parsley and flaky sea salt, then bake for about 15 minutes until golden brown.
Leave a Reply