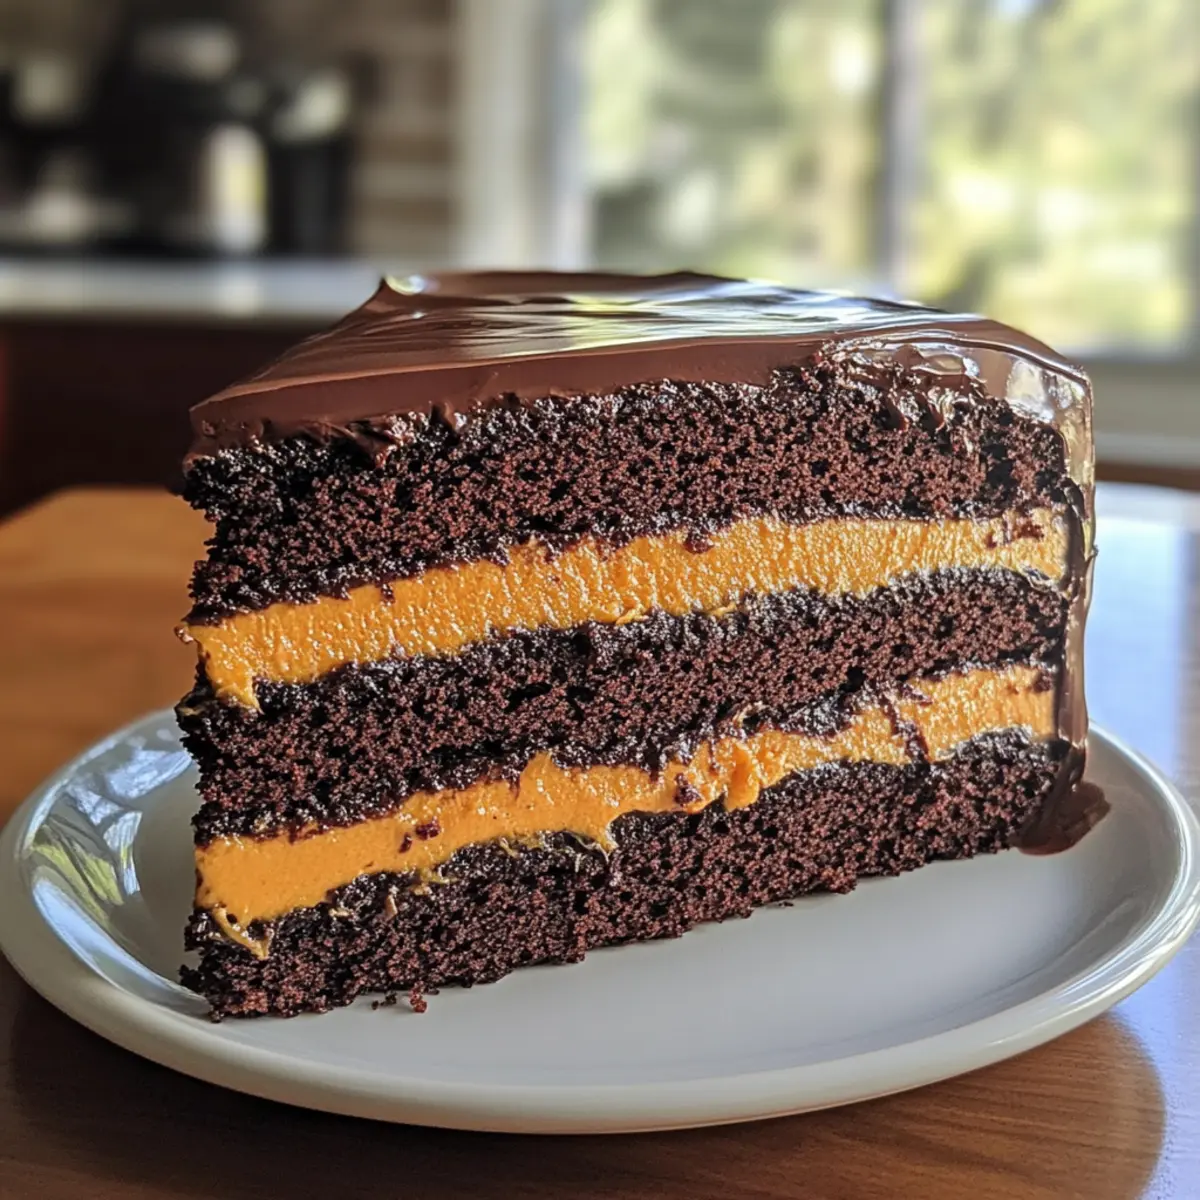
As I stood by the kitchen counter, the zesty aroma of freshly squeezed oranges filled the air, instantly lifting my spirits. There’s something magical about the harmony between rich chocolate and bright citrus, which is why I just had to share my recipe for Chocolate Orange Layer Cake with Ganache. Ideal for any celebration or simply to brighten your day, this easy-to-make dessert layers moist chocolate cake with a luscious orange cream filling, all draped in a silky ganache. Not only does it promise to impress your guests, but its quick prep time means you can whip it up without spending all day in the kitchen. Are you ready to take your dessert game to the next level? Let’s dive into this delightful recipe!
Why is Chocolate Orange Cake Irresistible?
Decadent combination: The indulgent blend of chocolate and citrus creates an explosion of flavor that dances on your palate.
Quick and easy: With straightforward steps, this recipe ensures that even novice bakers can achieve impressive results.
Impressive yet approachable: Perfect for gatherings or everyday treats, it’s a showstopper that won’t stress you out.
Versatile and fun: Feel free to experiment with variations, like chocolate ganache or fresh fruit toppings for extra flair!
Crowd-pleaser: This cake never fails to impress, making it a favorite at any celebration, just like my Chocolate Dipped Orange cookies!
Chocolate Orange Layer Cake Ingredients
• Perfect for your delicious creation!
For the Cake
• All-purpose flour – Base structure of the cake; can be substituted with gluten-free flour for a GF option.
• Unsweetened cocoa powder – Adds rich chocolate flavor; use Dutch process cocoa for a milder taste.
• Granulated sugar – Sweetness and moisture; brown sugar could add a deeper flavor.
• Baking powder & Baking soda – Leavening agents for cake lift; ensure they are fresh for best results.
• Salt – Enhances flavor profile; do not omit, as it balances sweetness.
• Large eggs – Provides structure and moisture; vegan option: use flax eggs (1 tbsp flaxseed meal + 2.5 tbsp water = 1 egg).
• Whole milk – Adds richness and moisture; substitute with buttermilk for added tang.
• Vegetable oil – Keeps the cake moist; melted coconut oil can be a substitute.
• Vanilla extract – Enhances overall flavor; use pure for best results.
• Hot coffee – Intensifies chocolate flavor; replace with hot water in a pinch.
For the Orange Cream Filling
• Sugar – Sweetener for orange cream filling; adjust to taste.
• Cornstarch – Thickening agent for the cream; can be replaced with arrowroot powder.
• Egg yolks – Adds richness to the filling; whole eggs can be used, but consistency may vary.
• Freshly squeezed orange juice – Provides the citrus flavor; lemon juice can be used in an emergency, altering the taste.
• Orange zest – Infuses flavor and aroma; can use zest from other citrus for variation.
• Butter – Adds richness to the cream filling; vegan butter can be used for dairy-free options.
For the Ganache
• Heavy cream – Essential for making ganache; substitute with coconut cream for a dairy-free version.
• Chopped dark chocolate – Creates rich, silky ganache; can mix varieties of chocolate for different flavors.
Dive into this mouthwatering Chocolate Orange Layer Cake, and let the sweet symphony of flavors transform your day!
Step‑by‑Step Instructions for Chocolate Orange Layer Cake
Step 1: Preheat and Prepare Pans
Begin by preheating your oven to 350°F (175°C) to ensure it reaches the right temperature for baking. While the oven heats, grease three 8-inch cake pans with butter or cooking spray and line the bottoms with parchment paper to prevent sticking. This preparation will help your Chocolate Orange Layer Cake emerge easily and beautifully rise.
Step 2: Mix Dry Ingredients
In a large mixing bowl, whisk together the all-purpose flour, unsweetened cocoa powder, granulated sugar, baking powder, baking soda, and salt. Make sure there are no lumps and everything is well-combined. This dry mixture forms the foundation for your moist cake. Take a moment to enjoy the rich cocoa aroma before proceeding to the next step.
Step 3: Combine Wet Ingredients
Add the large eggs, whole milk, vegetable oil, and vanilla extract to the dry ingredients. Mix on medium speed until you achieve a smooth batter, which may appear runny—this is normal. Make sure to scrape down the sides of the bowl for thorough mixing. The Chocolate Orange Layer Cake batter should look glossy and well-blended before you incorporate the coffee.
Step 4: Enhance with Coffee
Gently fold in the hot coffee into the batter until fully combined. This step intensifies the chocolate flavor and adds depth to your cake. The warm temperature helps dissolve any remaining cocoa clumps, leaving your batter silky smooth. You’re now ready to pour the batter into the prepared pans; just take a moment to admire its luscious texture.
Step 5: Bake Cake Layers
Divide the batter evenly among the three cake pans. Bake in your preheated oven for 25-30 minutes, or until a toothpick inserted in the center comes out clean. As the cakes bake, your kitchen will fill with a comforting chocolate scent. Once done, remove from the oven and allow them to cool in the pans for about 10 minutes before turning them out onto a wire rack.
Step 6: Cool Cakes Properly
After a brief cooling period, gently flip each layer onto the wire rack and peel off the parchment paper. Let the cakes cool completely to room temperature before assembly. This cooling is essential, as warm layers can melt your orange cream filling and ganache, resulting in a mess rather than a stunning Chocolate Orange Layer Cake.
Step 7: Prepare Orange Cream Filling
In a saucepan, whisk together sugar, cornstarch, and egg yolks until smooth. Gradually stir in the freshly squeezed orange juice and cook over medium heat, stirring constantly until the mixture thickens—this should take about 5-7 minutes. Once thickened, remove from heat and gently mix in the orange zest and butter, allowing the filling to cool completely before spreading it.
Step 8: Make the Ganache
To create the rich ganache, heat the heavy cream in a small saucepan until it just begins to steam, but do not boil. Pour the hot cream over the chopped dark chocolate in a heatproof bowl and let it sit for about 5 minutes. Afterward, stir until smooth and glossy. Set aside for a few minutes to thicken slightly before using it on the cake.
Step 9: Assemble the Cake
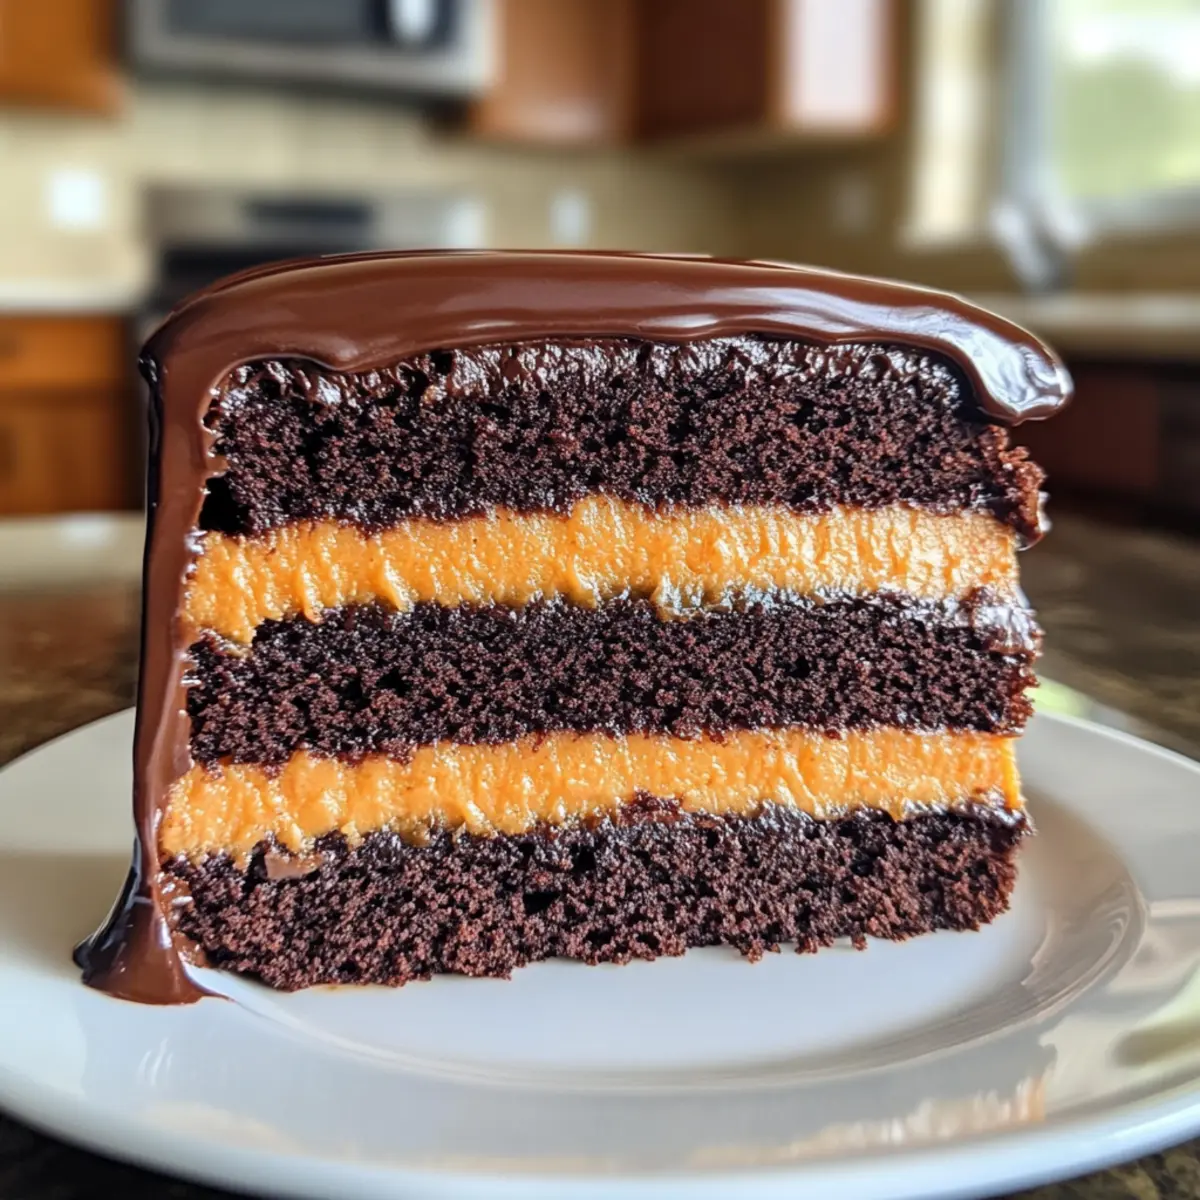
Once the cake layers and orange cream filling are cooled, it’s time to assemble your masterpiece. Place one layer of chocolate cake on a serving plate and spread a generous amount of the orange cream filling on top. Repeat this with the second layer and finish with the final layer on top. Allow your cake to stand tall and proud before drizzling ganache over it.
Step 10: Finish with Ganache
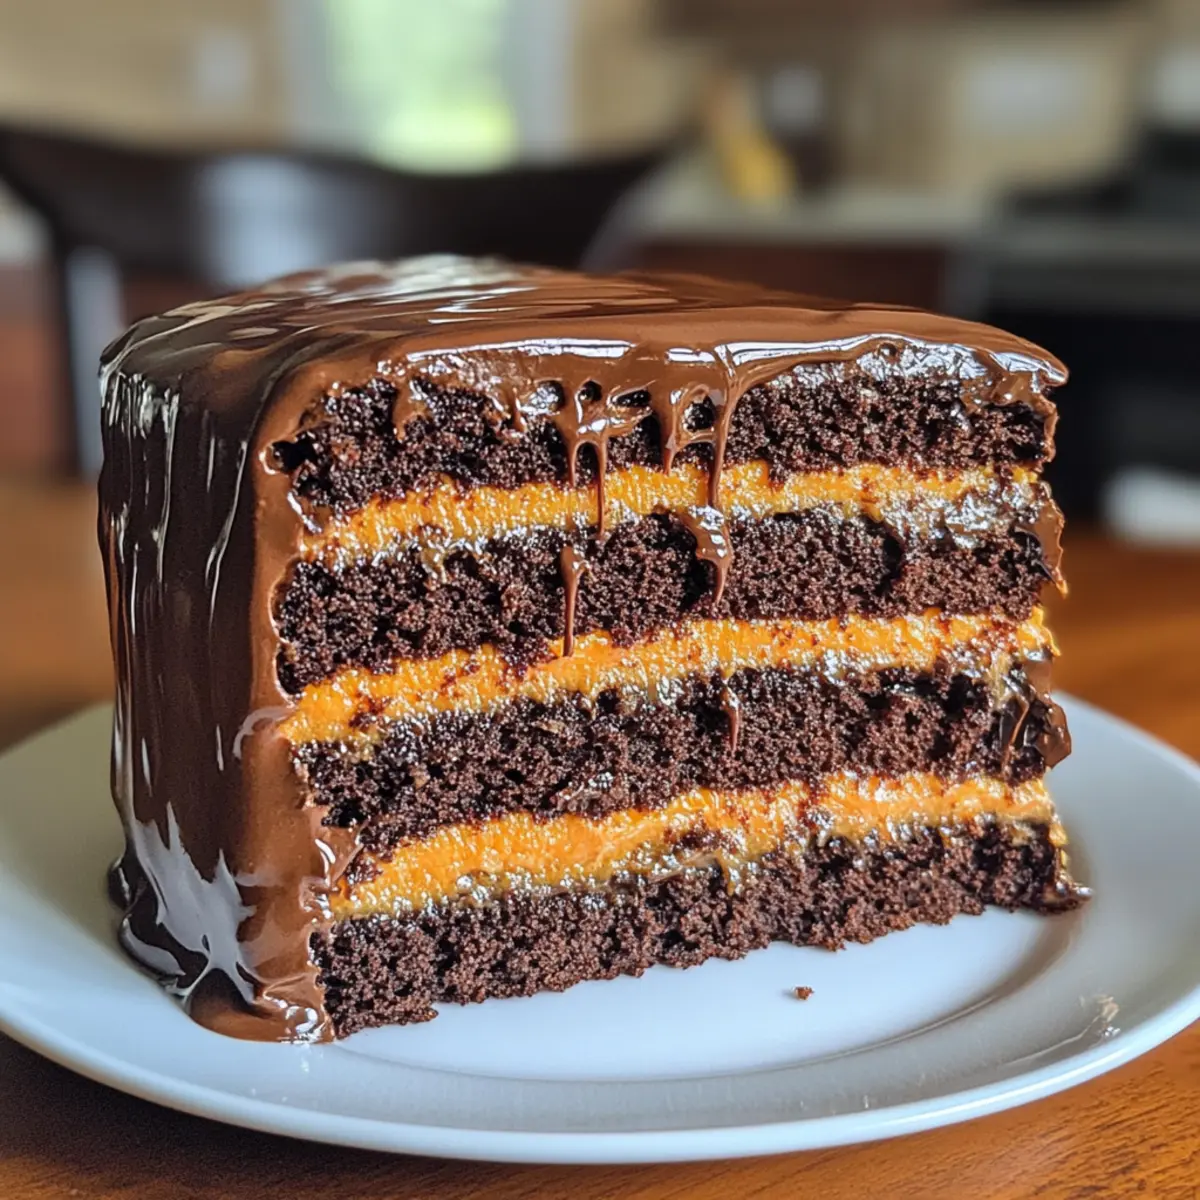
Pour the remaining ganache over the top of the assembled cake, letting it drip down the sides for that beautiful, elegant finish. Take your time to ensure even coverage, and be sure to admire the glossy exterior that will entice anyone who sees your Chocolate Orange Layer Cake. It’s now ready to serve and impress!
Make Ahead Options
These Chocolate Orange Layer Cakes are perfect for meal prep enthusiasts! You can bake the cake layers up to 24 hours in advance; simply allow them to cool completely, then tightly wrap in plastic wrap to prevent drying out. The orange cream filling can be prepared and refrigerated for up to 3 days; just make sure to stir it well before use to maintain its creamy texture. For the ganache, you can also make it ahead and refrigerate it; simply reheat gently before pouring over the assembled cake. When ready to serve your delicious Chocolate Orange Layer Cake, layer your chilled cakes with the orange cream filling and finish with the warmed ganache for that indulgent touch!
Chocolate Orange Layer Cake Variations
Feel free to let your creativity shine as you explore these delicious variations designed to enhance your Chocolate Orange Layer Cake!
-
Gluten-Free: Substitute all-purpose flour with a gluten-free blend for a lovely cake anyone can enjoy. The flavors remain beautifully intact, ensuring no one misses out on this delightful dessert.
-
Vegan-Friendly: Use flax eggs and coconut cream for the ganache. This way, your cake maintains its dreamy texture while being perfectly plant-based!
-
Nutty Addition: Mix in some chopped walnuts or pecans to the batter for an extra crunch. The nutty flavor pairs beautifully with the chocolate and orange, elevating your cake to new heights.
-
Citrus Swap: Try replacing the orange juice with other citrus juices like lemon or grapefruit for a unique twist. Each option infuses a fresh zing that’s sure to surprise!
-
Chocolate Variety: Use different types of chocolate (milk chocolate or white chocolate) for the ganache to adjust sweetness and flavor depth according to your palate.
-
Fruit Topper: Garnish with fresh berries or candied orange slices to add a pop of color and freshness. These toppings not only beautify the cake but also enhance the fruitiness of the dessert.
-
Ultimate Indulgence: Drizzle a rich caramel sauce over the ganache before serving. This luxurious addition creates a luscious layer that’s hard to resist, just like my Chocolate Raspberry Cheesecake or Luxurious Dubai Chocolate.
-
Spicy Kick: Add a pinch of cayenne pepper or cinnamon to the batter for a hint of warmth. This uncommon twist provides a delightful surprise that makes every bite unforgettable.
Expert Tips for Chocolate Orange Layer Cake
-
Room Temperature Ingredients: Ensure all ingredients are at room temperature before mixing. This helps achieve a smoother batter and better cake texture.
-
Perfect Baking Time: Keep an eye on your cake as it bakes; start checking at the 25-minute mark to avoid overbaking, which can lead to dryness.
-
Ganache Temperature: Allow the ganache to cool for a few minutes before pouring it on the cake. This gives it a thicker texture that adheres better and creates a beautiful finish.
-
Layer Cooling: Make sure your cake layers are completely cool before frosting. Warm layers can cause the filling and ganache to melt together, resulting in less impressive presentation.
-
Sealing and Freezing: If you’re making the Chocolate Orange Layer Cake ahead of time, wrap the cooled cake in plastic wrap. It freezes well, ensuring freshness for weeks!
What to Serve with Chocolate Orange Layer Cake
As you savor each luscious bite of this decadent dessert, consider complementing its rich chocolate and citrus flavors with delightful pairings that create a memorable, full meal experience.
-
Vanilla Ice Cream: A creamy scoop melts perfectly beside the cake, providing a cooling contrast to the rich ganache. The classic pairing enhances the sweetness and rounds out the flavor profile beautifully.
-
Fresh Berry Medley: Berries such as strawberries, raspberries, or blueberries add a refreshing burst of flavor. Their natural tartness balances the richness of the cake while adding a pop of color to your dessert platter.
-
Espresso or Coffee: The deep, bold flavors of a hot cup of espresso or coffee heighten the chocolate experience. Perfect for coffee lovers, this pairing creates a comforting conclusion to your meal.
-
Chocolate-Covered Orange Slices: Elevate the citrus notes with chocolate-dipped orange segments. Their sweet and tangy essence pairs superbly, making an elegant and delicious finishing touch to your dessert.
-
Chocolate Mint Tea: Enjoy a soothing cup of chocolate mint tea alongside the cake. The herbal mint notes contrast nicely with the sweetness, leaving a refreshing finish on your palate.
-
Candied Ginger Bites: For a unique twist, try serving candied ginger. Its spicy-sweet notes complement the citrus flavors and add an exciting zing to your dessert experience.
Crafting a delightful meal around your Chocolate Orange Layer Cake transforms a simple dessert into a memorable gathering moment!
How to Store and Freeze Chocolate Orange Layer Cake
Room Temperature: Store the cake in a cool, dry place for up to 1 day. Cover it with a cake dome or wrap it in plastic wrap to keep it fresh.
Fridge: Keep any leftover slices in an airtight container in the refrigerator for up to 3-4 days. This will maintain the cake’s moistness and preserve the flavors of the orange cream filling.
Freezer: If you want to enjoy the Chocolate Orange Layer Cake later, wrap the cooled layers in plastic wrap and then in aluminum foil. It can be frozen for up to 3 months.
Reheating: To serve, thaw the cake in the fridge overnight before bringing it to room temperature. If desired, lightly reheat slices in the microwave for 10-15 seconds for a warm treat!
Chocolate Orange Layer Cake Recipe FAQs
How do I know if my oranges are ripe for juice and zest?
Absolutely! Look for oranges that are firm, heavy for their size, and have a vibrant color. Avoid those with dark spots or wrinkled skin, as they may be overripe. Fresh fruit will offer the best flavor for both juice and zest—so when you’re squeezing and zesting, you’ll get that bright, zesty taste!
What’s the best way to store leftover Chocolate Orange Layer Cake?
Very! To ensure your cake remains fresh, store it in an airtight container in the refrigerator for up to 3-4 days. If you want to keep it longer, wrap individual slices or the whole cake tightly in plastic wrap and then in aluminum foil before placing it in the freezer for up to 3 months. This keeps the chocolate moist and the orange flavors intact!
Can I freeze the Chocolate Orange Layer Cake?
Absolutely! Here’s how: Once your cake has completely cooled, wrap each layer in plastic wrap and then in aluminum foil. This double wrapping protects it from freezer burn. Label with the date, and you can enjoy your delicious cake later—just thaw overnight in the fridge before serving.
What should I do if my ganache isn’t thickening properly?
Not to worry! If your ganache is too thin, it may need more time to cool and set. After pouring hot cream over the chocolate, let it sit for at least 5 minutes before stirring to create a smooth texture. If it’s still too thin after cooling, you can return the mixture to low heat, adding in a bit more chopped chocolate until it reaches a thicker consistency.
Are there any allergies I should consider with this recipe?
Yes, it’s important! This Chocolate Orange Layer Cake contains common allergens such as eggs, dairy, and wheat. If you’re baking for guests with dietary restrictions or allergies, you can swap large eggs for flax eggs, use dairy-free butter and heavy cream alternatives, and choose gluten-free flour instead. Always double-check labels to avoid any unwanted surprises!
Can dogs eat chocolate or any cake ingredients?
Definitely no! Chocolate is toxic to dogs. Be cautious and ensure that any leftovers are stored well out of paws’ reach, as even small amounts of chocolate can be harmful to our furry friends. If you want to share a treat with your pet, consider preparing a dog-friendly cake without any chocolate!
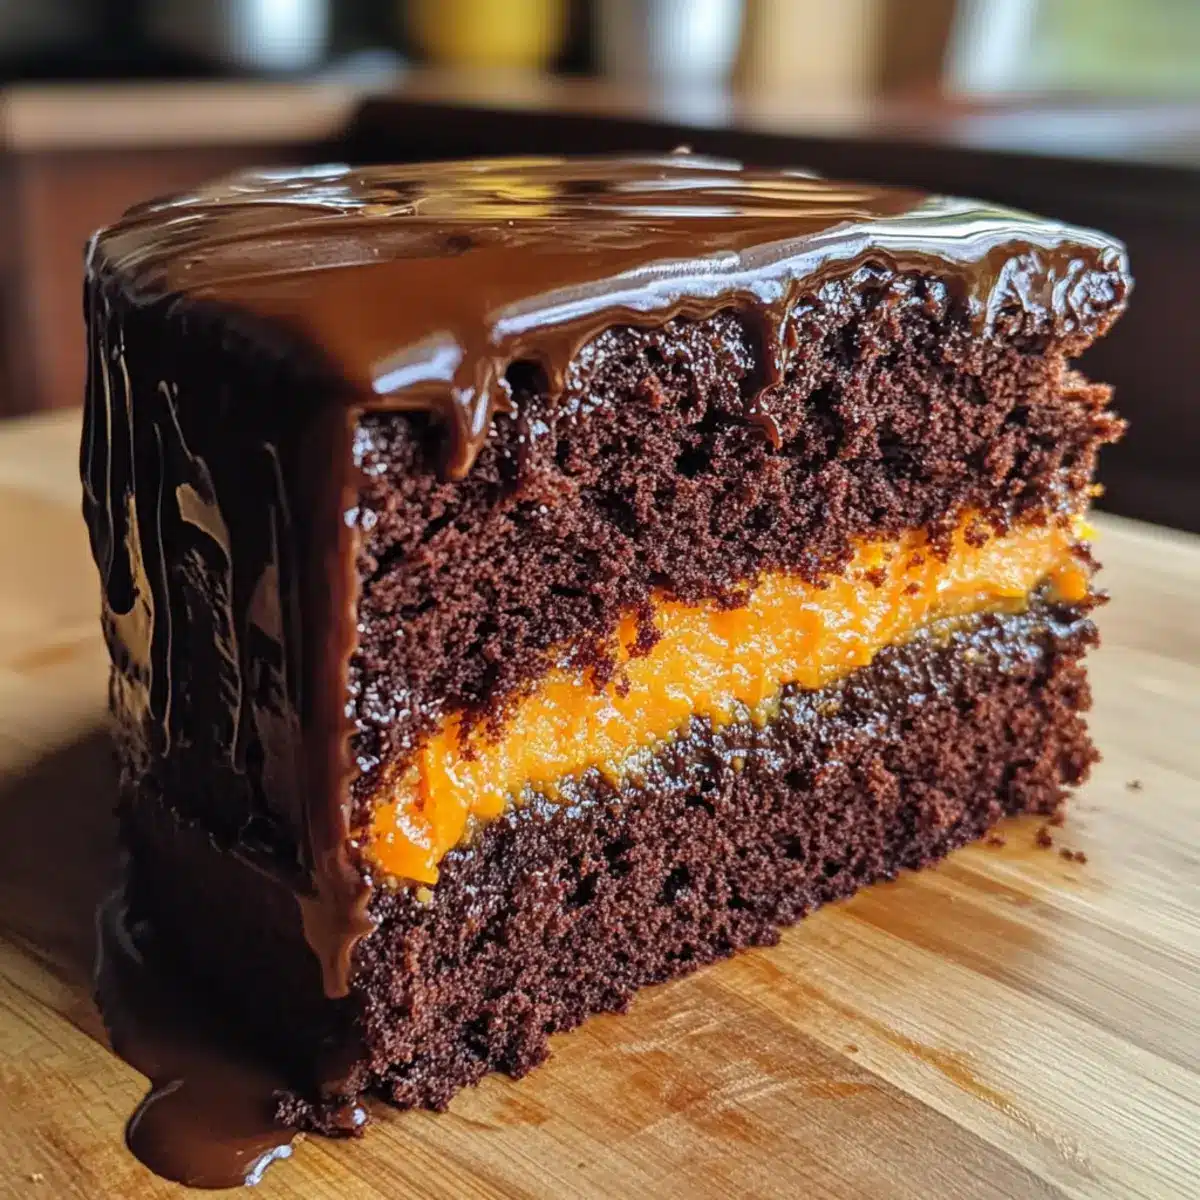
Decadent Chocolate Orange Layer Cake to Brighten Your Day
Ingredients
Equipment
Method
- Preheat your oven to 350°F (175°C) and prepare three 8-inch cake pans with grease and parchment paper.
- In a large mixing bowl, whisk together the dry ingredients: all-purpose flour, cocoa powder, sugar, baking powder, baking soda, and salt.
- Add the wet ingredients: eggs, milk, oil, and vanilla to the dry mixture. Mix on medium speed until smooth.
- Fold hot coffee into the batter until fully combined, then pour the batter evenly into the prepared pans.
- Bake for 25-30 minutes, or until a toothpick comes out clean. Cool in pans for 10 minutes, then transfer to a wire rack.
- Allow the cakes to cool completely before assembly.
- Whisk together sugar, cornstarch, and egg yolks in a saucepan. Gradually stir in orange juice and cook until thickened.
- Remove from heat and mix in orange zest and butter. Let the cream filling cool.
- Heat heavy cream until steaming, then pour over chopped chocolate. Stir until smooth and let thicken slightly.
- Layer the cooled chocolate cakes, spreading orange cream between each layer.
- Drizzle ganache over the top of the assembled cake, allowing it to drip down the sides.
- Your Chocolate Orange Layer Cake is now ready to serve!
Leave a Reply