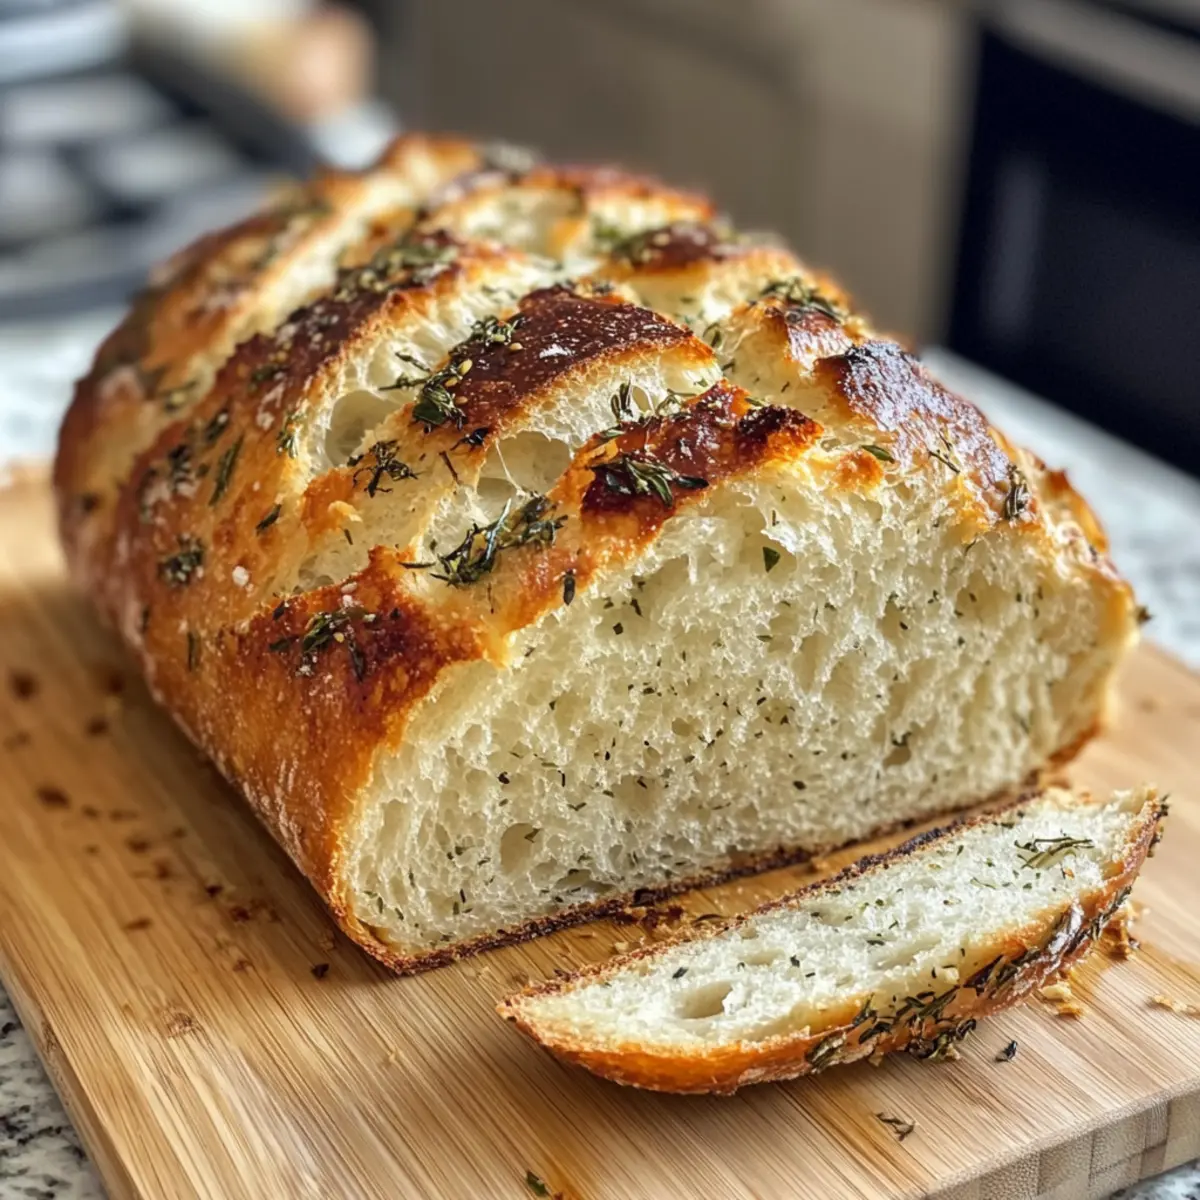
The savory scent of garlic and herbs wafting through the kitchen is an invitation no one can resist. As I mixed my ingredients for this Garlic Herb Dutch Oven Bread, I couldn’t help but smile, remembering the countless times I’ve turned to this recipe when friends gather or family seeks comfort. What’s truly remarkable about this bread is its simplicity; you’ll find it requires minimal hands-on effort and yields a flavorful loaf that’s as impressive as those from a local bakery. Plus, with its hearty crust and soft interior, this vegetarian delight pairs perfectly with your favorite soups or salads. Curious to create the perfect bread that fills your home with warmth? Let’s dive into the details!
Why Is This Bread So Special?
Simplicity at Its Finest: This Garlic Herb Dutch Oven Bread is incredibly easy to make, even for novices. With just a few ingredients and minimal prep time, you can produce a crusty, artisanal loaf without stress.
Heavenly Aroma: As the bread bakes, your kitchen will be filled with the irresistible scent of garlic, enticing everyone around you. It’s the perfect way to impress guests!
Versatile Pairing: This bread shines alongside soups, salads, or pasta, making it an excellent companion for various meals. Consider serving it with delicious Garlic Paprika Shrimp for a complete dining experience.
Crowd-Pleaser: Perfect for gatherings or family dinners, this bread is bound to be a hit— everyone loves fresh bread!
Room for Creativity: Feel free to experiment with different herbs or add-ins like sun-dried tomatoes or cheese, making each loaf uniquely yours. Enjoy the creative process as you bake!
Garlic Herb Dutch Oven Bread Ingredients
Enjoy the ease of homemade bread with these simple ingredients.
For the Bread
- All-Purpose Flour – This provides structure and texture; you can use bread flour for a chewier crust.
- Salt – Enhances flavor and controls yeast activity for optimal taste.
- Instant Yeast – Helps the bread rise quickly; can substitute with active dry yeast by activating it in warm water first.
- Warm Water – Essential for hydrating the flour and activating the yeast; ideal temperature is around 110°F (43°C).
- Garlic (minced) – Adds that signature aromatic flavor; increase for a stronger garlic kick!
- Fresh Herbs (e.g., rosemary, thyme) – Infuses the bread with delightful herbal notes; feel free to customize to your taste.
- Olive Oil – Ensures the crust turns golden and crispy; an important step for that perfect bake!
Step‑by‑Step Instructions for Garlic Herb Dutch Oven Bread
Step 1: Mix the Dry Ingredients
In a large mixing bowl, combine 3 cups of all-purpose flour, 1 teaspoon of salt, and 1 teaspoon of instant yeast. Use a whisk to blend them together until evenly combined, ensuring there are no clumps. This mixture forms the base of your Garlic Herb Dutch Oven Bread, setting the stage for a delightful rise.
Step 2: Add Wet Ingredients
Pour in 1.5 cups of warm water (around 110°F or 43°C) followed by 4 cloves of minced garlic and 2 tablespoons of chopped fresh herbs, such as rosemary or thyme. Stir the mixture with a wooden spoon until a shaggy dough forms. Don’t worry if it looks messy; that’s how your bread develops that wonderful chewy texture!
Step 3: The Dough Rests
Cover the bowl tightly with plastic wrap and let it rest at room temperature for 12 to 18 hours. This long fermentation allows the flavors to deepen and the yeast to work its magic. You’ll know it’s ready when the dough has doubled in size and appears bubbly on the surface.
Step 4: Preheat the Dutch Oven
About 30 minutes before you’re ready to bake, preheat your oven to 450°F (230°C) with your Dutch oven inside. This step is crucial for creating a crusty outer layer on your Garlic Herb Dutch Oven Bread; the intense heat will give your loaf a beautiful golden finish.
Step 5: Prepare the Dutch Oven
Carefully remove the hot Dutch oven from the oven using oven mitts. Add 2 tablespoons of olive oil, swirling it around to coat the bottom. This oil not only flavors the crust but also prevents the bread from sticking, allowing for easy removal once it’s baked to perfection.
Step 6: Shape the Dough
Transfer the rested dough onto a floured surface. With floured hands, gently shape the dough into a round ball, taking care not to deflate it too much. The key here is to maintain its airy quality, which contributes to the tender inside of your Garlic Herb Dutch Oven Bread.
Step 7: Bake the Bread
Place the shaped dough carefully into the preheated Dutch oven. Cover it with the lid and bake for 30 minutes. This initial covered phase traps steam, helping the bread rise beautifully and creating that signature chewy crust we all love.
Step 8: Finish Baking
After 30 minutes, remove the lid from the Dutch oven and allow the bread to bake for an additional 15 to 20 minutes. Keep a close eye on it—you want your Garlic Herb Dutch Oven Bread to turn a deep golden brown and have a hollow sound when tapped on the bottom.
Step 9: Cool and Slice
Once baked, transfer the bread to a wire rack and let it cool for at least 30 minutes before slicing. This cooling period allows the crumb to set and gives you the perfect texture. Once cooled, slice into your flavorful Garlic Herb Dutch Oven Bread and savor the delicious aroma!
Garlic Herb Dutch Oven Bread Variations
Feel free to make this Garlic Herb Dutch Oven Bread your own! Let your creativity shine in every loaf.
- Dairy-Free: Omit cheese and use a dairy-free substitute to create a lighter version.
- Cheesy Delight: Add 1 cup of shredded mozzarella or parmesan cheese for a deliciously cheesy twist. The gooey cheese melts beautifully into the bread, giving it an irresistible flavor.
- Add-Ins Galore: Toss in sun-dried tomatoes or olives for a Mediterranean flair. These add-ins can elevate the bread’s taste and make for a delightful snacking experience.
- Herb Boost: Substitute fresh herbs with a blend of your favorite dried herbs, adjusting the amount since dried herbs are more concentrated. A hint of basil or oregano can transport your bread to Italy!
- Spicy Kick: Incorporate a teaspoon of crushed red pepper flakes for a touch of heat. It’s a wonderful surprise that will delight spice lovers.
- Onion Lovers: Swap out garlic for caramelized onions to create a deliciously sweet flavor profile. This variation adds depth, making it perfect for a comforting dinner.
- Nutty Texture: Fold in a half cup of chopped walnuts or pecans for an earthy crunch. The nuts will add both texture and a beautiful flavor contrast.
As you explore these variations, you might want to pair this warm bread with a hearty soup, like Pumpkin Bread Pudding. The complimentary flavors will make your meal truly unforgettable!
What to Serve with Garlic Herb Dutch Oven Bread
Transform your homemade bread into a delightful meal with these hearty and delicious pairings that will leave your taste buds dancing.
-
Creamy Tomato Soup: The rich tomato flavor complements the garlicky notes of the bread, creating a cozy and satisfying duo.
-
Simple Green Salad: A crisp, refreshing salad brightens the meal, balancing the hearty bread with vibrant flavors from fresh veggies and a tangy vinaigrette.
-
Olive Oil and Balsamic Vinegar: A small bowl of good quality olive oil mixed with balsamic vinegar offers a fantastic dipping option, enhancing the bread’s flavors with rich textures.
-
Herbed Butter: Whip some softened butter with your favorite herbs, and spread it on warm slices for an indulgent treat that elevates each bite.
-
Pasta Primavera: The garlicky aroma of the bread pairs beautifully with the fresh vegetables and light sauces of pasta primavera, creating a delightful harmony of flavors.
-
Red Wine: A glass of fruity red wine, such as a Merlot or Chianti, complements the rich flavors of the bread and brings warmth to your dining experience.
-
Garlic Shrimp Skewers: Grilled shrimp tossed in garlic and herbs echo the flavors of the bread, offering a deliciously satisfying combination for seafood lovers.
-
Roasted Vegetables: A medley of roasted seasonal vegetables with olive oil provides a sweet and savory contrast, balancing out the savory flavors of the bread.
-
Apple Crisp: For dessert, the sweet, cinnamon-spiced apple crisp harmonizes with the bread, making for a heartwarming ending to your meal.
-
Cheese Board: Pair with an assortment of cheeses like aged cheddar and creamy brie for a rich and savory spread that pairs wonderfully with the bread’s rustic quality.
Make Ahead Options
These Garlic Herb Dutch Oven Bread are perfect for busy home cooks looking to save time! You can mix the dry ingredients and prepare the dough up to 24 hours in advance. After forming the shaggy dough, cover it tightly with plastic wrap and let it rest at room temperature. To maintain quality, ensure it’s kept in a warm environment for optimal fermentation. When you’re ready to bake, simply preheat your Dutch oven, shape the dough, and follow the final baking instructions. This makes it easy to enjoy fresh, artisan-style bread when you’re short on time, all while filling your home with that inviting aroma!
Helpful Tricks for Garlic Herb Dutch Oven Bread
- Hydration Matters: Ensure your dough is well-hydrated; it should feel sticky but manageable. This helps create a moist interior for your Garlic Herb Dutch Oven Bread.
- Perfect Water Temp: Use a kitchen thermometer to check that your warm water is around 110°F (43°C). This optimal temperature activates the yeast effectively for a good rise.
- Don’t Overwork the Dough: When shaping, avoid kneading too much. Overworking can lead to a denser loaf; instead, shape gently to maintain that airy texture.
- Experiment with Flavors: Feel free to mix in different herbs, cheese, or even spices to tailor your Garlic Herb Dutch Oven Bread to your taste preferences. Each variation can create a delightful new experience!
- Storage Tip: To keep your bread crusty, store leftovers in a paper bag at room temperature instead of plastic, which traps moisture and can lead to a soft crust.
How to Store and Freeze Garlic Herb Dutch Oven Bread
Room Temperature: Store leftover bread in a paper bag to maintain the crust’s crispness; it will stay fresh for up to 3 days.
Fridge: Avoid refrigerating your Garlic Herb Dutch Oven Bread as it can dry out; instead, keep it at room temperature.
Freezer: For longer storage, slice the bread and place it in an airtight container or freezer bag. It can be frozen for up to 3 months without losing flavor.
Reheating: To enjoy your frozen slices, thaw them at room temperature and reheat in the oven for 10 minutes at 350°F (175°C) to restore that delightful crust!

Garlic Herb Dutch Oven Bread Recipe FAQs
How do I choose the right herbs for this recipe?
Absolutely! Fresh herbs like rosemary and thyme are perfect for this Garlic Herb Dutch Oven Bread, but you can experiment with others such as parsley or basil. The key is to use what you enjoy most. If using dried herbs, remember that they are more concentrated, so reduce the amount to about one-third of the fresh herb quantity.
How should I store leftover Garlic Herb Dutch Oven Bread?
For optimal freshness, store your leftover Garlic Herb Dutch Oven Bread in a paper bag at room temperature. This method keeps the crust crispy for up to 3 days. Avoid plastic bags, as they trap moisture and can make your crust soft and chewy.
Can I freeze Garlic Herb Dutch Oven Bread?
Absolutely! To freeze, simply slice the bread and place it in an airtight container or freezer bag. It will maintain its delicious flavor for up to 3 months. When you’re ready to enjoy it, thaw at room temperature and then reheat in the oven for about 10 minutes at 350°F (175°C) to bring back that lovely crispiness.
What if my dough doesn’t rise?
Very often, insufficient rise can be due to water that’s too hot (over 120°F or 49°C can kill the yeast) or using expired yeast. To ensure success, always use a kitchen thermometer for the warm water. If the dough is still not rising, let it sit longer in a warm place; sometimes yeast just needs a little more time to work its magic!
Can I make this bread vegan-friendly?
Indeed! This recipe is already vegetarian, but if you’re aiming for a vegan option, you can easily maintain that by ensuring all add-ins (like cheese) are dairy-free. The main recipe is naturally vegan, as it contains no animal products!
What should I do if my bread turns out dense?
If your Garlic Herb Dutch Oven Bread turns out dense, it’s likely due to either under-kneading or not enough hydration in the dough. Make sure to measure your flour precisely and try to add a little extra water if the dough feels dry while mixing. A well-hydrated and adequately resting dough is key to achieving that fluffy, airy texture we all love!
Garlic Herb Dutch Oven Bread: Easy Rustic Flavor Awaits
Ingredients
Equipment
Method
- Mix the dry ingredients: Combine flour, salt, and instant yeast in a large mixing bowl using a whisk.
- Add wet ingredients: Pour in warm water, minced garlic, and chopped herbs. Stir with a wooden spoon until shaggy dough forms.
- Let the dough rest: Cover the bowl and let it rest at room temperature for 12 to 18 hours.
- Preheat the Dutch oven: Preheat the oven to 450°F with the Dutch oven inside.
- Prepare the Dutch oven: Add olive oil to the hot Dutch oven, swirling to coat.
- Shape the dough: Turn the rested dough onto a floured surface and shape it into a round ball.
- Bake the bread: Place the dough in the preheated Dutch oven, cover, and bake for 30 minutes.
- Finish baking: Remove the lid and bake for an additional 15 to 20 minutes until golden brown.
- Cool and slice: Transfer the bread to a wire rack and let cool for at least 30 minutes before slicing.
Leave a Reply