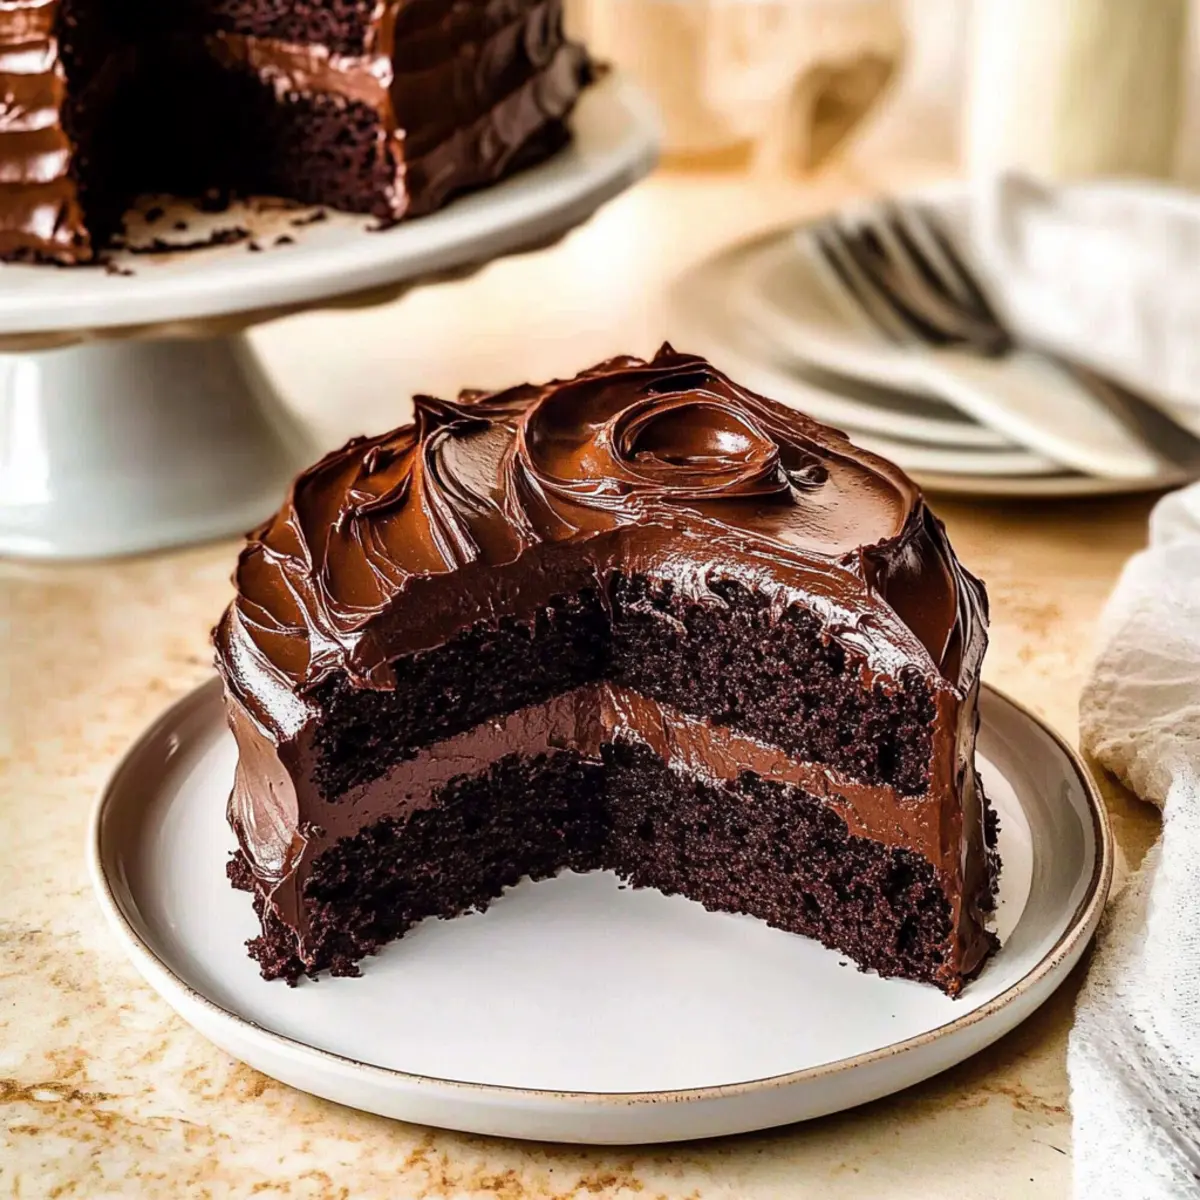
As I whipped up the batter for this cake, memories of childhood flooded back—like the moment Matilda savored her first slice of that heavenly chocolate cake. Inspired by the beloved film, this Best Matilda’s Chocolate Cake is everything a chocolate lover dreams of: rich, moist layers embraced by a glossy fudge frosting that beckons to be indulged. Not only is it a joy to make, but it also doubles as a spectacular centerpiece for any occasion, ensuring smiles all around. Plus, you can easily cater to dietary needs with gluten-free or vegan substitutes, making it a versatile dessert for all your friends and family. What celebration would you sprinkle a little Matilda magic on?
Why is Matilda’s Chocolate Cake a Must-Try?
Decadent Layers: Every bite of this cake is a celebration of rich chocolate, with moist layers that create a melt-in-your-mouth experience.
Versatile Recipe: Easily adapt this cake to suit various dietary needs—gluten-free or vegan options are just as delicious!
Perfect for Celebrations: Impress your guests with a stunning centerpiece that’s not just beautiful but also incredibly tasty.
Time-Saving Delight: Quick to prepare, this cake is a delightful way to satisfy your chocolate cravings without a lengthy process.
Childhood Nostalgia: Inspired by the beloved classic, it evokes joyful memories reminiscent of Matilda’s enchanting story—making it a delightful treat for all ages!
Matilda’s Chocolate Cake Ingredients
For the Cake Batter
- Flour – Provides structure; substitute with self-rising or gluten-free flour as needed.
- Granulated Sugar – Adds sweetness and moisture; caster sugar could also be used for a finer texture.
- Baking Powder & Baking Soda – Helps the cake rise; make sure they are fresh for optimal results.
- Cocoa Powder – Adds rich chocolate flavor; opt for Dutch-process cocoa for a deeper taste.
- Vegetable Oil – Keeps the cake moist; can be swapped with canola oil or melted butter.
- Eggs – Binds ingredients together; using room-temperature eggs creates a fluffier cake.
- Buttermilk – Adds moisture and tang; make at home by mixing milk with vinegar or lemon juice.
- Hot Coffee – Intensifies the chocolate flavor without being detectable; substitute with hot water if necessary.
- Vanilla Extract – Enhances overall flavor; always choose pure vanilla extract for the best outcome.
- Salt – Brightens and balances flavors; kosher salt is a great choice.
For the Fudge Frosting
- Dark Chocolate – Essential for richness in frosting; use high-quality chocolate (60-70% cocoa) for best taste.
- Unsalted Butter – Creates a creamy texture; can replace with salted butter but reduce added salt.
- Heavy Cream – Ensures the right consistency for frosting; full-fat is necessary; no substitutes recommended.
- Powdered Sugar – Sweetens and thickens frosting; can be homemade by blending granulated sugar.
This Matilda’s chocolate cake promises a delightful treat that will have everyone coming back for seconds!
Step‑by‑Step Instructions for Matilda’s Chocolate Cake
Step 1: Preheat the Oven
Preheat your oven to 350°F (180°C) and prepare two 8-inch round baking pans. Line the bottoms with parchment paper and lightly grease the sides to ensure easy removal of the cakes once baked. This step is crucial for achieving perfectly baked layers that will hold their shape and texture in your Matilda’s chocolate cake.
Step 2: Mix Dry Ingredients
In a large mixing bowl, combine the flour, granulated sugar, cocoa powder, baking powder, baking soda, and salt. Whisk together until well-blended, ensuring there are no lumps. The aim is to create a uniform dry mixture that sets the foundation for the rich flavor of your Matilda’s chocolate cake.
Step 3: Combine Wet Ingredients
Add the eggs, buttermilk, vegetable oil, and vanilla extract directly to the dry ingredients. Using a spatula, mix gently until the batter is almost combined; a few lumps are okay at this stage. The addition of these wet ingredients will introduce moisture essential for the cake’s rich and fluffy texture.
Step 4: Add Hot Coffee
Pour in the hot coffee, stirring gently to combine until the batter is smooth and free of lumps. The heat from the coffee enhances the deep cocoa flavor, making your Matilda’s chocolate cake even more decadent. Ensure the batter is silky before moving on to the next step.
Step 5: Bake
Divide the batter evenly between the prepared baking pans. For even baking, you may use cake strips around the pans to prevent doming. Place in the preheated oven and bake for 25-30 minutes, or until a toothpick inserted in the center comes out clean. The cakes should rise beautifully, signaling they are nearly done.
Step 6: Cool Layers
Once baked, remove the cakes from the oven and let them cool in the pans for 10 minutes. Carefully transfer the layers onto wire racks to cool completely. Allowing them to cool thoroughly is vital as this prevents the frosting from melting, ensuring a delightful finish to your Matilda’s chocolate cake.
Step 7: Make the Frosting
In a medium saucepan over low heat, melt the unsalted butter along with the heavy cream and dark chocolate, stirring continuously until smooth. Sift in the cocoa powder and powdered sugar, mixing until fully blended and glossy. This rich frosting will be the crowning glory of your Matilda’s chocolate cake.
Step 8: Chill Frosting
Once the frosting is smooth, remove it from heat and cover the surface with plastic wrap to prevent a skin from forming. Allow the mixture to cool in the refrigerator for 1-2 hours to thicken it for easy spreading. Chilling the frosting properly is essential for achieving that perfect, velvety texture.
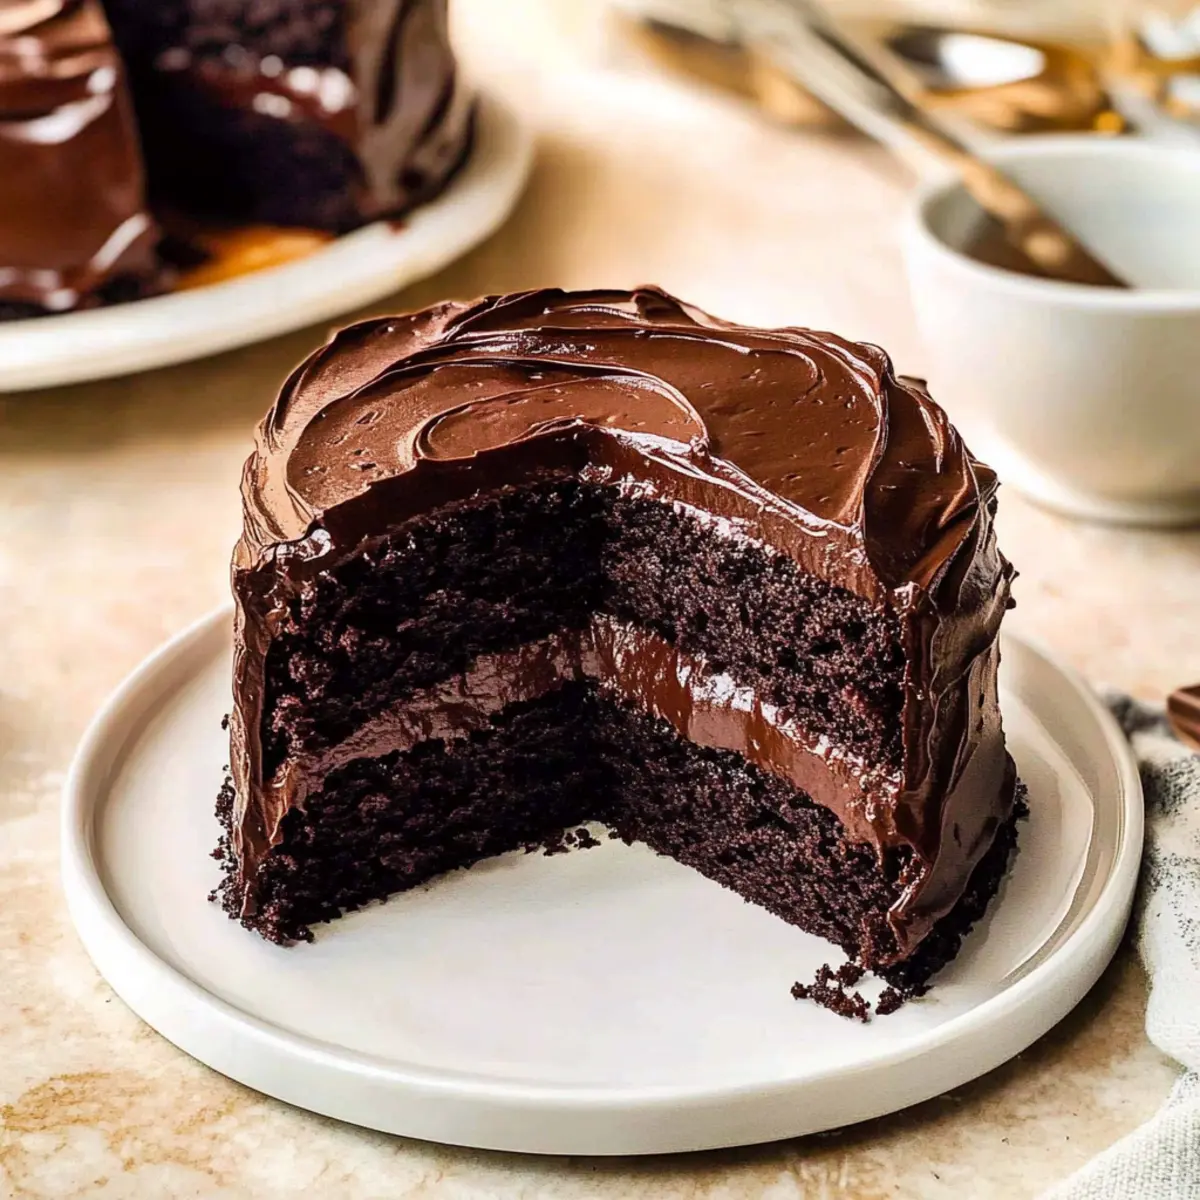
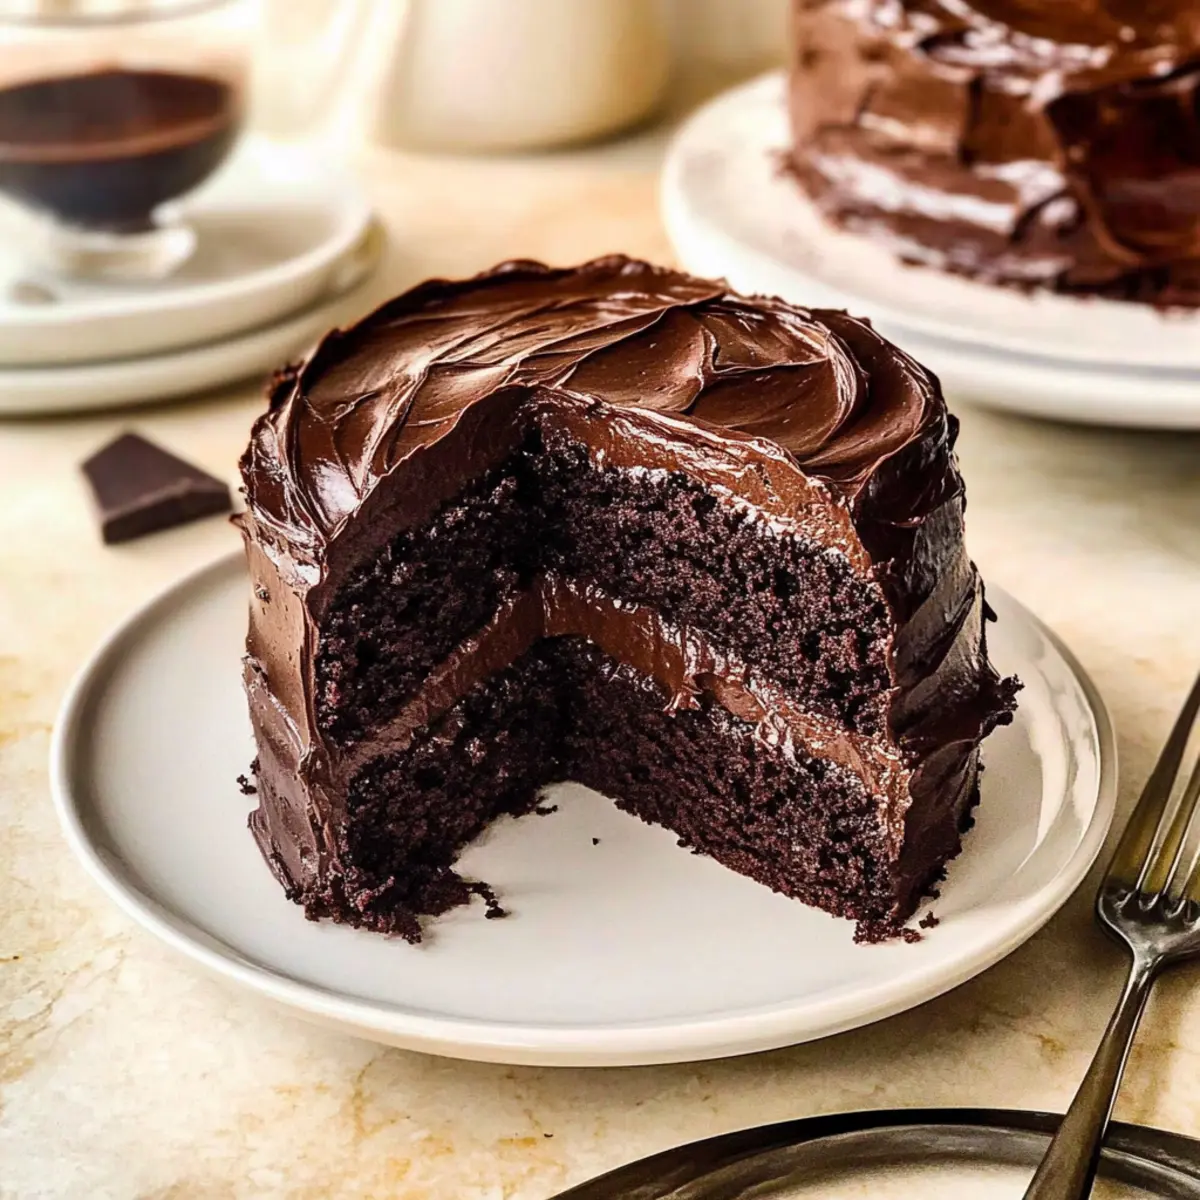
Step 9: Assemble the Cake
Once the cakes are completely cool and the frosting is ready, place one cake layer on a serving plate. Spread about ⅓ of the frosting on top, then place the second layer on and frost the top and sides with the remaining frosting. This step transforms your Matilda’s chocolate cake into a centerpiece worthy of any celebration.
Step 10: Create Design
Using an offset spatula, create beautiful texture on the frosting for an elegant finish. Feel free to decorate with chocolate shavings or sprinkles if desired. This final touch adds personality to your Matilda’s chocolate cake, making it even more delightful for friends and family to enjoy.
Matilda’s Chocolate Cake Variations
Feel free to tailor this delightful cake to your taste and dietary needs, making it truly your own!
-
Gluten-Free: Replace all-purpose flour with a gluten-free blend for an equally delicious cake that everyone can enjoy.
-
Vegan: Use almond milk instead of buttermilk and swap in vegan butter for the frosting to create a plant-based version.
-
Citrus Infusion: Add the zest of one orange or lemon to the batter; it brightens the chocolate with a lovely contrast of flavors. This citrus twist elevates the taste and freshness, making it even more exciting.
-
Nutty Crunch: Fold in chopped walnuts or almonds into the batter for added texture and flavor. The crunch pairs beautifully with the soft, moist cake, creating a delightful surprise in every bite.
-
Mocha Flavor: Enhance the coffee flavor by adding a bit of instant espresso powder to the batter. It deepens the chocolate nuances and creates a coffee-chocolate experience that’s utterly irresistible.
-
Spicy Kick: Add a pinch of cayenne pepper or chili powder to the batter for a warm, subtle heat that pairs surprisingly well with chocolate. This unexpected twist keeps guests guessing, making it a fun conversation starter!
-
Decadent Drizzle: Drizzle caramel sauce over the frosted cake for a sweet and sticky addition that takes indulgence to the next level. This contrast in flavors and textures adds another layer of richness!
-
Cheesecake Layer: Create a cheesecake layer by mixing cream cheese with sugar and eggs, and baking it between the cake layers. This adds a creamy richness that balances out the chocolate’s deep flavors.
Each of these delicious twists opens up new possibilities for your Matilda’s chocolate cake! For more inspiration, check out my other chocolate delights like the irresistible Chocolate Raspberry Cheesecake or indulge in the luxurious goodness of Dark Chocolate Almond Clusters.
What to Serve with Best Matilda’s Chocolate Cake
As you slice into the rich layers of this decadent cake, consider these delightful accompaniments that elevate the experience to new heights.
- Fresh Berries: The tartness of raspberries or strawberries beautifully balances the richness of the chocolate, providing a refreshing burst of flavor.
- Vanilla Ice Cream: Creamy vanilla ice cream adds a delightful contrast to the warm, fudgy layers, making every bite feel like a decadent treat. The coldness melts beautifully against the cake’s warmth.
- Espresso Shots: A strong shot of espresso enhances the chocolate’s complexity and richness, creating a warm hug for your taste buds. It’s the perfect pairing for coffee lovers!
- Whipped Cream: Light and airy whipped cream adds a touch of elegance and sweetness. Top each slice with a dollop for a beautiful presentation that invites indulgence.
- Chocolate Dipped Fruits: From strawberries to bananas, these sweet nuggets of flavor pair irresistibly with the cake, adding another layer of chocolatey goodness.
- Mint Chocolate Chip Cookies: Serve alongside for a delightful textural contrast; the minty freshness complements the chocolate and rounds off the dessert perfectly.
- Milkshake: A thick, chocolatey milkshake echoes the flavors in the cake and is a fun option to serve at gatherings. The cool creaminess completes the guilty pleasure experience!
- Hazelnut Pralines: Their crunchy texture adds interest and depth while harmonizing with the chocolate’s rich sophistication.
Choose one or mix and match to create the ultimate dessert experience that leaves everyone craving just one more slice of Matilda’s chocolate cake!
Make Ahead Options
These Matilda’s Chocolate Cake layers are perfect for busy home cooks looking to save time without sacrificing flavor! You can bake the cake layers up to 24 hours in advance and store them tightly wrapped in plastic wrap at room temperature to keep them moist. The fudge frosting can also be made ahead; simply cover it with plastic wrap directly on the surface and refrigerate for 1-2 days. When ready to assemble, bring both the cake layers and frosting to room temperature, frost the layers as directed, and enjoy a dessert that tastes just as delicious as if it were freshly made!
How to Store and Freeze Matilda’s Chocolate Cake
Fridge: Keep your Matilda’s chocolate cake wrapped in plastic wrap or covered with foil to maintain its moisture. It will stay fresh for up to 4 days.
Freezer: For long-term storage, freeze the cake layers individually after they have cooled completely. Wrap them tightly in plastic wrap and foil; they will keep for up to 3 months.
Thawing: To enjoy your frozen cake, transfer it to the fridge and let it thaw overnight. This will preserve the cake’s delicious texture and flavor.
Reheating: If you prefer a warm slice, you can gently reheat individual pieces in the microwave for about 10-15 seconds, just enough to take the chill off without compromising the cake’s moistness.
Expert Tips for Matilda’s Chocolate Cake
-
Room Temperature Ingredients: Ensure all your ingredients are at room temperature before mixing to promote better emulsification and an airy texture in your Matilda’s chocolate cake.
-
Freshness Counts: Always check the expiration dates on your baking powder and baking soda. Expired leavening agents can lead to dense cakes that don’t rise properly.
-
Don’t Rush Cooling: Allow the cake layers to cool completely before frosting; this prevents the frosting from melting and sliding off your beautiful creation.
-
Adjust Coffee Temperature: The coffee should be hot, but not boiling. Too hot can cook the eggs in your batter; too cold won’t enhance the chocolate flavor effectively.
-
Frosting Firmness: If your frosting is too soft for spreading, pop it in the refrigerator for about 30 minutes to thicken up. This way, it will hold up beautifully in your Matilda’s chocolate cake.
-
Use a Kitchen Scale: For the most accurate measurements, especially with flour, using a kitchen scale helps ensure consistency in your cake’s structure and texture.

Matilda’s Chocolate Cake Recipe FAQs
How do I select the best cocoa powder for my Matilda’s chocolate cake?
Absolutely! For the best results in your Matilda’s chocolate cake, I recommend using Dutch-process cocoa powder. It has a richer flavor and darker color that enhances the overall taste of your cake. However, if you can’t find it, natural cocoa powder is a suitable substitute, though the flavor may be a bit lighter.
What’s the best way to store my Matilda’s chocolate cake?
To keep your Matilda’s chocolate cake fresh, wrap it tightly in plastic wrap or cover it with foil. This will prevent it from drying out. Stored this way, it can last in the fridge for up to 4 days. If you want to keep it longer, consider freezing it!
Can I freeze the Matilda’s chocolate cake? If so, how?
Certainly! To freeze your Matilda’s chocolate cake, wait until it has cooled completely. Wrap each layer individually in plastic wrap, then in foil, to prevent freezer burn. It can be stored in the freezer for up to 3 months! Thaw the cake in the refrigerator overnight before serving to maintain its moistness.
What if my frosting is too soft?
Very useful question! If your frosting is too soft to spread, don’t worry! Simply refrigerate it for 30 minutes. This cooling period allows it to firm up and makes it easier to work with when frosting your cake. If it’s still too soft after chilling, you can add a bit more powdered sugar to reach your desired consistency.
Is this cake safe for people with dairy allergies?
Great consideration! This recipe contains dairy, but you can easily make it dairy-free by substituting the buttermilk with almond milk (adding a teaspoon of vinegar) and using vegan butter in the frosting. Always ensure to check all labels for possible dairy-derived ingredients, especially in pre-packaged items.
What if I need a gluten-free version of Matilda’s chocolate cake?
No problem at all! To adapt your Matilda’s chocolate cake for gluten-free diets, swap the all-purpose flour with a gluten-free baking blend that you enjoy. Make sure to choose a product with a good binding agent to ensure your cake rises nicely and maintains its delicious texture.
Matilda's Chocolate Cake: Moist Layers That Melt in Your Mouth
Ingredients
Equipment
Method
- Preheat your oven to 350°F (180°C) and prepare two 8-inch round baking pans by lining the bottoms with parchment paper and lightly greasing the sides.
- In a large mixing bowl, combine the flour, granulated sugar, cocoa powder, baking powder, baking soda, and salt. Whisk together until well-blended.
- Add the eggs, buttermilk, vegetable oil, and vanilla extract to the dry ingredients. Mix gently until the batter is almost combined; a few lumps are okay.
- Pour in the hot coffee, stirring gently to combine until the batter is smooth and free of lumps.
- Divide the batter evenly between the prepared baking pans. Bake for 25-30 minutes, or until a toothpick inserted in the center comes out clean.
- Once baked, remove the cakes from the oven and let them cool in the pans for 10 minutes. Transfer the layers onto wire racks to cool completely.
- In a medium saucepan over low heat, melt the unsalted butter along with the heavy cream and dark chocolate, stirring until smooth. Sift in cocoa powder and powdered sugar, mixing until glossy.
- Once the frosting is smooth, cover the surface with plastic wrap and allow to cool in the refrigerator for 1-2 hours.
- Once the cakes are cool and the frosting is ready, place one cake layer on a serving plate and spread about ⅓ of the frosting on top. Place the second layer on and frost with remaining frosting.
- Create texture on the frosting with an offset spatula for an elegant finish. Optionally decorate with chocolate shavings or sprinkles.
Leave a Reply