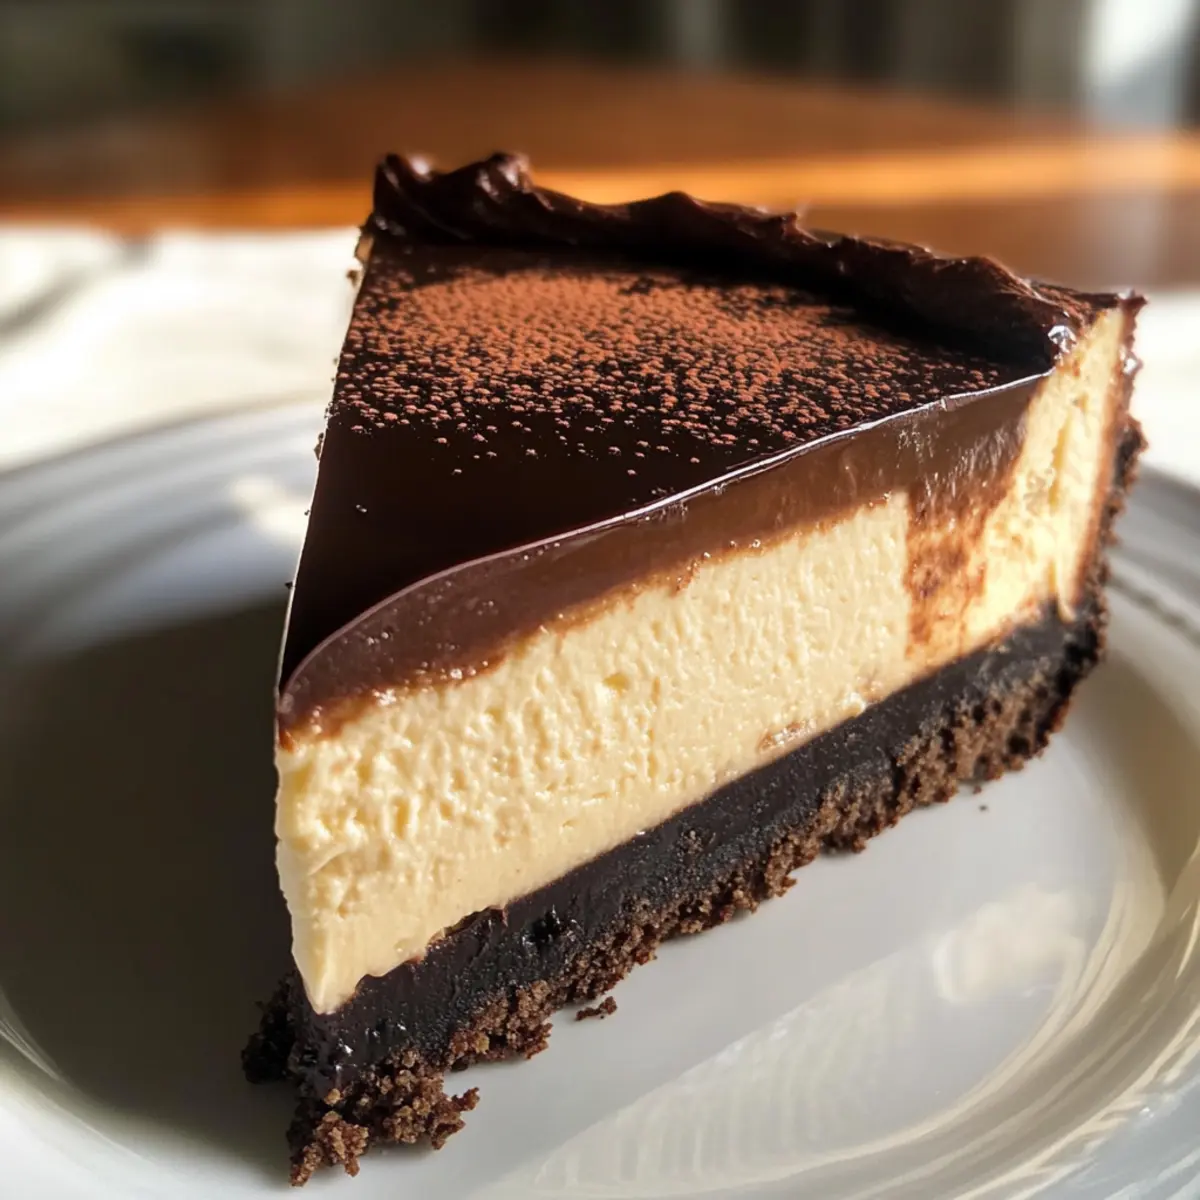
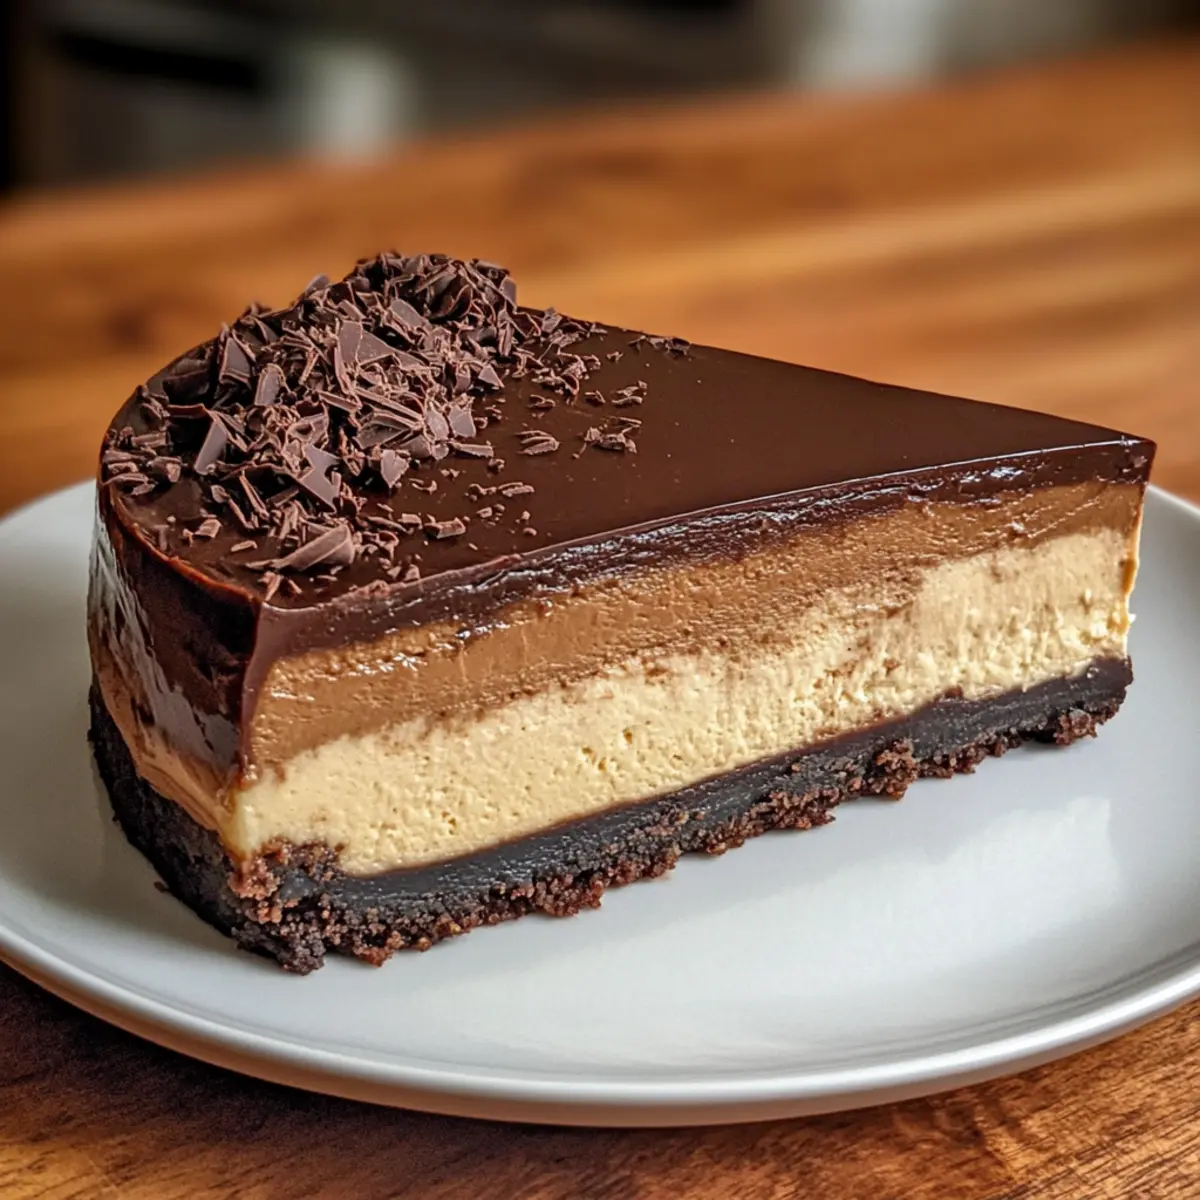
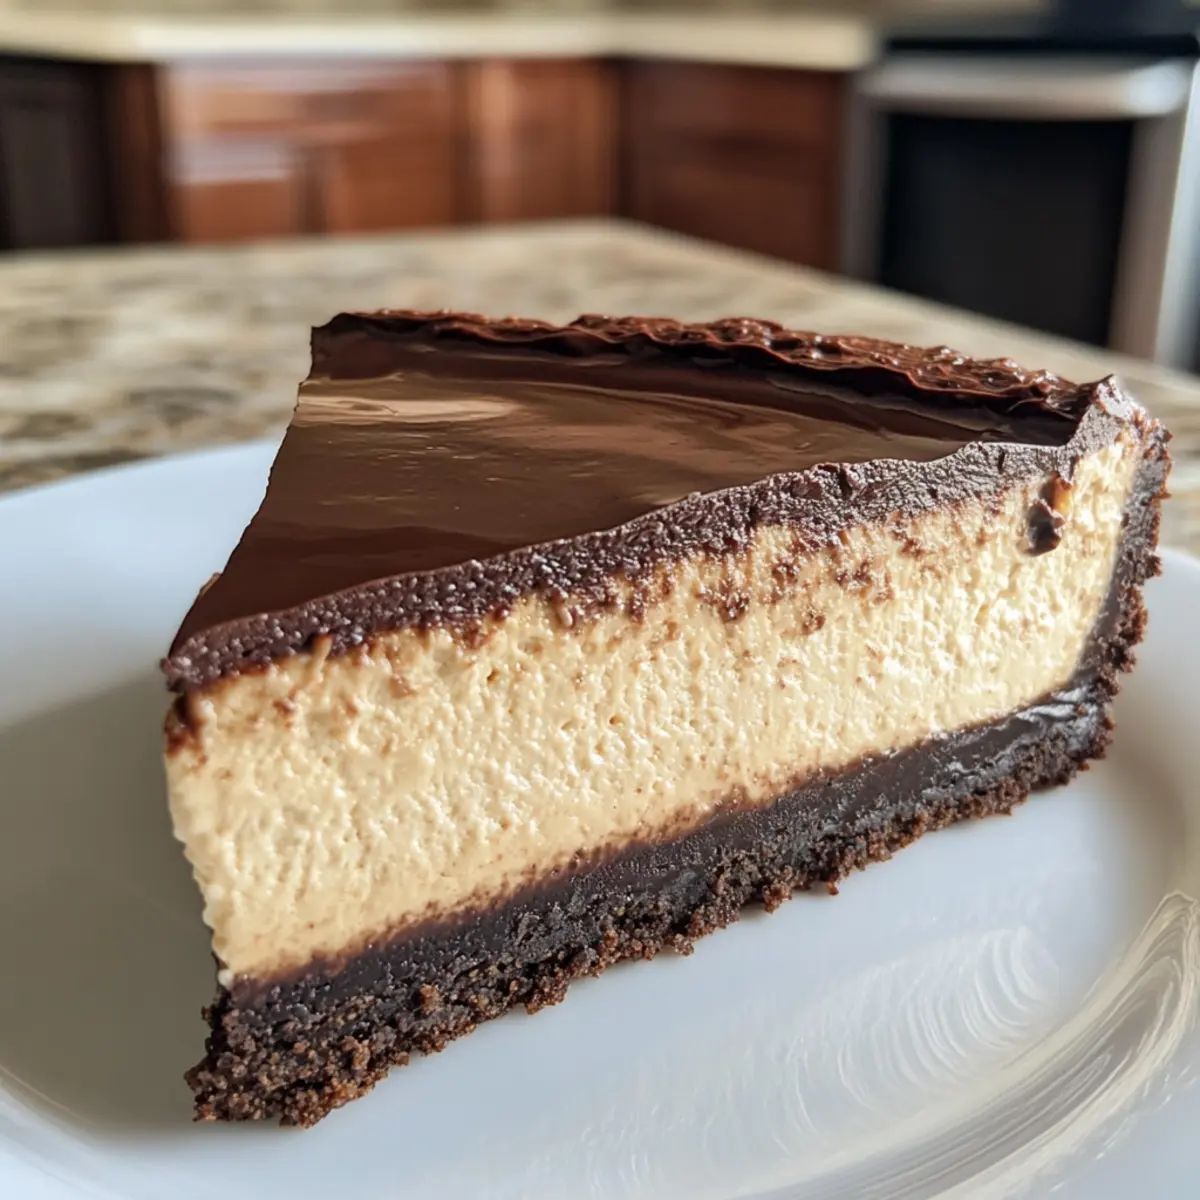
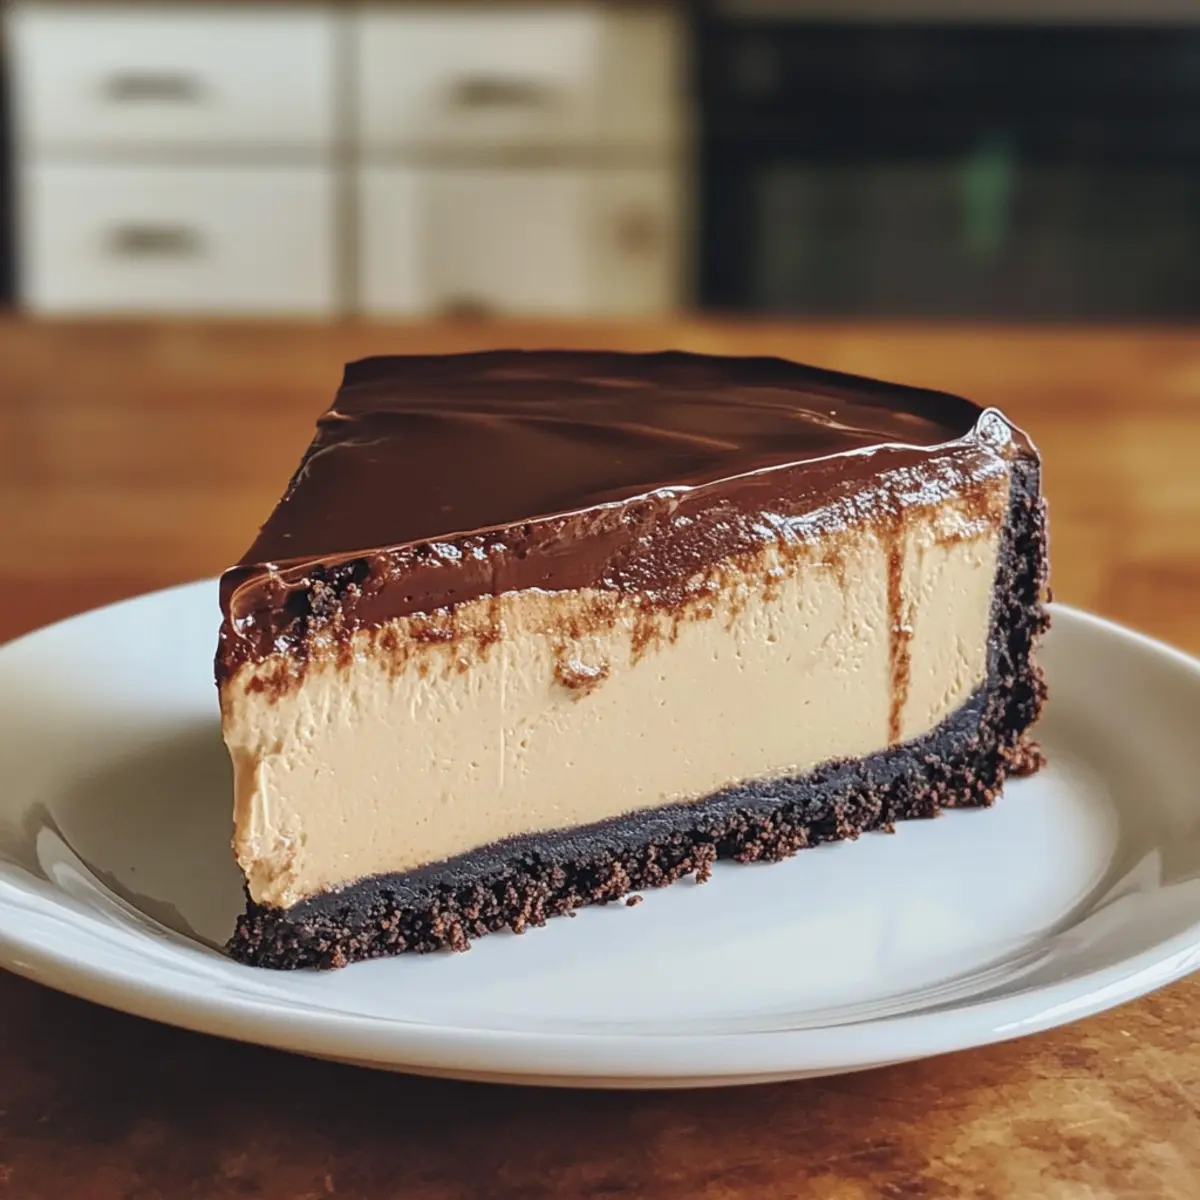
Amidst the whirlwind of life, I discovered something magical: the symphony of coffee and cream cheese coming together to create a luscious Coffee Cheesecake. This indulgent dessert is more than just a treat; it’s a culinary hug, perfect for those moments when you need a breather from the everyday fast-paced chaos. With minimal prep time, you can craft a show-stopping cheesecake that promises to impress both guests and your own taste buds. Plus, it’s adaptable for those following gluten-free or dairy-free lifestyles! The creamy texture paired with the bold coffee notes is an experience that beckons for leisurely enjoyment. Curious about how to bring this velvety delight to your own kitchen? Let’s dive in!
Why is Coffee Cheesecake a Must-Try?
Indulgent Flavor: The rich combination of cream cheese and coffee creates a dessert that’s both comforting and sophisticated.
Quick Preparation: With minimal steps, you can whip up this delightful treat without spending hours in the kitchen.
Versatile Options: Adaptable for those with gluten-free or dairy-free needs, ensuring everyone can savor this masterpiece.
Gourmet Experience: Impress your guests with a café-quality dessert that looks and tastes like it came straight from a bakery.
Perfect for Any Occasion: Whether it’s a casual gathering or a special celebration, this Coffee Cheesecake is bound to be the star of the show.
Time-Saving: Make it ahead of time! Prepare it the day before and let it chill, freeing up your schedule for more important things.
For another way to indulge in creamy deliciousness, be sure to check out my Lemon Lavender Cheesecake for a refreshing twist that pairs beautifully with coffee!
Coffee Cheesecake Ingredients
• Dive into the delightful components of this indulgent dessert and make it yours!
For the Crust
- Oreos – Perfect for a rich and crunchy base; swap for gluten-free cookies to make it suitable for gluten-free diets.
- Salted Butter – Binds the crust; use unsalted if you prefer a less salty taste.
- Espresso Powder – Optional; enhances the chocolate flavor of the crust for an extra coffee kick.
For the Filling
- Cream Cheese – The star of the filling, providing a creamy texture; non-dairy cream cheese works for a dairy-free option.
- Granulated Sugar – Sweetens the filling beautifully; adjust to your taste preference.
- Coffee Extract – Deepens the coffee flavor; strong brewed coffee can be used in a pinch.
- Large Eggs – Provides structure; ensure they’re at room temperature for easier mixing.
- Heavy Cream – Adds luscious creaminess; coconut cream is a great dairy-free substitute.
- Cold Brew Coffee – Infuses the cheesecake with coffee flavor; substitute with strong brewed coffee if needed.
- Lemon Juice – Brightens and balances the flavors; vinegar can be used as a substitute.
- Salt – A little pinch enhances the overall flavor of your cheesecake.
- All-Purpose Flour – Adds structure; leave it out entirely for a gluten-free version and use a gluten-free blend.
For the Ganache
- Bittersweet Chocolate – Creates a glossy, rich ganache; semi-sweet chocolate can be a delightful alternative.
- Heavy Cream – Essential for a smooth ganache; can use coconut cream for a dairy-free option.
- Powdered Sugar & Vanilla Extract – Optional ingredients that sweeten and enhance the ganache’s flavor.
Let the magic of your Coffee Cheesecake begin!
Step‑by‑Step Instructions for Coffee Cheesecake
Step 1: Preheat the Oven and Prepare the Pan
Begin by preheating your oven to 300°F (150°C). While it warms up, grab a 9-inch springform pan and wrap it tightly in aluminum foil, ensuring the seams are sealed to prevent water from seeping in during the baking process. This pan will hold your luscious Coffee Cheesecake perfectly.
Step 2: Create the Cookie Crust
In a large mixing bowl, combine crushed Oreos, melted salted butter, and optional espresso powder. Mix until the crumbs are evenly coated and the mixture resembles wet sand. Press this mixture firmly into the bottom of the prepared springform pan, creating an even, compact crust. This will be the foundation of your rich Coffee Cheesecake.
Step 3: Mix the Cheesecake Filling
In a separate bowl, beat the softened cream cheese, granulated sugar, and coffee extract until smooth and creamy, ensuring there are no lumps. Gradually add in the eggs, one at a time, mixing well after each addition. Blend in the heavy cream, cold brew coffee, lemon juice, salt, and flour until fully combined, creating a velvety filling for your Coffee Cheesecake.
Step 4: Assemble for Baking
Carefully pour the cheesecake filling over your prepared crust in the springform pan, ensuring it spreads evenly. Next, place the springform pan inside a larger roasting pan, and add enough hot water to the outer pan to create a water bath. This method helps maintain moisture and prevents cracks in your indulgent cheesecake.
Step 5: Bake the Cheesecake
Transfer the assembled cheesecake to the preheated oven and bake for 75-85 minutes. The cheesecake is done when the edges appear set and the center has a slight jiggle, indicating a creamy texture. Once baked, turn off the oven, crack the oven door, and let it cool inside for 20 minutes to prevent sudden temperature changes.
Step 6: Chill the Cheesecake
After cooling, remove the Coffee Cheesecake from the oven and the water bath. Allow it to cool completely at room temperature before transferring it to the refrigerator. Chill for at least 8 hours or overnight to let the flavors meld and the texture set beautifully for serving.
Step 7: Prepare the Ganache
For the ganache, gently heat heavy cream in a small saucepan until just simmering. Pour the hot cream over chopped bittersweet chocolate in a bowl and stir until completely melted and smooth. Once the cheesecake is chilled, drizzle this glossy ganache over the top, allowing it to set in the refrigerator for an hour or two.
Step 8: Whip and Garnish
For a touch of elegance, whip heavy cream with optional pudding mix and powdered sugar until soft peaks form. Pipe this whipped cream over the chilled Coffee Cheesecake, decorating with your favorite garnishes. Your indulgent Coffee Cheesecake is now ready to be sliced and served, providing a delicious experience for all!
How to Store and Freeze Coffee Cheesecake
Fridge: Store leftover Coffee Cheesecake in an airtight container for up to 3 days. This keeps it fresh and ready for late-night indulgence or post-meal treats!
Freezer: You can freeze Coffee Cheesecake for up to 3 months. Wrap slices tightly in plastic wrap, then place them in a freezer-safe container to avoid freezer burn.
Thawing: When ready to enjoy, thaw the cheesecake in the fridge overnight. This preserves its texture, allowing you to savor its creamy goodness without loss of flavor.
Reheating: For a warm treat, gently reheat individual slices in the microwave for about 15-20 seconds on low power, ensuring you don’t overheat and lose that silky indulgence!
Coffee Cheesecake Variations & Substitutions
Feel free to explore these creative twists to make your Coffee Cheesecake uniquely yours!
- Gluten-Free Crust: Use gluten-free cookies instead of Oreos for a deliciously inclusive dessert.
- Dairy-Free Option: Swap cream cheese and heavy cream for their non-dairy alternatives to cater to lactose sensitivities. Coconut cream works wonders!
- Flavor Extracts: Experiment with vanilla or hazelnut extract for a deeper flavor profile; the nuances can take your cheesecake to a whole new level.
- Rich Chocolate Ganache: For added sweetness, use semi-sweet chocolate instead of bittersweet in the ganache; it enhances the overall flavor beautifully.
- Texture Twist: Mix in crushed nuts or chocolate chips into the crust for an added crunch that contrasts deliciously with the creamy filling.
- Enhanced Sweetness: Add a layer of caramel sauce on top of your ganache for a luscious flavor boost that pairs wonderfully with coffee.
- Fruity Touch: Top with fresh berries or a berry compote to bring a bright, tart element that cuts through the richness of the cheesecake.
- Coffee Variations: Consider adding a shot of espresso into the cheesecake filling for an intensified coffee kick—perfect for true coffee lovers!
Don’t forget to try my Chocolate Raspberry Cheesecake for a fruity contrast or a Creamy Coffee Panna Cotta for a silky dessert experience!
Expert Tips for Coffee Cheesecake
-
Use a Water Bath: To prevent cracking, bake your Coffee Cheesecake in a water bath. This ensures gentle heat during baking, resulting in a smooth surface.
-
Room Temperature Ingredients: Make sure your cream cheese and eggs are at room temperature. This allows for easier mixing and a creamier texture in your cheesecake.
-
Chill Overnight: Patience pays off! Letting your Coffee Cheesecake chill overnight will enhance the flavors and create a more velvety texture.
-
Avoid Overmixing: When incorporating eggs into your batter, mix just until combined. Overmixing can introduce air and lead to cracks during baking.
-
Careful Cooling: After baking, let your cheesecake cool in the oven with the door ajar. This gradual cooling process helps prevent sudden temperature changes that can crack the surface.
-
Experiment with Flavors: Feel free to swap in different extracts or toppings. Vanilla or almond extracts can add unique notes to your Coffee Cheesecake, expanding your flavor profile!
Make Ahead Options
These delightful Coffee Cheesecake treats are perfect for busy home cooks looking to save time! You can prepare the crust and filling up to 24 hours in advance – simply assemble the crust and refrigerate it, then mix the filling and store it separately until you’re ready to bake. This helps maintain freshness and flavor. When it’s time to finish the cheesecake, pour the filling over the crust and bake it as instructed. After chilling for at least 8 hours or overnight, drizzle on the ganache and garnish before serving. By prepping ahead, you’ll have a show-stopping dessert ready with minimal effort when needed!
What to Serve with Coffee Cheesecake?
Imagine the delightful aroma of fresh coffee mingling with sweet indulgence as you plan a feast around your Coffee Cheesecake.
-
Fresh Berries: The bright tartness of strawberries or raspberries balances the rich creaminess, adding a refreshing contrast to every slice.
-
Whipped Cream: A dollop of lightly sweetened whipped cream on top enhances the cheesecake’s creamy texture and complements its coffee flavor.
-
Chocolate Ganache Tart: The luxurious richness of chocolate tart pairs beautifully with coffee cheesecake, elevating the dessert experience.
-
Cocoa-Dusted Almonds: These crunchy, chocolatey almonds provide interesting texture and flavor against the smooth cheesecake, enhancing every bite.
-
Vanilla Ice Cream: A scoop of vanilla ice cream next to your cheesecake introduces a delightful temperature contrast while bringing sweetness to the table.
-
Espresso Martini: This rich coffee cocktail pairs perfectly with the cheesecake, highlighting the coffee notes and creating a wonderful after-dinner indulgence.
-
Decadent Caramel Sauce: Drizzling warm caramel sauce over your cheesecake transforms it into an extravagantly sweet treat that everyone will adore.
Consider these pairing options to create a dessert spread that tantalizes the taste buds and brings warmth to your gatherings.
Coffee Cheesecake Recipe FAQs
What type of Oreos should I use for the crust?
You can use regular Oreos for a classic flavor; however, if you’re accommodating gluten-free needs, swap them out for gluten-free cookies that provide a similar texture and taste!
How should I store leftover Coffee Cheesecake?
Store your leftover Coffee Cheesecake in an airtight container in the fridge for up to 3 days. Ideally, it should be kept cool and protected to maintain its velvety texture and rich flavor. Serve chilled for the best experience!
Can I freeze Coffee Cheesecake?
Absolutely! To freeze your Coffee Cheesecake, wrap individual slices in plastic wrap, then place them in a freezer-safe container. It can be stored for up to 3 months. To enjoy, simply thaw it in the refrigerator overnight—this helps retain the creamy goodness!
What if I see cracks in my cheesecake after baking?
Don’t fret! If you encounter cracks, it may be due to a quick temperature change. To prevent this, always use a water bath during baking and allow your cheesecake to cool slowly in the oven with the door ajar for about 20 minutes after baking. This gentle approach reduces stress on the cheesecake’s surface.
Can I make this coffee cheesecake dairy-free?
Yes! Substitute the cream cheese with non-dairy cream cheese and use coconut cream instead of heavy cream. For the ganache, melt dairy-free chocolate with coconut cream. These changes will keep your cheesecake creamy and indulgent while catering to dairy-free diets.
Is it okay for my pets to have cheesecake?
While your furry friends may beg for a taste, it’s best to keep cheesecake away from pets! Ingredients like chocolate and sugar can harm them. Indulge in this Coffee Cheesecake for yourself, and maybe treat your pets to some safe, pet-friendly snacks instead!
Irresistible Coffee Cheesecake: Your New Favorite Indulgence
Ingredients
Equipment
Method
- Preheat your oven to 300°F (150°C) and prepare a 9-inch springform pan by wrapping it in aluminum foil.
- Combine crushed Oreos, melted salted butter, and optional espresso powder. Mix until evenly coated and press into the bottom of the pan.
- Beat softened cream cheese, granulated sugar, and coffee extract until smooth. Add in eggs one at a time, mixing well. Blend in heavy cream, cold brew coffee, lemon juice, salt, and flour.
- Pour cheesecake filling into the crust. Place the springform pan inside a larger roasting pan and fill the outer pan with hot water.
- Bake for 75-85 minutes until edges are set and center jiggles slightly. Cool in the oven with door ajar for 20 minutes.
- Cool the cheesecake to room temperature, then chill in the refrigerator for at least 8 hours or overnight.
- Heat heavy cream for ganache until just simmering, pour over chopped chocolate and stir until smooth. Drizzle over chilled cheesecake.
- Whip heavy cream with optional pudding mix and powdered sugar until soft peaks form and pipe over cheesecake.
Leave a Reply