As I stood in my kitchen, the aroma of warm vanilla danced through the air, instantly transporting me back to my grandmother’s cozy home. That’s the magic of a creamy fail-proof egg custard—an enchanting dessert that brings comfort with every spoonful. With just a handful of pantry staples, this easy recipe invites you to create a velvety treat that’s perfect for family gatherings or a simple weeknight indulgence. What I adore most is its versatility; whether you’re after a decadent classic or a lightened-up version, this custard can be customized to fit any palate or dietary need. Imagine serving a deliciously smooth custard that everyone can enjoy! Ready to dive into this delightful world of dessert? Let’s get started!

Why Is This Custard Recipe a Must-Try?
Ease of Preparation: This easy fail-proof recipe requires minimal skills, making it perfect for both novice cooks and seasoned chefs alike.
Customizable Delight: Whether you want it dairy-free or low-calorie, this custard welcomes substitutions like almond milk or a sprinkle of stevia, ensuring everyone can indulge.
Comforting Flavor: Every spoonful evokes the nostalgic taste of childhood, with that rich vanilla aroma taking you back to cozy family gatherings.
Versatile Serving Options: Serve it chilled topped with nutmeg or fresh fruits, or even paired with a Lemon Truffles dessert for a delightful contrast.
Quick Baking Time: In just 35-40 minutes, you can create a dessert that feels indulgent yet effortlessly meets your schedule.
Rediscover the joy of homemade desserts with this creamy custard recipe that promises to impress whether it’s a special occasion or a casual evening treat!
Creamy Fail-Proof Egg Custard Ingredients
• Just a few simple ingredients transform into a delightful tribute to homemade comfort!
For the Base
- Eggs – Essential for richness and flavor; if vegan, consider using a commercial egg replacer (texture may vary).
- Milk – Whole milk gives that creamy indulgence; for a lighter take, opt for almond or coconut milk, which slightly changes the taste.
- Sugar – Standard granulated sugar sweetens perfectly; brown sugar enhances depth, while stevia can reduce calories for health-conscious choices.
For Flavor
- Vanilla Extract – A must for classic flavor; pure vanilla extract is best to ensure richness, though essence can work in a pinch.
- Salt – Just a pinch elevates the overall flavor profile beautifully; essential for balance.
Embrace the joy of creating this creamy fail-proof egg custard, and watch everyone indulge in its sumptuous goodness!
Step‑by‑Step Instructions for Creamy Fail-Proof Egg Custard
Step 1: Preheat the Oven
Begin by preheating your oven to 325°F (165°C). This temperature is crucial for achieving that perfect, silky texture in your creamy fail-proof egg custard. As the oven warms up, it allows the custard to bake evenly, creating a delightful dessert that sets beautifully.
Step 2: Whisk the Eggs
In a medium mixing bowl, gently whisk together your eggs until they are fully combined, avoiding the introduction of too much air. This step should take about 1-2 minutes, ensuring a smooth custard base. You’ll notice the eggs blending into a uniform mixture, ready to take on the creamy goodness.
Step 3: Warm the Milk
Next, heat your milk in a medium saucepan over medium heat. Stir occasionally until small bubbles form around the edges, signaling that it’s warm (but not boiling). This process takes about 3-5 minutes and is essential for tempering the eggs without scrambling them, ensuring a luscious texture in your creamy fail-proof egg custard.
Step 4: Temper the Eggs
Slowly pour the warm milk into your whisked eggs, stirring continuously. This gentle action should take about 2 minutes and is crucial for preventing the eggs from cooking too quickly. You’ll see the mixture becoming lighter and more homogeneous, setting the foundation for your velvety custard.
Step 5: Add Sweetness and Flavor
Stir in the granulated sugar, vanilla extract, and a pinch of salt until fully dissolved. This process usually takes an extra minute and infuses the custard with rich flavor. You’ll notice the mixture becoming slightly thicker and more aromatic, bringing the creamy fail-proof egg custard to life.
Step 6: Strain the Mixture
To achieve a smooth texture, pour the custard mixture through a fine mesh sieve into a large measuring cup. This step eliminates any lumps or scrambled bits, ensuring your dessert is flawlessly creamy. You’ll see the silky liquid pooling in the cup, ready for the next step.
Step 7: Prepare the Ramekins
Evenly pour the strained custard into ramekins, filling each one about three-quarters full. Take a moment to admire the lovely, glossy surface of your mixture as you fill them. This will allow enough space for the custard to puff slightly while baking without overflowing.
Step 8: Create a Water Bath
To maintain moisture during baking, place the filled ramekins in a deep baking dish and carefully pour in hot water until it reaches halfway up the sides of the ramekins. This water bath will help the custard cook gently and evenly, ensuring a smooth finish on your creamy fail-proof egg custard.
Step 9: Bake the Custard
Transfer the baking dish to your preheated oven and bake for 35-40 minutes. Keep an eye on the custards; they should be set but still slightly jiggly in the center when done. The slightest jiggle indicates a perfectly creamy texture, so you can be sure not to overbake.
Step 10: Cool and Chill
Once baked, remove the custards from the oven and let them cool to room temperature for about 30 minutes. Afterward, refrigerate them for at least 2 hours to set further and chill. This stage allows the flavors to meld beautifully, making your creamy fail-proof egg custard even more delightful.
Step 11: Serve and Garnish
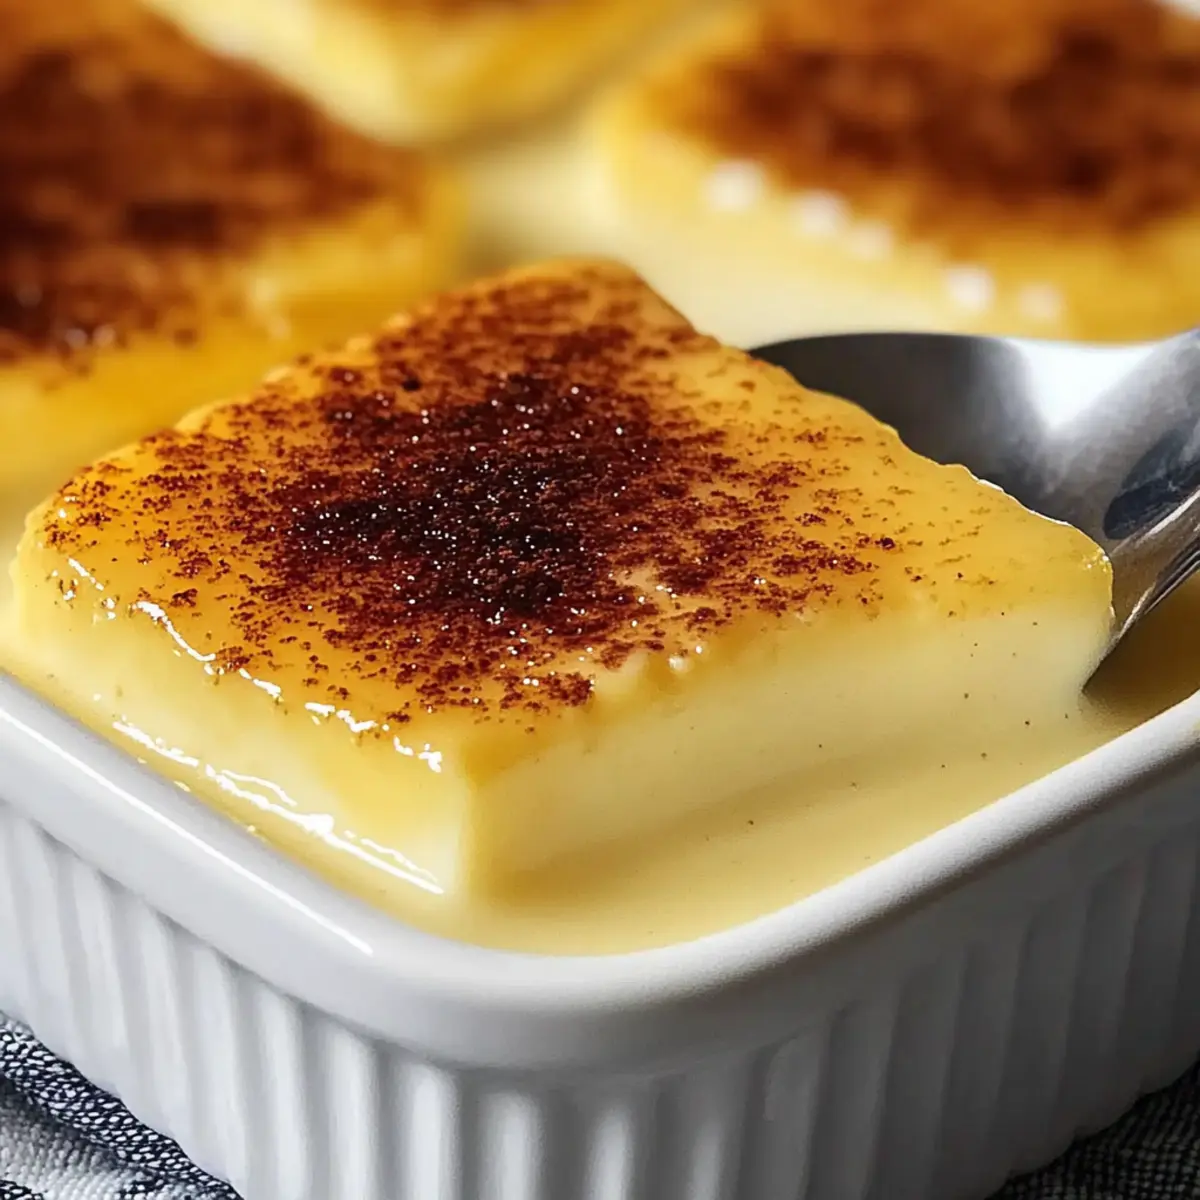
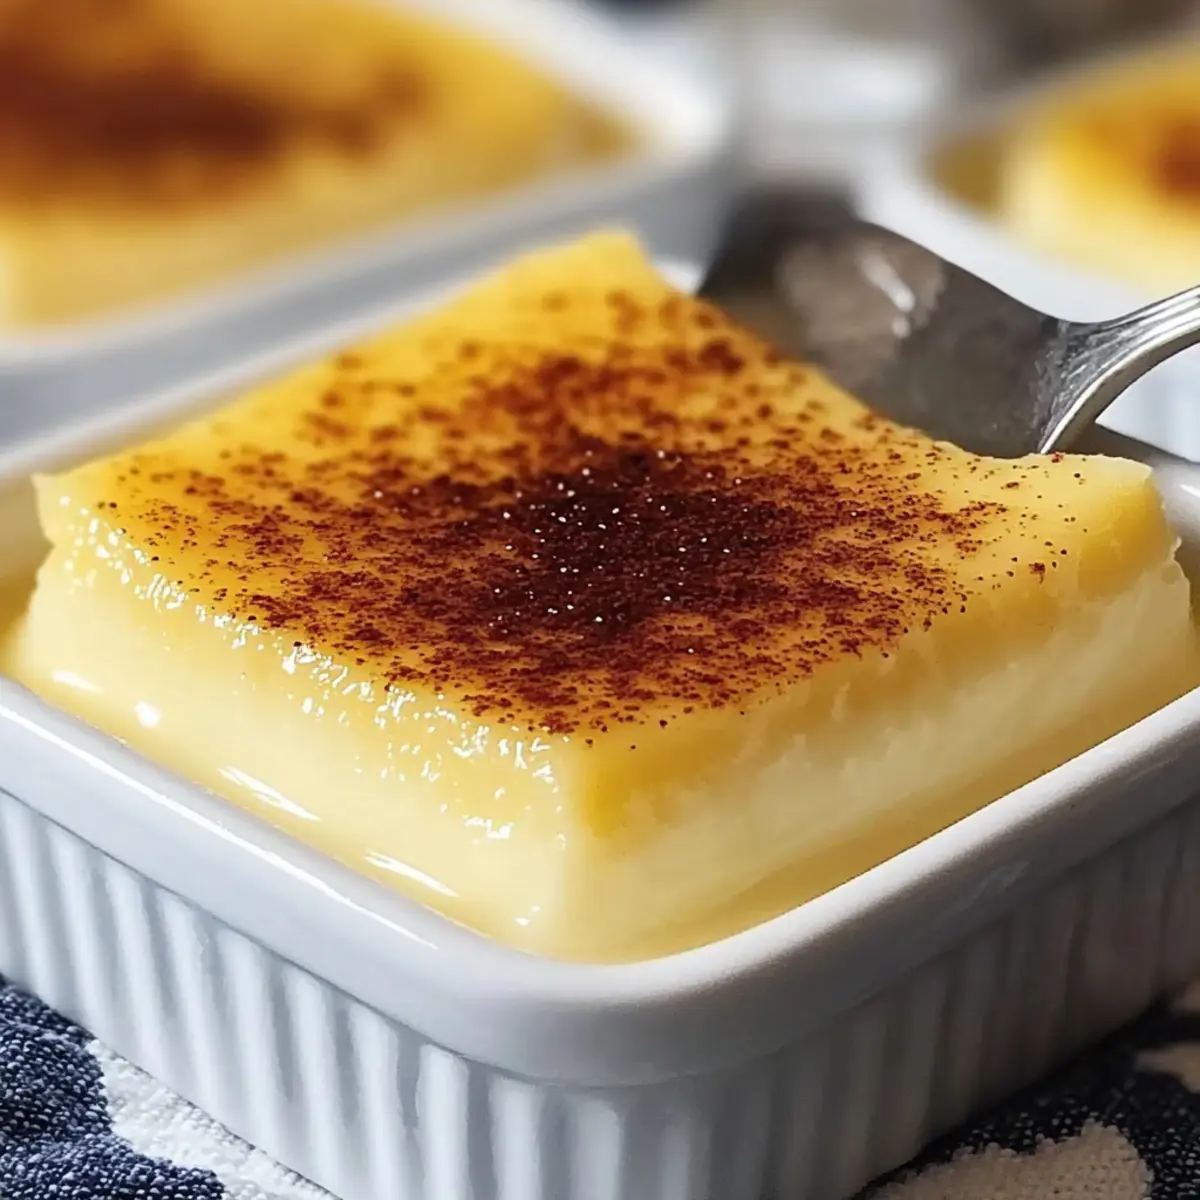
When ready to serve, take the custards out of the fridge and sprinkle a hint of ground nutmeg or garnish with fresh fruit. This final touch adds a burst of flavor and visual appeal, inviting everyone to savor a spoonful of this creamy delight!
Creamy Fail-Proof Egg Custard Variations
Feel free to let your creativity shine by customizing this delightful egg custard to suit your taste and dietary needs!
-
Dairy-Free: Use almond, coconut, or oat milk to replace whole milk. This twist offers a delicious variant, perfect for those avoiding dairy.
-
Vegan-Friendly: Replace eggs with a commercial egg replacer for a plant-based alternative. The texture will differ slightly, but the flavor remains delightful.
-
Sweetness Swap: Switch granulated sugar with coconut sugar or a low-calorie sweetener like stevia for a lighter version without sacrificing flavor.
-
Flavor Infusion: Stir in a teaspoon of almond extract or lemon zest for a refreshing twist that elevates the custard’s taste to new heights.
-
Rich Chocolate Custard: Mix in some cocoa powder or melted chocolate to your egg custard mixture for a decadent chocolate dessert experience.
-
Citrus Burst: Increase the flavor dynamics by adding a hint of orange or lemon juice to your base mixture; it brings brightness that complements the custard beautifully.
-
Warm Spice: For a cozy vibe, mix in a pinch of cinnamon or nutmeg before baking. It’ll add warmth and an inviting aroma that feels like home.
-
Textural Topping: Consider topping with crushed graham crackers or a dollop of whipped cream just before serving. This contrast in texture can enhance your custard experience!
As you explore these variations, you can create an enticing dessert that resonates with your family, reminiscent of comforting treats like Baked Lobster Tails or a charming finish to your meal with Lemon Truffles. Each twist reveals a new layer of luxurious flavor, making every bite a joyful experience.
How to Store and Freeze Creamy Fail-Proof Egg Custard
Refrigerator: Keep leftovers in an airtight container in the fridge for up to 3 days. Chill your custard gently to maintain its smooth texture and flavor delight.
Freezer: For longer storage, freeze the custard in individual servings in freezer-safe containers. It can last up to 2 months, but the texture might slightly change upon thawing.
Thawing: When ready to enjoy, thaw custard in the refrigerator overnight, then give it a gentle stir before serving to regain some creaminess.
Reheating: You can warm up the custard gently in the microwave or in a water bath at low heat, avoiding high temperatures to prevent curdling.
Make Ahead Options
These creamy fail-proof egg custards are perfect for meal prep and can save you significant time on busy days! You can prepare the custard mixture up to 24 hours in advance by following all the steps until you pour it into the ramekins. Once prepared, allow the custard to cool to room temperature, cover the ramekins with plastic wrap, and refrigerate them until you’re ready to bake. When it’s time for dessert, place the ramekins in a water bath as described in the original recipe, and bake as instructed. This method ensures the custards remain just as delicious and creamy, making them an ideal choice for entertaining or a comforting treat at home!
Expert Tips for Creamy Fail-Proof Egg Custard
-
Perfect Egg Tempering: Take your time when mixing warm milk into the eggs; this step prevents scrambling and ensures a silky custard.
-
Check for Doneness: Baking can vary; your custard should have a slight jiggle in the center when done, indicating its creamy texture is perfect.
-
Strain for Smoothness: Always strain the mixture through a fine sieve to eliminate lumps and achieve a luxurious mouthfeel in your creamy fail-proof egg custard.
-
Flavor Infusions: Consider infusing the milk with flavors like almond extract or citrus zest before combining; just be cautious with amounts to avoid overpowering the custard.
-
Chill Time Is Key: Allowing the custard to chill for at least 2 hours after baking enhances the flavor and consistency; the wait makes all the difference!
What to Serve with Easy and Creamy Egg Custard
Creating the perfect dessert experience means knowing how to pair flavors that enhance your creamy custard delight.
-
Fresh Berries: Their natural sweetness and acidity provide a refreshing contrast, brightening each bite of the creamy egg custard.
-
Whipped Cream: A dollop of lightly sweetened whipped cream introduces a fluffy texture, complementing the silky smoothness of the custard beautifully.
-
Chocolate Sauce: Drizzling rich chocolate sauce adds an indulgent touch, bringing a delightful mix of flavors that can make dessert feel extra special.
-
Almond Cookies: These sweet, nutty treats add crunch and a hint of additional flavor, creating a lovely juxtaposition with the smooth custard.
-
Coffee: A warm cup of coffee brings a perfect balance of bitterness to the sweet, creamy custard. The two marry beautifully on the palate.
-
Lemon Tart: Pairing with a small slice of lemon tart introduces tangy flavors, offering a delightful contrast to the softness of the custard.
-
Coconut Macaroons: Their chewy texture and tropical sweetness offer an exciting flavor pairing, inviting every spoonful of custard to be savored.
-
Sparkling Wine: A glass of sparkling wine not only elevates the dessert experience but its effervescence keeps the palate refreshed between rich bites.
Consider these serving ideas the next time you whip up your creamy fail-proof egg custard, turning a simple dessert into a delightful feast for the senses!

Creamy Fail-Proof Egg Custard Recipe FAQs
What kind of eggs should I use for the custard?
Absolutely! Fresh large eggs are essential for a rich flavor and smooth texture. If you’re going vegan, a commercial egg replacer can be used, although expect some variation in the final texture.
How should I store leftover egg custard?
I recommend keeping leftovers in an airtight container in the refrigerator for up to 3 days. This helps maintain its delightful creamy texture. Enjoy it chilled for the best experience!
Can I freeze the egg custard?
Yes, indeed! To freeze your creamy fail-proof egg custard, pour it into individual freezer-safe containers. It can last up to 2 months in the freezer. When ready to enjoy, simply thaw it in the refrigerator overnight before stirring gently to restore its creamy consistency.
How do I know when my custard is done baking?
Very good question! Your custard should be set but still slightly jiggle in the center when you pull it from the oven, which usually takes about 35-40 minutes. This slight jiggle indicates a perfectly creamy texture, ensuring it’s not overbaked.
Can I use non-dairy milk alternatives?
Absolutely! Whole milk gives the custard classic creaminess, but you can use almond, coconut, or soy milk as lighter alternatives. Just keep in mind that these will change the flavor profile somewhat, so choose according to your taste preferences!
Creamy Fail-Proof Egg Custard – The Ultimate Comfort Dessert
Ingredients
Equipment
Method
- Preheat your oven to 325°F (165°C).
- In a medium mixing bowl, gently whisk together your eggs until fully combined.
- Heat your milk in a medium saucepan over medium heat until small bubbles form.
- Slowly pour warm milk into whisked eggs, stirring continuously to temper.
- Stir in granulated sugar, vanilla extract, and a pinch of salt until dissolved.
- Pour the custard mixture through a fine mesh sieve into a measuring cup.
- Evenly pour the strained custard into ramekins, filling them three-quarters full.
- Place filled ramekins in a deep baking dish, pouring hot water halfway up the sides.
- Bake custards for 35-40 minutes until set with a slight jiggle in the center.
- Let custards cool at room temperature for 30 minutes, then refrigerate for at least 2 hours.
- Serve with a sprinkle of nutmeg or fresh fruit as garnish.
Leave a Reply