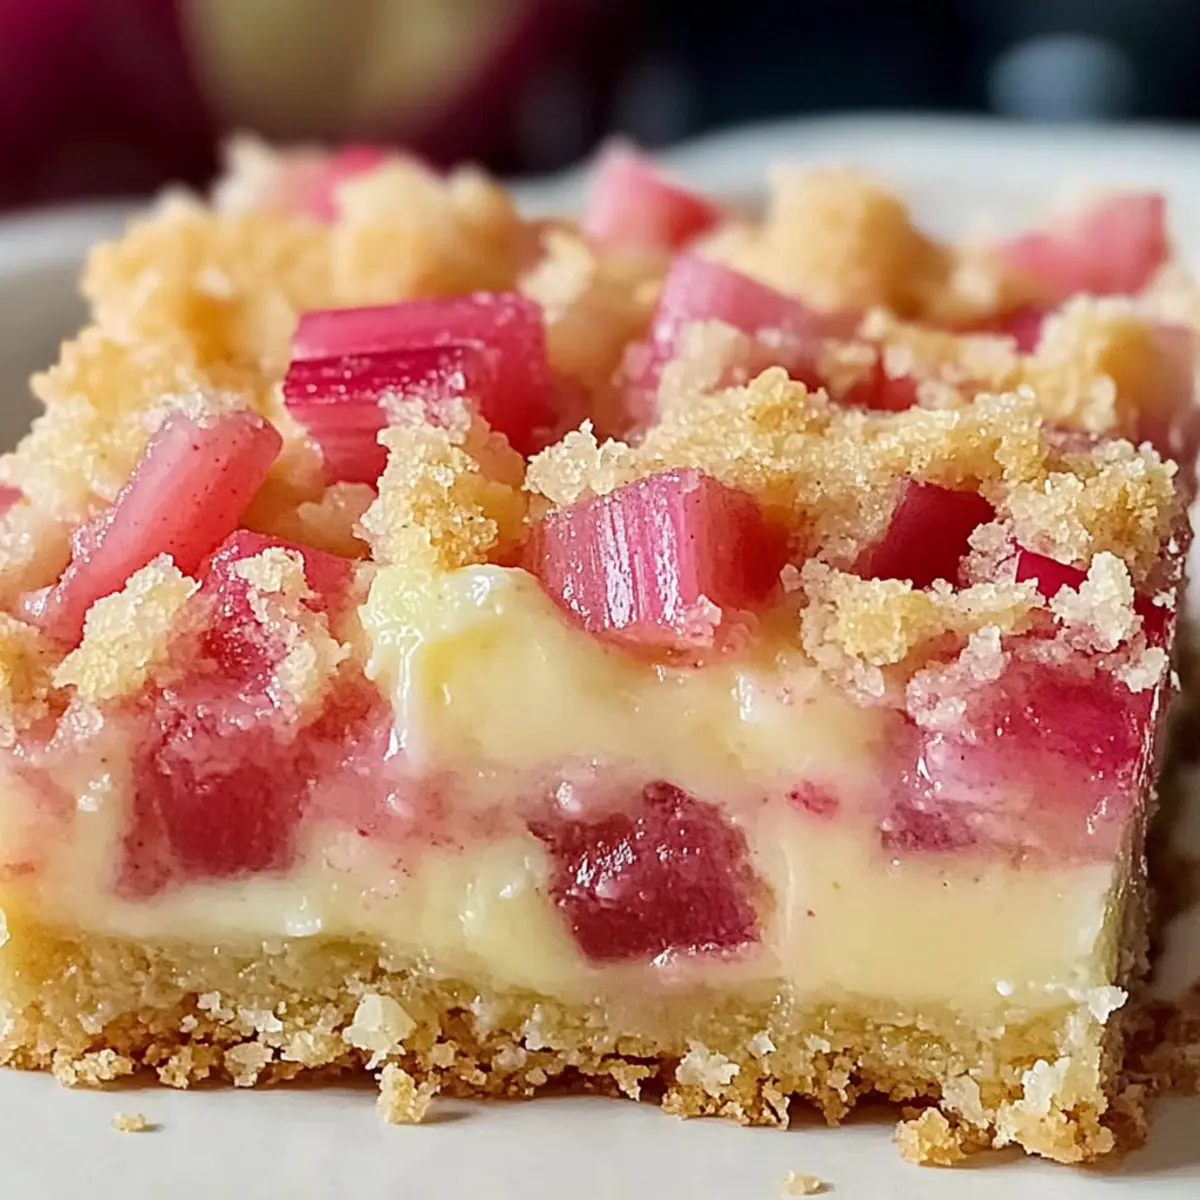
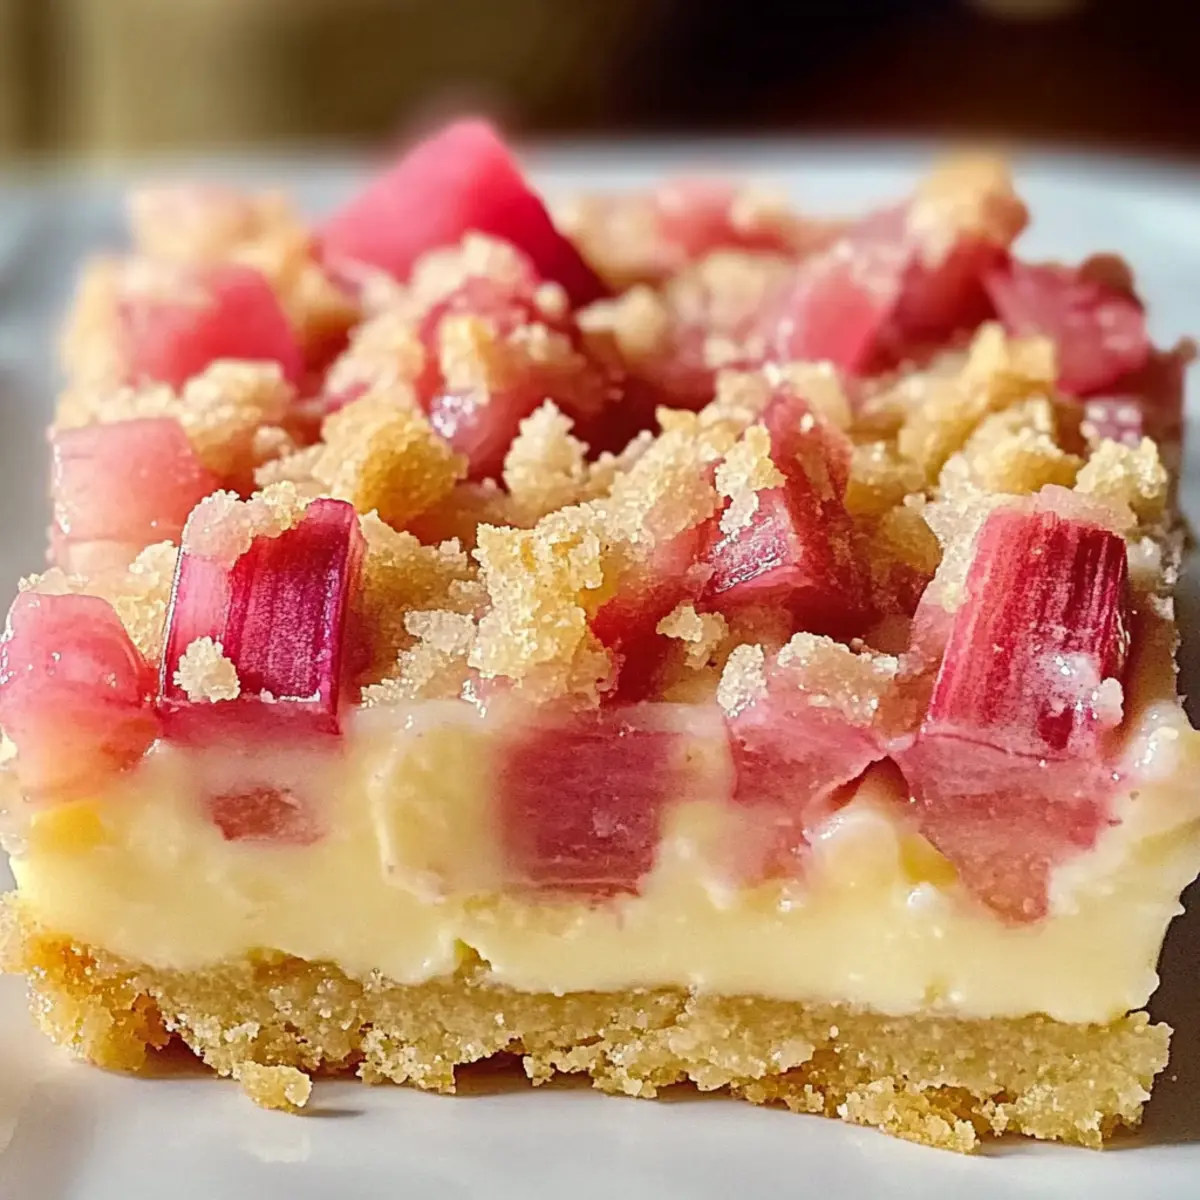
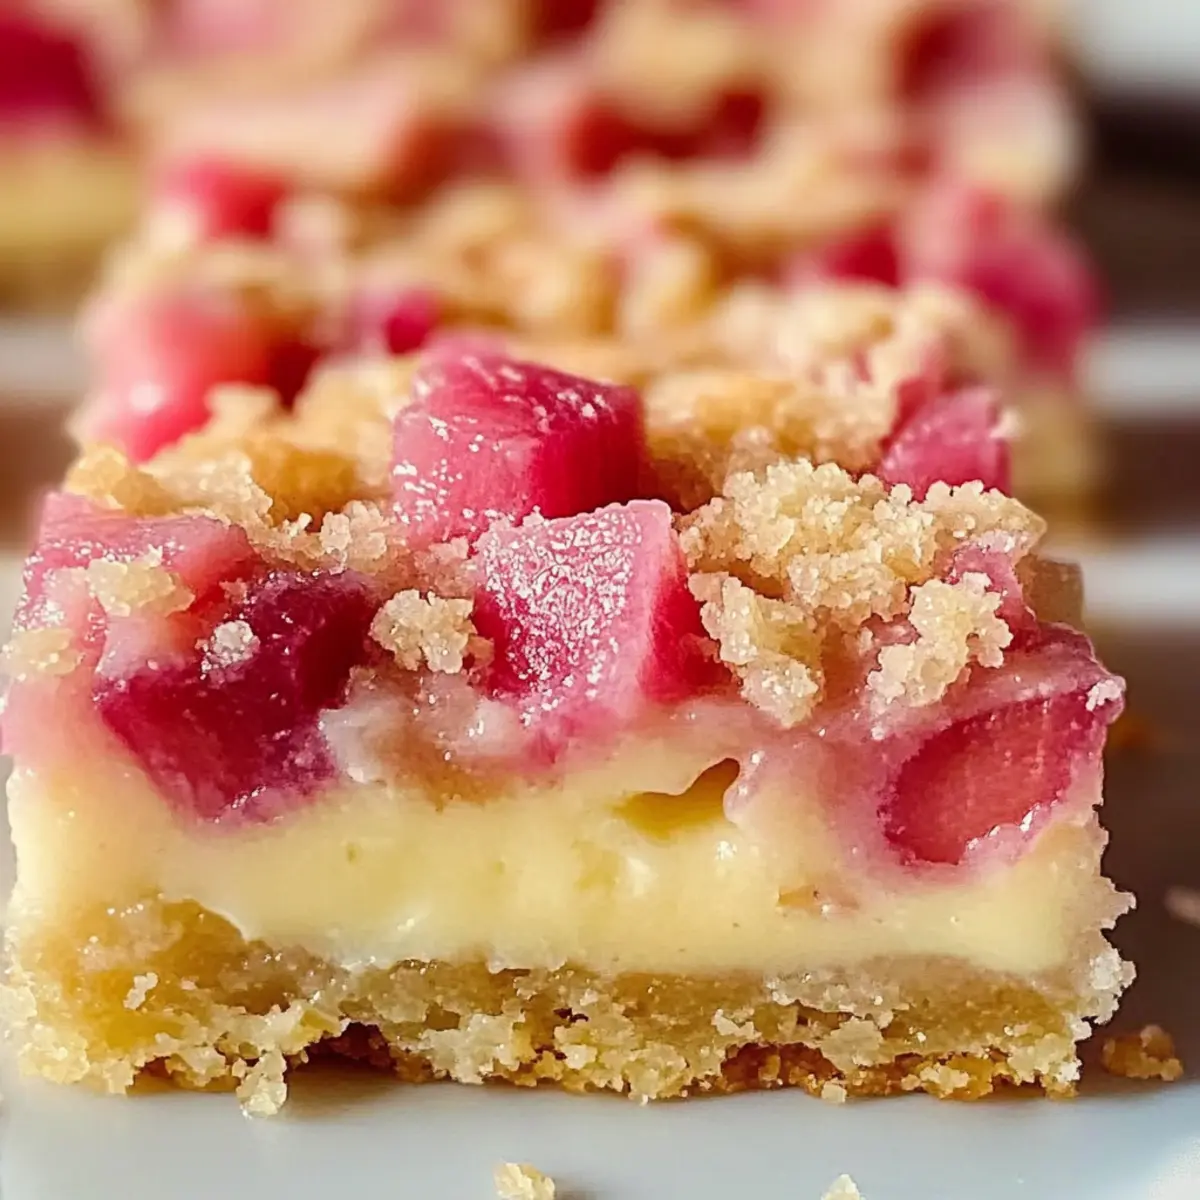
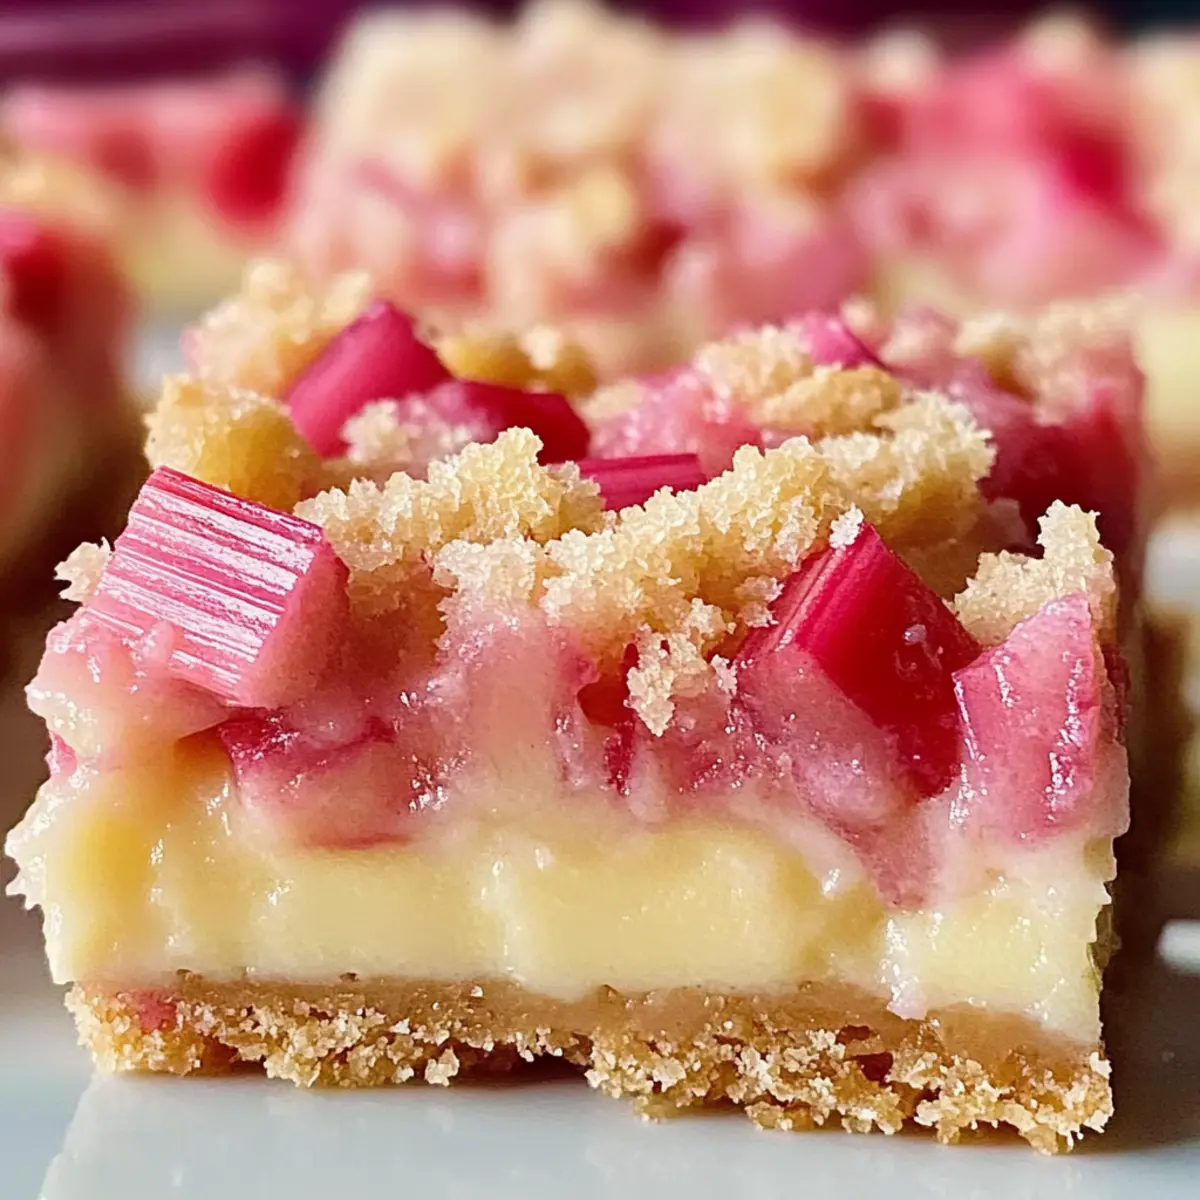
As the first hints of spring begin to emerge, it feels like an invitation to indulge in the delightful flavors of the season. These Rhubarb Dream Bars offer a simple yet nostalgic dessert that captures that essence beautifully. With just six straightforward ingredients, this recipe is perfect for those who crave homemade comfort without spending hours in the kitchen. The buttery shortbread crust perfectly complements a creamy, custard-like filling infused with tangy rhubarb, creating a luscious contrast that is simply irresistible. Plus, it’s a potentially gluten-free option with easy substitutions, making it a crowd-pleaser for everyone at your table. Are you ready to create a treat that brings the joy of spring right into your home?
Why Are Rhubarb Dream Bars So Special?
Simplicity at Its Finest: With just six ingredients, these bars come together effortlessly, ensuring you spend more time enjoying and less time prepping.
Nostalgic Delight: Experience a throwback to sweet spring memories with every bite of tangy rhubarb nestled in a creamy filling.
Versatile Flavors: Feel free to switch out rhubarb for your favorite fruits like strawberries or raspberries, allowing you to customize the taste to fit any occasion.
Ideal for Sharing: These bars are perfect for gatherings, bringing a touch of homemade love that leaves everyone asking for seconds.
Perfectly Textured: The buttery shortbread crust balances the creamy filling for a delightful experience that is both comforting and indulgent.
For a scrumptious variation, consider trying these Pistachio Dream Bars for another delightful twist!
Rhubarb Dream Bars Ingredients
For the Crust
• All-Purpose Flour – Structure for the crust and filling; can substitute a 1:1 gluten-free flour blend for a gluten-free option.
• Powdered Sugar – Adds sweetness and texture to the crust; no alternative needed.
• Butter (cold and cubed) – Provides richness and creates a flaky crust; use cold butter for the best texture.
For the Filling
• Large Eggs – Binds ingredients and helps the filling set; room temperature eggs mix better.
• Granulated Sugar – Sweetens the filling; a standard ingredient with no substitutions.
• Salt – Enhances flavors and balances sweetness; essential for taste.
• Diced Rhubarb – The star of this recipe, providing tanginess; use fresh or frozen, but thaw and drain frozen rhubarb before use.
• Ground Cinnamon (optional) – Introduces warmth to the flavor profile; omit for a simpler taste.
Enjoy crafting these delightful Rhubarb Dream Bars that are sure to evoke sweet memories of spring!
Step‑by‑Step Instructions for Rhubarb Dream Bars
Step 1: Preheat the Oven
Begin by preheating your oven to 325°F (160°C). While the oven warms up, prepare a 9×13-inch baking pan by greasing it with butter or non-stick spray. This step ensures that your Rhubarb Dream Bars slide right out of the pan when you’re ready to serve, creating perfectly clean edges.
Step 2: Make the Crust Mixture
In a large mixing bowl, combine 2 cups of all-purpose flour and ½ cup of powdered sugar. Next, cut in 1 cup of cold, cubed butter using a pastry cutter or your fingers until the mixture resembles coarse crumbs. It should hold together when pressed. This buttery blend will form the base of your delicious dessert.
Step 3: Bake the Crust
Once your crust mixture is ready, pour it into your greased baking pan. Press it evenly across the bottom, ensuring a solid layer. Place the pan in the preheated oven and bake for 15 minutes, or until the edges are lightly golden. This step will create a firm, buttery shortbread crust to hold the creamy filling.
Step 4: Prepare the Filling
While the crust is baking, prepare the filling in the same bowl. Lightly whisk together 4 large eggs until frothy. Gradually stir in 2 cups of granulated sugar, ½ cup of flour, 1 teaspoon of salt, and if desired, ½ teaspoon of ground cinnamon. Mix until smooth and well-combined; it should be thick, glossy, and free of lumps.
Step 5: Add the Rhubarb
Gently fold in 4 cups of diced rhubarb into the filling mixture. Take care to distribute the rhubarb evenly throughout, as this texture is key to the flavor profile of your Rhubarb Dream Bars. The bite of tangy rhubarb pairs beautifully with the sweet custard-like filling, creating a delicious flavor contrast.
Step 6: Bake Again
Once your crust has baked, remove it from the oven and pour the rhubarb filling over the hot crust. Spread it evenly, ensuring that the filling completely covers the base. Return the pan to the oven and bake for an additional 60 minutes. You’ll know it’s done when the filling is set and no longer jiggles when gently shaken.
Step 7: Cool and Slice
After baking, allow the Rhubarb Dream Bars to cool completely in the pan. This cooling period is crucial for creating clean slices, so be patient! Once cooled, use a sharp knife to cut into squares or rectangles. These delightful bars are now ready to enjoy, showcasing that perfect blend of crust and creamy rhubarb filling.
What to Serve with Rhubarb Dream Bars?
As you prepare to treat your loved ones to these delightful bars, consider how to craft a full meal experience that dances on the palate.
-
Whipped Cream: A light and airy topping that enhances the creamy filling, providing a dreamy contrast with every bite.
-
Fresh Berries Salad: Juicy strawberries and blueberries add freshness and vibrant color, balancing the tangy rhubarb with natural sweetness.
-
Vanilla Ice Cream: Creamy richness elevates the dessert to another level, offering a delightful temperature contrast that’s utterly indulgent.
-
Sparkling Water with Lime: This refreshing beverage cleanses the palate, beautifully complementing the tartness of the rhubarb and finishing your meal on a bright note.
-
Herbed Quinoa Salad: A light salad with fresh herbs and a zesty vinaigrette offers a contrasting texture and flavor, making it a perfect accompaniment for a well-rounded spread.
-
Chocolate Drizzle: Add a touch of melted dark chocolate drizzled over the bars for a decadent twist that beautifully contrasts with the tartness, transforming each bite into pure bliss.
Indulge in creating an inviting table that celebrates the vibrant spring flavors of your homemade Rhubarb Dream Bars!
Make Ahead Options
These Rhubarb Dream Bars are perfect for busy home cooks looking to save time without sacrificing flavor! You can prepare the crust up to 24 hours in advance; simply press the crumb mixture into the pan, cover it tightly, and refrigerate. The filling can also be mixed ahead—combine the eggs, sugar, flour, and rhubarb, and store it in an airtight container in the fridge for up to 3 days. When you’re ready to bake, simply pour the chilled filling over the pre-baked crust and follow the baking instructions. This ensures that your bars are just as delicious while giving you more time to enjoy moments with family and friends!
Rhubarb Dream Bars Variations & Substitutions
Customize your Rhubarb Dream Bars in delightful ways that add personal touch and flavor!
-
Gluten-Free: Substitute all-purpose flour with a 1:1 gluten-free flour blend to accommodate dietary needs.
-
Fruit Substitutes: Swap rhubarb for chopped strawberries or raspberries for a sweeter twist. This can create a lovely jammy filling.
-
Heat Factor: Add a pinch of cayenne pepper to the filling for a surprising kick that compliments the sweet and tangy layers beautifully.
-
Nutty Crunch: Incorporate chopped walnuts or pecans into the crust for a delightful crunch that elevates the texture even further.
-
Dairy-Free: Use coconut oil in place of butter for a dairy-free version while still achieving that flaky crust.
-
Extra Flavor: Experiment by adding a splash of vanilla extract to the filling for a deeper, warmer flavor profile. This simple addition can evoke memories of comforting homemade treats.
-
Mix it Up: Combine diced peaches or blueberries with the rhubarb for a fruit medley that enhances the overall taste and appearance of your bars; seasonal, fresh flavors will shine!
For a nutty variation, you might also enjoy the delightful Pistachio Dream Bars, where the rich nuts lend their unique flavor to the dish!
How to Store and Freeze Rhubarb Dream Bars
-
Room Temperature: If you plan to eat the Rhubarb Dream Bars within a day, you can store them at room temperature, wrapped loosely in plastic wrap or foil for up to 24 hours.
-
Fridge: To keep these delicious bars fresh, place them in an airtight container in the refrigerator for up to 4-5 days, preserving their creamy texture and flavorful filling.
-
Freezer: For longer storage, freeze your Rhubarb Dream Bars with layers of parchment paper between them to make separating easier. They can last up to 2 months in the freezer.
-
Reheating: When you’re ready to enjoy a bar from the freezer, let it thaw overnight in the fridge, then reheat gently in the microwave or serve chilled for a refreshing treat.
Expert Tips for Rhubarb Dream Bars
-
Cool Completely: Let the bars cool thoroughly before slicing to achieve clean cuts and maintain the perfect texture. Patience pays off!
-
Texture Boost: For added crunch, sprinkle some chopped nuts, like pecans or almonds, on top of the filling before baking.
-
Use Fresh Rhubarb: Fresh rhubarb gives the best flavor and texture. If using frozen, remember to thaw and drain it to prevent excess moisture.
-
Perfect Egg Temperature: Ensure your eggs are at room temperature. This helps them mix more easily into the filling for a smoother consistency.
-
Avoid Overbaking: Keep an eye on the bars during the last few minutes of baking. Overbaking can lead to a dry filling; it should be set but slightly wobbly in the center when done.
Rhubarb Dream Bars Recipe FAQs
What kind of rhubarb should I use?
Absolutely! Fresh rhubarb provides the best flavor and texture for these bars. If you’re using frozen rhubarb, remember to thaw and drain it beforehand to avoid excess moisture, which can make the filling soggy.
How should I store leftover Rhubarb Dream Bars?
To keep your delightful bars fresh, store them in an airtight container in the refrigerator for 4-5 days. If you want to enjoy them longer, they freeze beautifully for up to 2 months. Just remember to separate layers with parchment paper for easy serving later!
Can I make Rhubarb Dream Bars gluten-free?
Very! Simply substitute the all-purpose flour with a 1:1 gluten-free flour blend. Ensure that all other ingredients, such as the baking powder, are also gluten-free, and you’ll have a delicious dessert everyone can enjoy.
What can I do if my filling doesn’t set properly?
If your filling is still jiggly after the recommended baking time, it might need a bit more time in the oven. Continue baking in 5-minute increments until it is set but not overbaked. Remember, the bars will firm up as they cool, so patience is key!
How do I freeze Rhubarb Dream Bars?
To freeze these delectable bars, first let them cool completely. Then, cut them into squares and layer them between sheets of parchment paper in an airtight container or freezer bag. They can last up to 2 months in the freezer. When you’re ready to enjoy, simply thaw overnight in the fridge before serving.
Can I use other fruits instead of rhubarb?
Absolutely! Feel free to swap out the rhubarb for your favorite fruits like strawberries or raspberries. Just keep in mind that you may need to adjust the sugar based on the sweetness of the fruit you choose.
Rhubarb Dream Bars That Bring Sweet Nostalgia to Life
Ingredients
Equipment
Method
- Preheat the oven to 325°F (160°C) and prepare a 9x13-inch baking pan by greasing it.
- In a large mixing bowl, combine 2 cups of all-purpose flour and ½ cup of powdered sugar. Cut in 1 cup of cold, cubed butter until the mixture resembles coarse crumbs.
- Press the crust mixture into the prepared baking pan and bake for 15 minutes or until lightly golden.
- In the same bowl, lightly whisk together 4 large eggs until frothy. Gradually stir in 2 cups of granulated sugar, ½ cup of flour, 1 teaspoon of salt, and optionally, ½ teaspoon of ground cinnamon.
- Gently fold in 4 cups of diced rhubarb into the filling mixture.
- Pour the rhubarb filling over the hot crust. Spread it evenly and bake for an additional 60 minutes, until the filling is set.
- Allow the bars to cool completely before slicing into squares or rectangles.
Leave a Reply