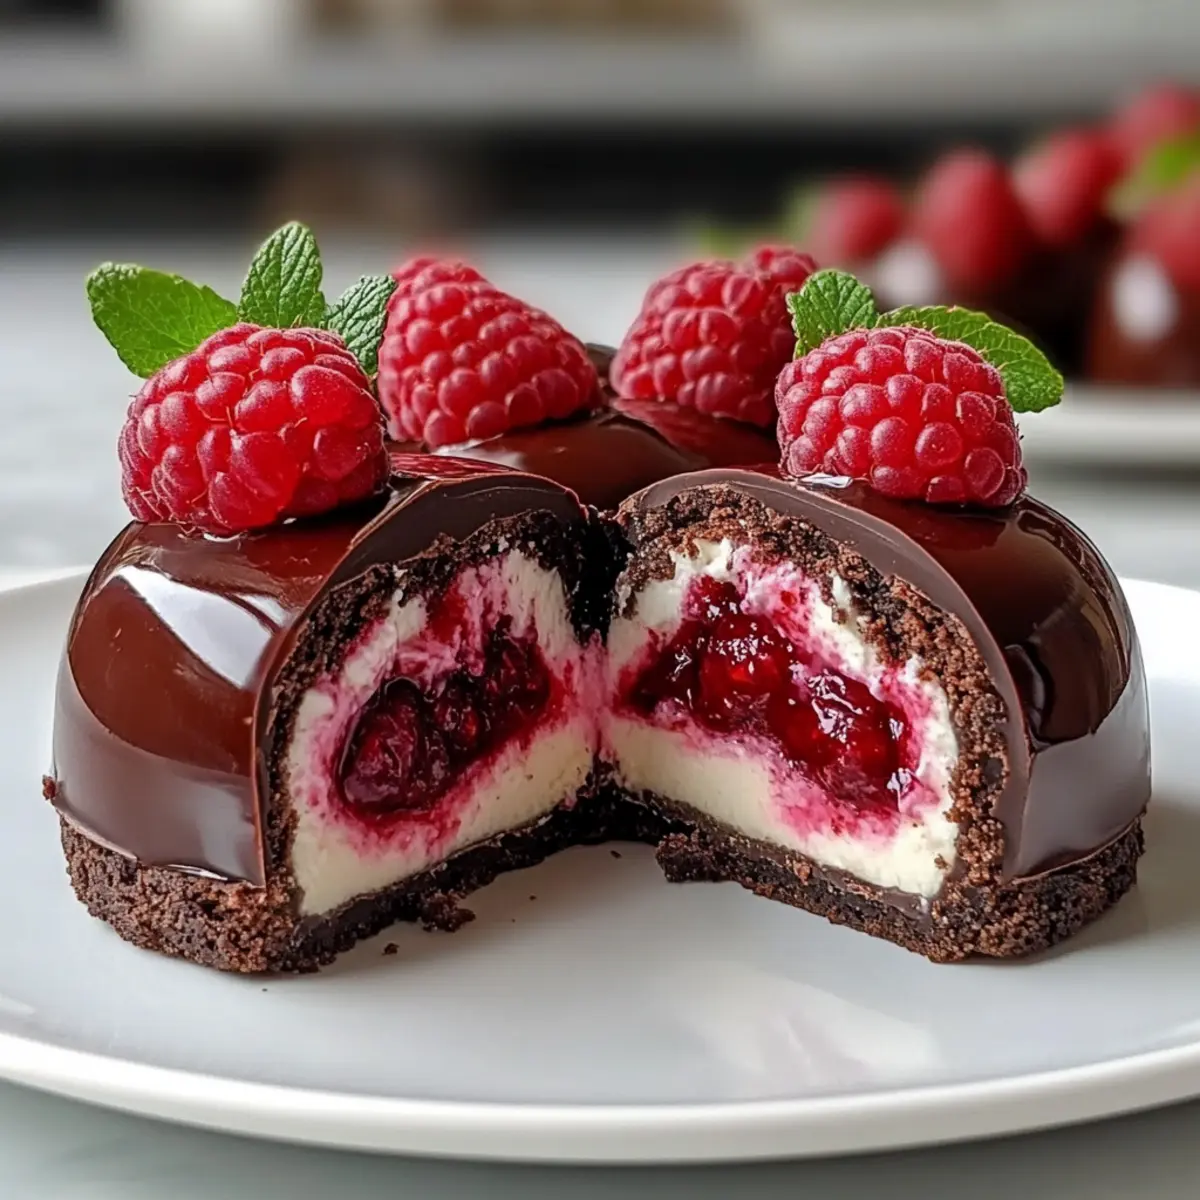
As I stood in my kitchen, a wave of inspiration washed over me while gazing at the fresh raspberries sitting on my counter. I decided to transform them into something truly special: Chocolate Raspberry Cheesecake Domes. This no-bake dessert is a heavenly combination of rich chocolate and creamy raspberry cheesecake that you can serve in beautiful individual portions. Not only do these domes look stunning, making them perfect for impressing guests, but they are also incredibly simple to whip up with just a few quality ingredients. Whether you’re celebrating a special occasion or simply indulging yourself, these delightful treats will please your palate and elevate your dessert game. Curious about how to create these elegant gems at home? Let’s dive in!

Why Are Chocolate Raspberry Cheesecake Domes Irresistible?
Delectable Indulgence: Each bite combines velvety cheesecake and rich chocolate, creating a luxurious treat perfect for any occasion.
No-Bake Convenience: Say goodbye to complicated baking! This recipe is a straightforward no-bake delight that anyone can master—ideal for busy weeknights or last-minute gatherings.
Gorgeous Presentation: These domes are as stunning as they are delicious, making them the star of your dessert table and guaranteed to impress your guests.
Versatile Flavor: While raspberry shines in this recipe, swap it for other fruits to create delightful variations, much like my Luxurious Dubai Chocolate or Japanese Cotton Cheesecake ideas.
Crowd-Pleasing Treat: Perfect for parties or intimate dinners, everyone will love the combination of textures and flavors in these individual bites.
Quick to Prepare: With just a bit of chilling time needed, you can whip these up in no time, leaving you more moments to enjoy with friends and family.
Chocolate Raspberry Cheesecake Domes Ingredients
For the Chocolate Shell
- Dark Chocolate – Use high-quality chocolate for a glossy finish; avoid chocolate chips for the best results.
For the Cheesecake Filling
- Cream Cheese – Creates a creamy, tangy base; vegan cream cheese can substitute for a dairy-free option.
- Heavy Cream – Adds a rich, mousse-like texture; coconut cream can be used for a dairy-free alternative.
- Powdered Sugar – Sweetens smoothly without graininess; granulated sugar works too with thorough mixing.
- Vanilla Extract – Enhances flavor; pure vanilla extract yields the best taste.
- Raspberries – Provide natural fruit brightness; use fresh or frozen raspberries, pureed and strained for smooth consistency.
- Gelatin – Stabilizes the filling for a firm set; substitute with agar-agar for a vegetarian version, adjusting the setting time.
- Chocolate Cake – Forms the dome base, adding great texture; can be omitted for a creamier dessert.
These Chocolate Raspberry Cheesecake Domes are bound to become your new go-to dessert!
Step‑by‑Step Instructions for Chocolate Raspberry Cheesecake Domes
Step 1: Melt the Chocolate
Begin by chopping high-quality dark chocolate into small, even pieces and place them in a microwave-safe bowl. Heat the chocolate in the microwave in 30-second intervals, stirring after each session until it is completely melted and smooth. This process usually takes about 1-2 minutes. You’re looking for a glossy consistency—this will form the elegant outer shell of your Chocolate Raspberry Cheesecake Domes.
Step 2: Coat the Molds
Using a pastry brush, carefully coat the interior of silicone half-sphere molds with a thin layer of the melted chocolate. Make sure to cover all edges for a seamless finish. Place the coated molds in the refrigerator to chill for about 10 minutes, or until the chocolate is firm and set. This initial layer will create a sturdy shell for your delicious filling.
Step 3: Apply a Second Coat
After the first layer has set, remove the molds from the refrigerator and apply a second layer of the melted chocolate to ensure the shells are thick and durable. This time, use a spoon to help guide the chocolate into all the corners. Return the molds to the fridge again for about 15–20 minutes until the chocolate has completely solidified, creating a perfect base for the filling.
Step 4: Prepare the Gelatin
While the chocolate shells are chilling, bloom the gelatin by sprinkling it over a small bowl of cold water and letting it sit for about 5 minutes. This will allow the gelatin to absorb the water and soften adequately. In the meantime, you can start preparing the raspberry cheesecake filling for your Chocolate Raspberry Cheesecake Domes.
Step 5: Mix the Cream Cheese Filling
In a mixing bowl, use an electric mixer to beat the softened cream cheese until it’s light and fluffy, about 2-3 minutes. Gradually add in the powdered sugar and vanilla extract, mixing until fully incorporated. The filling should have a smooth texture and delightful flavor that forms the creamy essence of your Chocolate Raspberry Cheesecake Domes.
Step 6: Incorporate the Raspberry Puree
Add the strained raspberry puree to the cream cheese mixture and gently fold it in with a spatula until the color is consistent. Make sure there are no lumps. The raspberry will infuse a vibrant hue and tangy sweetness into your filling, making the cheesecake part of your Chocolate Raspberry Cheesecake Domes both delicious and visually appealing.
Step 7: Melt the Gelatin
Next, take your bloomed gelatin and microwave it for about 10-15 seconds, or until fully melted. Then, gradually mix the melted gelatin into the raspberry cheesecake mixture, stirring continuously to avoid lumps. This step is crucial for allowing your filling to set properly, creating that delightful dome shape.
Step 8: Whip the Heavy Cream
In a separate bowl, whip the heavy cream using an electric mixer until soft peaks form, about 2-4 minutes. Be careful not to overwhip; you want a light, airy texture. Once ready, gently fold the whipped cream into the raspberry cheesecake mixture, combining them seamlessly. This will contribute to the luscious texture of your Chocolate Raspberry Cheesecake Domes.
Step 9: Fill the Molds
Using a piping bag or a spoon, fill each chocolate dome shell with the raspberry cheesecake mixture, leaving a little space at the top for the chocolate cake layer. This ensures a balanced combination of textures. Once all the shells are filled, return them to the refrigerator to allow the filling to set for at least 30 minutes.
Step 10: Add the Cake Base
While the filling is setting, cut rounds of pre-baked chocolate cake to fit the top of each dome. Carefully press a cake round into each filled dome, ensuring it rests on the cheesecake layer. The cake base adds a delightful texture to your Chocolate Raspberry Cheesecake Domes and enhances the overall flavor experience.
Step 11: Chill Until Set
Cover the filled molds with plastic wrap or foil and chill them in the refrigerator for at least 4 hours, or overnight for best results. This will allow each of your Chocolate Raspberry Cheesecake Domes to firm up beautifully, making them easy to unmold and ensuring a delightful bite.
Step 12: Unmold and Serve
Once set, gently remove the domes from the molds by inverting them onto a plate. Let them sit at room temperature for about 10 minutes before serving to enhance the texture. You can optionally garnish with fresh raspberries, sprigs of mint, or a dusting of cocoa powder for an elegant touch. Indulge in your delicious Chocolate Raspberry Cheesecake Domes!
Expert Tips for Chocolate Raspberry Cheesecake Domes
-
Quality Matters: Use high-quality dark chocolate for the shell to achieve a glossy finish. Cheap chocolate can lead to a dull and less appealing surface.
-
Perfect Gelatin: Always bloom gelatin properly in cold water before adding it to your mixture. This prevents lumps and ensures a smooth filling for your Chocolate Raspberry Cheesecake Domes.
-
Avoid Overwhipping: When whipping heavy cream, stop at soft peaks. Overwhipping can lead to grainy texture, ruining your dessert’s creamy consistency.
-
Chill Thoroughly: Be sure to let the domes chill for at least 4 hours to set fully. This step is crucial to achieve a firm structure that’s easy to unmold.
-
Use Fresh Raspberries: Opt for fresh raspberries for the best flavor and presentation. Frozen raspberries may work, but they can slightly alter the texture of the filling.
-
Serve at Room Temperature: Allow the domes to sit at room temperature for 10 minutes before serving to let the flavors develop and enhance the dessert’s texture.
What to Serve with Chocolate Raspberry Cheesecake Domes
Elevate your dessert experience with delightful pairings that complement the rich layers of these indulgent treats.
-
Fresh Mint Leaves: Adding sprightly mint will provide a refreshing contrast, enhancing the overall flavor profile of the domes. Sprinkle some on top right before serving for an inviting touch.
-
Raspberry Coulis: A drizzle of this sweet and tart sauce elevates each bite, bringing out the fresh raspberry flavor in the cheesecake. It adds a burst of color and brightness to your dessert plate.
-
Whipped Cream: Serve a dollop of lightly sweetened or vanilla-infused whipped cream alongside. Its airy texture balances the richness of the cheesecakes perfectly, creating a harmonious duo of flavors.
-
Chocolate Sauce: For true chocolate lovers, an extra drizzle of chocolate sauce on the plate creates a luxurious, decadent touch. It enhances the dark chocolate shell’s richness while adding an indulgent flair.
-
Espresso or Coffee: Pair your Chocolate Raspberry Cheesecake Domes with a shot of espresso or a cup of rich coffee. The bitterness complements the sweetness beautifully, making for a well-rounded treat.
-
Ice Cream: A scoop of vanilla or raspberry ice cream alongside each dome can turn every bite into a delightful extravagance. The cold creaminess will contrast with the rich chocolate and creamy cheesecake.
-
Cheese Board: Create an elegant cheese platter with brie or mascarpone as a light contrast to the sweet dessert. A touch of savory can balance the sweetness, making the meal feel complete.
-
Sparkling Wine: Enjoy these domes with a glass of sparkling wine or a sweet dessert wine. The fizz balances the richness while enhancing the celebratory vibe of your dessert.
Chocolate Raspberry Cheesecake Domes Variations
Feel free to sprinkle your creative touch on these delightful Chocolate Raspberry Cheesecake Domes for a truly personalized dessert experience!
-
Berry Blast: Swap raspberry puree for strawberry, blueberry, or mango puree for a fresh twist. Each berry will bring its unique sweetness, celebrating seasonal fruits beautifully.
-
Vegan Delight: Use vegan cream cheese and coconut cream in place of dairy. The result is just as rich and delicious, making these domes perfect for dairy-free diets without sacrificing flavor.
-
Nutty Addition: Fold in chopped nuts like almonds or hazelnuts into the cheesecake filling for added crunch and depth. A subtle nuttiness can beautifully complement the tartness of the raspberries.
-
Citrus Zing: Add a splash of lemon or orange zest to the filling for a refreshing citrus punch. This will brighten the flavors and add a delightful layer of complexity to each bite.
-
Cheesecake Dipping: If you enjoy a little more texture, skip the cake layer and opt for cookie crumbles instead. Think chocolate wafers or graham crackers for a delightful contrast amongst the creamy goodness.
-
Mint Chocolate: Incorporate peppermint extract into the chocolate to create a refreshing minty shell. This will transform your domes into a mint chocolate sensation, perfect for the holidays.
-
Kick of Spice: Add a pinch of cinnamon or cayenne pepper to the filling for a surprising heat. This will awaken your taste buds and create a splendid contrast against the sweet and tangy raspberry.
-
Elegant Garnish: Elevate the presentation further by drizzling with raspberry coulis or a rich chocolate ganache on top. This additional layer of sauce will not only enhance the visual appeal but also amplify the flavor experience.
Feel free to explore these variations or get inspired to create your own unique spin! For other indulgent chocolate ideas, check out my Dark Chocolate Quinoa Crisps or Chocolate Dipped Orange Shortbread Cookies. The possibilities are endless!
Make Ahead Options
These Chocolate Raspberry Cheesecake Domes are perfect for busy home cooks looking to save time during special occasions! You can prepare the chocolate shells and the raspberry cheesecake filling up to 24 hours in advance, storing them separately in the refrigerator to maintain their quality. The filled and assembled domes can be chilled for up to 4 days before serving, ensuring they stay just as delicious. Simply cover them tightly with plastic wrap to prevent drying out. When you’re ready to impress your guests, garnish with fresh raspberries or cocoa powder, and allow the domes to sit at room temperature for about 10 minutes before serving for the best texture.
How to Store and Freeze Chocolate Raspberry Cheesecake Domes
Fridge: Store your Chocolate Raspberry Cheesecake Domes in an airtight container in the refrigerator for up to 4 days. This keeps them fresh and maintains their creamy texture.
Freezer: If you want to make them ahead of time, freeze the un-garnished domes in an airtight container for up to a month. Thaw overnight in the refrigerator before serving for the best experience.
Serving Tips: Once ready to enjoy, let the domes sit at room temperature for about 10 minutes prior to serving. This enhances their texture and flavor, making each bite even more delightful.
Reheating: These decadent treats are best enjoyed cold or at room temperature—no need for reheating!
Chocolate Raspberry Cheesecake Domes Recipe FAQs
What type of dark chocolate should I use?
I recommend using high-quality dark chocolate for the outer shell to achieve a glossy finish and rich flavor. Avoid chocolate chips, as they contain stabilizers that may not melt smoothly. Look for couverture chocolate if you want a professional finish!
How should I store leftover desserts?
Store your Chocolate Raspberry Cheesecake Domes in an airtight container in the refrigerator for up to 4 days. This keeps them fresh and maintains their delicious creamy texture.
Can I freeze Chocolate Raspberry Cheesecake Domes?
Absolutely! You can freeze the un-garnished domes in an airtight container for up to a month. When you’re ready to enjoy, simply thaw them overnight in the refrigerator. Allow them to sit at room temperature for about 10 minutes before serving for the best texture.
What can I do if my cheesecake filling is too runny?
If your filling turns out too runny, it might be due to insufficient gelatin or the cream not being whipped enough. Gradually add more dissolved gelatin (bloomed as described in the recipe) and gently fold it into the mixture. If you do this, refrigerate for some time before filling the molds, as this will help set the filling properly.
Is this recipe suitable for a vegetarian diet?
Yes! The Chocolate Raspberry Cheesecake Domes are vegetarian. However, if you want to make them completely vegetarian-friendly, substitute the gelatin with agar-agar, keeping in mind that the setting time will vary slightly. Just be sure to follow the instructions on the agar-agar package for perfect results!
Can I make these domes ahead of time?
Definitely! You can prepare these Chocolate Raspberry Cheesecake Domes ahead of time and store them in the refrigerator for up to 4 days. They are perfect for special occasions, allowing you to enjoy your time with guests without any last-minute fuss.
Decadent Chocolate Raspberry Cheesecake Domes You'll Adore
Ingredients
Equipment
Method
- Melt the chocolate in the microwave in 30-second intervals, stirring until smooth.
- Coat the interior of silicone molds with melted chocolate and chill until firm.
- Apply a second layer of chocolate and chill again until solidified.
- Bloom the gelatin in cold water for 5 minutes.
- Mix cream cheese until fluffy, then integrate powdered sugar and vanilla.
- Fold in strained raspberry puree until color is consistent.
- Melt bloomed gelatin and stir it into the cheesecake mixture.
- Whip heavy cream until soft peaks form and fold into the cheesecake mixture.
- Fill each chocolate shell with raspberry cheesecake mixture and chill again.
- Cut rounds of chocolate cake and press onto the filled domes.
- Chill until set, then unmold and serve after resting.
Leave a Reply