As I sifted through my pantry for just the right mix of ingredients, a delightful memory surfaced: the sweet joy of biting into a fluffy Twinkie after school. Recreating that nostalgic experience inspired me to craft my very own Homemade Twinkies—trust me, once you make these, you’ll never go back to store-bought! Made with real ingredients and no preservatives, these treats not only savor the past but also introduce a healthier spin on a beloved classic. Whipping up these soft, pillowy sponge cakes requires minimal effort, making them a perfect choice for both carefree afternoons and special celebrations. Why rush out for snacks when you can fill your kitchen with the amazing aroma of freshly baked goodness? Ready to indulge in some homemade bliss? Let’s dive into the recipe and bring childhood back to life!
Why Make Homemade Twinkies?
Nostalgia takes center stage as you recreate this classic treat, bringing back those sweet childhood memories with each fluffy bite. Real ingredients ensure that you’re avoiding preservatives while still indulging in the deliciousness. Customizable options allow you to experiment with flavors or fillings, making these Twinkies uniquely yours. Simple to make, they’re perfect for both seasoned bakers and beginners alike. Why settle for store-bought when you can enjoy the warmth of freshly baked homemade goodness? For added inspiration, check out my delightful Homemade Orange Candy for another nostalgic experience!
Homemade Twinkies Ingredients
• Dive into the deliciousness of Homemade Twinkies with these real ingredients!
For the Sponge Cake
- All-purpose flour – Provides the structure; gluten-free flour can be used for a gluten-free version.
- Baking powder – This acts as a leavening agent; make sure it’s fresh for a perfect rise.
- Salt – Enhances flavors; adjust to taste as needed.
- Eggs (4 large, room temperature) – For both structure and moisture; room temperature eggs whip up better for a lighter sponge.
- Granulated sugar (2/3 cup) – Adds sweetness; substitute with coconut sugar for a low-glycemic option.
- Vanilla extract (1/2 teaspoon) – Infuses flavor; pure vanilla gives the best results.
- Milk (2 tablespoons, warm) – Moistens the batter; almond milk is a great dairy-free substitute.
- Unsalted butter (1 tablespoon, melted) – Adds flavor and moisture; use coconut oil for a dairy-free alternative.
For the Cream Filling
- Unsalted butter (1/2 cup, softened) – Ensures creaminess; vegan butter can be used for a dairy-free version.
- Marshmallow creme (1/2 cup) – The star component of the filling; feel free to use homemade or store-bought vegan marshmallow fluff if preferred.
- Powdered sugar (1 cup) – Contributes sweetness and texture; adjust based on your taste preferences.
- Vanilla extract (1 teaspoon for filling) – Additional flavor; same tip as above applies.
- Heavy cream (1 tablespoon) – Adds richness; substitute with coconut cream for a dairy-free option.
Step‑by‑Step Instructions for Homemade Twinkies
Step 1: Preheat and Prepare
Begin by preheating your oven to 350°F (175°C). While the oven is heating, grease a Twinkie pan or a mini loaf pan with butter to prevent sticking. This step is crucial as it ensures your Homemade Twinkies will easily come out of the molds after baking. Make sure to set aside the prepared pan for later use.
Step 2: Sift Dry Ingredients
In a small bowl, sift together 1 cup of all-purpose flour, 1 teaspoon of baking powder, and a pinch of salt to combine these dry ingredients thoroughly. Sifting helps aerate the flour and ensures there are no lumps, creating a light texture for your sponge. Set this mixture aside while you whip up the eggs and sugar.
Step 3: Beat Eggs and Sugar
In a large mixing bowl, beat 4 room temperature eggs and 2/3 cup of granulated sugar using an electric mixer on high speed for about 6-8 minutes. This mixture should become thick and pale, almost tripling in volume. The fluffiness achieved here is essential for the lightness of your Homemade Twinkies, so take your time with this step.
Step 4: Incorporate Vanilla and Flour
Gently fold in 1/2 teaspoon of vanilla extract into the egg and sugar mixture. Once incorporated, add in the sifted flour mixture gradually. Use a spatula to fold the flour in without deflating your eggs; the batter should remain light and airy. This careful mixing will help your Twinkies rise beautifully while baking.
Step 5: Combine Wet Ingredients
In a separate bowl, combine 2 tablespoons of warm milk and 1 tablespoon of melted unsalted butter. Make sure the butter isn’t too hot to avoid cooking the eggs. Fold this mixture into your batter gently until just combined. This addition adds moisture to your Homemade Twinkies and contributes to that irresistible tenderness.
Step 6: Fill the Molds
Carefully fill your prepared Twinkie molds or mini loaf pans about 3/4 full with the batter. This allows room for the sponge to rise without overflowing. Use a spoon or piping bag for easier filling. Bake in your preheated oven for about 12-15 minutes, until the tops are golden brown and a toothpick inserted in the center comes out clean.
Step 7: Cool the Cakes
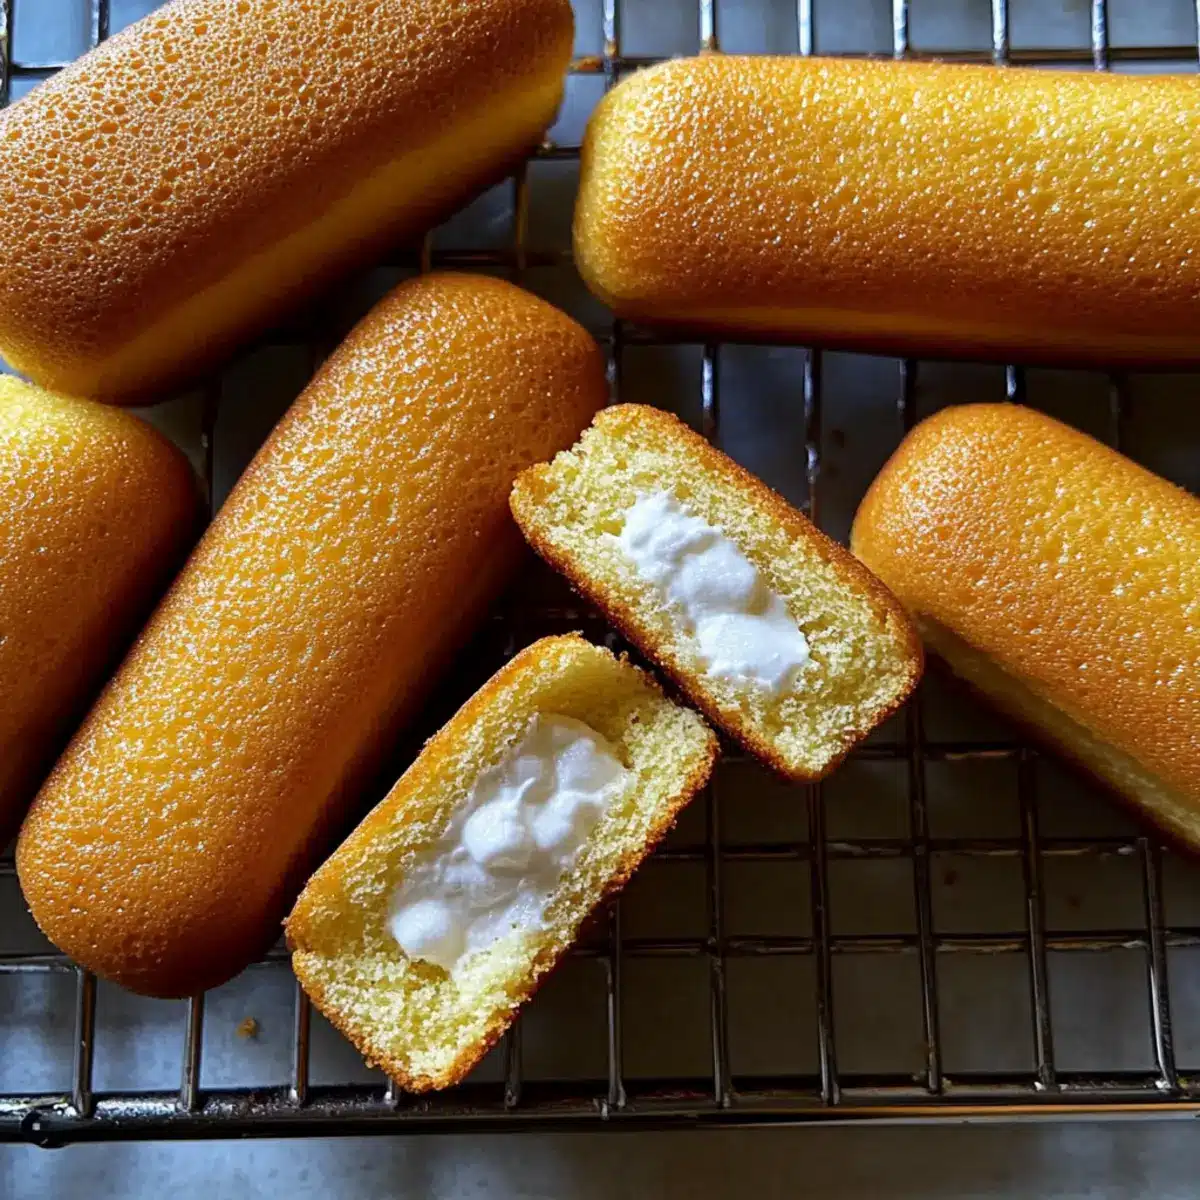
Once baked, remove your pan from the oven and let the Twinkies cool in the pan for about 5 minutes. Then, carefully transfer them to a wire rack to cool completely. It’s essential to let them cool fully before filling them; otherwise, the filling may melt or ooze out, ruining your Homemade Twinkies.
Step 8: Prepare the Filling
In a medium bowl, beat 1/2 cup of softened unsalted butter with an electric mixer until fluffy. Gradually mix in 1/2 cup of marshmallow crème, 1 cup of powdered sugar, 1 teaspoon of vanilla extract, and 1 tablespoon of heavy cream until smooth. This creamy filling will be the star of your Homemade Twinkies, so ensure it’s thoroughly mixed.
Step 9: Fill the Twinkies
Once the sponge cakes are completely cool, use a piping bag fitted with a small round tip to inject the marshmallow filling into the bottom of each cake. This ensures even distribution and keeps the filling neatly inside. Fill each Twinkie until you feel slight resistance; the filling should be generous yet not overflowing.
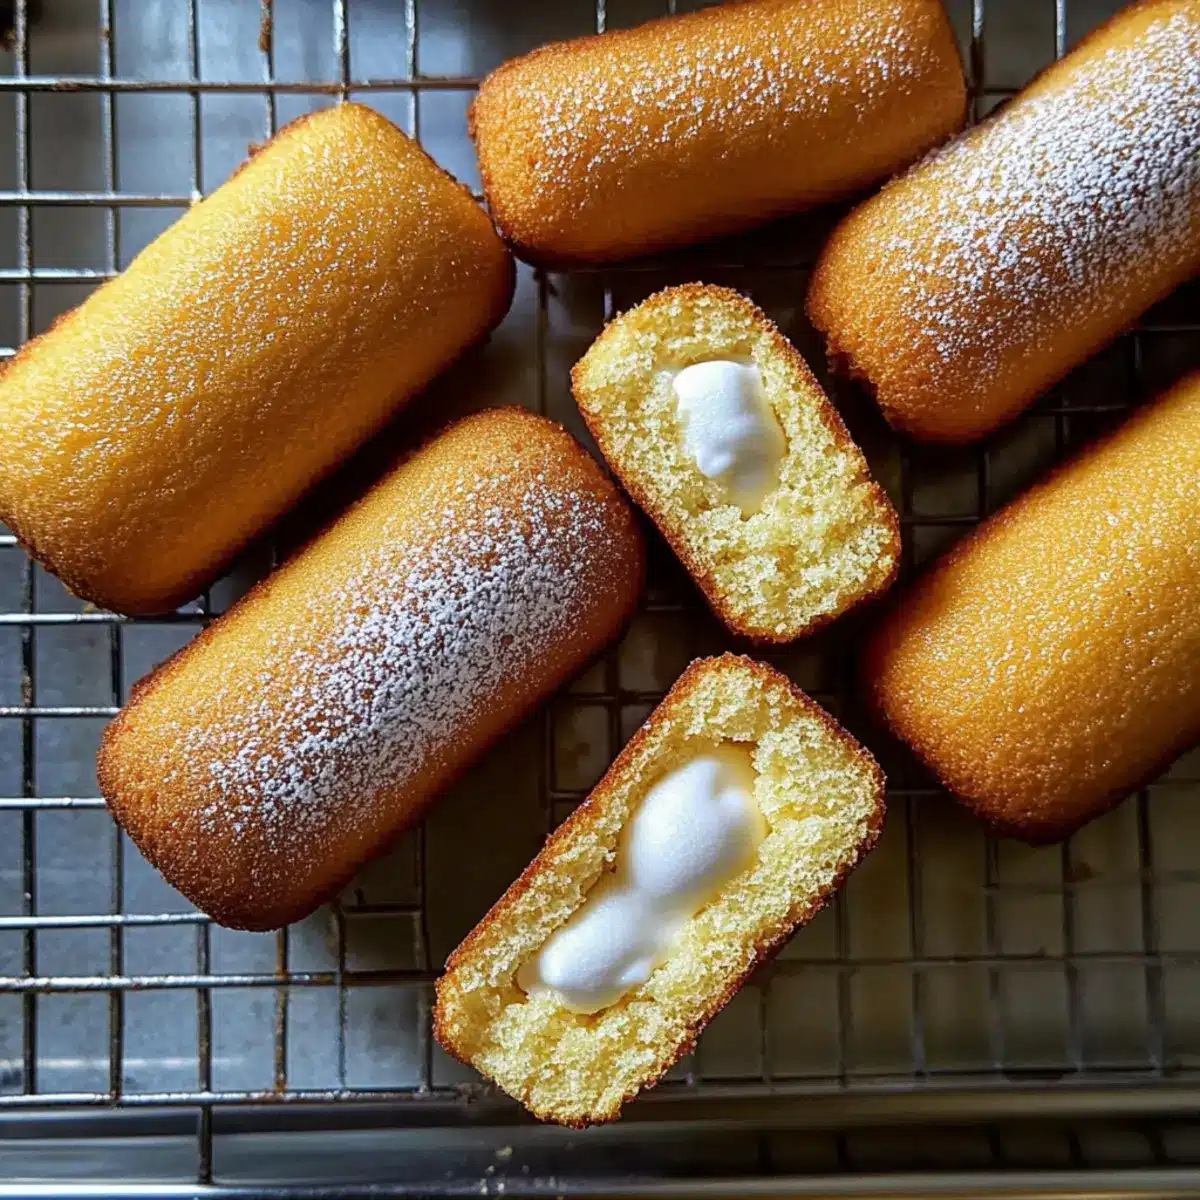
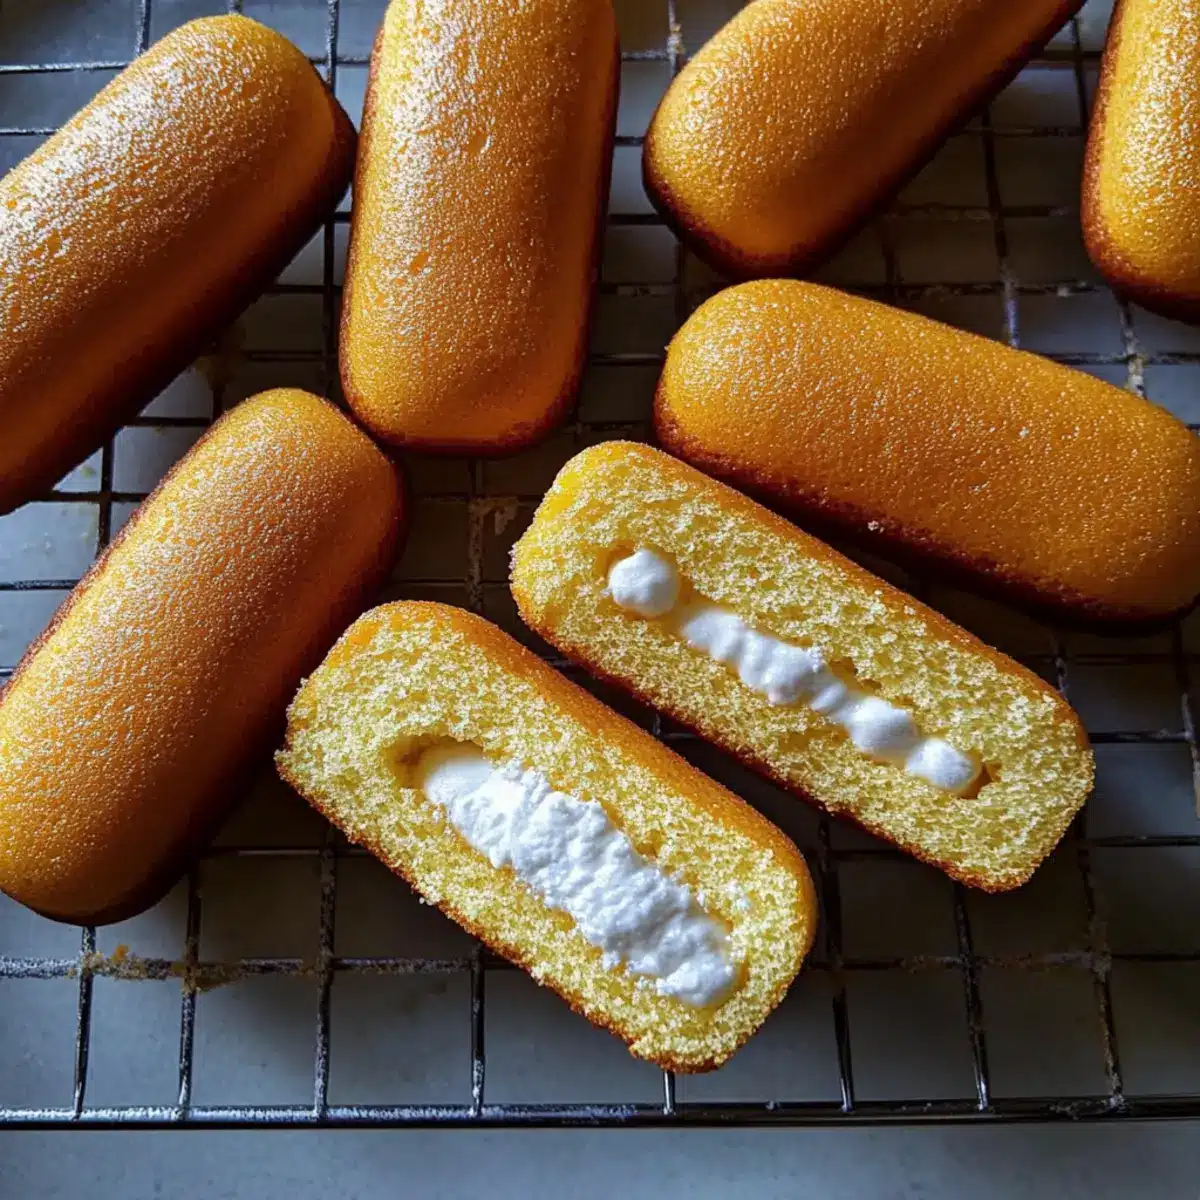
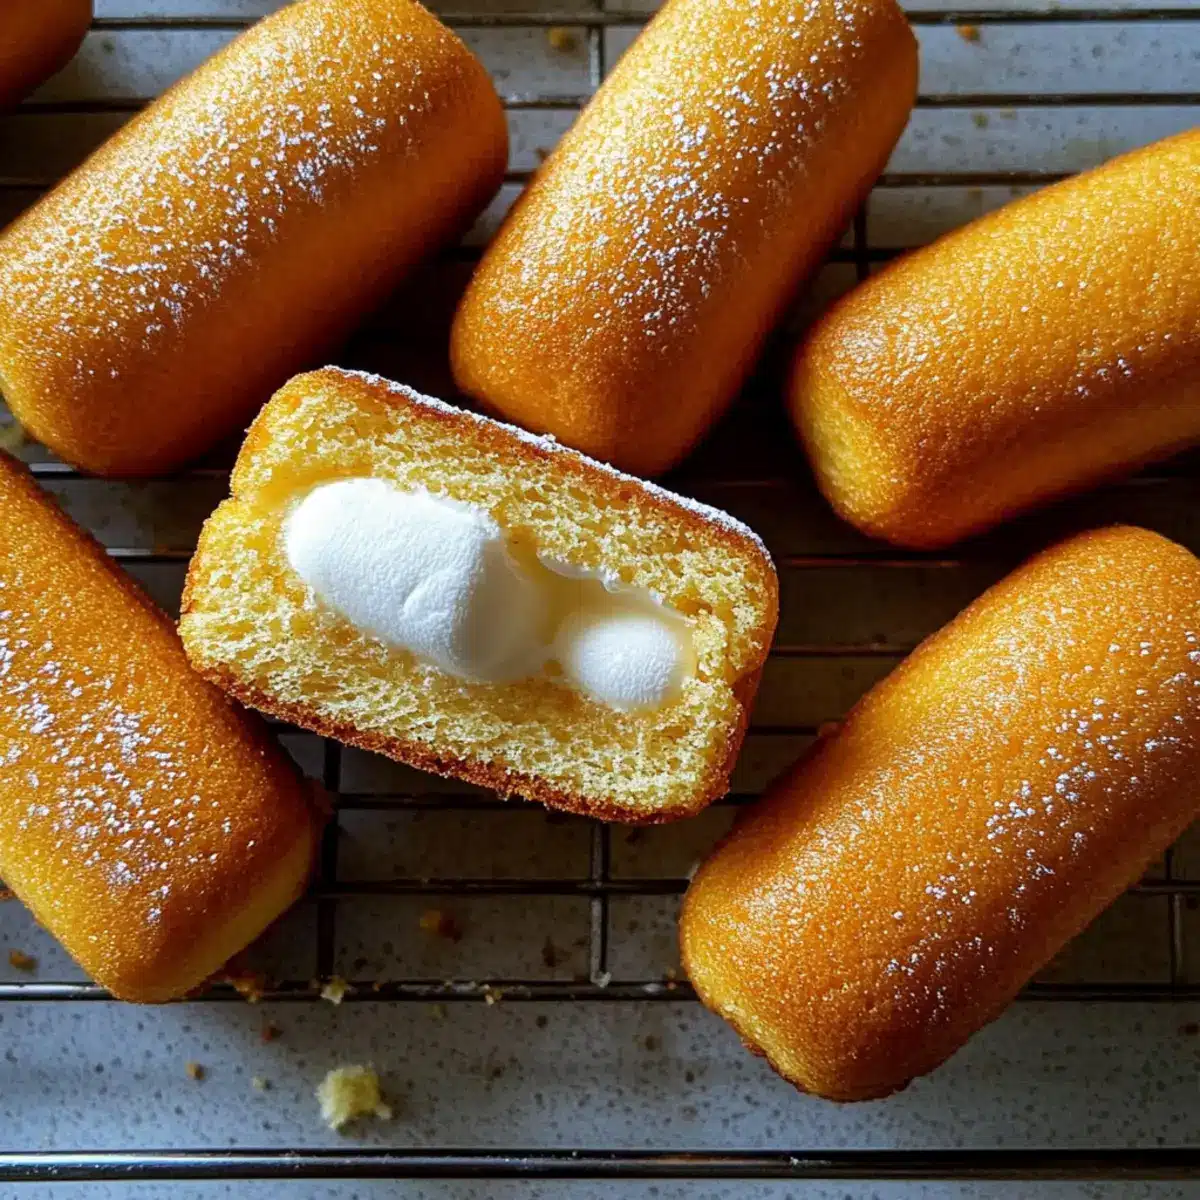
Step 10: Serve or Refrigerate
Your Homemade Twinkies are now ready to be enjoyed! For the best taste and texture, serve them immediately, or place them in an airtight container in the refrigerator for up to 4-5 days. Relish the delightful nostalgia of this classic treat with your family and friends!
Homemade Twinkies: Delightfully Customizable Options
Ready to put your personal spin on these beloved treats? Let’s explore some exciting ways to adapt your Homemade Twinkies for even more fun and flavor!
- Gluten-Free: Swap all-purpose flour for a gluten-free blend to enjoy the same delicious memories without gluten.
- Dairy-Free: Substitute milk and butter with almond milk and coconut oil, making these Twinkies accessible for those avoiding dairy.
- Chocolate Delight: Mix in chocolate chips or use cocoa powder in the sponge for a rich chocolatey twist. Ah, the magic of chocolate will have taste-buds dancing!
- Flavorful Fillings: Experiment with flavored extracts like mint or almond in the filling for a new taste adventure. This surprise in every bite will keep you coming back for more!
- Fruit-Filled Versions: Inject a fruit compote or puree into the filling for a refreshing touch. Whether it’s strawberry or blueberry, the burst of flavor will brighten your day.
- Decorative Touches: Drizzle with chocolate ganache or roll the filled Twinkies in sprinkles for a festive flair. These small changes can turn your dessert into a visual feast.
- Deconstructed Style: Serve the sponge cubes with whipped cream and fresh fruit for a chic presentation. It’s a fancy way to enjoy the same nostalgic flavors while impressing your guests.
Feel free to get creative! Each variation opens up new possibilities, just like my delightful Homemade Orange Candy, which offers yet another fun twist on nostalgic treats.
Expert Tips for Homemade Twinkies
-
Room Temperature Eggs: Ensure your eggs are at room temperature for maximum volume and aeration in your sponge cake, making those Homemade Twinkies light and fluffy.
-
Gentle Folding: Be careful not to over-mix your batter after adding the flour to maintain that airiness; folding gently preserves the delicate texture needed for each Twinkie.
-
Cool Completely: Allow the cakes to cool entirely before filling them; this prevents the creamy marshmallow filling from melting and keeps a perfect consistency.
-
Use a Piping Bag: To achieve neat and even filling distribution, a piping bag is highly recommended. It helps inject the filling smoothly into your Homemade Twinkies.
-
Bake and Test: Every oven is different, so start checking your Twinkies a minute or two before the suggested time to avoid over-baking; they should be golden brown and a toothpick should come out clean.
How to Store and Freeze Homemade Twinkies
Room Temperature: Keep your Homemade Twinkies in a cool, dry place for up to 1 day. If they aren’t all consumed, however, it’s best to refrigerate them to maintain freshness.
Fridge: Store in an airtight container in the refrigerator for up to 4-5 days. Layer parchment paper between the Twinkies to prevent them from sticking together while they chill.
Freezer: For longer storage, wrap each Twinkie tightly in plastic wrap and place them in a freezer-safe bag. They can be frozen for up to 3 months. Thaw in the fridge or at room temperature before serving.
Reheating: If you prefer them warm, microwave each Twinkie for 10-15 seconds. Enjoy the nostalgic goodness of your Homemade Twinkies fresh out of the oven!
What to Serve with Homemade Twinkies?
Elevate your wonderful homemade Twinkies with delightful pairings that harmonize their soft sweetness and creamy filling.
-
Fresh Berries: Juicy strawberries, blueberries, or raspberries add a tart contrast to the sugary delight, making every bite refreshing.
-
Chocolate Sauce: Drizzling warm chocolate sauce over your Twinkies offers a rich, decadent twist that is simply irresistible.
-
Ice Cream: Serve with a scoop of vanilla or chocolate ice cream for a classic dessert experience that takes it over the top.
-
Whipped Cream: Fluffy whipped cream complements the rich filling, creating a dreamy combination that is sure to tantalize your taste buds.
-
Nutella Spreading: A thin layer of Nutella adds a delicious hazelnut flavor that pairs beautifully with the vanilla cake and filling.
-
Coffee or Milk: A warm cup of coffee or a glass of cold milk balances the sweetness of the Twinkies, enhancing their nostalgic taste.
-
Fruit Compote: A homemade fruit compote can introduce pleasing acidity and freshness, elevating the indulgent experience of each Twinkie.
-
Lemon Zest: Add bright lemon zest to the filling for a zesty twist. It brings a light and refreshing flavor that pairs wonderfully with the rich cake.
-
Chilled Sparkling Wine: A glass of bubbly complements the dessert’s sweetness, making it an elegant finish for a gathering or celebration.
Make Ahead Options
These Homemade Twinkies are perfect for meal prep enthusiasts! You can bake the sponge cakes up to 24 hours in advance, allowing them to cool completely before storing them in an airtight container at room temperature. The filling can also be prepared up to 3 days ahead; just keep it refrigerated in a separate container. When you’re ready to serve, simply pipe the filling into the cooled cakes for a freshly made taste. This method not only saves you time but ensures your Twinkies are just as delicious, with that light and fluffy texture intact. Why wait when you can treat yourself to homemade bliss any day?
Homemade Twinkies Recipe FAQs
How do I choose the right eggs for my homemade Twinkies?
Absolutely! Always select fresh eggs for your Homemade Twinkies. Look for eggs without any cracks or dark spots. Room temperature eggs whip better, enhancing volume and creating that fluffy texture we love in these treats. If you forget to take them out beforehand, you can place them in warm water for about 10 minutes to speed up the process!
How should I store my homemade Twinkies?
For best results, keep your Homemade Twinkies in an airtight container in the refrigerator for up to 4-5 days. If you’re storing them at room temperature, enjoy them within 1 day. To prevent sticking, layer parchment paper between each Twinkie, ensuring they stay fresh and delicious!
Can I freeze my homemade Twinkies?
Very much! To freeze Homemade Twinkies, wrap each one tightly in plastic wrap and place them in a freezer-safe bag. They can last for up to 3 months in the freezer. When you’re ready to enjoy them, simply thaw in the fridge overnight or at room temperature for a couple of hours. For a warm treat, you can microwave them for 10-15 seconds!
What if my Twinkies come out too dry or dense?
If your Homemade Twinkies turn out dry, it could be due to overbaking. Always check them a minute or two early, and ensure you’re using room temperature ingredients for better incorporation. For a lighter sponge, be gentle when folding in the flour; this helps maintain airiness. Remember, patience is key—allow them to cool completely before filling to maintain that perfect texture!
Are there any dietary considerations with the ingredients?
Definitely! If you or someone you’re serving has dietary restrictions, substitutes are easy to find. Use gluten-free flour for those avoiding gluten, or coconut and almond milk for dairy-free options. You can also choose coconut sugar instead of granulated sugar for a low-glycemic alternative. Always make sure to check labels for potential allergens!
How can I customize my filling for homemade Twinkies?
The more the merrier! You can easily customize the filling by incorporating chocolate chips, flavored extracts, or even fruit purees for a unique twist. If you want a chocolate version, you can use cocoa powder in the filling or a chocolate sponge with vanilla filling. Feel free to get creative and make these Homemade Twinkies uniquely yours!
Homemade Twinkies: Delightfully Nostalgic and Customizable Treats
Ingredients
Equipment
Method
- Preheat your oven to 350°F (175°C) and grease a Twinkie pan or a mini loaf pan with butter.
- Sift together the flour, baking powder, and salt in a small bowl.
- In a large mixing bowl, beat the eggs and sugar on high speed until thick and pale.
- Gently fold in vanilla extract and the sifted flour mixture into the egg and sugar mixture.
- Combine warm milk and melted butter in a separate bowl, then fold this into the batter.
- Fill the molds about 3/4 full with batter and bake for 12-15 minutes.
- Let the Twinkies cool in the pan for 5 minutes, then transfer to a wire rack.
- Beat the filling ingredients until smooth; prepare to fill the cooled Twinkies.
- Use a piping bag to inject the marshmallow filling into each cooled sponge.
- Serve immediately or refrigerate in an airtight container for up to 4-5 days.
Leave a Reply