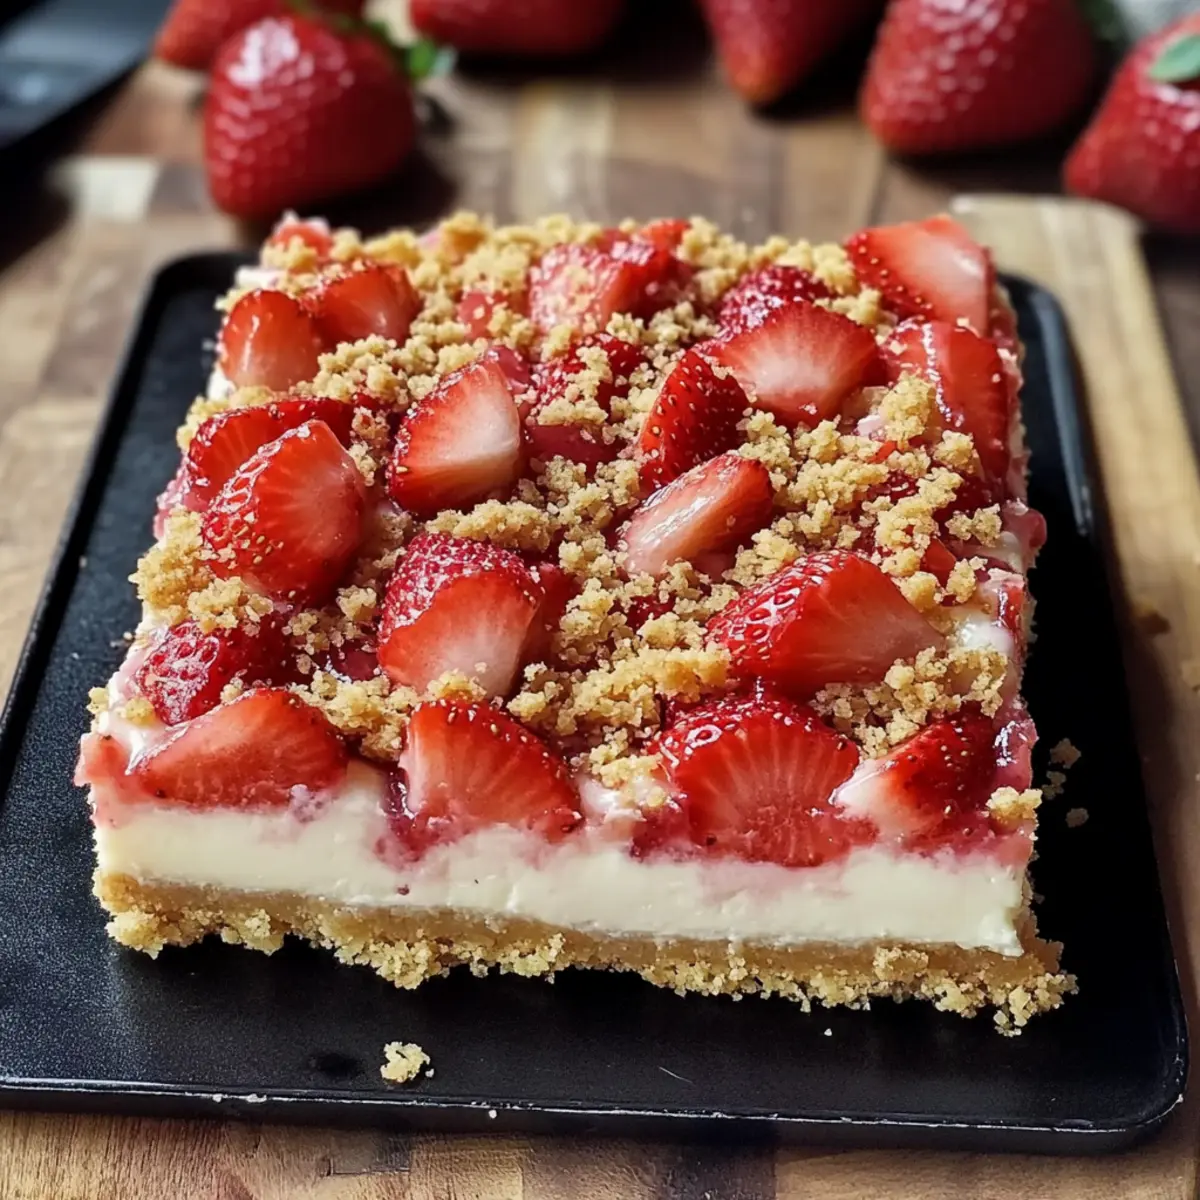
As I stood in my kitchen, the sweet scent of strawberries mingling with the buttery aroma of graham crackers brought me back to sun-drenched summer days. These Strawberry Cheesecake Bars are a delightful solution when you crave a dessert that’s both easy to make and visually stunning. With just a few simple ingredients, you can whip up a treat that’s not only a crowd-pleaser but also perfect for those who love to impress without the fuss. These versatile bars are ideal for summer get-togethers or cozy holiday celebrations, and if you’re looking for gluten-free options, I’ve got you covered! Each bite offers a luscious blend of creamy cheesecake and juicy strawberries, all layered on a crunchy crust. Isn’t it wonderful when dessert can be both beautiful and stress-free? Ready to dive into this irresistible recipe? Let’s get started!
Why Are Strawberry Cheesecake Bars So Irresistible?
Easy Preparation: With just a handful of ingredients, you’ll whip up these bars in no time, making them perfect for busy days or unexpected guests.
Bursting with Flavor: The combination of creamy cheesecake and fresh strawberries creates a balance of sweetness and tartness that pleases every palate.
Versatile Customization: You can easily replace strawberries with other fruits or even try an Oreo crust, giving you endless options for flavor suits all seasons.
Make-Ahead Delight: These bars are ideal for prepping in advance; simply store in the fridge for up to five days, ensuring dessert is always ready to impress.
Crowd-Pleaser: Whether it’s a summer picnic or holiday bash, these bars are sure to awaken sweet smiles and satisfied taste buds!
Strawberry Cheesecake Bars Ingredients
• Get ready for a deliciously easy treat!
For the Crust
- Graham Cracker Crumbs – The foundation of your bar’s crust; use gluten-free graham crackers for a gluten-free option.
- Melted Butter – Binds the crust together beautifully; can replace with coconut oil for a dairy-free treat.
- Granulated Sugar – Sweetens the crust perfectly; brown sugar gives a deeper flavor for those who love a twist.
For the Cheesecake Filling
- Cream Cheese – Makes the cheesecake smooth and creamy; low-fat cream cheese is a lighter alternative.
- Eggs – Critical for achieving the right texture; for a vegan version, substitute with flax eggs.
- Vanilla Extract – Intensifies the delicious flavor of the cheesecake; use pure vanilla extract for the best results.
- Salt – Balances all that sweetness; just a pinch will do wonders!
For the Topping
- Fresh Strawberries – Adds vibrant flavor and color; feel free to swap for other fresh berries if you like.
For the Crumble
- All-Purpose Flour – Provides structure to the crumble topping; almond flour can be used for a gluten-free version.
- Brown Sugar – Infuses a rich caramel-like sweetness; white sugar can be a direct substitute.
- Additional Melted Butter – Helps to bind the crumble together; coconut oil works well as an alternative.
Get ready to savor each bite of these delightful Strawberry Cheesecake Bars!
Step‑by‑Step Instructions for Strawberry Cheesecake Bars
Step 1: Preheat and Prepare
Preheat your oven to 350°F (175°C) and line a 9×9-inch baking dish with parchment paper, allowing some overhang for easy lifting after baking. This simple prep step creates a non-stick base that makes removing your delicious Strawberry Cheesecake Bars effortless once they’re ready.
Step 2: Make the Crust
In a medium bowl, combine graham cracker crumbs, melted butter, and granulated sugar, mixing until the texture resembles wet sand. Press this mixture firmly into the bottom of the prepared dish to create an even crust. Bake the crust in the preheated oven for about 10 minutes, until slightly golden and fragrant, then remove it to cool.
Step 3: Prepare the Cheesecake Filling
In a large mixing bowl, beat the cream cheese until smooth using an electric mixer. Gradually add in the eggs, granulated sugar, vanilla extract, and salt, continuing to mix until all ingredients are well blended and creamy. Pour the cheesecake mixture carefully over the cooled crust, smoothing the top with a spatula for an even layer.
Step 4: Add Fresh Strawberries
Evenly distribute the diced strawberries over the cheesecake layer, pressing them gently into the filling for better integration. This addition not only enhances the visual appeal of your Strawberry Cheesecake Bars but also infuses them with that juicy freshness that makes each bite memorable.
Step 5: Create the Crumble Topping
In another bowl, whisk together the all-purpose flour, brown sugar, and a pinch of salt. Stir in the melted butter until the mixture forms a crumbly texture. Sprinkle this crumble evenly over the strawberries, ensuring complete coverage to provide a delightful crunch to your finished bars.
Step 6: Bake to Perfection
Place the assembled dish back in the oven and bake for 35-40 minutes, or until the center is set but slightly jiggly. The edges should look firm, while the middle will slightly wobble when gently shaken. This balance ensures a creamy consistency in your Strawberry Cheesecake Bars.
Step 7: Cool and Chill
Once baked, remove the bars from the oven and let them cool on a wire rack for about one hour. After cooling, refrigerate for at least one hour to fully set the filling and develop the flavors, giving you that creamy, fruity bliss that’s perfect for serving.
Step 8: Serve and Enjoy
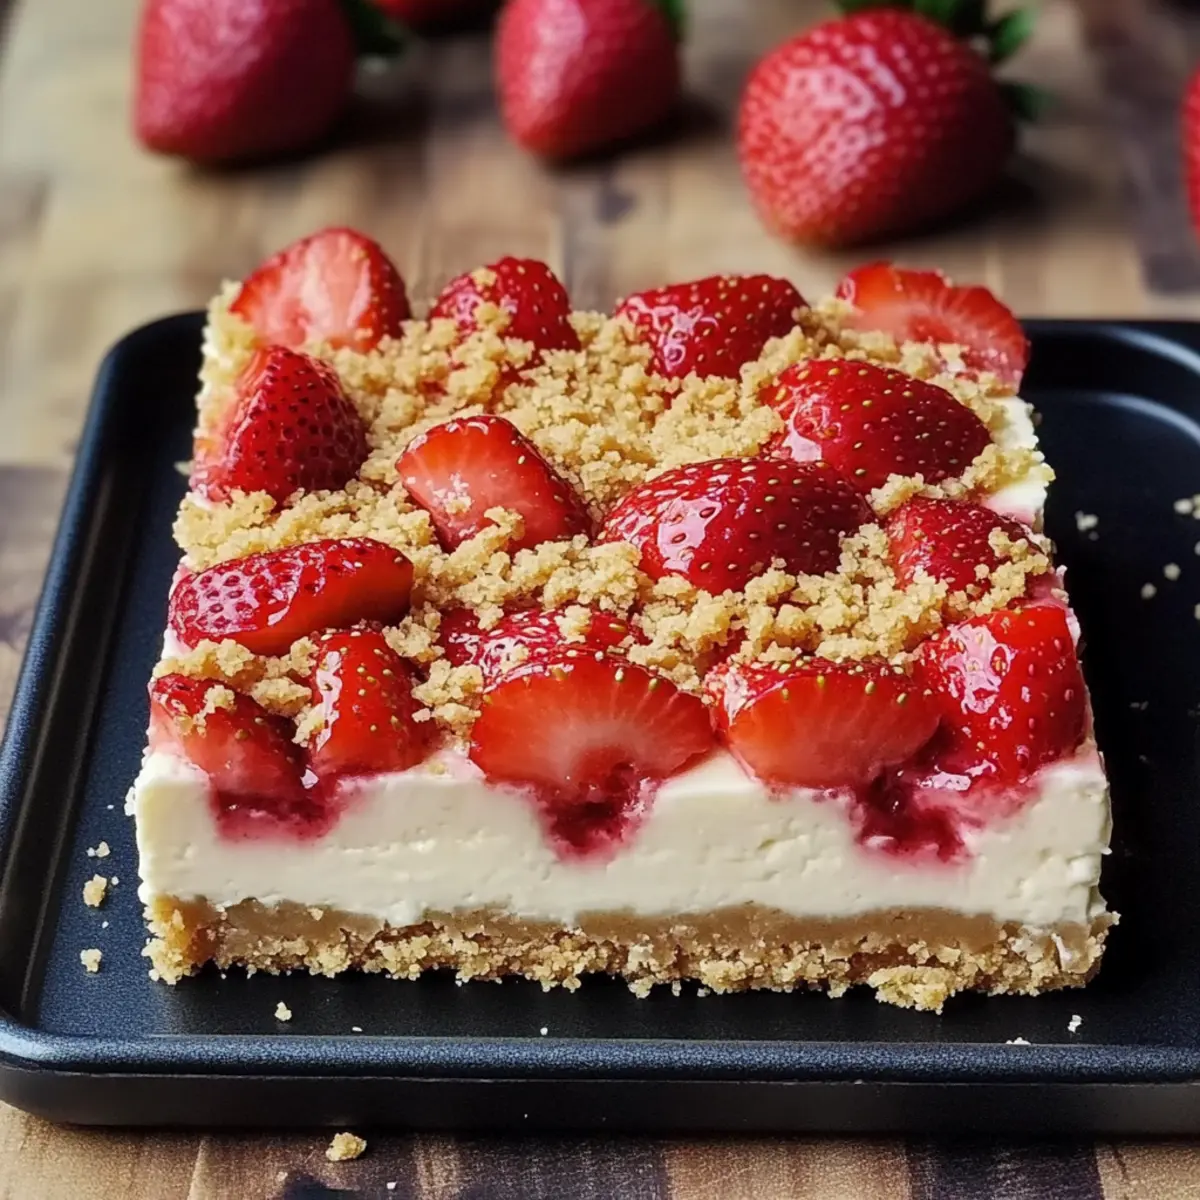
Once chilled, lift the bars out of the baking dish using the overhanging parchment paper. Cut into squares with a sharp knife for clean edges, and enjoy your exquisite Strawberry Cheesecake Bars. They pair wonderfully with whipped cream or additional fresh fruit for a delightful presentation at your next gathering!
Make Ahead Options
These Strawberry Cheesecake Bars are perfect for meal prep, allowing you to enjoy delightful homemade treats without the last-minute rush! You can prepare the crust and cheesecake filling up to 24 hours in advance. Simply assemble the crust and filling, cover tightly with plastic wrap, and refrigerate to keep them fresh. The strawberries can be sliced and stored in an airtight container for up to 3 days. When you’re ready to finish your Strawberry Cheesecake Bars, simply add the strawberries and crumble topping, bake as instructed, and enjoy a delicious dessert that tastes just as fresh as the day you made it!
Strawberry Cheesecake Bars Variations & Substitutions
Feel free to play around with the ingredients and make these Strawberry Cheesecake Bars your own delicious masterpiece!
-
Gluten-Free: Use gluten-free graham crackers instead of regular ones for a tasty twist that everyone can enjoy. You might not even notice the difference!
-
Dairy-Free: Swap the cream cheese for a dairy-free cream cheese alternative and coconut oil for the crust for a delightful version that’s just as creamy.
-
Sweetener Alternatives: Try using honey or maple syrup in place of granulated sugar for a lighter sweet touch; just adjust the amounts accordingly for taste.
-
Flavored Additions: Mix in a teaspoon of almond extract with the cheesecake filling to bring a new layer of flavor that perfectly complements the strawberries.
-
Fruit Variations: Replace strawberries with other juicy fruits like blueberries or raspberries; pomegranate seeds also add a burst of color and sweetness!
-
Spicy Kick: Add a pinch of cinnamon or ginger into your crust mixture for a cozy flavor that warms your heart, perfect for autumn gatherings.
-
Nutty Texture: For a crunchier topping, include chopped pecans or walnuts in the crumble mixture—it adds another delightful layer and nutrients to each bite.
-
Syrupy Sweetness: Drizzle some homemade strawberry syrup over your bars before serving to enhance sweetness and add a beautiful glaze that’s irresistible.
Explore your creativity and elevate these Strawberry Cheesecake Bars just the way you like! If you want to keep the delicious dessert inspiration going, check out these Strawberry Shortcake Macarons or dive into a slice of Chocolate Raspberry Cheesecake—you won’t regret it!
What to Serve with Strawberry Cheesecake Bars?
These delightful treats shine even brighter with the right accompaniments, transforming dessert into an unforgettable experience.
- Whipped Cream: A soft dollop adds velvety richness that elevates the sweet, fruity layers beautifully.
- Fresh Berries: A medley of raspberries or blueberries enhances the fruity explosion and adds a pop of color on the plate. Their tangy notes pair wonderfully with the creamy cheesecake.
- Mint Leaves: A fresh garnish not only looks stunning but also adds a hint of freshness that cuts through the sweetness, making each bite feel lighter.
- Chocolate Drizzle: A rich, bittersweet chocolate drizzle provides a luxurious contrast to the fruity bars, appealing to chocolate lovers’ hearts.
- Iced Tea or Lemonade: A refreshing glass of iced tea or lemonade balances the sweetness with vibrant acidity; the chill will match the delightful creaminess of the bars.
- Almond Biscotti: Crunchy biscotti brings a delightful textural contrast and optional nutty flavor that complements the creamy cheesecake, offering a sophisticated crunch.
- Coconut Macaroons: These chewy treats are perfect for adding a tropical twist, harmonizing with the creaminess of the cheesecake and the strawberries’ freshness.
- Coffee or Espresso: A warm cup of coffee or espresso balances the sweetness, providing a cozy way to enhance the overall dessert experience.
- Sundae Toppings: Think sprinkles or crushed nuts to offer texture and fun! Kids and adults alike will adore a playful twist to their dessert.
How to Store and Freeze Strawberry Cheesecake Bars
Fridge: Store your Strawberry Cheesecake Bars in an airtight container for up to 5 days. This ensures they stay fresh and perfectly creamy for whenever you crave a sweet treat.
Freezer: For longer storage, wrap the bars individually in plastic wrap and then place them in a freezer-safe container. They can be frozen for up to 2 months without sacrificing flavor.
Thawing: To enjoy frozen bars, simply transfer them to the fridge for a few hours or overnight to thaw. This helps maintain the delightful texture.
Reheating: These bars are best enjoyed chilled; do not reheat in the microwave as it may affect the creamy consistency.
Expert Tips for Strawberry Cheesecake Bars
-
Avoid Overbaking: Keep a close eye on your bars; they should be set with a slight jiggle in the center. Overbaking leads to a dry texture.
-
Chill Thoroughly: For the best flavor and texture, refrigerate the bars for at least an hour after baking. This enhances the creaminess of the cheesecake filling.
-
Sharp Knife Cuts: Use a sharp knife for slicing the bars to achieve clean cuts. This way, everyone can enjoy a beautiful piece of strawberry cheesecake bars!
-
Add Personal Touches: Feel free to experiment with toppings! Whipped cream or a sprinkle of crushed nuts elevate the presentation and taste perfectly.
-
Mix Fruit Varieties: Swap strawberries for seasonal fruits like raspberries or blueberries to keep things exciting and delicious.
Strawberry Cheesecake Bars Recipe FAQs
What type of strawberries should I use for the best flavor?
Absolutely! Fresh strawberries are ideal as they provide the best flavor and texture. Look for berries that are bright red, firm, and fragrant, avoiding any with dark spots or mushiness. If strawberries are out of season, consider using other seasonal fruits like blueberries or raspberries for a delightful twist.
How should I store leftover Strawberry Cheesecake Bars?
For maximum freshness, store your Strawberry Cheesecake Bars in an airtight container in the refrigerator for up to 5 days. Make sure they are fully cooled before storing to maintain their creaminess. If you want to keep them longer, you’ve got the option to freeze them—more on that in the next question!
Can I freeze these Strawberry Cheesecake Bars?
Yes! To freeze, wrap each bar individually in plastic wrap, then place them in a freezer-safe container. They can be stored for up to 2 months. When you’re ready to enjoy them, simply transfer the required amount to the fridge for a few hours to thaw. This method helps retain their delicious texture and taste.
What should I do if my cheesecake bars are too soft after baking?
If your bars appear too soft, don’t worry! It’s common for cheesecake to seem too soft when first taken out of the oven; they will firm up as they cool. Make sure they have set properly before cutting. If you find them consistently too soft, try baking a bit longer next time, but be cautious not to overbake!
Are Strawberry Cheesecake Bars safe for people with gluten intolerance?
Absolutely! You can make these bars gluten-free by substituting regular graham cracker crumbs with gluten-free options. Ensure that all other ingredients, like the crust and crumble toppings, are also free of gluten. This way, even your gluten-sensitive friends can enjoy a slice of this luscious dessert.
Can I customize this recipe with other flavors?
The more the merrier! You can easily customize the cheesecake flavor by adding different fruit purees or extract flavors. Try swapping the strawberries for peaches, mangoes, or even chocolate chips, and feel free to mix spices like cinnamon in the crust. The versatility of these Strawberry Cheesecake Bars will surely satisfy any craving!
Strawberry Cheesecake Bars: Creamy, Fruity Bliss You’ll Love
Ingredients
Equipment
Method
- Preheat your oven to 350°F (175°C) and line a 9x9-inch baking dish with parchment paper.
- In a medium bowl, combine graham cracker crumbs, melted butter, and granulated sugar, mixing until the texture resembles wet sand. Press firmly into the bottom of the prepared dish. Bake for about 10 minutes.
- In a large mixing bowl, beat cream cheese until smooth. Gradually add eggs, granulated sugar, vanilla extract, and salt, mixing until creamy. Pour over the cooled crust.
- Evenly distribute diced strawberries over the cheesecake layer, pressing gently into the filling.
- In another bowl, whisk together all-purpose flour, brown sugar, and a pinch of salt. Stir in melted butter until crumbly. Sprinkle over strawberries.
- Bake for 35-40 minutes, or until the center is set but slightly jiggly. Let cool on a wire rack for about one hour.
- Refrigerate for at least one hour to fully set. Lift bars out of the baking dish, cut into squares, and enjoy!
Leave a Reply