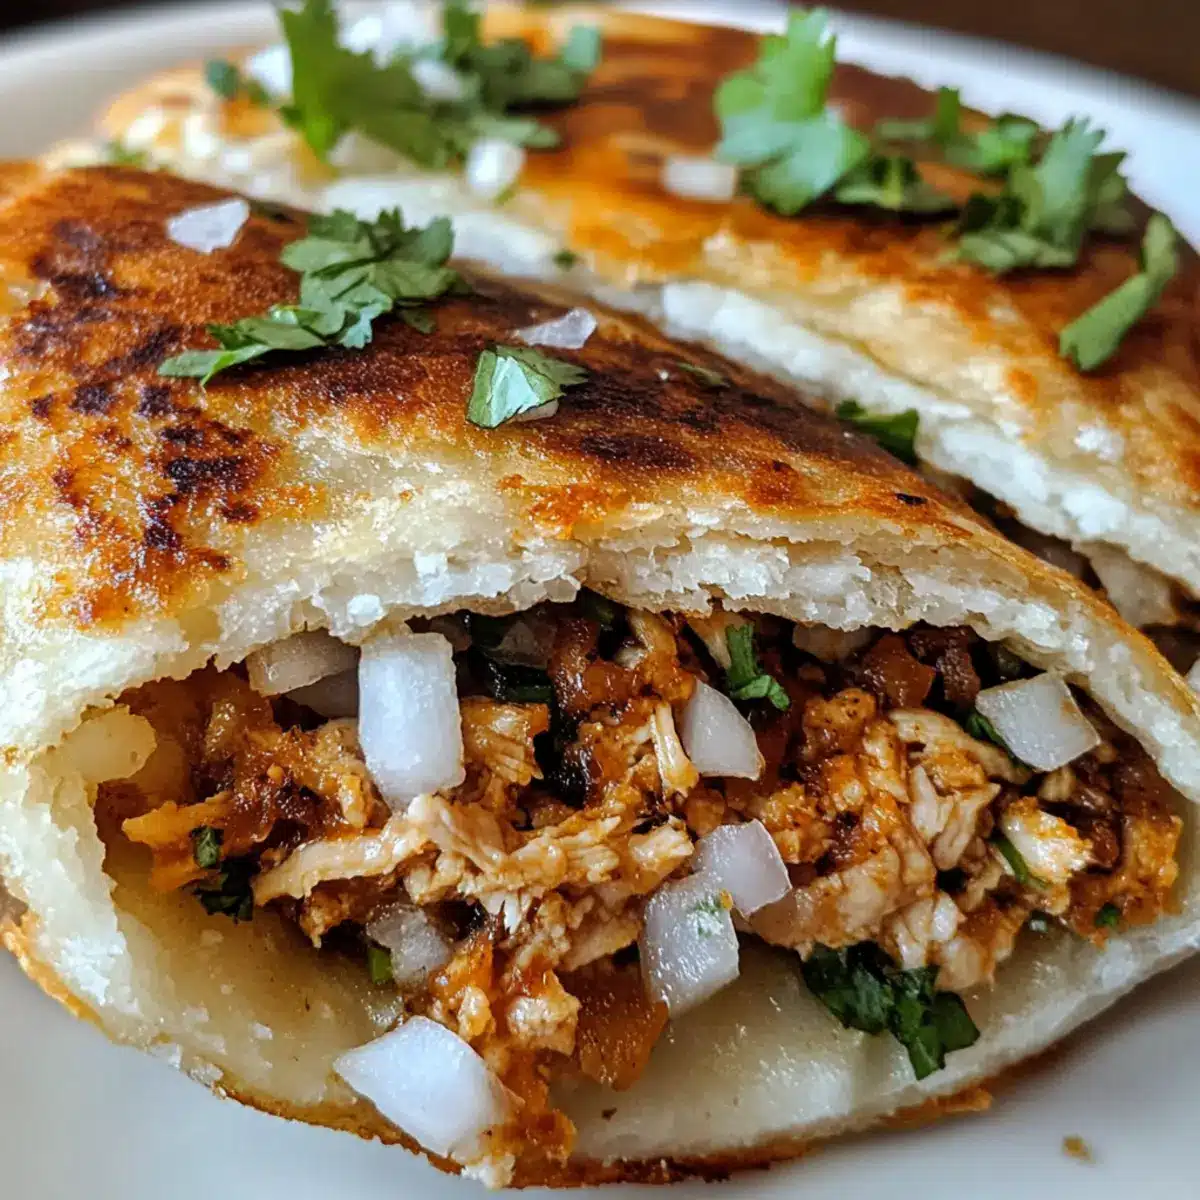
Traveling through the vibrant streets of Mexico, I stumbled upon a charming food stand, the air thick with enticing aromas and laughter. It was here I first tasted the mouthwatering Authentic Mexican Gorditas, a delightful fusion of crispy exterior and fluffy interior, filled to the brim with savory goodness. These delicious pockets are not just a meal; they’re a culinary embrace, perfect for a quick weeknight dinner or to impress guests at your next gathering. With endless possibilities for fillings—whether it’s shredded chicken, spiced beef, or colorful veggies for our vegetarian friends—these gorditas cater to every palate. Plus, they can easily be made gluten-free without sacrificing that beloved homemade taste! So, are you ready to bring a taste of Mexico right into your kitchen? Let’s dive into this scrumptious recipe together!
Why are Gorditas a must-try?
Endless customizations: These authentic Mexican gorditas offer countless variations with fillings, ensuring there’s something for everyone—meat lovers and vegetarians alike will be delighted.
Crispy meets fluffy: The perfect texture combination will have your taste buds dancing from the first bite, making them a unique addition to your recipes.
Quick and easy: With a straightforward preparation process, you’ll whip these up in no time, perfect for a busy weeknight meal.
A crowd-pleaser: Whether it’s a family dinner or a gathering with friends, these tasty pockets are bound to impress and satisfy all your guests.
Health-conscious options: Substitute ingredients effortlessly, making a gluten-free or vegetarian version without losing that authentic flavor. Try them with fresh toppings or alongside a refreshing Ensalada de Nopalitos for a complete meal experience!
Authentic Mexican Gorditas Ingredients
-
For the Dough
• Masa Harina – The heart of the dish, providing structure and that traditional flavor; opt for gluten-free masa harina if needed.
• Warm Water – Essential for hydrating the masa harina to form a pliable dough that’s easy to work with.
• Salt – A small addition that enhances the overall flavor of your gorditas.
• Vegetable Oil (2 tablespoons + for frying) – Adds richness to the dough and is crucial for frying to achieve that crispy exterior. -
For the Filling
• Shredded Chicken or Beef (2 cups) – The primary filling that packs in the protein; veggie lovers can substitute with refried beans or sautéed vegetables.
• Onion (1, diced) – Brings flavor and texture, making each bite more delightful.
• Fresh Cilantro (1 cup, chopped) – Adds a burst of freshness that balances the richness of the filling. -
For Serving
• Lime Wedges – Essential for squeezing over the gorditas, brightening each bite for a refreshing kick.
With these authentic Mexican gorditas ingredients, you’re all set to bring a taste of Mexico into your home kitchen, ready to customize to your heart’s desire!
Step‑by‑Step Instructions for Authentic Mexican Gorditas
Step 1: Prepare the Dough
In a large mixing bowl, combine masa harina and salt, then gradually add warm water. Mix until it starts to form a cohesive dough, then knead for about 5 minutes until smooth and pliable. Allow the dough to rest for at least 30 minutes; this helps achieve that perfect tender texture in your gorditas.
Step 2: Shape the Gorditas
After resting, divide the dough into 12 equal portions. Roll each piece into a smooth ball and flatten them into disks, about 1/4 inch thick. Use your hands or a rolling pin, ensuring they are evenly thick for consistent cooking. Set the shaped disks aside on a plate, ready for frying to create those delightful authentic Mexican gorditas.
Step 3: Heat the Oil
In a large skillet, pour in about 1/2 inch of vegetable oil and heat over medium-high until it reaches approximately 350°F (you can test this by dropping in a small piece of dough; it should sizzle). This step is crucial for achieving that crispy exterior. Keep an eye on the oil to ensure it does not overheat, as burnt oil will affect the flavor of your gorditas.
Step 4: Fry the Gorditas
Carefully place 2-3 dough disks into the hot oil, ensuring they do not overcrowd the pan. Fry each side for 2-3 minutes until golden brown and crispy, turning them gently with a slotted spoon. Once properly fried, they should puff slightly; this visual cue signals they are ready to be removed. Transfer the gorditas to a plate lined with paper towels to drain excess oil.
Step 5: Create the Pockets
Once the fried gorditas have cooled slightly, take a sharp knife and carefully cut a pocket into the side of each one. Be gentle to avoid tearing them apart; the goal is to create a perfect little pouch for your filling. This step is essential for enjoying the full experience of these authentic Mexican gorditas.
Step 6: Fill and Serve
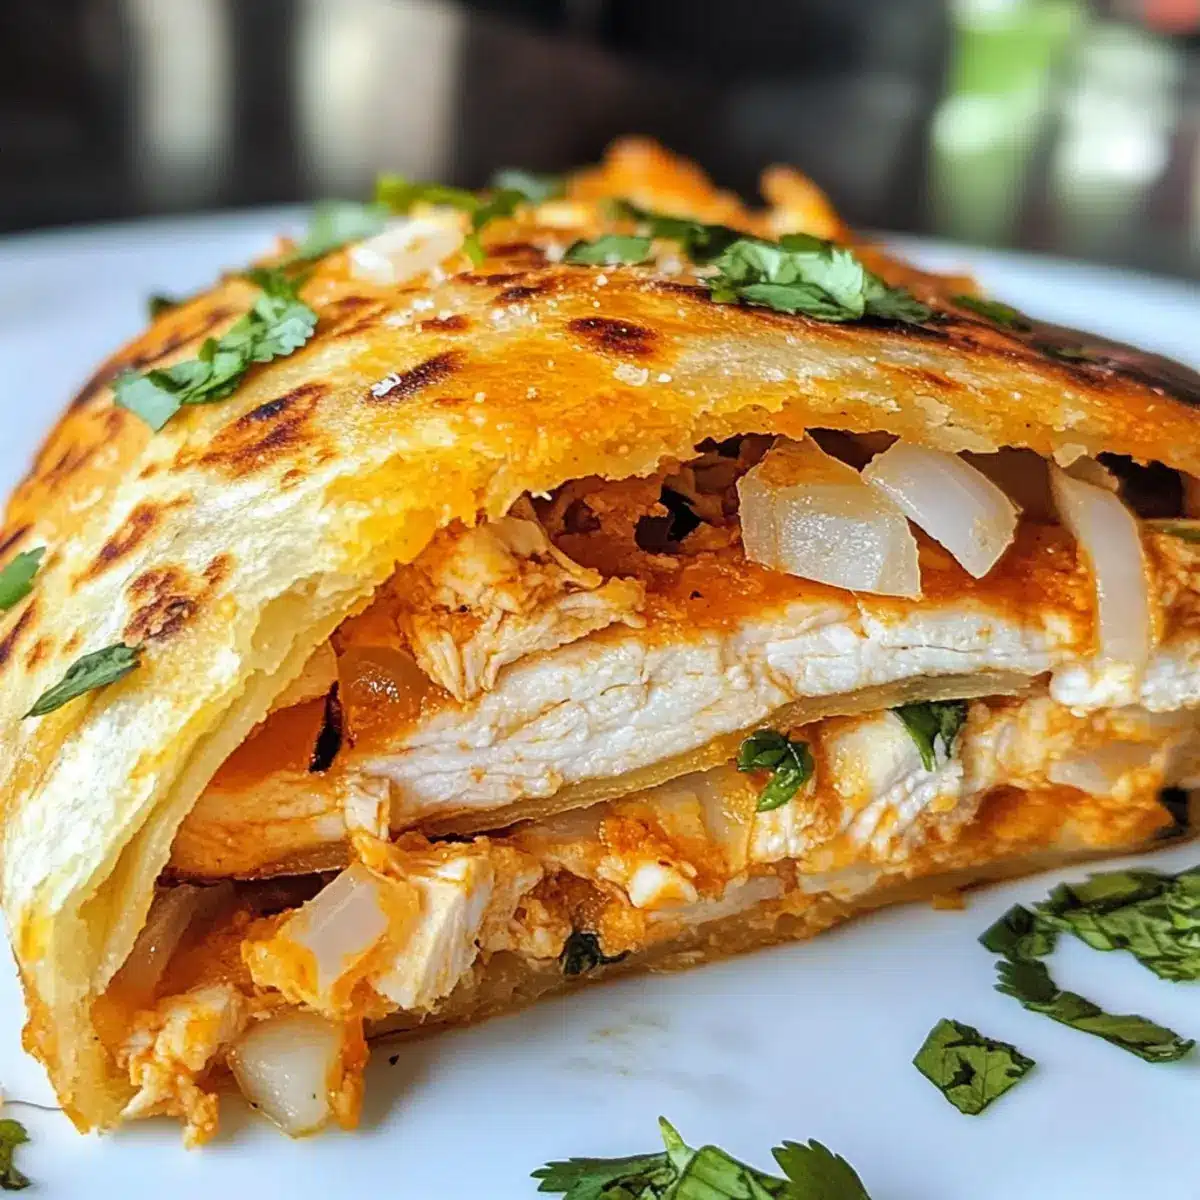
Now it’s time for the fun part! Load each gordita with your choice of shredded chicken, beef, or a vegetarian filling of your liking. Add diced onions, fresh cilantro, and of course, a squeeze of lime juice to brighten the flavors. Serve immediately while they’re still warm, and enjoy the incredible taste of your homemade authentic Mexican gorditas with family and friends.
Expert Tips for Authentic Mexican Gorditas
-
Knead Properly: Kneading the dough is essential; don’t rush this step, as it creates a tender texture in the authentic Mexican gorditas.
-
Monitor Oil Temperature: Use a thermometer to maintain the oil temperature. Too low will lead to greasy gorditas, while too high can burn them quickly.
-
Avoid Overcrowding: Fry only a few gorditas at a time to ensure they cook evenly and achieve that crispy exterior without steaming.
-
Poke and Puff: Poking holes in the dough disks before frying can prevent excessive puffing, ensuring the perfect pocket for fillings.
-
Experiment with Fillings: Don’t hesitate to try different proteins or vegetables—gorditas are easily customizable, perfect for every palate!
Authentic Mexican Gorditas Variations
Feel free to get creative and customize your gorditas to suit your culinary dreams and dietary preferences!
-
Protein Swap: Use seasoned ground beef, pulled pork, or grilled chicken for a hearty twist. Each filling brings its unique flavor, enhancing the gorditas experience.
-
Vegetarian Delight: Replace traditional meat fillings with refried beans, sautéed bell peppers, or roasted zucchini for a colorful and satisfying option. It’s a great way to enjoy the deliciousness without compromising on taste.
-
Gluten-Free Option: For those needing a gluten-free treat, simply substitute masa harina with a gluten-free corn flour blend. This ensures everyone can enjoy these delightful pockets!
-
Extra Crunch: Add a sprinkle of cheese to the filling before sealing the gorditas for a gooey, melty addition. Think about trying Oaxaca cheese for an authentic touch.
-
Spicy Variation: Spice things up by incorporating jalapeños or chipotle peppers into your filling mix. It adds a fiery kick that’s absolutely irresistible!
-
Creative Toppings: Elevate your gorditas with toppings like diced avocado, fresh pico de gallo, or homemade crema for a burst of flavor and color. Fresh ingredients really make a difference!
-
Herbal Boost: Fresh herbs such as mint or parsley can be added into the filling or as toppings, introducing a fresh taste that complements the gorditas beautifully.
-
Fruit Fusion: Experiment with tropical toppings like mango salsa to bring a sweet and zesty contrast to the savory fillings. This unexpected twist can become a new favorite!
Remember, the beauty of authentic Mexican gorditas lies in their versatility, so feel free to explore and find your perfect combination! And don’t forget to try pairing your gorditas with an enticing Mango Margarita or Ensalada de Nopalitos for a complete meal experience!
What to Serve with Authentic Mexican Gorditas
Bring a fiesta to your table with these satisfying, flavor-packed pockets that pair beautifully with a variety of side dishes and drinks.
-
Creamy Refried Beans: The rich, velvety texture complements the gorditas perfectly, adding a comforting element to your meal. Spoon them on the side or stuff them inside for a double dose of goodness.
-
Zesty Mexican Rice: This dish adds a burst of flavor and color to your plate. The bright seasonings contrast wonderfully with the savory fillings of your gorditas, making each bite an adventure.
-
Ensalada de Nopalitos: A fresh cactus salad that adds a crunchy, refreshing counterpart to the warm gorditas. With a zesty lime dressing, it balances the richness of the fillings beautifully.
-
Crispy Elote: This Mexican street corn is slathered in buttery, tangy goodness and topped with cheese, making for a delightful side that will complement the gorditas’ texture.
-
Guacamole with Tortilla Chips: A creamy, avocado-based dip adds a fresh, smooth texture. Pair it with crispy tortilla chips to contrast the soft gorditas and enhance the overall snacking experience.
-
Mango Margaritas: These fruity cocktails infuse a refreshing sweetness that pairs perfectly with the savory gorditas. The lightness will keep the mood festive and lively, elevating your meal into a true celebration.
Savor these pairings, and watch as they elevate your dining experience into a delicious Mexican feast!
How to Store and Freeze Authentic Mexican Gorditas
Fridge: Store leftover gorditas in an airtight container in the refrigerator for up to 3 days. Reheat in a preheated oven at 350°F for about 5-7 minutes for the best texture.
Freezer: To freeze, wrap each fried gordita individually in plastic wrap and place them in a freezer-safe bag or container. They can be stored for up to 3 months.
Reheating: For optimal flavor, reheat frozen gorditas in the oven, just like fresh, at 350°F for about 10-15 minutes or until heated through.
Make-Ahead: You can prepare the dough ahead of time and refrigerate it for up to 3 days, making it convenient for busy weeknights while retaining the deliciousness of your authentic Mexican gorditas.
Make Ahead Options
These authentic Mexican gorditas are a fantastic choice for meal prep enthusiasts! You can prepare the dough up to 3 days in advance; simply mix the masa harina, salt, and warm water, then form it into a ball and wrap it tightly in plastic wrap before refrigerating. For an extra time saver, you can also shape the dough into disks and place parchment paper between each one, storing them in an airtight container. When you’re ready to enjoy them, simply fry them up directly from the fridge and fill with your favorite protein or veggies. This way, you’ll have delicious homemade gorditas on your table without the last-minute rush!
Authentic Mexican Gorditas Recipe FAQs
What type of masa harina should I use?
I highly recommend using traditional masa harina for the best flavor and texture in your gorditas. If gluten-free, opt for a certified gluten-free masa harina or a corn flour blend, which works beautifully as a substitute without compromising the taste.
How should I store leftover gorditas?
Leftover gorditas can be stored in an airtight container in the refrigerator for up to 3 days. To reheat, preheat your oven to 350°F and warm them for approximately 5-7 minutes until they’re heated through and regain their delightful texture.
Can I freeze cooked gorditas?
Absolutely! To freeze, wrap each fried gordita individually in plastic wrap and then place them in a freezer-safe bag. They can be stored for up to 3 months. When you’re ready to enjoy, reheat them directly from the freezer in the oven at 350°F for about 10-15 minutes, and they’ll taste almost freshly made!
What should I do if my dough is too sticky?
If your dough turns out sticky, simply sprinkle in a little more masa harina, about a tablespoon at a time, and continue kneading until it reaches a smooth, pliable consistency. Ensuring your hands and the work surface are lightly dusted with masa harina during shaping can also help prevent sticking.
Can I use frozen filling for my gorditas?
Yes! If you’re using a frozen filling, make sure it is fully thawed and reheated before adding it to your gorditas. This ensures that everything is at a safe temperature and flavorful when served. For a busy weeknight, I often make a big batch of fillings ahead of time and freeze them in portions for convenience.
Are gorditas safe for my pets?
While sharing your food is tempting, it’s important to avoid giving your pets gorditas, especially if they contain ingredients like onions or certain spices, which can be harmful to them. Stick to pet-friendly treats to keep your furry friends safe!
Authentic Mexican Gorditas: Crispy Comfort Food You’ll Love
Ingredients
Equipment
Method
- In a large mixing bowl, combine masa harina and salt, then gradually add warm water. Mix until it starts to form a cohesive dough, then knead for about 5 minutes until smooth and pliable.
- Allow the dough to rest for at least 30 minutes.
- After resting, divide the dough into 12 equal portions. Roll each piece into a smooth ball and flatten them into disks, about 1/4 inch thick.
- In a large skillet, pour in about 1/2 inch of vegetable oil and heat over medium-high until it reaches approximately 350°F.
- Carefully place 2-3 dough disks into the hot oil, frying each side for 2-3 minutes until golden brown and crispy.
- Once fried, take a sharp knife and carefully cut a pocket into the side of each gordita.
- Load each gordita with your choice of filling, add diced onions, fresh cilantro, and squeeze lime juice over the top.
Leave a Reply