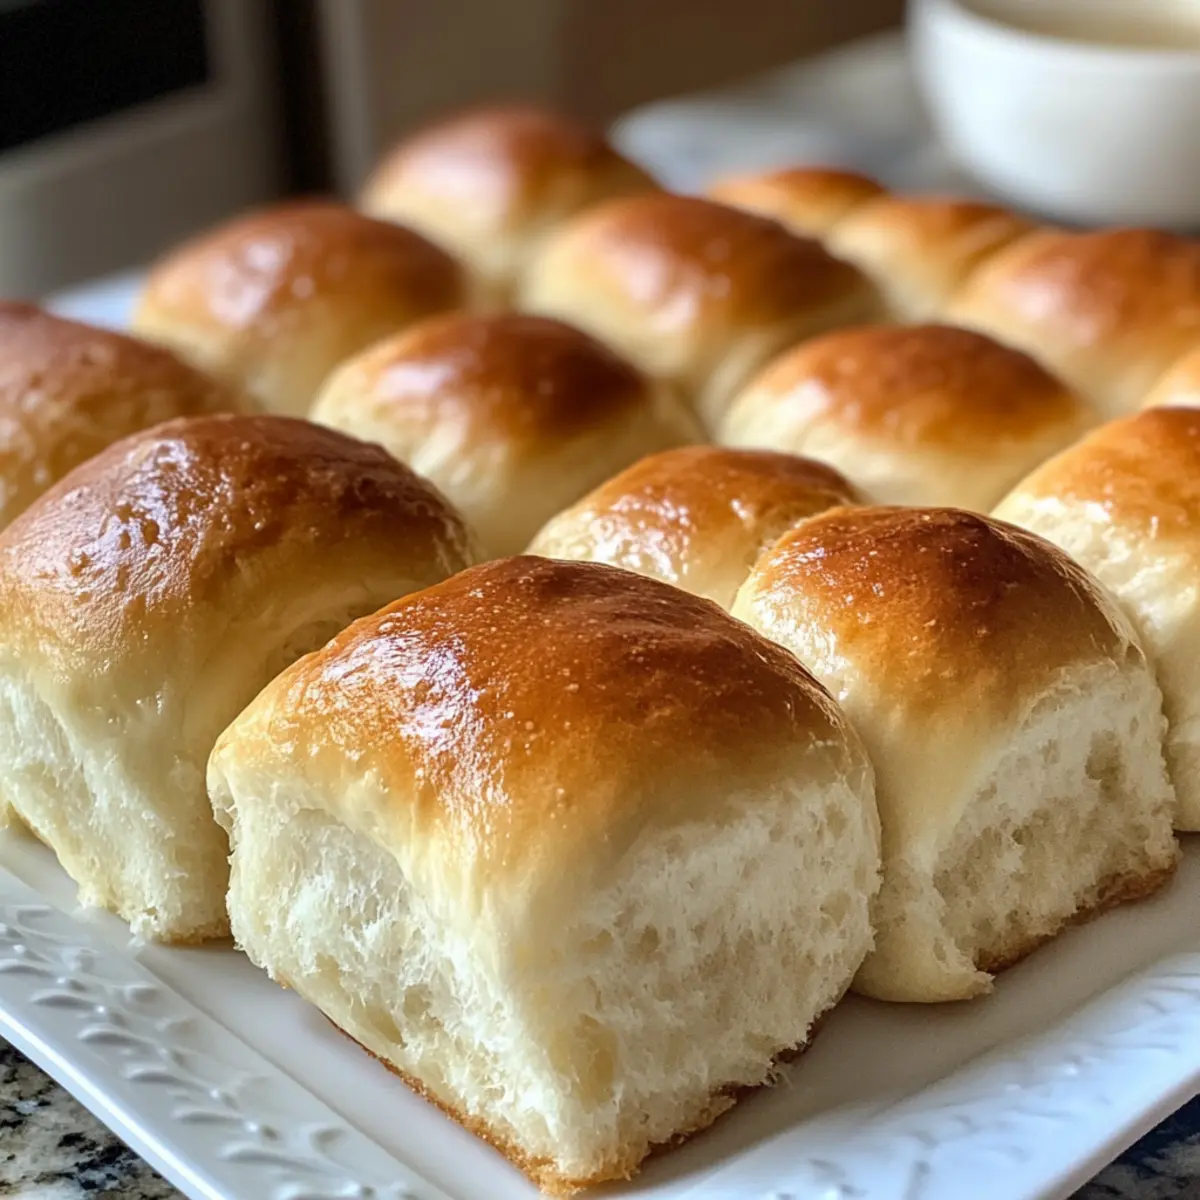
As I scooped a fluffy Buttermilk Roll off the baking sheet, the warm aroma wafted through my kitchen, instantly transporting me to my childhood family dinners. These rolls are the epitome of homemade goodness, and they’re not just a side dish; they’re a comforting hug on a plate. With their soft, buttery texture and golden crust, these Buttermilk Rolls are an effortless way to elevate any meal. They’re perfect for holiday gatherings or cozy weeknight dinners, effortlessly pairing with soups, pastas, and chilis. Plus, they’re surprisingly quick to prepare, making them an ideal choice for both novice chefs and seasoned kitchen warriors. Are you ready to knead, roll, and bake your way to the fluffiest dinner rolls you’ve ever made?
Why are Buttermilk Rolls a must-try?
Warmth and Comfort: Every bite of these rolls brings a sense of nostalgia. Easy to Make: The recipe is straightforward, perfect for both beginners and experienced bakers. Fluffy Texture: They rise beautifully, creating an ideal fluffy bite that melts in your mouth. Versatile Pairing: Perfectly complements various dishes, like soups and chilis—check out my Pepperoni Pizza Rolls for a delicious pairing idea! Quick Preparation: In under two hours, you can have fresh rolls ready to wow your family or guests—ideal for last-minute entertaining. Golden Crust: The beautiful, crispy exterior isn’t just for looks; it adds delightful crunch to the soft interior.
Buttermilk Rolls Ingredients
• • These delightful rolls are made with simple ingredients that create a perfect homemade touch.
For the Dough
- Buttermilk – Provides creaminess and tenderness to the rolls. Note: Can substitute with milk and vinegar (1 cup milk + 1 tablespoon vinegar).
- All-purpose Flour – Forms the structure of the rolls. Note: Bread flour can also be used for different texture results.
- Active Dry Yeast – Causes the dough to rise. Ensure yeast is fresh for best results.
- Granulated Sugar – Adds sweetness to the dough.
- Salt – Enhances flavor; essential in baking.
- Baking Powder – Helps achieve the perfect texture and rise.
- Milk – Added to the egg wash and inside the rolls for moisture.
For Egg Wash
- Egg – Used for the egg wash to give the tops a golden color.
- Milk – Combined with the egg to create a glossy finish.
These Buttermilk Rolls are a must-have on your table, and with these ingredients, you’ll enjoy that fluffy, buttery goodness in no time!
Step‑by‑Step Instructions for Buttermilk Rolls
Step 1: Activate the Yeast
In a stand mixer, combine 1 cup of warm milk (110°F) and 2 teaspoons of active dry yeast. Let the mixture sit for about 10 minutes until it becomes frothy, signaling that the yeast is active and ready to work its magic. This step is crucial for achieving those fluffy Buttermilk Rolls that everyone loves.
Step 2: Mix the Ingredients
Once your yeast is bubbly, add 1 cup of buttermilk, 1/4 cup of granulated sugar, and 1 teaspoon of salt to the bowl. Mix on medium speed until everything is well combined, creating a smooth base for your dough. The buttermilk contributes to the tenderness while enhancing the flavor of your rolls.
Step 3: Combine Dry Ingredients
Gradually add in 2 cups of all-purpose flour and 1 tablespoon of baking powder to the wet mixture. Keep mixing on medium speed until the dough begins to pull away from the sides of the bowl, creating a cohesive mass. It should look slightly sticky, indicating it’s ready for the next step in crafting your Buttermilk Rolls.
Step 4: Knead the Dough
Sprinkle a small amount of flour onto a clean surface and transfer the dough. Knead it for about 5-7 minutes, until it turns smooth and elastic. Remember, the key here is to ensure the dough is soft and not too dry; this will help achieve that irresistible light texture in your rolls.
Step 5: First Rise
Place your kneaded dough into an oiled bowl, turning it to coat. Cover with a damp cloth and let it rise in a warm area for 1-2 hours, or until it has doubled in size. This rising time allows the yeast to create air bubbles, making your Buttermilk Rolls nice and fluffy.
Step 6: Shape the Dough
After the dough has risen, punch it down gently to release air. Shape it into a log and cut it into 12 equal pieces. Roll each piece into a ball, making them smooth and round. This process helps to create those beautiful, fluffy rolls that will elevate any meal.
Step 7: Second Rise
Transfer the shaped rolls to a parchment-lined baking sheet, placing them close together for a soft finish. Cover them with a cloth and let them rise for another hour until they puff up nicely. This second rise ensures an airy texture, giving your Buttermilk Rolls that melt-in-your-mouth quality.
Step 8: Preheat the Oven
While the rolls are rising, preheat your oven to 375°F (190°C). The perfect temperature for achieving a golden, crispy exterior while the inside remains deliciously soft. Preparing your oven now allows the rolls to go right in once they’ve completed their rising time.
Step 9: Brush with Egg Wash
In a small bowl, whisk together 1 egg and 2 tablespoons of milk for the egg wash. Once your rolls have risen, gently brush the mixture over the tops of each roll. This step not only adds a beautiful shine but also enhances their golden color as they bake, making your Buttermilk Rolls even more appetizing.
Step 10: Bake
Carefully place the baking sheet in the preheated oven and bake the rolls for 13-15 minutes, or until golden brown on top. You’ll know they’re done when they sound hollow when tapped on the bottom. The aroma filling your kitchen will be the perfect signal that your Buttermilk Rolls are ready to be enjoyed.
Step 11: Cool Before Serving
Once baked, transfer the rolls to a wire rack to cool for at least 10 minutes. This cooling time helps to ensure that the rolls maintain their soft, fluffy texture. Allowing them to cool also enhances their flavors, making every bite of your Buttermilk Rolls absolutely delightful.
Make Ahead Options
These Buttermilk Rolls are perfect for meal prep enthusiasts looking to save time during busy weeks! You can prepare the dough up to 24 hours in advance by following the first rise instructions and then refrigerating the dough (just make sure it’s covered tightly to prevent drying out). When you’re ready to bake, allow the dough to come to room temperature and proceed with shaping the rolls. Alternatively, you can shape the rolls and place them on a baking sheet, cover, and refrigerate for up to 3 days. Just take them out about 30 minutes before baking to let them rise properly. With these tips, you’ll enjoy deliciously fluffy Buttermilk Rolls with ease, making any meal feel special without the last-minute rush!
What to Serve with Buttermilk Rolls
Imagine your dinner table bursting with flavor, where soft, buttery rolls steal the spotlight and pair perfectly with your favorite dishes.
-
Creamy Mashed Potatoes: The smooth and velvety texture of mashed potatoes creates a delectable contrast to the fluffy rolls, making every bite irresistible.
-
Rich Beef Chili: The hearty flavors of chili soak into the rolls, creating a delightful experience that warms the heart and soul.
-
Fabulous French Onion Soup: The sweetness of caramelized onions paired with gooey cheese is elevated when you dip a warm roll into the savory broth.
-
Garlicky Green Beans: Fresh green beans toss with garlic bring crunch and flavor that beautifully balances the soft tenderness of Buttermilk Rolls.
-
Garden Salad with Vinaigrette: Crisp lettuce and vibrant veggies dressed in a tangy vinaigrette provide a refreshing complement, perfect alongside your rolls.
-
Apple Pie à la Mode: End your meal on a sweet note. The combination of warm apple pie and a scoop of vanilla ice cream pairs well with the buttery rolls you’ve enjoyed.
-
Hot Apple Cider: A warm drink that enhances the cozy vibe of your meal, making it the perfect accompaniment while you savor fluffy Buttermilk Rolls.
These delightful pairings make each meal memorable, inviting warmth and comfort to your table!
Buttermilk Rolls: Endless Possibilities
Customize your Buttermilk Rolls with these delicious twists that will ignite your creativity in the kitchen!
-
Whole Wheat: Replace some or all of the all-purpose flour with whole wheat flour for added nutrition and a slightly nutty taste. The hearty flavor enhances your rolls while still keeping them soft.
-
Dairy-Free: Substitute buttermilk with your favorite non-dairy milk and add vinegar to retain that tangy flavor. These will still be fluffy and comforting, perfect for everyone at the table!
-
Cheesy Delight: Mix in shredded cheese, such as cheddar or Parmesan, into the dough for a rich and savory flavor. These cheesy rolls are fantastic alongside soups or as a snack on their own.
-
Herbed Goodness: Add fresh or dried herbs, like rosemary or thyme, to the dough for a fragrant touch. Herb-infused rolls pair beautifully with roasted meats and Mediterranean dishes.
-
Garlic Rolls: Brush the tops with melted butter mixed with minced garlic before baking for a delectable garlic flavor. These rolls are sure to be a crowd-pleaser, especially when served with pasta dishes!
-
Spicy Kick: Incorporate chopped jalapeños or crushed red pepper flakes into the dough for a spicy twist. Spice lovers will appreciate this fiery version as a unique accompaniment to their meals.
-
Sweet Rolls: For a sweeter option, add cinnamon and sugar to the dough. After baking, drizzle with a simple glaze made from powdered sugar and milk for a dessert-like treat that’s still a comforting comfort food.
-
Pair with Ideas: Looking for delicious pairings? Try these rolls with a bowl of warming chili or my scrumptious Pepperoni Pizza Rolls for a delightful dinner spread!
These variations not only enhance the flavor but also transform your Buttermilk Rolls into unique creations that your family and friends will love. Enjoy experimenting and bringing your personal touch to this beloved recipe!
Expert Tips for Buttermilk Rolls
-
Yeast Activation: Always ensure the milk is warm, not hot, around 110°F (43°C), to activate the yeast without killing it.
-
Flour Type: For a different texture, experiment with bread flour instead of all-purpose flour; it can yield an even fluffier result!
-
Knead Until Smooth: Knead the dough until it’s smooth and elastic; this step is critical for achieving that soft texture you love in Buttermilk Rolls.
-
Rising Time: Allow sufficient rising time—about 1-2 hours for the first rise, and 1 hour for the second—for rolls that double in size and become light.
-
Egg Wash Shine: Apply the egg wash evenly for a beautiful golden crust, enhancing both taste and presentation when baked.
-
Storage Tips: Let the rolls cool completely before storing them in a plastic bag to prevent moisture buildup that can make them soggy.
How to Store and Freeze Buttermilk Rolls
Room Temperature: Store fully cooled Buttermilk Rolls in a plastic bag at room temperature for up to 3 days to maintain their soft texture.
Fridge: For longer freshness, place the rolls in an airtight container in the fridge for up to a week, but note that this may slightly affect their texture.
Freezer: Freeze Buttermilk Rolls for up to 3 months by wrapping each roll tightly in plastic wrap. For best quality, thaw and consume them within a day for optimal fluffiness.
Reheating: To reheat, place thawed rolls in a preheated oven at 350°F (175°C) for about 5-10 minutes until warm, reviving their freshly baked taste.
Buttermilk Rolls Recipe FAQs
What type of buttermilk should I use for my Buttermilk Rolls?
You can use store-bought buttermilk for the best flavor and texture. If you don’t have any on hand, create a quick substitute by combining 1 cup of milk with 1 tablespoon of vinegar or lemon juice. Let it sit for about 5-10 minutes until it thickens slightly; this will give your rolls the desired tenderness.
How should I store leftover Buttermilk Rolls?
After baking, allow your Buttermilk Rolls to cool completely and then store them in a plastic bag at room temperature for up to 3 days. If you want them to last longer, place them in an airtight container in the fridge for up to a week, but be aware that refrigerating may affect their soft texture slightly.
Can I freeze Buttermilk Rolls, and how should I do it?
Absolutely! To freeze your Buttermilk Rolls, wrap each roll tightly in plastic wrap, ensuring they’re well sealed to prevent freezer burn. Place the wrapped rolls in a freezer-safe bag or container. They can be stored for up to 3 months. When ready to enjoy, simply thaw them at room temperature or reheat them in the oven at 350°F (175°C) for about 5-10 minutes until warmed through.
Why are my Buttermilk Rolls not rising properly?
If your rolls aren’t rising, there could be a few reasons. First, ensure your yeast is fresh; expired yeast won’t activate. Secondly, check that the milk is warm enough (about 110°F) when activating the yeast, as hot milk can kill it. Lastly, make sure you’re allowing ample time for the dough to rise—1-2 hours for the first rise should give it enough time to double in size.
Can I make these rolls ahead of time?
Yes, you can! Prepare the dough up to the first rise, then punch it down and refrigerate it overnight. The next day, allow the dough to come to room temperature before shaping, letting the rolls rise again before baking. This allows for fresh, baked rolls with minimal last-minute effort, perfect for busy days or special occasions!
Are there any dietary considerations for these rolls?
These Buttermilk Rolls contain dairy and gluten, so they may not be suitable for those with lactose intolerance or gluten sensitivities. If you have dietary restrictions, consider swapping the buttermilk with a non-dairy alternative, like almond milk with a splash of vinegar, and using a gluten-free all-purpose flour mix to achieve a similar texture and flavor.
Buttermilk Rolls: Soft, Fluffy Goodness for Your Table
Ingredients
Equipment
Method
- In a stand mixer, combine 1 cup of warm milk (110°F) and 2 teaspoons of active dry yeast. Let sit for about 10 minutes until frothy.
- Add 1 cup of buttermilk, 1/4 cup of granulated sugar, and 1 teaspoon of salt to the bowl. Mix on medium speed until well combined.
- Gradually add in 2 cups of all-purpose flour and 1 tablespoon of baking powder to the wet mixture. Mix until the dough pulls away from the bowl.
- Transfer the dough to a floured surface and knead for 5-7 minutes until smooth and elastic.
- Place the kneaded dough in an oiled bowl, cover with a damp cloth, and let rise in a warm area for 1-2 hours.
- Punch down the risen dough, shape it into a log, and cut it into 12 equal pieces.
- Roll each piece into a ball and place on a parchment-lined baking sheet. Let rise for another hour.
- Preheat your oven to 375°F (190°C).
- Whisk together 1 egg and 2 tablespoons of milk for the egg wash. Brush over the tops of the rolls.
- Bake for 13-15 minutes until golden brown on top. Cool on a wire rack for at least 10 minutes before serving.
Leave a Reply