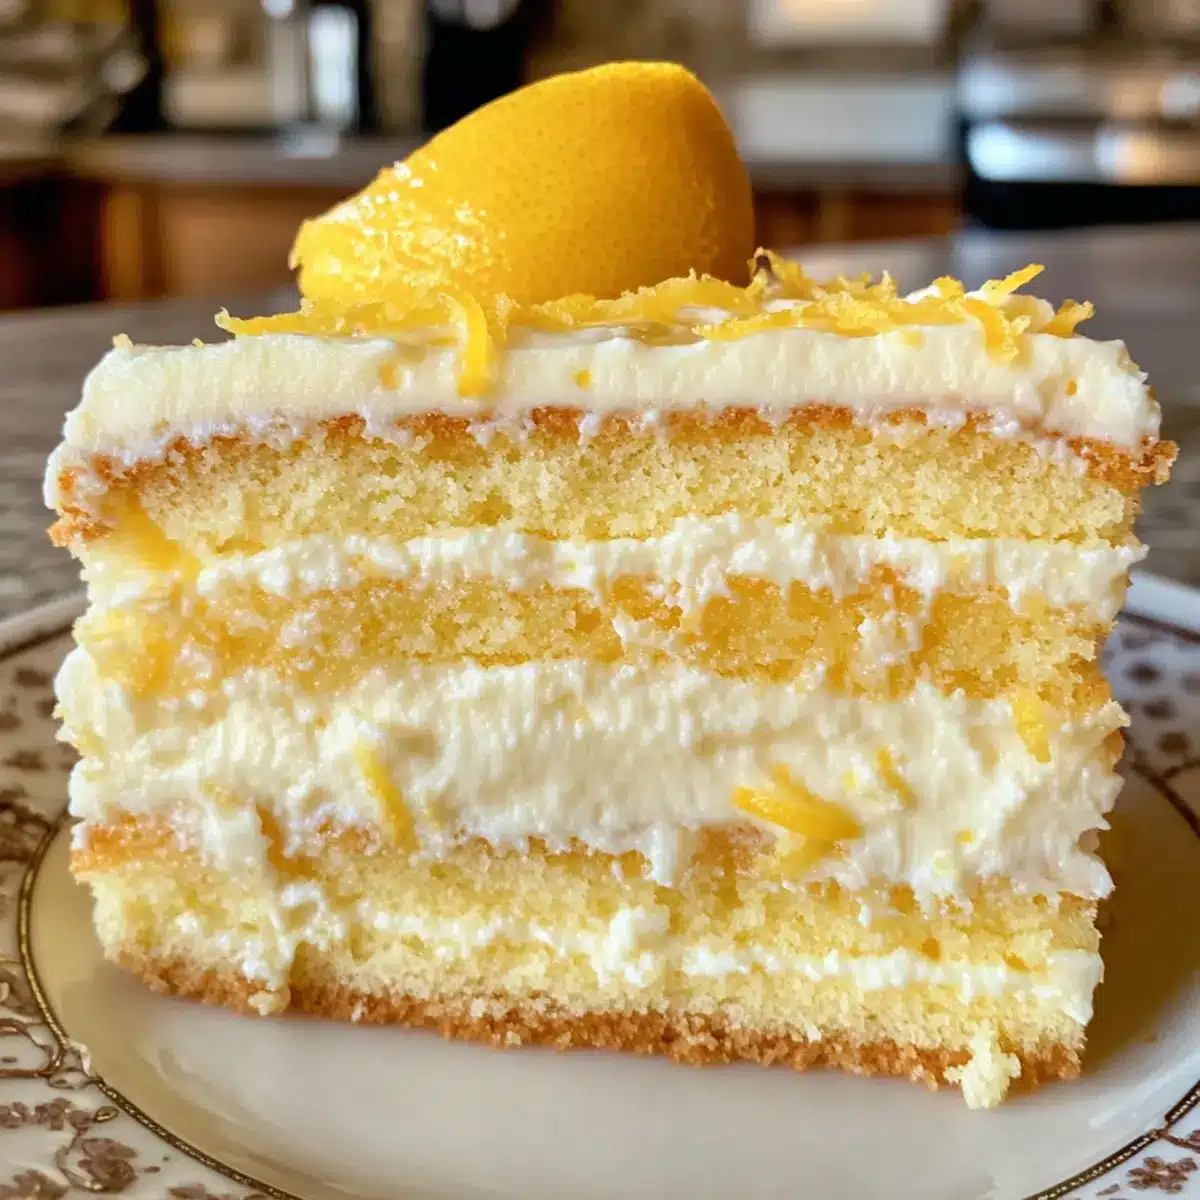
As I stood in my kitchen, the unmistakable scent of lemon zest wafted through the air, instantly transporting me to sunny summer afternoons. This Creamy Lemon Cheesecake Cake is the ultimate combination of rich creaminess and bright citrus flavor—a dessert that elegantly straddles the line between indulgence and refreshment. Not only is this recipe a crowd-pleaser, but it’s also surprisingly quick to assemble, making it perfect for any gathering or a special treat just for you. You’ll impress friends and family with its stunning layers, and perhaps the best part is how wonderfully it holds up in the fridge, developing even more flavor as it chills. What’s your favorite dessert to whip up when the mood strikes?
Why is this dessert a summer must?
Simplicity at its finest: This Creamy Lemon Cheesecake Cake is easy to prepare, making it ideal for both novice bakers and seasoned chefs. Bright, zesty flavors shine through the creamy cheesecake layer, creating a balance that refreshes the palate. Versatile in serving options, it pairs beautifully with fresh berries or a dollop of whipped cream for an elegant touch. Make-ahead friendly and improves in flavor after chilling, this cake is perfect for gatherings or a sweet surprise for yourself. And if you’re a fan of citrus delights, you’ll love this alongside my Lemon Truffles Minutes!
Creamy Lemon Cheesecake Cake Ingredients
For the Cheesecake Layer
• Full-Fat Cream Cheese – Provides richness and creaminess; avoid low-fat versions for the best texture.
• Granulated Sugar – Sweetens the cheesecake while balancing the tartness of lemon.
• Sour Cream – Adds moisture and a slight tang that’s essential for flavor.
• Lemon Extract – Enhances the overall lemon flavor; for a fresher taste, consider using lemon zest.
• Eggs – Essential for binding; make sure they are at room temperature for best results.
For the Lemon Cake Layers
• Butter – Key for moisture and structure; ensure it’s softened before using.
• Buttermilk – Adds tenderness and richness, making the cake lighter.
• Cake Flour – Creates a tender crumb that’s light and fluffy.
• Baking Powder/Soda – Essential for leavening to help the cake rise.
• Salt – Enhances the flavor across both layers.
For Frosting
• Powdered Sugar – For sweetness and fluffiness in frosting; add gradually to avoid sugar clouds.
• Remaining Cream Cheese – Ensures the frosting remains creamy and consistent with the cheesecake.
Step‑by‑Step Instructions for Creamy Lemon Cheesecake Cake
Step 1: Preheat the Oven for the Cheesecake
Begin by preheating your oven to 300°F (150°C). This lower temperature is crucial for baking the cheesecake layer gently, preventing cracks. While it heats, prepare a water bath by placing a larger pan filled with hot water in the oven’s lower rack. This step will help keep the moisture in the oven, ensuring a smooth, creamy texture for your Creamy Lemon Cheesecake Cake.
Step 2: Prepare the Springform Pan
Grease a 9-inch springform pan with butter, then line the bottom with parchment paper for easy removal after baking. This will ensure that your cheesecake layer stays intact when you release it later. Set the prepared pan aside, ready to hold the luscious cheesecake batter once it’s mixed to perfection.
Step 3: Mix the Cheesecake Batter
In a large mixing bowl, beat 16 ounces of softened full-fat cream cheese with an electric mixer until smooth and creamy, about 2-3 minutes. Gradually add in 1 cup of granulated sugar, a pinch of salt, and ½ cup of sour cream, mixing until fully combined. Then, incorporate 1 teaspoon of lemon extract and add 3 large eggs one at a time, mixing just until blended, being careful not to overmix to avoid cracks later.
Step 4: Bake the Cheesecake
Pour the cheesecake batter into the prepared springform pan, smoothing the top with a spatula. Carefully place the pan in the water bath you prepared earlier, and bake for about 45 minutes. The edges should appear set, while the center may still have a slight jiggle. Turn the oven off and leave the cheesecake in for an additional hour to cool slowly, which will help prevent cracking.
Step 5: Cool and Chill the Cheesecake
Once the hour is up, remove the cheesecake from the oven and allow it to cool at room temperature. After it has cooled, refrigerate for at least 4 hours or overnight. This chilling step is essential for developing the rich flavor and creamy texture of your Creamy Lemon Cheesecake Cake, making it easier to layer later.
Step 6: Prepare the Lemon Cake Layers
When you’re ready to bake the lemon cake layers, preheat your oven to 350°F (175°C). In a large bowl, whisk together 1 ½ cups of cake flour, 1½ teaspoons of baking powder, ½ teaspoon of baking soda, and a pinch of salt. This mixture will create the tender crumb you want for your lemon layers. Set aside while you mix the wet ingredients.
Step 7: Cream Butter and Sugar
In another bowl, cream together ½ cup of softened butter and 1 cup of granulated sugar until light and fluffy, about 3-5 minutes. This is a vital step for incorporating air into the batter, leading to a light cake. Then, mix in 2 large eggs one at a time, followed by ½ cup of buttermilk and 1 teaspoon of lemon extract, blending well after each addition.
Step 8: Combine the Cake Batters
Gradually add the dry ingredients to the butter mixture, stirring gently to combine. Avoid overmixing to maintain the lightness of your lemon cake layers. Once everything is combined, you should have a smooth batter ready for the oven. Distribute the batter evenly between two prepared 9-inch round cake pans.
Step 9: Bake the Cake Layers
Bake the lemon cake layers in the preheated oven for 20-24 minutes. They are done when a toothpick inserted into the center comes out clean or with a few moist crumbs attached. Once baked, remove the layers from the oven and allow them to cool in the pans for about 10 minutes; then, transfer to wire racks to cool completely.
Step 10: Assemble the Cake
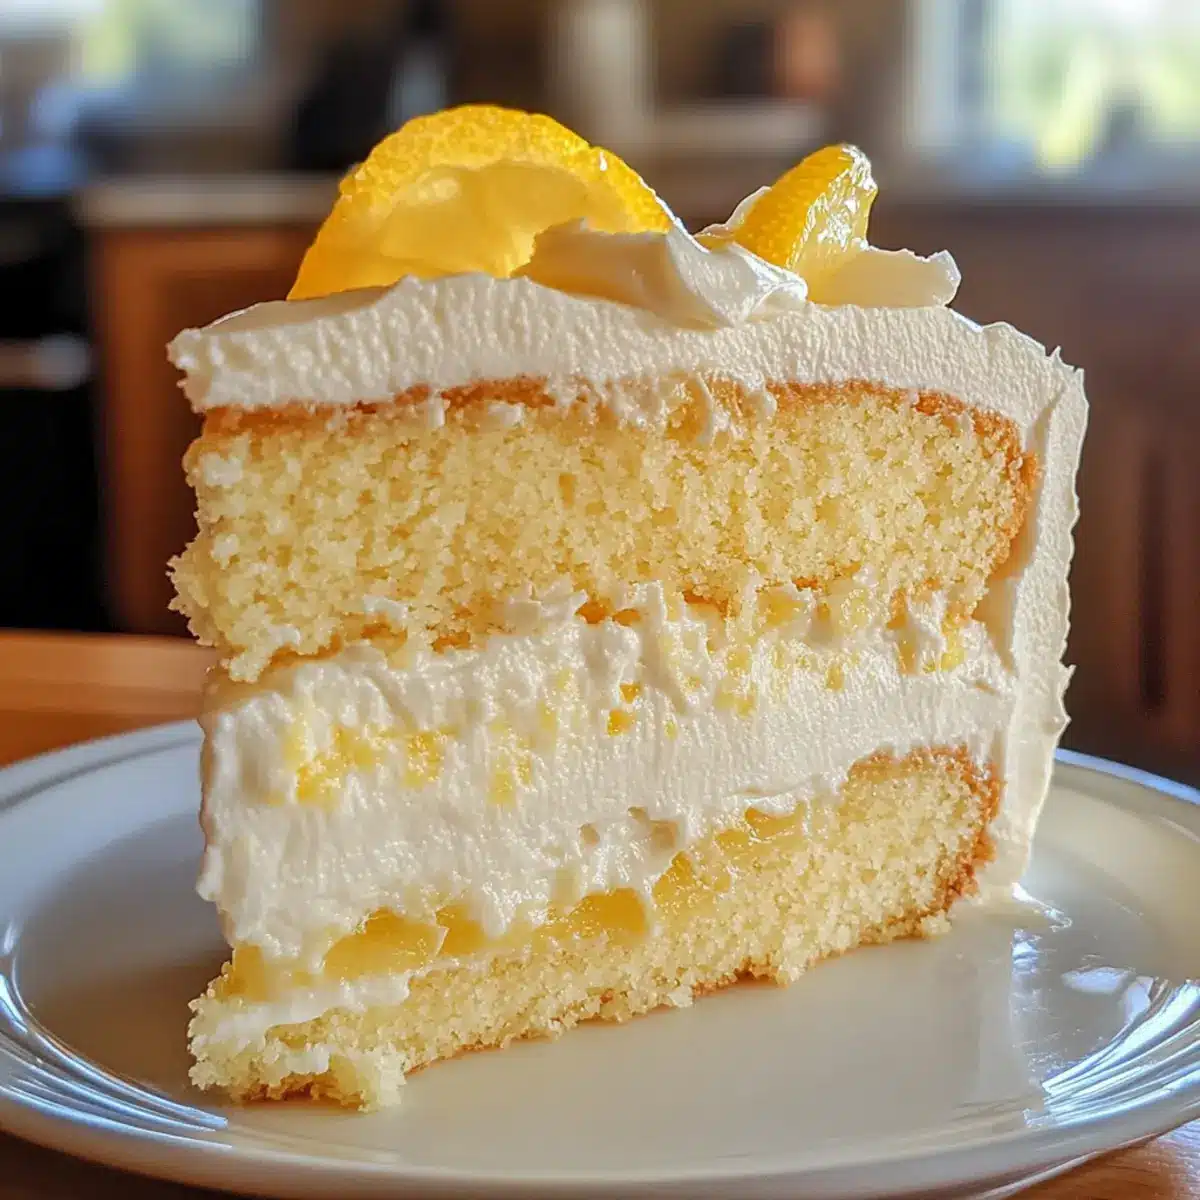
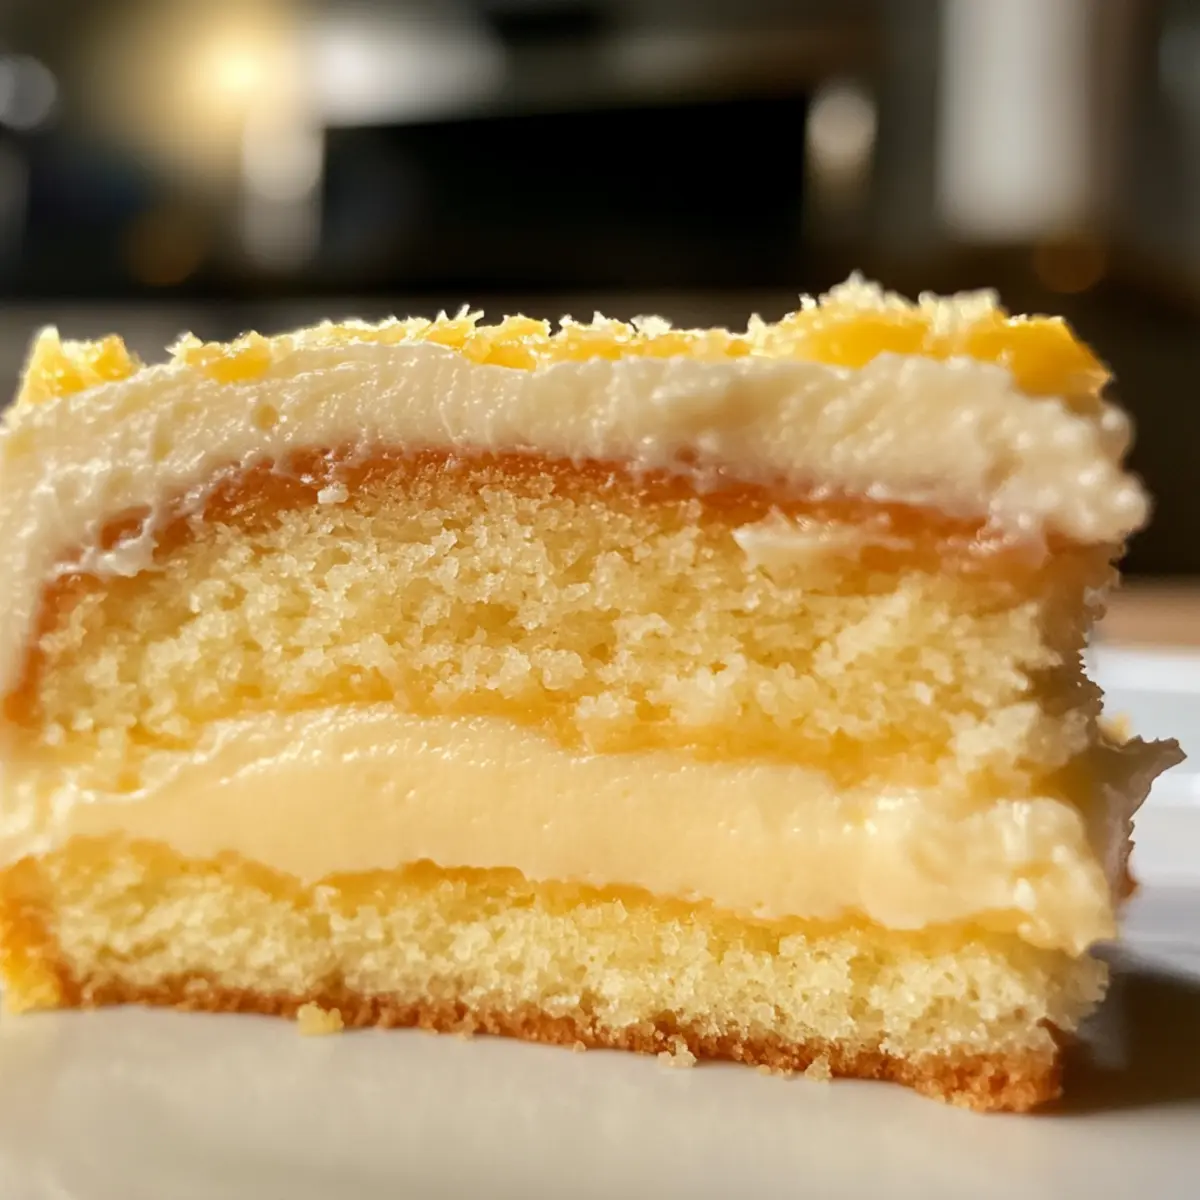
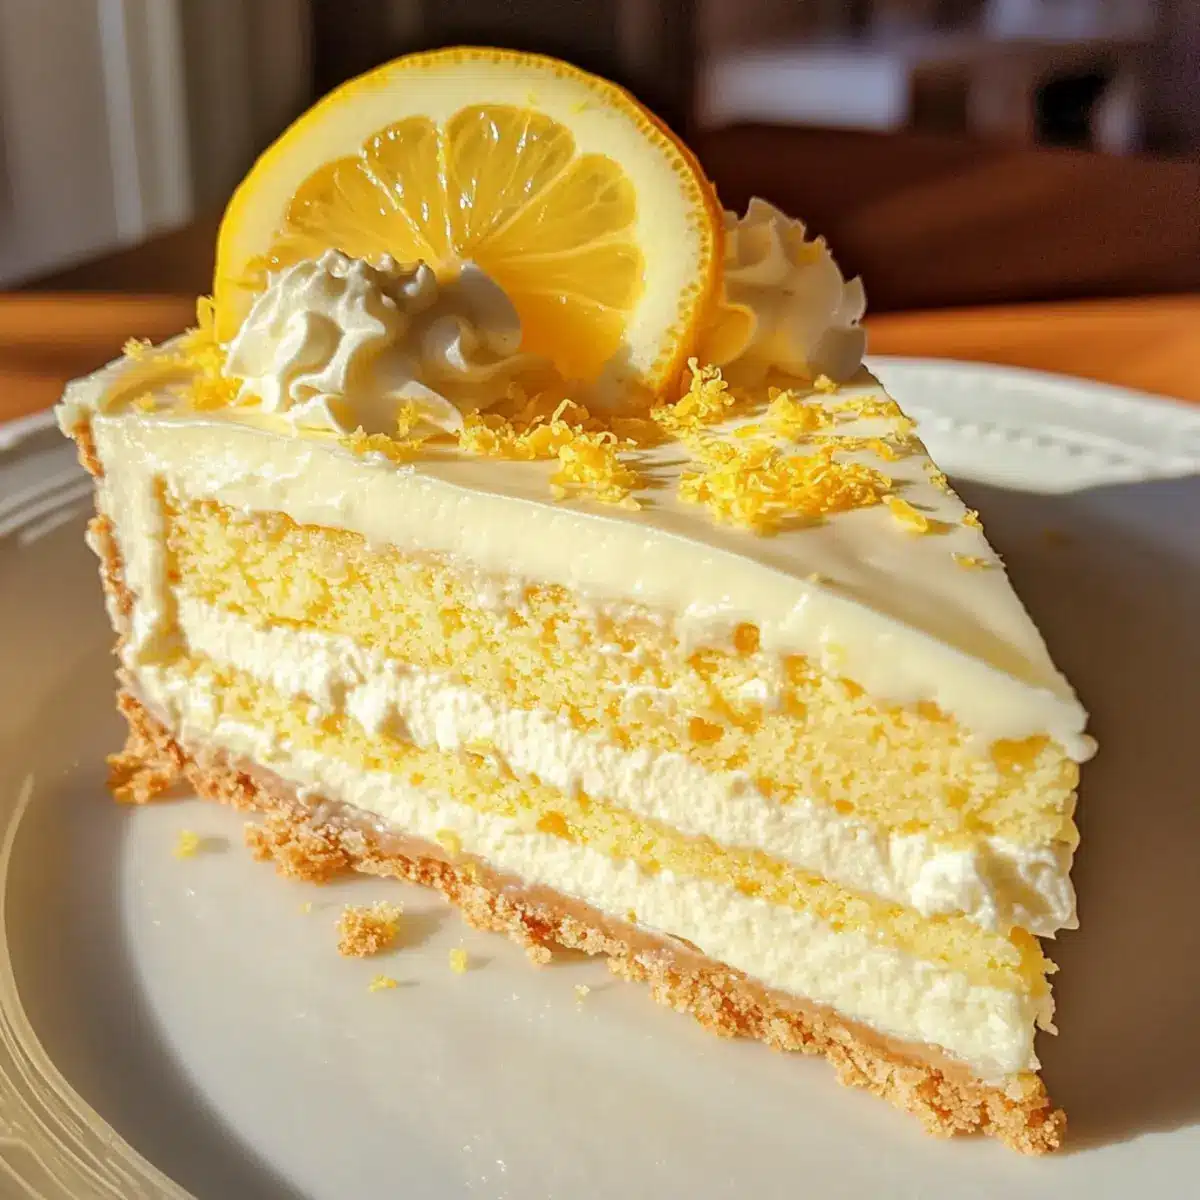
Once the cheesecake and cake layers are fully cooled, it’s time to assemble your Creamy Lemon Cheesecake Cake. Begin with a lemon cake layer placed on a serving plate, followed by the chilled cheesecake layer, then top with the second lemon cake layer. Spread a generous layer of cream cheese frosting over the top and sides, making sure to create a beautiful presentation.
Step 11: Frost and Chill
For the frosting, beat together remaining cream cheese with powdered sugar until fluffy. Apply a layer of frosting over the assembled cake. Once frosted, chill the entire cake for at least 30 minutes before serving. This allows the flavors to meld beautifully while making the cake easier to slice.
Step 12: Serve and Enjoy
Slice your Creamy Lemon Cheesecake Cake and serve it chilled, perhaps with fresh berries or a dollop of whipped cream. This vibrant dessert is perfect for any occasion, bringing both richness and a refreshing citrus kick to the table.
Make Ahead Options
This Creamy Lemon Cheesecake Cake is perfect for busy home cooks looking to save time without sacrificing flavor! You can prepare the cheesecake layer up to 24 hours in advance; simply bake it, let it cool, and refrigerate it wrapped tightly in plastic wrap to prevent drying out. The lemon cake layers can also be baked up to 3 days ahead; after cooling, store them in an airtight container in the fridge. When you’re ready to serve, simply assemble your cake by layering the cheesecake and lemon cakes, stab the frosting, and chill for 30 minutes. This way, you’ll end up with a fresh-tasting dessert that brings all the vibrant, zesty goodness to your gathering with minimal last-minute effort!
Expert Tips for Creamy Lemon Cheesecake Cake
• Room Temperature Ingredients: Ensure all ingredients, particularly cream cheese and eggs, are at room temperature to create a smooth, lump-free batter. This ensures your Creamy Lemon Cheesecake Cake bakes evenly.
• Mix Just Enough: Avoid overmixing the cheesecake layer. Mix until ingredients are just combined to prevent cracks while baking. Overmixing can incorporate excess air, causing the cheesecake to rise and crack.
• No Peeking: Resist the urge to open the oven door during the first 25 minutes of baking the cheesecake. Sudden temperature changes can lead to sinking or cracks in your cake.
• Water Bath for Cheesecake: Always bake your cheesecake in a water bath. This creates a humid environment that helps prevent cracks while maintaining a silky texture—key for a successful Creamy Lemon Cheesecake Cake.
• Chill Before Slicing: After assembling and frosting, allow the cake to chill in the refrigerator for at least 30 minutes before serving. This makes slicing easier and enhances flavor by letting the ingredients meld together.
What to Serve with Creamy Lemon Cheesecake Cake?
Elevate your dessert experience by pairing this zesty delight with complementary flavors and textures that shine alongside it.
-
Fresh Berries:
Berries add a burst of color and natural sweetness, enhancing the lemon’s brightness. Strawberries, blueberries, or raspberries make gorgeous toppings or a vibrant side. -
Whipped Cream:
A dollop of fluffy whipped cream provides a light, airy contrast to the rich cheesecake layer, making each bite feel indulgent yet refreshing. -
Iced Tea or Lemonade:
Refreshing beverages like iced tea or freshly squeezed lemonade perfectly balance the cake’s richness. Opt for a hint of mint to elevate the experience even further. -
Lemon Sorbet:
Serve a scoop of lemon sorbet for a cool, tangy counterpart. Its icy texture cleanses the palate, making every slice feel like an exquisite treat. -
Shortbread Cookies:
Crunchy, buttery shortbread cookies add delightful texture. Their mild sweetness complements the cake without overwhelming the bright lemon flavors. -
Chocolate Ganache:
A drizzle of silky chocolate ganache plays beautifully against the citrus notes, creating an unexpected, decadent twist to this bright dessert. -
Honey Drizzle:
A touch of honey adds a hint of floral sweetness that mingles perfectly with the zesty lemon, enhancing the cake’s overall flavor profile. -
Coffee:
A rich cup of coffee brings warmth, contrasting the cool, creamy cake. The bitterness balances the sweetness, making it a perfect end to any meal. -
Pistachio Crumble:
A sprinkle of chopped pistachios adds both color and a nutty crunch. This vibrant garnish visually enhances the dish while providing a delightful surprise in flavor. -
Mint Leaves:
Fresh mint leaves can brighten the presentation and offer a refreshing finish after the rich cake. Use them as a garnish for a touch of elegance.
Creamy Lemon Cheesecake Cake Variations
Feel free to personalize your cake and make it uniquely yours with these delightful twists!
- Citrus Swap: Substitute lemon extract with lime or orange for a fresh flavor twist.
- Berry Topping: Add fresh berries like strawberries or blueberries on top of the frosting for a burst of color and taste.
- Nutty Crunch: Incorporate crushed nuts or a praline layer between the cheesecake and cake for added texture and flavor.
- Gluten-Free: Replace all-purpose flour with a gluten-free flour blend, ensuring your cake remains fluffy and delicious!
- Vegan Option: Use vegan cream cheese and egg replacer for a plant-based version of this creamy delight.
Imagine a Hawaiian twist by adding coconut flakes throughout the cake layers! For even more citrus desserts, don’t forget to check out my Hawaiian Cheesecake Salad and Chocolate Raspberry Cheesecake; they will surely brighten your day!
- Lighter Frosting: Fold in whipped cream to your cream cheese frosting for a lighter, airy texture.
- Spice It Up: Add a hint of ginger or cinnamon to the cake batter for a warm, comforting flavor profile.
How to Store and Freeze Creamy Lemon Cheesecake Cake
Fridge: Store leftover cake in an airtight container in the fridge for up to 5 days. Chilling enhances the flavor, making each slice even more delightful.
Freezer: For longer storage, you can freeze unfrosted cake layers for up to 3 months. Wrap each layer tightly in plastic wrap and aluminum foil to prevent freezer burn.
Thawing: To enjoy your frozen Creamy Lemon Cheesecake Cake, move it to the refrigerator to thaw overnight. Frosting can be added after thawing for best results.
Reheating: If serving chilled, there’s no need to reheat; just slice and enjoy! If you prefer a slightly warm cheesecake layer, microwave individual slices for about 10-15 seconds.
Creamy Lemon Cheesecake Cake Recipe FAQs
How do I select ripe lemons for this recipe?
Absolutely! When choosing lemons, look for ones that are firm, heavy for their size, and have a bright yellow color. Avoid lemons that have dark spots or are overly soft, as these indicate overripeness. Fresh lemons will give your cake that vibrant flavor you desire!
How should I store leftover Creamy Lemon Cheesecake Cake?
To keep your delicious cake fresh, store any leftovers in an airtight container in the refrigerator for up to 5 days. The chilling process will enhance the flavors, making each slice even more delightful the next day!
Can I freeze the Creamy Lemon Cheesecake Cake?
Very! For the best results, you can freeze unfrosted cake layers for up to 3 months. Wrap each layer tightly in plastic wrap followed by aluminum foil to avoid freezer burn. When you’re ready to enjoy, thaw the layers in the refrigerator overnight before frosting.
What should I do if my cheesecake cracks during baking?
If your cheesecake cracks, don’t worry! While cracks can happen, baking it in a water bath next time can help prevent this. If cracks do appear, you can cover them with frosting for a beautiful finish—it will still taste delicious!
Are there any dietary considerations I should be aware of?
Yes! This Creamy Lemon Cheesecake Cake contains dairy products, which may not be suitable for those with lactose intolerance or dairy allergies. You may be able to substitute with dairy-free alternatives, but keep in mind the flavor and texture might vary.
Can I use a different citrus flavor instead of lemon?
Absolutely! If you’re craving a twist, feel free to swap out lemon extract for other citrus flavors like lime or orange. Adjusting the zest can offer a delightful change while keeping that creamy cheesecake element intact!
Creamy Lemon Cheesecake Cake That's Pure Sunshine Bliss
Ingredients
Equipment
Method
- Preheat your oven to 300°F (150°C) for the cheesecake layer and prepare a water bath.
- Grease a 9-inch springform pan with butter and line the bottom with parchment paper.
- In a large bowl, beat the softened cream cheese until smooth, then add sugar, salt, sour cream, lemon extract, and eggs, mixing until blended.
- Pour the cheesecake batter into the pan and bake in the water bath for about 45 minutes.
- Let the cheesecake cool slowly in the oven for an hour, then refrigerate for at least 4 hours.
- Preheat the oven to 350°F (175°C). Whisk together cake flour, baking powder, baking soda, and salt in a bowl.
- Cream together softened butter and sugar until light, then incorporate eggs, buttermilk, and lemon extract.
- Combine dry ingredients with the butter mixture, avoiding overmixing, then divide batter between two prepared pans.
- Bake the cake layers for 20-24 minutes until a toothpick comes out clean.
- Once cooled, assemble the cake by layering a lemon cake, cheesecake, and then the second cake layer. Frost with cream cheese frosting.
- Chill the assembled cake for at least 30 minutes before serving.
- Serve sliced, chilled, optionally with berries or whipped cream.
Leave a Reply