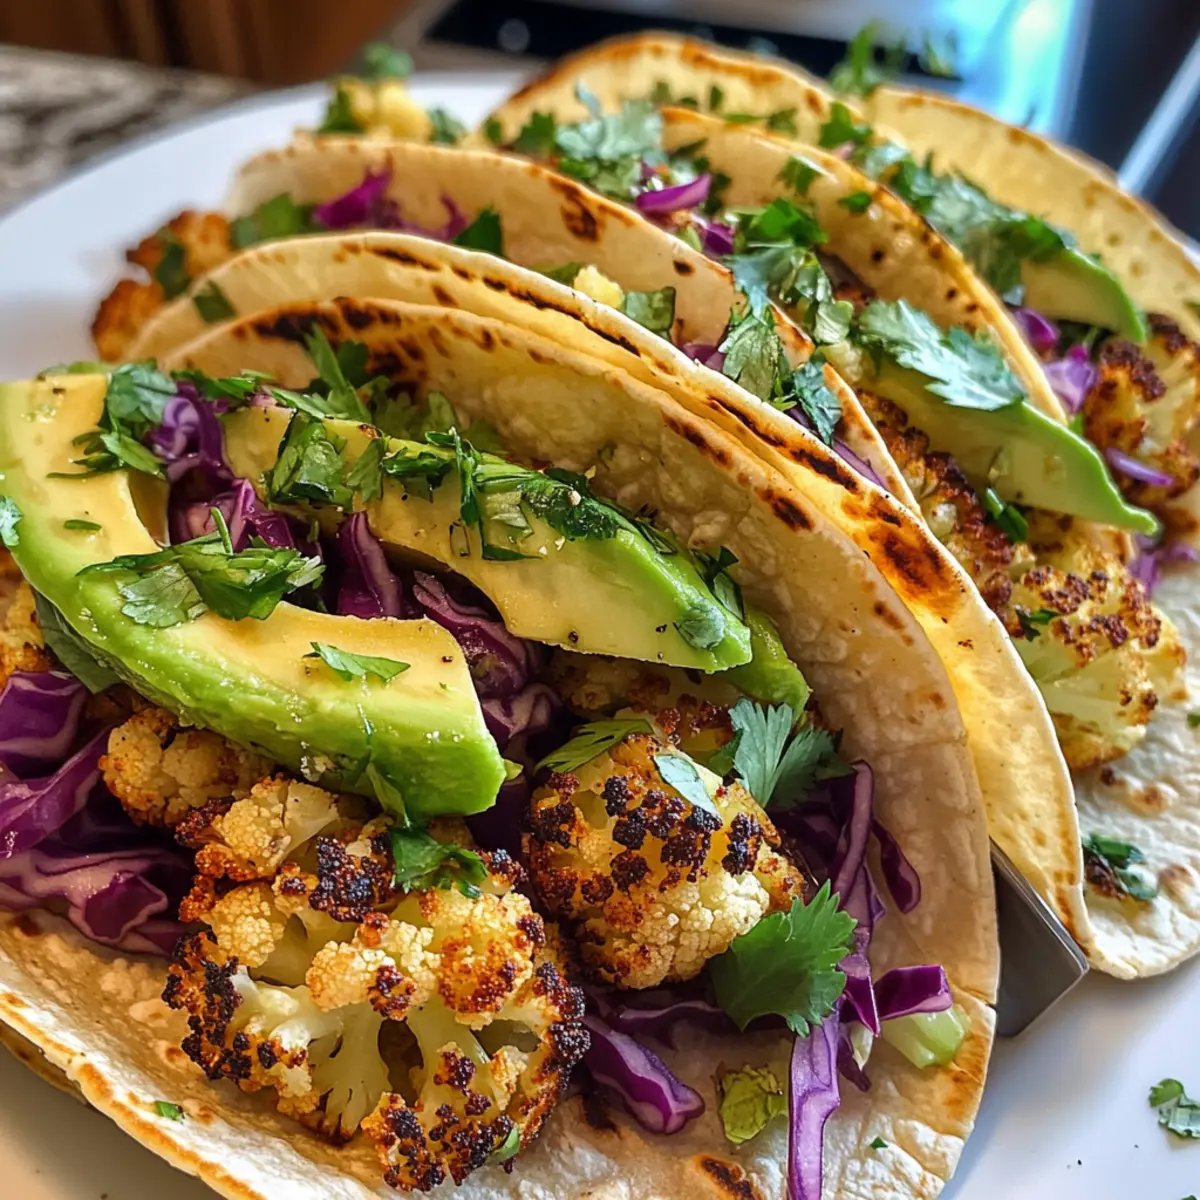
When I first roasted cauliflower, I had no idea it would transform into a taco sensation. These Garlic Roasted Cauliflower Tacos are a delightful reminder that plant-based meals can be both satisfying and quick to prepare. Packed into warm tortillas, the savory garlic-infused cauliflower pairs beautifully with creamy avocado and crunchy cabbage—perfect for anyone seeking a delicious and easy weeknight meal. Not only are these tacos vegan and gluten-free, but they also bring a fresh twist to the dinner table without sacrificing flavor. Whether you’re trying to cut back on meat or simply looking for a tasty meal that won’t have you slaving away in the kitchen, these tacos are sure to impress. Ready to dive into a world where healthy meals spark joy and creativity?
Why are these tacos so irresistible?
Flavorful Explosion: Each bite features garlic-roasted cauliflower, seasoned to perfection with spices that awaken your taste buds.
Quick & Easy: Perfect for weeknight meals, these tacos come together in under 30 minutes, saving you time without compromising taste.
Nutritious Twist: Packed with fiber and healthy fats, they’re a guilt-free indulgence that nourishes your body.
Versatile Toppings: Customize your tacos with fresh toppings like creamy avocado or crunchy cabbage, making every serving unique!
Crowd Pleaser: Whether hosting a gathering or enjoying a cozy night in, these tacos are sure to impress everyone at your table. Serve them with a side of Honey Bacon Roasted Potatoes for a complete experience!
Garlic Roasted Cauliflower Tacos Ingredients
For the Tacos
• Cauliflower – The star of this dish, choose the largest head for the best texture.
• Olive Oil – Essential for roasting; it helps achieve that perfect golden crisp.
• Garlic – Fresh minced garlic is best for maximum flavor impact.
• Smoked Paprika – Adds a smoky depth; consider chipotle powder for a spicy kick.
• Ground Cumin – Enhances the taco seasoning, providing another layer of flavor.
• Chili Powder – Brings mild heat and complexity to the mix.
• Salt – A crucial element for bringing out all the flavors in your tacos.
• Black Pepper – Offers a gentle spice that balances the dish.
• Corn or Flour Tortillas – The perfect vehicle for your flavorful filling—choose gluten-free if desired.
For the Toppings
• Red Cabbage – Adds crunch and vibrant color to each bite.
• Fresh Cilantro – Brightens up the dish; parsley works as a suitable substitute.
• Avocado – Brings creaminess and richness; ensure it’s perfectly ripe!
• Diced Tomatoes or Salsa – Freshness is key; opt for seasonal tomatoes for optimal flavor.
• Sour Cream – An optional addition; can be replaced with Greek yogurt for a tangy twist or omitted for a vegan option.
• Lime – Squeeze fresh lime juice over the tacos to elevate the flavors.
These Garlic Roasted Cauliflower Tacos promise to delight your senses while being friendly to your dietary preferences. Enjoy crafting these delectable bites!
Step‑by‑Step Instructions for Garlic Roasted Cauliflower Tacos
Step 1: Preheat the Oven
Begin by preheating your oven to 425°F (220°C). While the oven heats, line a baking sheet with parchment paper to prevent the cauliflower from sticking. This step sets the stage for crispy, golden-tasting garlic roasted cauliflower that will become the star of your tacos.
Step 2: Prepare the Cauliflower
In a large mixing bowl, toss the cauliflower florets with olive oil, minced garlic, smoked paprika, ground cumin, chili powder, salt, and black pepper. Ensure each floret is well-coated in the seasoning mix; this will enhance the flavor of your garlic roasted cauliflower. Let it sit for a few minutes to absorb the flavors while the oven finishes heating.
Step 3: Roast the Cauliflower
Spread the seasoned cauliflower florets onto the prepared baking sheet in a single layer, making sure they are not crowded. Roast them in the preheated oven for 25-30 minutes, turning halfway through until they are golden brown and crispy. Keep an eye on them for a perfectly caramelized appearance, which indicates they’re ready for your tacos.
Step 4: Prepare Fresh Toppings
While the cauliflower roasts, take this time to prepare your toppings. Shred the red cabbage for crunch, slice the avocado for creaminess, and chop the fresh cilantro for brightness. You can also dice the tomatoes or prepare salsa if you prefer. These fresh ingredients will balance beautifully with the roasted cauliflower in your tacos.
Step 5: Warm the Tortillas
In a dry skillet over medium heat, warm the corn or flour tortillas for about 30 seconds on each side, or until they become soft and pliable. This step is essential for making sure your tortillas do not tear when filled, and it enhances the overall flavor and texture of your Garlic Roasted Cauliflower Tacos.
Step 6: Assemble the Tacos
Once the cauliflower is roasted to perfection, it’s time to assemble your tacos. Place a generous portion of the garlic roasted cauliflower into each warm tortilla, and top with shredded cabbage, cilantro, avocado, and diced tomatoes or salsa. For an extra touch, add a dollop of sour cream and squeeze fresh lime juice over the top to elevate the flavors before serving.
Make Ahead Options
These Garlic Roasted Cauliflower Tacos are a fantastic option for busy weeknights, and they can be easily prepared in advance to simplify your meal planning! You can roast the cauliflower up to 3 days in advance; just allow it to cool, then store it in an airtight container in the refrigerator. For the best flavor, prep your toppings like shredded cabbage, chopped cilantro, and diced tomatoes or salsa and keep them refrigerated for up to 24 hours. To maintain the cauliflower’s crispy texture, reheat it in a skillet or the oven before assembling your tacos. When you’re ready to serve, warm the tortillas for that perfect finish, and you’ll enjoy delicious, homemade tacos with minimal effort!
How to Store and Freeze Garlic Roasted Cauliflower Tacos
Airtight Container: Store leftover tacos in an airtight container for up to 3 days to maintain freshness. Keeping toppings separate from the cauliflower ensures the right texture when you’re ready to enjoy them again.
Refrigerate Cauliflower: If you have extra roasted cauliflower, it can be refrigerated for up to 5 days. When reheating, use a skillet or oven to revitalize its crispiness before assembling.
Freezing Cauliflower: For longer storage, freeze cooled roasted cauliflower in a freezer-safe bag for up to 3 months. Thaw overnight in the fridge before reheating.
Reheating Tips: To reheat, place the cauliflower in a skillet over medium heat until hot and crispy. Warm tortillas separately before assembling your Garlic Roasted Cauliflower Tacos for an optimal experience.
Garlic Roasted Cauliflower Tacos Variations
Feel free to get creative with your Garlic Roasted Cauliflower Tacos! With a few simple swaps, you can tailor them to suit your taste and dietary needs.
-
Seasonal Veggie Swap: Replace part of the cauliflower with roasted sweet potatoes or squash for a heartier, sweeter taco experience. Imagine the comforting flavors mingling together!
-
Crunchy Radishes: Add fresh, sliced radishes during spring for added crunch and a pop of color. They bring a refreshing bite that balances beautifully with the roasted veggies.
-
Summer Freshness: In the warmer months, top with extra fresh tomatoes and diced avocados to enhance the seasonal flavors. The juicy freshness brightens up every bite!
-
Spice Things Up: For those who crave heat, swap the smoked paprika with chipotle powder for a delightful kick. It’ll elevate your tacos with a smoky, fiery depth.
-
Creamy Cashew Sauce: Blend soaked cashews with lemon juice and garlic for a creamy vegan alternative to sour cream. The luscious texture adds richness without dairy.
-
Herb Variations: If cilantro isn’t your thing, try fresh parsley or mint for a different flavor profile. Both herbs will lend a unique twist that complements the tacos perfectly.
-
Add Black Beans: For added protein and texture, mix in some black beans alongside the cauliflower. They’ll boost the heartiness and create a more fulfilling meal.
-
Tangy Greek Yogurt: Replace sour cream with Greek yogurt for a tangy twist that pairs well with the savory notes. It also packs an extra protein punch!
These variations ensure your Garlic Roasted Cauliflower Tacos are as versatile as your cravings! Serve them alongside a delightful side like Spicy Mexican Roasted Sweet Potatoes for a complete meal full of flavor!
What to Serve with Garlic Roasted Cauliflower Tacos
Elevate your meal with delightful sides and refreshing flavors that complement these tempting tacos.
-
Cilantro Lime Rice: This zesty rice dish adds a lightness that complements the richness of the tacos while enhancing the fresh cilantro notes.
-
Black Bean Salad: A protein-packed salad featuring black beans, corn, and diced tomatoes. Its hearty texture and flavor balance perfectly with the crispy cauliflower.
-
Grilled Corn on the Cob: Charred corn offers a sweet, smoky contrast, turning your meal into a summery fiesta. Sprinkle with lime and chili powder for an extra kick!
-
Pickled Radishes: The bright tanginess of pickled radishes adds a delightful crunch and acidity, refreshing your palate between bites of hearty tacos.
-
Avocado Cilantro Dressing: Drizzled over the tacos or served as a dip, this creamy dressing enhances the flavors while ensuring a smooth texture that feels indulgent.
-
Margaritas or Fresh Limeade: Pair your tacos with a citrusy drink that brightens the overall experience. Cheers to a fun meal!
-
Chili Lime Fruit Salad: A vibrant mix of seasonal fruits with a sprinkle of chili powder creates a sweet and spicy contrast that complements the savory profile of the tacos.
-
Plantains: Crispy or fried plantains lend a sweet, caramelized touch, providing an enjoyable contrast to the savory garlic-roasted cauliflower.
-
Churros: For a sweet ending, serve these delightful cinnamon-sugar treats, which offer a warm and comforting conclusion to your taco night.
Expert Tips
• Single Layer for Roasting: Ensure cauliflower florets are spread out in a single layer on the baking sheet to maximize crispiness and avoid steaming.
• Pre-Roast for Extra Flavor: For the best Garlic Roasted Cauliflower Tacos, consider roasting your cauliflower a day ahead. Refrigerate, then reheat until crispy before assembling.
• Mind Your Tortillas: Avoid overloading your tortillas when assembling. A packed taco can break under the weight, so keep it light and manageable.
• Check for Gluten-Free: If accommodating dietary preferences, remember to check all sauces and toppings for gluten-free compliance to ensure everyone can enjoy these delightful tacos.
• Prep Fresh Ingredients Ahead: While the cauliflower roasts, prep your toppings in advance. This will streamline the taco assembly process, making your meal come together quickly and effortlessly.

Garlic Roasted Cauliflower Tacos Recipe FAQs
What is the best way to select a cauliflower?
When choosing cauliflower, look for a large head that’s firm with tightly packed florets and vibrant, green leaves. Avoid any heads that show dark spots or signs of spoilage, as these indicate age. The fresher the cauliflower, the better the flavor and texture you’ll achieve in your Garlic Roasted Cauliflower Tacos.
How should I store leftover tacos?
Store leftover tacos in an airtight container, making sure to keep the roasted cauliflower and toppings separate to maintain their individual textures. They can be kept in the refrigerator for up to 3 days. When ready to enjoy, simply reheat the cauliflower in a skillet or oven until it’s crispy again, then assemble your tacos.
Can I freeze roasted cauliflower?
Absolutely! For longer storage, allow your roasted cauliflower to cool and then transfer it to a freezer-safe bag or container. It can stay frozen for up to 3 months. When you’re ready to use it, thaw overnight in the fridge and then reheat in a skillet over medium heat until hot and crisp. This preserves the delicious texture for your Garlic Roasted Cauliflower Tacos!
What if my cauliflower doesn’t roast evenly?
If your cauliflower isn’t roasting evenly, ensure that you’re spreading it out in a single layer on the baking sheet. Overcrowding can lead to steaming rather than roasting. If you find that it’s getting too brown in some places, you can partially rotate the baking sheet halfway through cooking for a more consistent golden color.
Are these tacos suitable for a gluten-free diet?
Yes! To keep your Garlic Roasted Cauliflower Tacos gluten-free, use gluten-free tortillas. Always double-check any sauces or toppings you plan to add to ensure they’re gluten-free as well. Enjoying these delicious tacos with the right precautions means everyone can partake in this tasty meal without worry!
Garlic Roasted Cauliflower Tacos for a Flavorful Twist
Ingredients
Equipment
Method
- Preheat your oven to 425°F (220°C) and line a baking sheet with parchment paper.
- In a large mixing bowl, toss the cauliflower florets with olive oil, minced garlic, smoked paprika, ground cumin, chili powder, salt, and black pepper.
- Spread the seasoned cauliflower florets onto the prepared baking sheet and roast for 25-30 minutes, turning halfway through.
- While the cauliflower roasts, prepare your toppings: shred the red cabbage, slice the avocado, and chop the fresh cilantro.
- Warm the corn or flour tortillas in a dry skillet over medium heat for about 30 seconds on each side.
- Assemble your tacos by placing a generous portion of garlic roasted cauliflower into each warm tortilla and topping with cabbage, cilantro, avocado, and diced tomatoes or salsa.
Leave a Reply