Stepping into my kitchen is like opening a door to an island paradise, especially when I’m whipping up a Hawaiian Guava Cake. This vibrant dessert captures the essence of tropical delights with its luscious guava sweetness and a whisper of coconut. Not only is this recipe incredibly easy to prepare, making it perfect for busy weeknights, but it also leaves everyone swooning. It’s a delightful crowd-pleaser that looks as beautiful as it tastes, effortlessly elevating any gathering or family dinner. Plus, it offers gluten-free substitution options, ensuring everyone can join in on this delicious indulgence. Are you ready to dive into this tropical treat and bring a slice of Hawaii to your home?
Why is this cake a must-try?
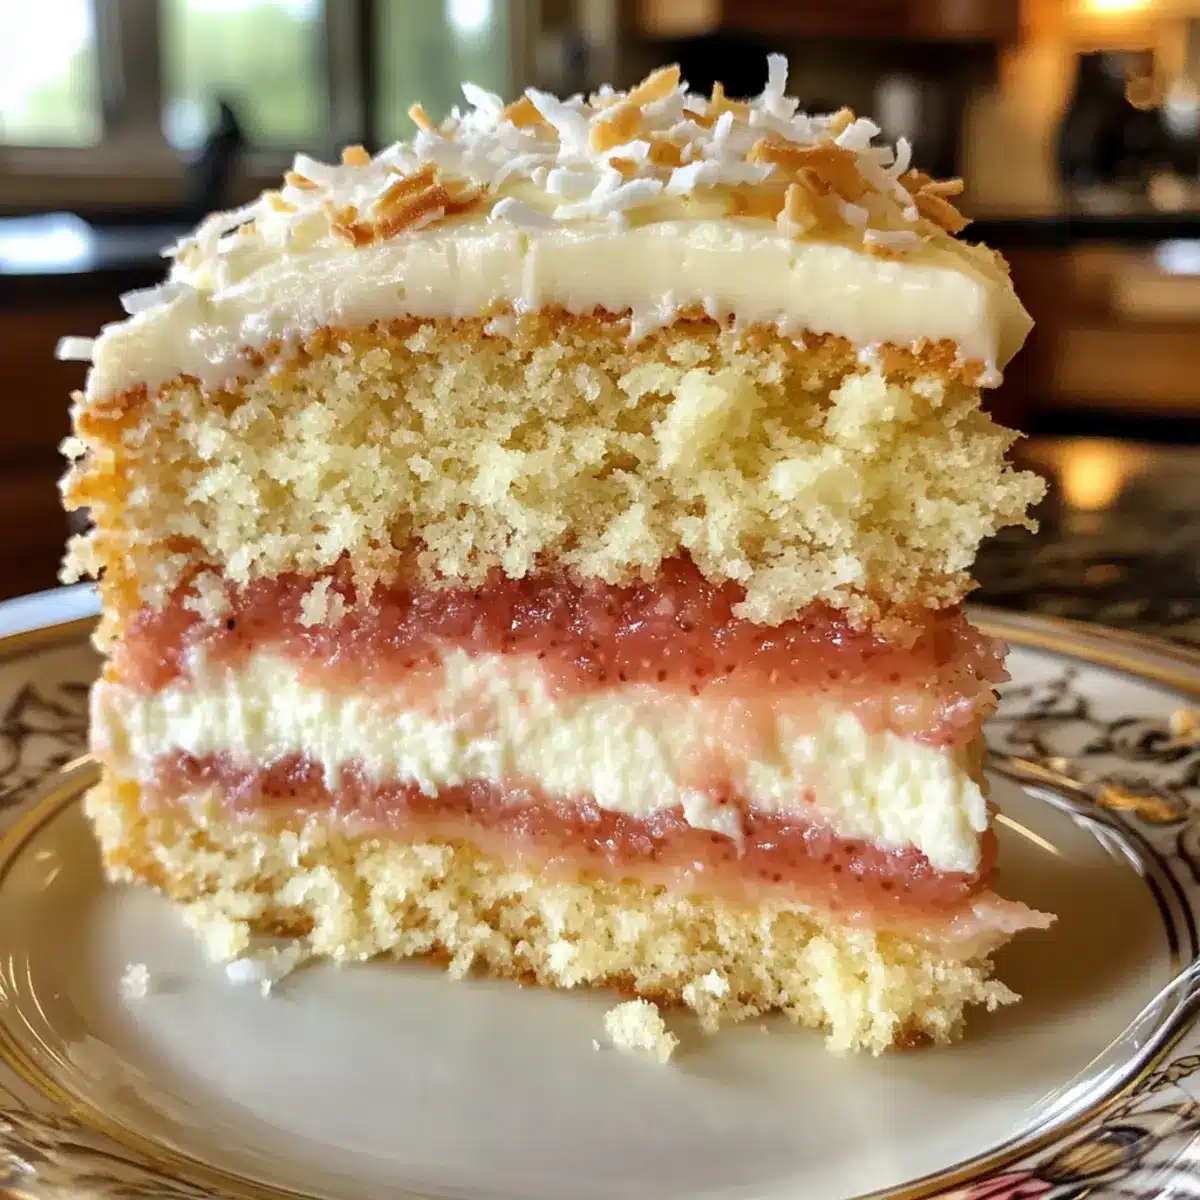
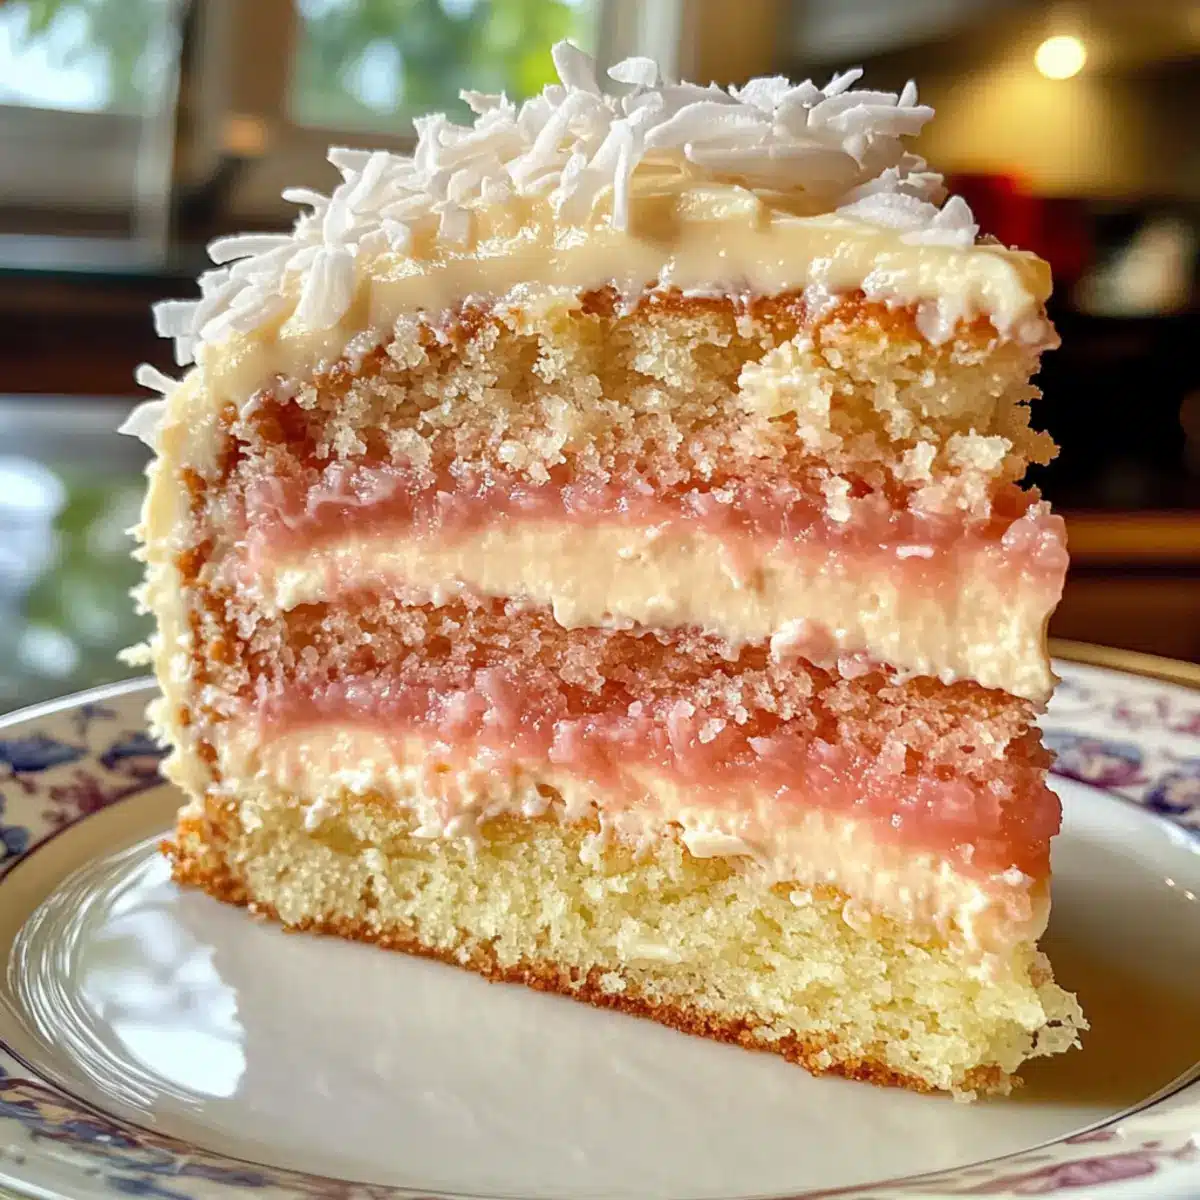
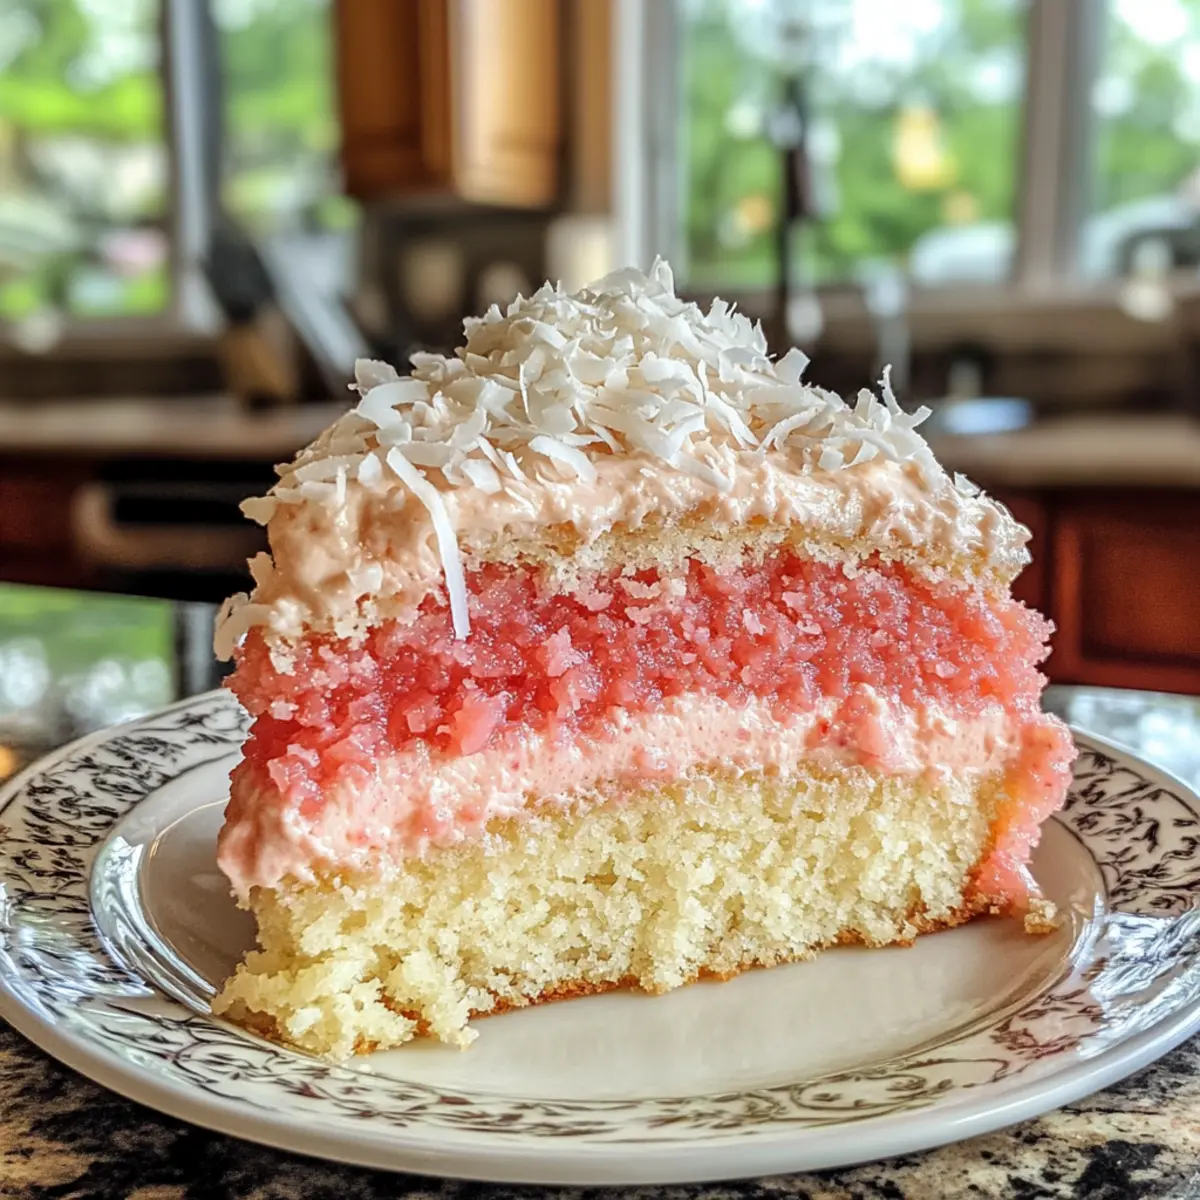
Tropical Flavor Explosion: The Hawaiian Guava Cake bursts with the sweetness of fresh guava, perfectly complemented by coconut undertones, transporting you straight to a sun-soaked beach.
Easy to Make: With just a few simple steps and readily available ingredients, you can whip up this show-stopping dessert without breaking a sweat.
Gluten-Free Options: Don’t worry; gluten-free friends can enjoy every bite using a gluten-free cake mix, making this recipe accessible for all.
Crowd-Pleasing Appeal: Whether it’s a casual family dinner or a festive gathering, this cake is guaranteed to impress and delight your guests.
Flavor Variability: Want to mix things up? Consider adding hints of pineapple or mango for that extra tropical flair, reminiscent of a Hawaiian beach party, just like when making Pistachio Blackberry Cake or Mango Mousse Cake.
Dive into your own slice of paradise with this delightful cake!
Hawaiian Guava Cake Ingredients
• These ingredients come together to create a slice of tropical paradise!
For the Cake
- Strawberry Cake Mix – The base of the cake; substitute with a gluten-free cake mix to cater to dietary restrictions.
- Guava Nectar/Juice – Infuses tropical flavor and moisture; opt for pure juice, not from concentrate, for optimal taste.
- Eggs – Provide binding and richness; remember to use room temperature eggs for better mixing.
- Coconut Oil – Adds a lovely hint of coconut flavor; can easily be swapped with vegetable oil if needed.
For the Cream Cheese Layer
- Cream Cheese – Essential for creaminess; make sure it’s at room temperature for smooth blending.
- Granulated Sugar – Sweetens the cream cheese layer; consider using coconut sugar for a healthier twist.
- Vanilla Extract – A little enhances the cream cheese flavor; pure vanilla is always best.
- Cool Whip – Adds lightness; feel free to use whipped coconut cream for a dairy-free option.
For the Glaze
- Guava Nectar/Juice (for glaze) – Same as above; this ingredient gives the cake a glossy finish.
- Cornstarch – Key for thickening the glaze; ensure it’s well mixed with water before heating.
- Water – Used for the cornstarch slurry; no need for substitutions here.
For Garnish
- Sweetened Coconut Flakes – Optional but great for adding texture and a tropical vibe to your cake before serving.
With these ingredients, you’re all set to create a stunning Hawaiian Guava Cake that resonates with the flavors of paradise!
Step‑by‑Step Instructions for Hawaiian Guava Cake
Step 1: Preheat the Oven
Begin by preheating your oven to 350°F (175°C). While it warms up, grab a 13×9-inch baking dish and lightly coat it with vegetable spray to ensure easy removal of your Hawaiian Guava Cake later on. This little prep will help create a perfect golden-brown crust.
Step 2: Prepare the Batter
In a large mixing bowl or a stand mixer, combine a package of strawberry cake mix, guava nectar or juice, room temperature eggs, and melted coconut oil. Blend on low speed for about 30 seconds, then increase to medium-high for 2 minutes until the batter is smooth and slightly fluffy. This adds the delightful tropical flavor you crave.
Step 3: Bake the Cake
Pour the vibrant batter evenly into your prepared baking dish. Place it in the preheated oven and bake for 24–26 minutes. To check for doneness, insert a toothpick into the center—if it comes out with a few moist crumbs, your Hawaiian Guava Cake is ready to come out and cool.
Step 4: Cool the Cake
Once baked, transfer the cake to a wire rack to cool completely. Allow at least 30 minutes for it to reach room temperature. This cooling phase is essential for the next steps, ensuring that the cream cheese layer spreads smoothly on top of your scrumptious cake.
Step 5: Prepare the Cream Cheese Layer
In a mixing bowl, beat softened cream cheese until fluffy and smooth. Gradually add granulated sugar and vanilla extract, mixing until fully incorporated. Gently fold in Cool Whip until the mixture is light and airy. This creamy layer will sit beautifully atop your cooled Hawaiian Guava Cake, providing a rich contrast to the fruity base.
Step 6: Spread the Cream Cheese Mixture
Once your cake is cool, evenly spread the cream cheese mixture over the top using a spatula. Make sure each slice will have a delightful bite of this luscious layer. After spreading, refrigerate the cake for at least 30 minutes to allow the cream cheese layer to set and firm up.
Step 7: Make the Guava Gel
In a saucepan, bring 2½ cups of guava juice and granulated sugar to a low boil over medium heat. While it’s heating, mix cornstarch with water to create a slurry. Once boiling, whisk the slurry into the juice mixture and continue stirring until it thickens, which usually takes a couple of minutes. Set this aside to cool—it will become a glossy glaze for your Hawaiian Guava Cake.
Step 8: Glaze the Cake
After the guava gel has cooled to room temperature, gently pour it over the top of the chilled cake, spreading it evenly to cover. This adds a beautiful, shiny finish and enhances the tropical flavors. Once glazed, return the cake to the refrigerator to chill until you’re ready to serve.
Step 9: Optional Garnish
Before serving, consider sprinkling sweetened coconut flakes on top for that extra tropical flair. This optional step adds texture and enhances the visual appeal of your Hawaiian Guava Cake, making it even more inviting for everyone at the table.
Hawaiian Guava Cake Variations
Feel free to explore these creative twists and swaps to match your taste preferences and dietary needs while keeping the tropical spirit alive!
-
Gluten-Free Option: Substitute the Strawberry Cake Mix with a gluten-free blend for a cake that everyone can enjoy.
-
Additional Fruit: Fold in diced fresh mango or pineapple into the batter for an added burst of tropical flavor that complements the guava perfectly. These fruit additions not only enhance taste but also create a beautifully colorful dessert!
-
Dairy-Free Delight: Swap cream cheese and Cool Whip with plant-based alternatives to make this cake dairy-free, so you don’t have to miss out on the creamy goodness.
-
Flavor Enhancements: Add a teaspoon of lemon zest to the cream cheese mixture for a bright, zesty kick. It perfectly complements the sweetness of the guava and brings a refreshing twist!
-
Nutty Crunch: Sprinkle in some chopped macadamia nuts or walnuts into the batter for a delightful crunch that adds texture and a hint of earthiness to your cake.
-
Chocolate Twist: Drizzle melted dark chocolate over the top after glazing for a touch of decadence that fuses beautifully with the tropical flavors.
If you’re looking for more indulgent options, check out the delightful Strawberry Shortcake Macarons or the rich flavors of Japanese Cotton Cheesecake. Let’s keep the creativity flowing in your kitchen!
Make Ahead Options
These Hawaiian Guava Cake preparations are perfect for busy home cooks looking to save time without sacrificing quality! You can make the cake itself up to 24 hours in advance; simply bake it, let it cool completely, and store it tightly covered at room temperature. The cream cheese layer can be prepared and refrigerated up to 3 days before serving—just mix it all together and keep it chilled until you’re ready to spread it on the cake. When it’s time to enjoy, glaze the cake with the guava gel you can prepare ahead and chill it to set for about 30 minutes. This way, you’ll have a stunning Hawaiian Guava Cake that’s just as delicious and ready to impress without the last-minute rush!
What to Serve with Hawaiian Guava Cake
Indulge in a tropical feast that perfectly complements the sweet and creamy delight of your Hawaiian Guava Cake.
-
Tropical Fruit Salad: A mix of fresh pineapple, mango, and kiwi brings vibrant flavors and a refreshing zing that balances the richness of the cake.
-
Vanilla Ice Cream: Creamy and cool, vanilla ice cream enhances the cake’s tropical notes. It’s the perfect comforting addition to each slice, melting subtly into the cake.
-
Coconut Water: Light and refreshing, this drink echoes the cake’s coconut flavor while providing hydration, making it an ideal pairing for warm summer days.
-
Chocolate Drizzle: A simple chocolate drizzle over each slice adds a touch of indulgence and a lovely contrast to the sweet, fruity cake.
-
Whipped Coconut Cream: For a dairy-free option, serve with whipped coconut cream for a light, airy topping that harmonizes with the cake’s flavors.
-
Pineapple Sorbet: This frozen treat not only pairs well with the cake but also adds a lively tanginess, creating a beautiful balance of sweetness and acidity.
Elevate your dessert experience with these delightful accompaniments, making each bite of Hawaiian Guava Cake even more enjoyable!
Expert Tips for Hawaiian Guava Cake
• Room Temperature Matters: Use room temperature ingredients for the cake and cream cheese layer. This ensures optimal mixing and a fluffy texture overall.
• Avoid Overbaking: Keep a close eye on your cake as it bakes. A toothpick should come out with just a few crumbs to prevent a dry cake.
• Smoothing the Glaze: To achieve a silky-smooth guava gel, make sure the cornstarch is evenly combined with water before incorporating it into the hot mixture.
• Chill Before Serving: Allow your Hawaiian Guava Cake to chill in the refrigerator before serving. This helps the flavors meld together beautifully and makes slicing easier.
• Swap Ingredients: Don’t hesitate to explore substitutions, like using a gluten-free cake mix or coconut cream instead of Cool Whip, ensuring everyone can enjoy this cake.
How to Store and Freeze Hawaiian Guava Cake
Fridge: Store the Hawaiian Guava Cake covered in plastic wrap or an airtight container for up to 3 days. This keeps it fresh and maintains its luscious texture.
Freezer: For longer storage, freeze individual slices wrapped tightly in plastic wrap and aluminum foil for up to 2 months. This allows you to enjoy a slice of paradise anytime!
Thawing: When ready to enjoy, simply transfer the slices to the fridge to thaw overnight. This gentle process helps retain moisture and flavor.
Reheating: If preferred warm, gently reheat in the microwave for about 10-15 seconds, just until slightly warmed, allowing you to savor all the tropical goodness.

Hawaiian Guava Cake Recipe FAQs
What type of guava juice should I use for the cake?
Absolutely! For the best flavor, use pure guava nectar or juice that is not from concentrate. This ensures the tropical essence shines through in every bite of your Hawaiian Guava Cake.
How should I store the Hawaiian Guava Cake?
Store your Hawaiian Guava Cake covered in plastic wrap or an airtight container in the refrigerator for up to 3 days. This helps to keep it fresh and maintain its delightful texture. Make sure to keep it chilled, especially if your kitchen is warm.
Can I freeze the Hawaiian Guava Cake?
Yes, you can! To freeze your Hawaiian Guava Cake, wrap individual slices tightly in plastic wrap and aluminum foil. This will last for up to 2 months in the freezer. When you’re ready to enjoy, simply transfer the slices to the fridge to thaw overnight for a delicious tropical treat!
What if my guava gel isn’t thickening properly?
Very often, this can happen if the cornstarch wasn’t fully mixed with water before adding it to the hot juice mixture. If the gel hasn’t thickened, remove it from heat, whisk in more cornstarch mixed with a little water (about 1 tablespoon each), and return it to the heat, stirring until it thickens.
Can I make this cake dairy-free?
Absolutely! For a dairy-free Hawaiian Guava Cake, substitute the cream cheese and Cool Whip with non-dairy alternatives, such as vegan cream cheese and coconut whipped cream. This way, everyone can savor the tropical flavors without worry!
Delicious Hawaiian Guava Cake that Brings Paradise Home
Ingredients
Equipment
Method
- Preheat your oven to 350°F (175°C) and coat a 13x9-inch baking dish with vegetable spray.
- Combine strawberry cake mix, guava nectar, eggs, and melted coconut oil in a mixing bowl. Blend on low speed for 30 seconds, then increase to medium-high for 2 minutes until smooth.
- Pour the batter into the prepared baking dish and bake for 24-26 minutes. Check for doneness with a toothpick.
- Transfer the cake to a wire rack to cool completely for at least 30 minutes.
- In a mixing bowl, beat cream cheese until fluffy. Gradually add sugar and vanilla, mixing until incorporated. Gently fold in Cool Whip.
- Spread the cream cheese mixture evenly over the cooled cake and refrigerate for at least 30 minutes.
- In a saucepan, boil guava juice and sugar. Mix cornstarch with water, whisk into the boiling mixture until thickened. Set aside to cool.
- Pour the cooled guava gel over the cream cheese layer and refrigerate the cake until ready to serve.
- Optional: Sprinkle sweetened coconut flakes on top before serving.
Leave a Reply