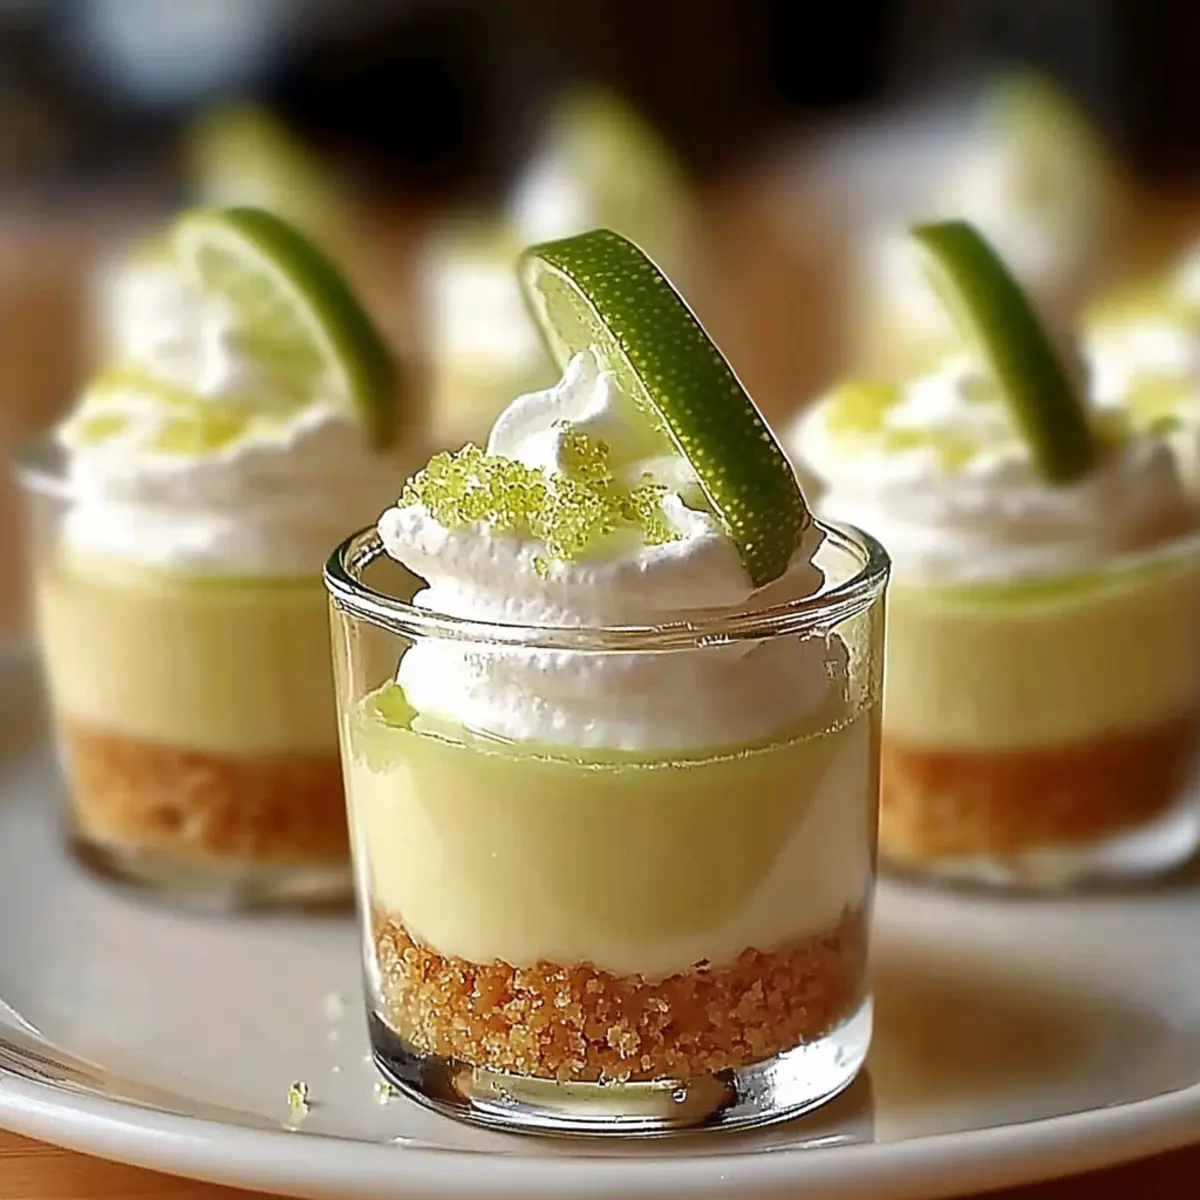
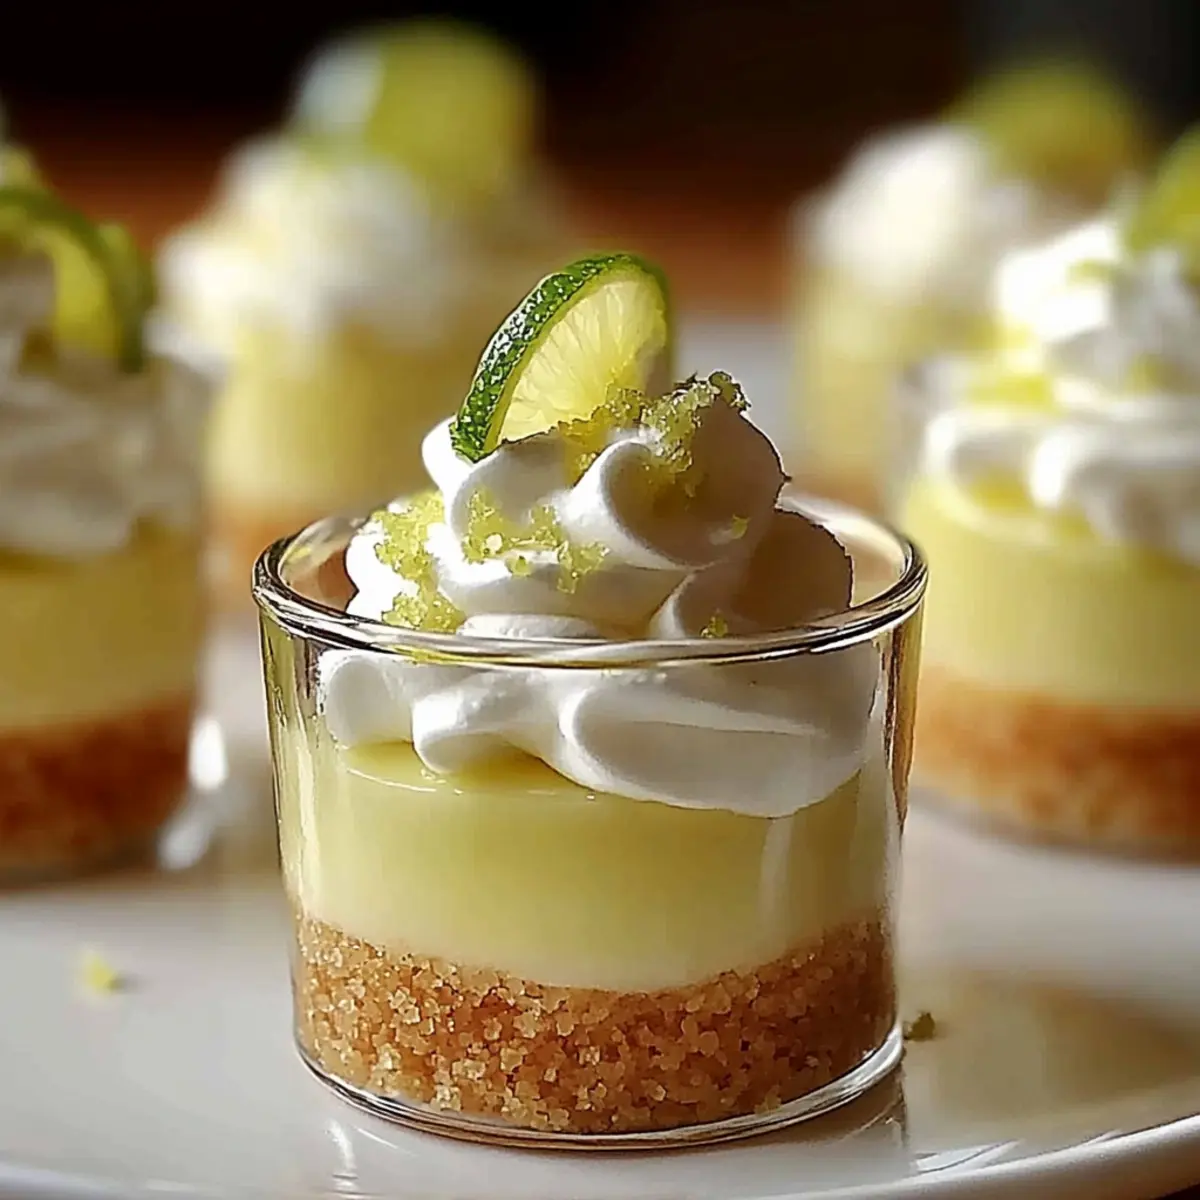
As I opened my fridge, a flicker of inspiration struck—was it possible to capture the zingy delight of my favorite key lime pie in a bite-sized treat? Enter these delightful No-Bake Key Lime Pie Mini Desserts, where refreshing citrus meets a creamy bliss. This easy recipe brings all the traditional flavors without the fuss of baking, making it perfect for casual gatherings or a little indulgence after dinner. With customizable ingredients and gluten-free options available, you can cater to any dietary need while impressing friends and family with stunning presentations. How about a quick mini dessert that’s easy to whip up and even easier to enjoy? Let’s dive into making these delightful morsels!
Why Are These Mini Desserts So Irresistible?
No-Bake Simplicity: These Key Lime Pie Mini Desserts come together in a flash, perfect for busy schedules or last-minute gatherings.
Zesty Flavor Explosion: Enjoy the classic key lime taste in a new, portable format that packs a punch with every bite.
Customizable Ingredients: Tailor the recipe to suit dietary preferences; opt for gluten-free graham crackers or dairy-free alternatives for a delicious twist.
Impressive Presentation: Serve these elegant mini desserts in glasses for a stunning display that will wow your guests. Just like my Mini Carrot Cakes, these treats are a feast for the eyes as well as the palate!
Quick Chill Time: With only 2 hours to set, you can whip these up and be ready to impress in no time. Perfect for casual get-togethers or even as a delightful post-dinner treat.
Key Lime Pie Mini Desserts Ingredients
For the Crust
- Graham Cracker Crumbs – Forms the crunchy base; substitute with gluten-free versions if needed.
- Melted Butter – Binds the crust and enriches flavor; coconut oil is a great dairy-free alternative.
- White Sugar – Adds sweetness; can be omitted if using sweeter cookies.
For the Filling
- Reduced-Fat Cream Cheese – Creates a creamy texture; full-fat gives a more indulgent taste.
- Low-Fat Vanilla Greek Yogurt – Provides tanginess and creaminess; opt for dairy-free yogurt if preferred.
- Fat-Free Sweetened Condensed Milk – Sweetens and thickens the filling; dairy-free options are available.
- Key Lime Juice – Delivers key flavor; always choose fresh for a vibrant taste.
- Green Food Coloring (optional) – Enhances visual charm; use sparingly for an elegant touch.
Step‑by‑Step Instructions for Key Lime Pie Mini Desserts
Step 1: Prepare the Crust
In a mixing bowl, combine the graham cracker crumbs, melted butter, and white sugar until fully blended. The mixture should resemble wet sand. Evenly distribute this crust mixture into mini dessert glasses, pressing firmly down with the back of a spoon or your fingers to create a compact base. Set aside while you prepare the creamy filling.
Step 2: Make the Filling
In a separate bowl, use an electric mixer to beat the softened reduced-fat cream cheese and low-fat vanilla Greek yogurt together until smooth and creamy, about 2-3 minutes. In another bowl, whisk together the fat-free sweetened condensed milk and fresh key lime juice until combined. Gradually fold the key lime mixture into the cream cheese mixture until well blended and no lumps remain, ensuring a delightful creamy filling for your Key Lime Pie mini desserts.
Step 3: Assemble Desserts
If you’d like a two-tone effect, divide the creamy filling in half and add a few drops of green food coloring to one portion. Using a piping bag, alternate piping each filling into the prepared dessert glasses for a visually appealing presentation. Fill the glasses until just above the crust, leaving a little space for garnishing later.
Step 4: Chill
Carefully place the assembled Key Lime Pie mini desserts in the refrigerator for at least 2 hours. This chilling time allows the filling to firm up nicely, creating that perfect creamy texture. You’ll know they are ready when you see they hold their shape but still have that soft, luscious appearance.
Step 5: Garnish (optional)
Once chilled, remove the mini desserts from the fridge and add a dollop of whipped cream on top of each serving for added indulgence. You can also sprinkle a bit of fresh lime zest or add a mint leaf for a pop of color and freshness. This final touch elevates your delightful Key Lime Pie mini desserts, making them irresistible for both the eyes and the palate.

Expert Tips for Key Lime Pie Mini Desserts
-
Softened Cream Cheese: Ensure your cream cheese is softened to room temperature for a smooth filling; avoid lumps for the best texture.
-
Chill Time Matters: Don’t rush the chilling process; allow at least 2 hours for the desserts to firm up properly, ensuring they hold their shape.
-
Piping Precision: Use a piping bag for a neat presentation; this technique elevates your Key Lime Pie mini desserts to a professional level.
-
Fresh Key Limes: Opt for fresh key lime juice instead of bottled for a vibrant flavor that truly captures the essence of this dessert.
-
Layer with Love: Try layering the filling with different colors or fruits like berries for a beautiful, eye-catching twist on presentation.
Key Lime Pie Mini Desserts Variations
Feel free to experiment with these delightful mini desserts and make them truly your own!
- Alternative Crusts: Use crushed ginger snaps or shortbread cookies for a unique twist on the classic crust flavor. The ginger adds a delightful spice that pairs beautifully with the citrus.
- Dairy-Free Delight: Substitute reduced-fat cream cheese with dairy-free cream cheese or coconut cream, ensuring the creamy texture remains intact while accommodating dietary needs.
- Flavor Explosion: Enhance the filling with fresh fruit purees, like raspberry or passion fruit, for a vibrant burst of color and flavor that surprises the palate.
- Chill and Thrill: Prepare a two-tone dessert by adding a splash of fruit juice to half the filling, creating a layer of colorful flavor goodness. It’s all about the visual appeal!
- Heathier Swaps: Opt for maple syrup instead of sugar to sweeten your filling while adding a hint of natural flavor. It’s an easy way to cut back on processed ingredients.
- Nutty Texture: Sprinkle chopped nuts, such as pecans or almonds, on top before serving for an added crunch that contrasts the creamy filling. It’s the perfect texture combo!
- Spicy Kick: For those who enjoy a little heat, mix in a pinch of cayenne pepper to the filling. This unexpected twist brings out the lime’s brightness and adds depth.
- Berry Good Twist: Layer in fresh berries, such as blueberries or strawberries, between the crust and filling for a fruity surprise that enhances both flavor and color. Just like with my Roasted Autumn Vegetable Pot Pies, adding seasonal fruits can elevate any dish!
What to Serve with No-Bake Key Lime Pie Mini Desserts
These delightful mini desserts are perfect for creating a full and satisfying meal experience that balances sweetness with fresh, vibrant flavors.
-
Crispy Arugula Salad: A light and peppery salad can offer a refreshing counterpoint to the creamy mini desserts, enhancing their citrusy zing. The peppery greens will brighten the palate beautifully.
-
Grilled Shrimp Skewers: The smoky, savory notes from grilled shrimp complement the tartness of the key lime desserts. The grilled flavors add depth, making for a well-rounded dining experience.
-
Refreshing Iced Tea: A chilled glass of iced tea, sweetened with a hint of lime, pairs wonderfully with the zesty key lime flavor, providing a quenching contrast that leaves you feeling refreshed.
-
Coconut Sorbet: This light, tropical dessert echoes the citrus tones of the mini desserts while providing a cold, creamy finish. The texture also adds an inviting chill after the meal.
-
Light Citrus Cocktails: Sparkling cocktails featuring grapefruit or orange juice will tie in the fruity notes and elevate the dining experience, making it feel more celebratory.
-
Mini Fruit Tarts: For an added touch of luxury, serve mini fruit tarts bursting with seasonal fruits. Their flaky crust provides a contrast to the creamy texture of the key lime desserts, while the freshness of fruit enhances the overall flavor profile.
-
Chocolate-Dipped Strawberries: These little treats are always a crowd-pleaser, offering a sweet and indulgent bite that complements the tartness of the key lime desserts. The chocolate adds richness that balances the overall meal.
-
Citrus Sorbet Float: Frozen citrus sorbet topped with sparkling water brings a playful element to the table, refreshing the palate before enjoying the sweet mini desserts.
Make Ahead Options
These No-Bake Key Lime Pie Mini Desserts are perfect for meal prep, saving you time on busy weeknights! You can prepare the crust and filling up to 24 hours in advance. For the crust, simply mix the graham cracker crumbs, melted butter, and sugar, then press it into the dessert glasses but avoid adding the filling until you’re ready to serve to maintain the perfect texture. Refrigerate the crusts in an airtight container. Keep the filling in a separate container, tightly sealed in the fridge to ensure it stays fresh. When ready to serve, just pipe the lime filling into the prepared crusts, chill them for an hour if they’ve been out for a while, and garnish with whipped cream and lime zest for a delightful presentation!
How to Store and Freeze Key Lime Pie Mini Desserts
Fridge: Store the mini desserts in an airtight container for up to 3 days to maintain their creamy texture and zesty flavor.
Freezer: These delightful Key Lime Pie mini desserts can be frozen for up to a month, but the crust may become slightly softer upon thawing.
Reheating: There’s no need to reheat; simply thaw in the fridge before serving. Garnish with fresh toppings immediately before enjoying for the best presentation.
Key Lime Pie Mini Desserts Recipe FAQs
What type of graham crackers should I use?
You can use traditional graham cracker crumbs for the crust, but feel free to substitute with gluten-free graham crackers or crushed ginger snaps if you have dietary restrictions. The key is to have a crumbly base that binds together well with melted butter.
How should I store these mini desserts in the fridge?
Store your Key Lime Pie mini desserts in an airtight container in the refrigerator for up to 3 days. This will help preserve their creamy texture and zesty flavor. If they’re left uncovered, they may absorb odors from the fridge, so sealing them is essential.
Can I freeze Key Lime Pie mini desserts?
Absolutely! You can freeze these mini desserts for up to a month. To do this, place them in a single layer in an airtight container or wrap them individually in plastic wrap. When you’re ready to enjoy, simply thaw them in the refrigerator overnight. Keep in mind, the crust may soften slightly after freezing, but they will still be delicious.
What should I do if the filling is too runny?
If your filling turns out runny, it’s possible the cream cheese wasn’t blended thoroughly or the key lime juice was too watery. To remedy this, try chilling the mixture for a bit longer to help it firm up or adding a little more cream cheese and re-mixing. Remember, let it chill for a solid 2 hours to fully set before serving.
Are these mini desserts suitable for gluten-free diets?
Yes, these Key Lime Pie mini desserts can be made gluten-free by using gluten-free graham cracker crumbs for the crust. Always double-check labels on other ingredients, like the condensed milk or yogurt, to ensure they don’t contain gluten if you’re catering to gluten-sensitive guests.

Refreshing Key Lime Pie Mini Desserts You Can Whip Up Fast
Ingredients
Equipment
Method
- In a mixing bowl, combine the graham cracker crumbs, melted butter, and white sugar until fully blended. Evenly distribute this crust mixture into mini dessert glasses, pressing firmly to create a compact base.
- In a separate bowl, use an electric mixer to beat the softened cream cheese and yogurt until smooth. In another bowl, whisk together the condensed milk and key lime juice, then fold into the cream cheese mixture until well blended.
- If desired, divide the filling in half and color one portion with green food coloring. Using a piping bag, alternate piping each filling into the glasses, filling until just above the crust.
- Place the assembled desserts in the refrigerator for at least 2 hours to allow the filling to firm up properly.
- Once chilled, remove the mini desserts and garnish with whipped cream, fresh lime zest, or mint leaves for extra color and flavor.
Leave a Reply