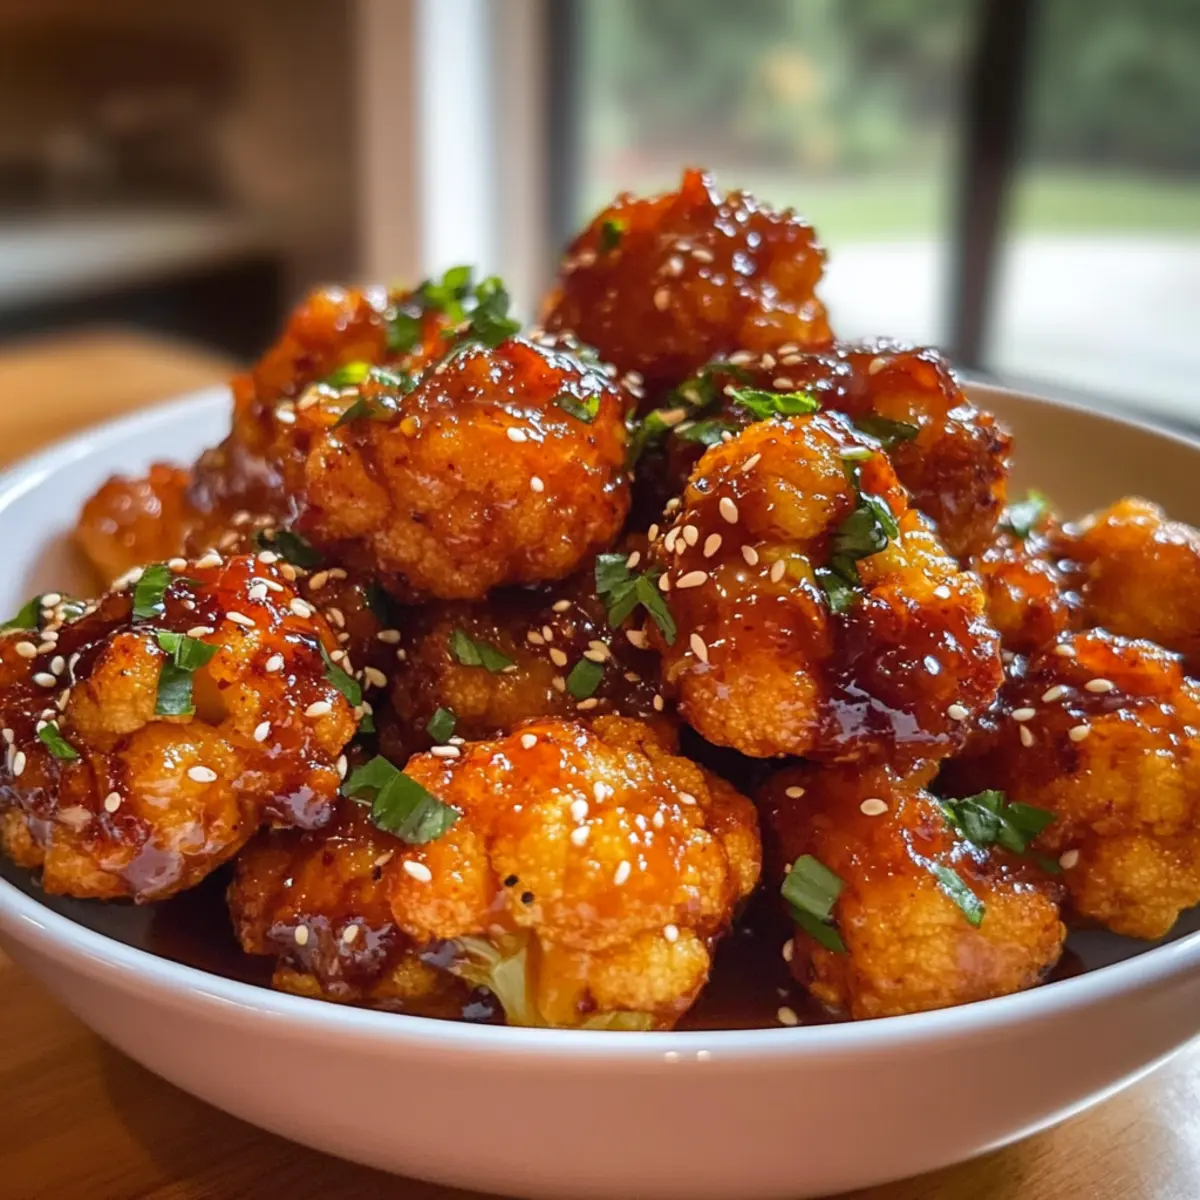
As I stood in my kitchen, the aroma of sizzling spices wafted through the air, and I couldn’t help but think about how comfort food often comes with a side of guilt. Enter my Crispy Baked Korean Cauliflower with Sweet & Spicy Sauce—a delightfully crunchy, plant-based treat that lights up your taste buds without the heaviness of traditional fried snacks. This Korean Baked Cauliflower is not only a healthier option but also incredibly easy to whip up, making it perfect for those busy weeknights or casual gatherings. Trust me, everyone—from picky eaters to seasoned foodies—will love diving into this irresistible dish that balances crispy textures and bold flavors. And just wait until you discover how adaptable this recipe is! Ready to explore the magic of sweet and spicy goodness?
Why Will You Love This Cauliflower?
Irresistible Crunch: Each floret is baked to perfection, delivering a satisfying crisp that rivals your favorite fried snacks.
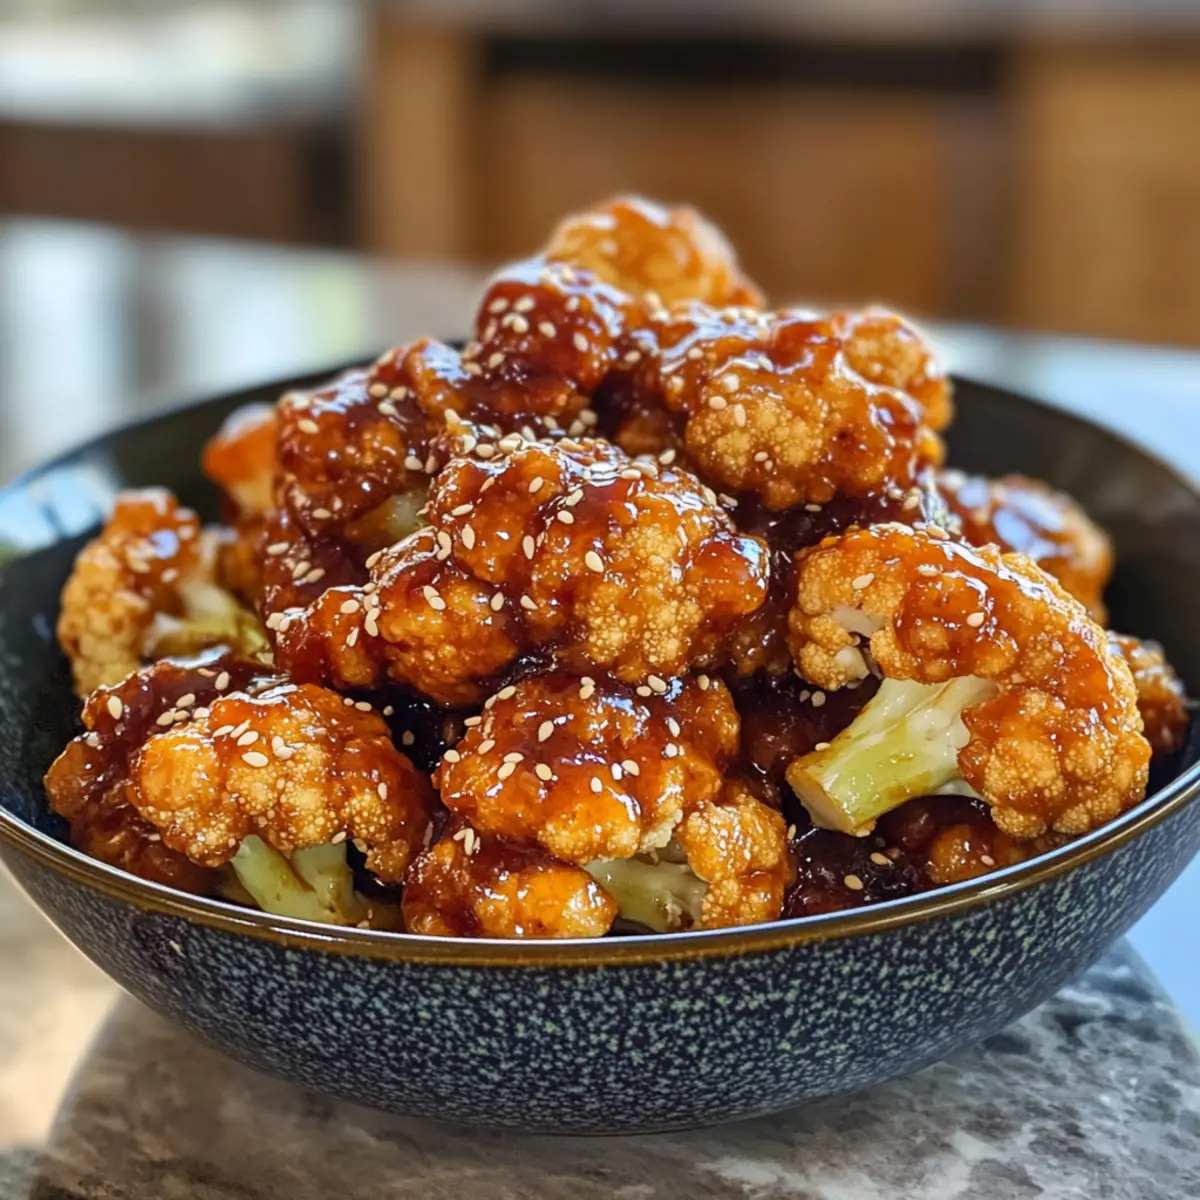
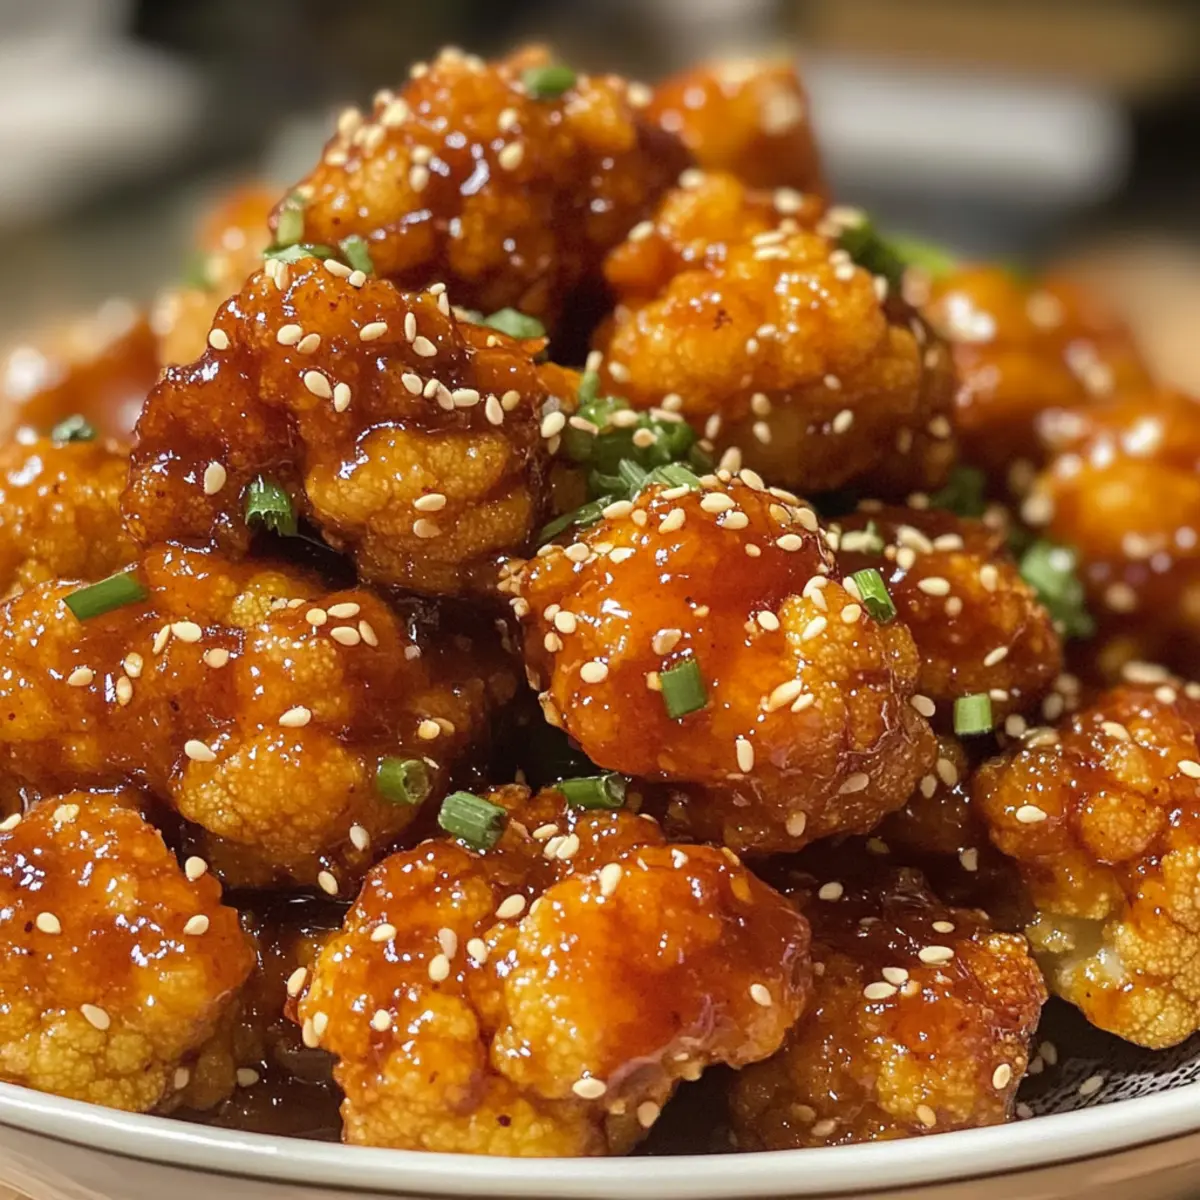
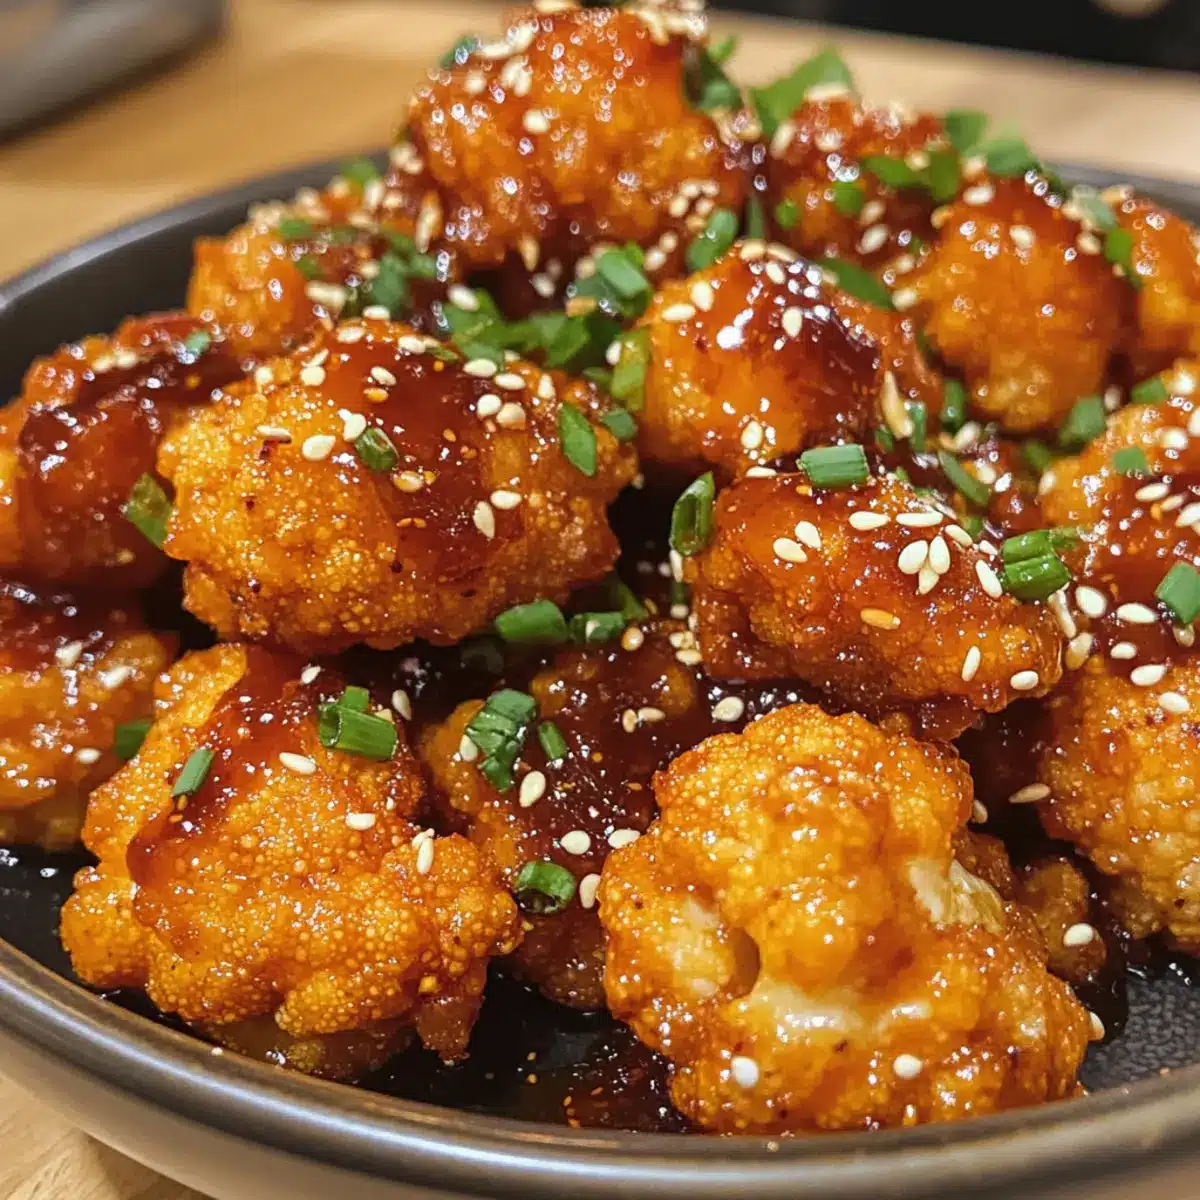
Sweet & Spicy Perfection: The sticky sauce showcases a delightful mix of flavors, offering an elegant, plant-based twist on traditional Korean Fried Chicken.
Quick & Easy: With just a few simple steps, you’ll have a show-stopping dish ready in no time—perfect for busy weeknights or unexpected guests.
Versatile & Adaptable: Feel free to switch up the cauliflower with broccoli or experiment with different nuts in the coating for exciting variations.
Crowd-Pleasing Flavor: This Korean Baked Cauliflower is an instant hit at any gathering, making it a fantastic appetizer or snack for everyone to enjoy.
Nutrient-Dense Delight: Packed with fiber and healthy fats, you can indulge guilt-free while nourishing your body. Don’t miss out on more delicious twists like Cauliflower Fried Rice or Twice Baked Breakfast Potatoes for a complete meal experience!
Korean Baked Cauliflower Ingredients
-
For the Breading
• Cauliflower – Use 1 medium-sized cauliflower, cut into florets for the base of this delicious dish.
• All Purpose Flour – Adds structure to the coating; substitute with gluten-free flour for a gluten-free option.
• Potato Starch – Ensures extra crispiness; corn starch can also be used in its place.
• Raw Almonds – Provides a delightful crunch and nutritional benefits; consider substituting with walnuts for a different texture.
• Panko Breadcrumbs – Contributes to a super crispy exterior; make sure to use gluten-free if needed.
• Non-Dairy Milk – Acts as a binding agent for the coating; almond milk works great, but any unsweetened plant milk will do. -
For the Sauce
• Ketchup – Adds a sweet base to the sauce; opt for a low-sugar version if preferred.
• Mirin – A touch of sweetness that enhances the flavor profile; can be replaced with rice vinegar if short on time.
• Sriracha – Introduces heat; adjust according to your spice tolerance or omit for a milder dip.
• Tamari Soy Sauce – Provides depth of flavor; make sure it’s gluten-free if necessary.
• Maple Syrup – Offers sweetness to balance the heat; honey can be an alternative (non-vegan).
• Rice Wine Vinegar – Adds a lovely acidity; apple cider vinegar is an excellent substitute.
• Gochujang – The primary heat source and flavor for this Korean Baked Cauliflower; any chili paste can substitute in a pinch.
• Gochugaru – Complements with extra flavor and spice; adjust according to your taste preference. -
For Flavoring
• Cayenne Pepper – Adds a kick of heat; adjust the amount to suit your palate.
• White Pepper – Enhances flavor complexity; feel free to swap with black pepper if that’s handy.
• Ginger Powder & Grated Ginger – Adds warmth and aromatic flavor; you can use either one based on your preference.
• Garlic Powder & Minced Garlic – Provides depth of flavor; more or less can be used depending on your taste.
• Fine Sea Salt – Elevates all the flavors; regular salt can serve as a suitable stand-in.
• Lemon Juice – Introduces acidity to balance the flavors; lime juice is a wonderful substitute.
• Sesame Oil – Infuses a rich nutty flavor; use olive oil if you’re out of sesame oil. -
For Garnish
• White Sesame Seeds – Adds a nutty flavor and visual appeal; optional for those with allergies.
Dive into this Korean Baked Cauliflower recipe and experience the joy of a healthy, crispy snack bursting with flavors that everyone will crave!
Step‑by‑Step Instructions for Korean Baked Cauliflower
Step 1: Preheat the Oven
Begin by preheating your oven to 425°F (220°C). This high temperature is essential for achieving the perfect crispy texture on your Korean Baked Cauliflower. While the oven warms up, gather your ingredients and prepare your baking tray by lining it with parchment paper to prevent sticking.
Step 2: Prepare the Cauliflower
Next, take your medium-sized cauliflower and cut it into uniform florets, ensuring they are similar in size for even cooking. Rinse the florets under cold water and pat them dry with a clean kitchen towel or paper towel. This will help the coating adhere better, giving you an irresistible crunch.
Step 3: Make the Coating Mixture
In a mixing bowl, combine the all-purpose flour, potato starch, cayenne pepper, white pepper, ginger powder, garlic powder, and sea salt. Whisk the dry ingredients until they are thoroughly blended, creating a flavorful coating for your Korean Baked Cauliflower. This mixture is key to achieving that standout crunch.
Step 4: Prepare the Wet Mixture
In a separate bowl, whisk together the non-dairy milk and lemon juice until smooth. This wet mixture acts as a binding agent, helping the dry coating stick to the cauliflower florets. It’s essential to have everything ready before you start coating the cauliflower to ensure a seamless process.
Step 5: Coat the Cauliflower
Now, dip each cauliflower floret into the milk mixture, allowing any excess to drip off. Then, dredge the floret in the flour mixture, pressing gently to ensure a good coating. This step will create a delightful crispy layer, so be sure each piece is well-covered for the best results in your Korean Baked Cauliflower.
Step 6: Add Crunch with Nuts and Breadcrumbs
Once all florets are coated with the flour mixture, roll them in crushed almonds and Panko breadcrumbs. This adds an extra layer of crunch and flavor. Place the coated florets evenly on your prepared baking tray without overcrowding them—this will help them crisp up beautifully in the oven.
Step 7: Bake for Crispy Perfection
Insert the baking tray into your preheated oven and bake the florets for 25-30 minutes. Halfway through, carefully flip them with a spatula to ensure they cook evenly on both sides. You’ll know they’re ready when they are golden brown and crispy, filling your kitchen with a mouthwatering aroma.
Step 8: Prepare the Sweet & Spicy Sauce
While the cauliflower bakes, prepare the sauce by combining ketchup, mirin, sriracha, tamari, maple syrup, rice wine vinegar, gochujang, grated ginger, and minced garlic in a saucepan. Heat over medium heat, stirring continuously until the mixture becomes smooth and warmed through, creating that delicious sticky glaze for your Korean Baked Cauliflower.
Step 9: Toss and Serve
Once the cauliflower florets are baked to crispy perfection, remove them from the oven and immediately toss them in the warm sauce until fully coated. This step infuses flavor into every bite of your Korean Baked Cauliflower, making it an irresistible treat that will wow your family and friends.
Step 10: Garnish and Enjoy
Finally, serve your crispy Korean Baked Cauliflower garnished with white sesame seeds, if desired. The added crunch and nutty flavor of the seeds enhance the dish visually and tastefully. Present it warm as a delightful snack or appetizer, ready to be enjoyed by all.
Expert Tips for Korean Baked Cauliflower
-
Marinate for Flavor: Let the coated cauliflower sit for a few minutes before baking to allow flavors to intensify, enhancing your Korean Baked Cauliflower.
-
Coating Consistency: Ensure an even coating of flour and nuts for optimal crunch; too little coating can lead to sogginess.
-
Watch the Oven: Keep an eye on baking time as each oven varies; your florets should be golden brown, not burnt.
-
Adjust Spice Levels: Always taste your sauce before tossing in the cauliflower. Adjust sriracha and gochujang for your preferred heat level.
-
Quick Reheat Method: If you have leftovers, reheat in a hot oven for a few minutes to regain that delightful crispiness, avoiding the microwave.
-
Experiment Wisely: Feel free to substitute cauliflower with other veggies like broccoli or Brussels sprouts for fresh variations, but keep the baking time in check!
Korean Baked Cauliflower Variations & Substitutions
Feel free to play around with this delightful recipe, bringing your unique twist to every bite.
- Broccoli Swap: Replace cauliflower with broccoli for a vibrant take that packs a similar crunch and nutritional benefits.
- Nutrient Boost: Add Chickpeas for additional protein. Mix them into the coating to create a heartier snack.
- Nut-Free Option: Go for Sunflower Seeds instead of almonds or walnuts for a nut-free coating that still provides crunch.
- Spice Up the Sauce: Add Diced Jalapeños to the sauce for an extra kick! This brings a fresh, fiery touch that heat lovers will appreciate.
- Gluten-Free Upgrade: Use Almond Flour instead of all-purpose flour for a low-carb option that’s also gluten-free.
- Add Some Greens: Toss in Spinach or Kale for an aromatic, leafy addition, boosting the nutritional content.
- Creamy Version: Blend in some Tahini into your sauce for a creamy texture that enhances flavor depth.
- Savory Cheese Flavor: Sprinkle Nutritional Yeast on along with the Panko to bring a cheesy essence while staying plant-based.
As you dive into this recipe, don’t forget to check out my Baked Lobster Tails for a luxe treat or my Broccoli Cauliflower Casserole for another cozy dish perfect for gatherings!
How to Store and Freeze Korean Baked Cauliflower
Fridge: Store leftover Korean Baked Cauliflower in an airtight container for up to 3 days. This keeps the flavor intact while ensuring freshness.
Freezer: For longer storage, freeze the unbaked, coated cauliflower florets on a baking tray. Once frozen, transfer them to a freezer bag for up to 2 months; bake from frozen, adding a few more minutes to cooking time.
Reheating: When ready to enjoy, reheat baked cauliflower in the oven at 350°F (175°C) for about 10-15 minutes to restore its crispiness. Avoid microwaving, as it can make the coating soggy.
Marinate Before Serving: To enhance the flavor before serving, let the coated cauliflower marinate in the sauce briefly for optimal enjoyment!
Make Ahead Options
These Korean Baked Cauliflower florets are perfect for meal prep, allowing you to enjoy a delicious snack with minimal effort! You can prep the cauliflower by cutting it into florets and coating them in the flour mixture up to 24 hours in advance. Simply refrigerate the coated florets in an airtight container to maintain their crisp quality. When you’re ready to serve, just bake the florets for 25-30 minutes until golden brown and crispy, then toss them in the sweet and spicy sauce to finish. This way, you get the same delightful crunch and flavor while saving time for your busy weeknights!
What to Serve with Korean Baked Cauliflower
Creamy, crunchy, and oh-so-delicious, elevate your meal with the perfect pairings for this unforgettable dish.
-
Fluffy Rice: Provides a soft, neutral base that soaks up the sweet and spicy sauce, balancing the bold flavors beautifully. Serve it with a dollop of sesame oil for added richness.
-
Vibrant Stir-Fried Vegetables: Add colorful bell peppers, snap peas, and carrots for a fresh crunch. This side dish adds a delightful texture and brightness that brings your meal to life.
-
Chilled Cucumber Salad: A crisp and tangy cucumber salad drizzled with rice vinegar is the perfect refreshing counterpart, enhancing the heat of the cauliflower with its coolness.
-
Savory Quinoa: Serve this protein-packed side seasoned with sesame seeds and soy sauce. Quinoa ties in beautifully, creating a lively, nutritious balance alongside your cauliflower.
-
Spicy Noodles: Whip up some sesame oil-infused noodles for a contemporary fusion touch. Their chewiness complements the crispy cauliflower while echoing the dish’s spicy notes.
-
Crisp Greens: A mixed leafy green salad tossed with a citrus vinaigrette introduces a burst of freshness and lightness, perfect for rounding out the meal with bright flavors.
-
Coconut Rice: The sweetness of coconut rice harmonizes with the spice of the cauliflower, offering an indulgent, tropical flair that will transport your taste buds.
-
Craft Beer: Pair with a light, hoppy beer that enhances the flavors without overpowering them. It’s a delightful companion that completes the experience of this savory treat.
-
Minted Lemonade: A refreshing mint lemonade adds a zesty, cooling note that beautifully contrasts the spicy layers of flavor in the Korean Baked Cauliflower, making each bite more enjoyable.
Korean Baked Cauliflower Recipe FAQs
How do I select the best cauliflower for this recipe?
Absolutely! Look for cauliflower heads that are firm, compact, and free of dark spots or blemishes. The florets should be bright white or a creamy color with fresh green leaves. If you can, select cauliflower that feels heavy for its size, as this indicates better freshness and taste.
What is the best way to store leftovers of Korean Baked Cauliflower?
You can store leftover Korean Baked Cauliflower in an airtight container in the refrigerator for up to 3 days. Make sure to let it cool completely before sealing to prevent moisture buildup, which can make the coating soggy. Simply reheat in the oven to regain that lovely crunch—around 10-15 minutes at 350°F (175°C) should do the trick!
Can I freeze Korean Baked Cauliflower?
Certainly! To freeze, I recommend freezing the unbaked, coated cauliflower florets on a baking tray first. Once they are completely frozen (about 1-2 hours), transfer them to a freezer bag for up to 2 months. When you’re ready to eat, just bake them straight from frozen, adding a few extra minutes to the cooking time.
What if my cauliflower isn’t crispy after baking?
Very! If you find your Korean Baked Cauliflower isn’t crispy enough, ensure you’re not overcrowding the baking tray, as this can trap steam. Also, make sure you’ve applied enough coating to create a solid crunch. If needed, turn up the oven temperature slightly in the last few minutes of baking and monitor closely until they achieve that golden brown color.
Are there any dietary considerations for this recipe?
Yes, it’s perfect for many diets! The Korean Baked Cauliflower is vegan and gluten-free, especially if you use gluten-free flour and panko breadcrumbs. If you’re preparing food for someone with nut allergies, simply swap the almonds for sunflower seeds or omit them entirely. Always check ingredient labels to ensure they meet your dietary needs.
Can I use other vegetables instead of cauliflower?
Absolutely! This recipe is highly adaptable. You can substitute cauliflower with broccoli or Brussels sprouts for a different flavor and texture profile. Just keep an eye on the baking time, as smaller veggies may need less time to reach the desired crispiness!
Crispy Korean Baked Cauliflower for a Guilt-Free Snack
Ingredients
Equipment
Method
- Preheat your oven to 425°F (220°C) and prepare your baking tray with parchment paper.
- Cut the cauliflower into uniform florets, rinse, and pat dry.
- Combine all-purpose flour, potato starch, cayenne pepper, white pepper, ginger powder, garlic powder, and sea salt in a bowl.
- In another bowl, whisk together non-dairy milk and lemon juice until smooth.
- Dip each floret in the milk mixture, then dredge in the flour mixture.
- Roll in crushed almonds and panko breadcrumbs, then place on the baking tray.
- Bake for 25-30 minutes, flipping halfway through, until golden brown and crispy.
- Combine ketchup, mirin, sriracha, tamari, maple syrup, rice wine vinegar, gochujang, ginger, and garlic in a saucepan. Heat and stir until smooth.
- Toss the baked cauliflower in the warm sauce until fully coated.
- Garnish with white sesame seeds if desired and serve warm.
Leave a Reply