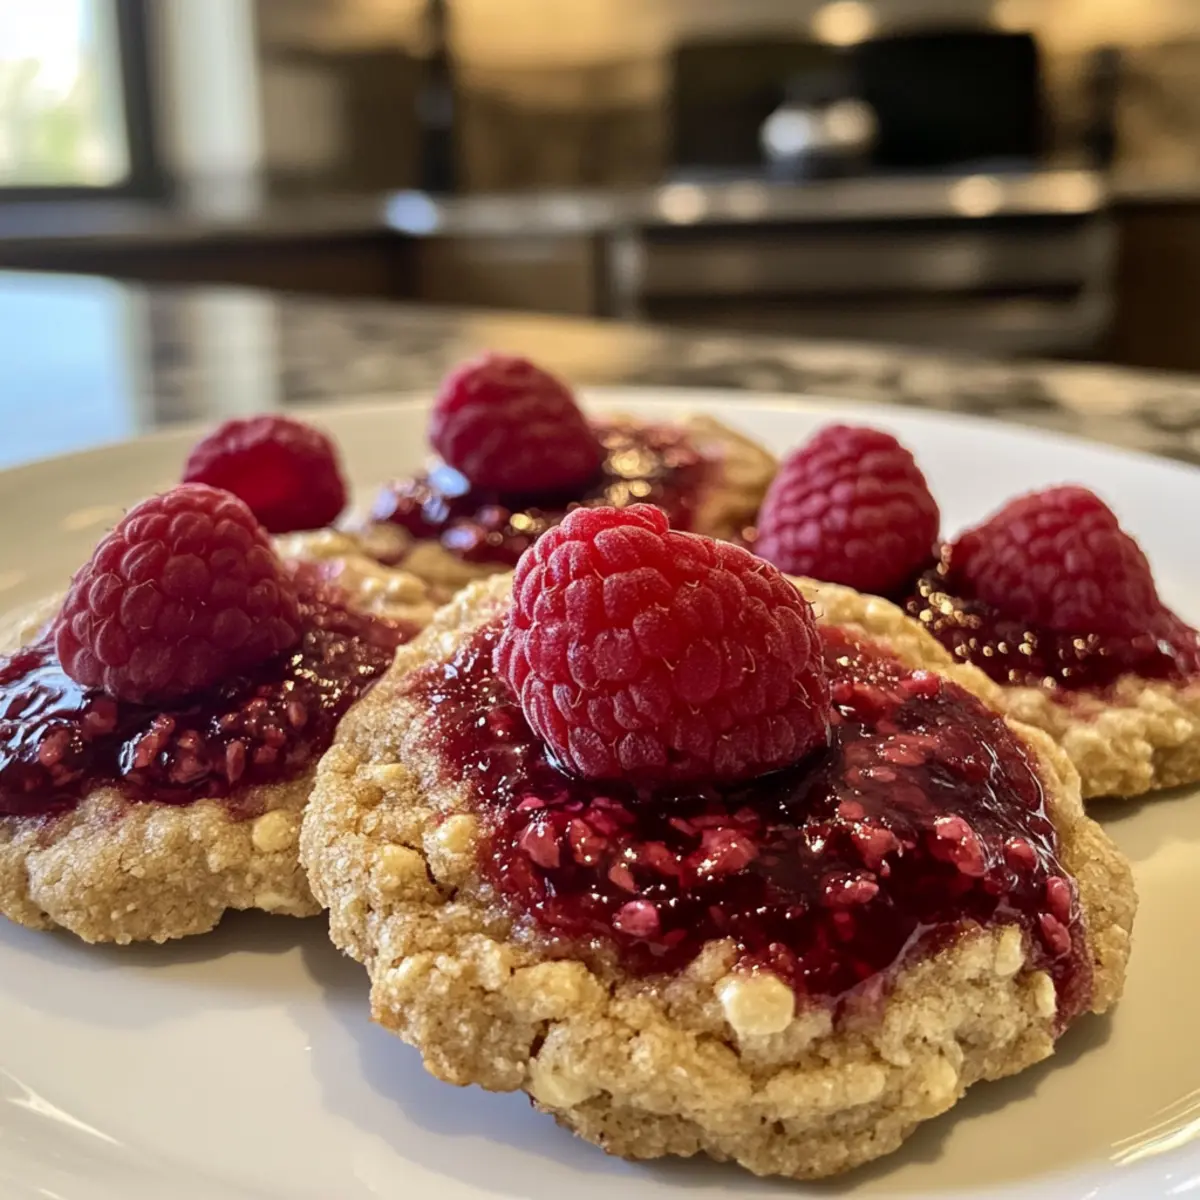
As I pulled those golden-brown cookies out of the oven, the sweet and tangy aroma of fresh raspberries filled my kitchen, instantly lifting spirits. These Gluten-Free Raspberry Cookies are a delightful homemade treat that not only satisfy cravings but also fit into a gluten-free lifestyle. With a soft, chewy texture and a burst of fruity flavor from a luscious homemade raspberry syrup and frozen raspberries, they make for the perfect dessert or cozy afternoon snack. What’s even better? They’re incredibly versatile—try them as vegan delights, or add a splash of almond extract for a sweet twist. With a recipe that’s both easy to follow and impressively beautiful, I guarantee these cookies will become a beloved staple in your home. Are you ready to get baking?
Why Are These Raspberry Cookies So Special?
Irresistible Flavor: Each bite bursts with sweet and tangy notes from the homemade raspberry syrup, making them a standout treat for any occasion.
Versatile Options: With variations like Vegan, Raspberry Almond, and Sugar-Free, there’s something for everyone to enjoy.
Quick to Make: The simple steps and quick bake time mean you’ll have a delightful homemade dessert ready in no time.
Perfect for Sharing: Impress your friends and family at your next gathering with cookies that look as good as they taste.
Healthy Indulgence: Gluten-free and made with real fruit, these cookies satisfy your cravings without the guilt—perfect alongside a cup of tea or coffee.
Looking for more tempting options? Check out my Raspberry Caramel Millionaires for a rich twist, or try the delightful Crunchy Almond Cookies for a different flavor profile!
Raspberry Cookies Ingredients
For the Cookies
- Frozen Raspberries – Provides a burst of fruit flavor; best when frozen to maintain shape during baking.
- Granulated Sugar – Adds sweetness; can be substituted with alternative sweeteners for a sugar-free version.
- Gluten-Free Flour (with xanthan gum) – Essential for structure, ensuring the cookies remain gluten-free; regular flour may alter the dietary status.
- Cornstarch – Helps achieve a soft, chewy texture for irresistible delight.
- Baking Powder – Provides leavening for lightness and a perfect rise.
- Kosher Salt – Enhances overall flavor, bringing out the tartness of the raspberries.
- Unsalted Butter (or Vegan Baking Stick) – Contributes richness and moisture; can be swapped for vegan sticks for a dairy-free treat.
- Milk – Adds moisture and tenderness; alternative plant-based milk works well for a vegan version.
- Raspberry Syrup – Infuses the cookies with vibrant fruit flavor; can be made ahead and stored.
- Red Food Coloring – Optional, for enhanced visual appeal and a pop of color.
- Chopped Frozen Raspberries – Adds delicious fruit surprises in every bite of your raspberry cookies.
For Additional Ideas
- Almond Extract – A teaspoon adds a delightful nutty flavor for Raspberry Almond variations.
- Lemon Zest – A fresh addition for a zesty Raspberry Lemon twist.
- Shredded Coconut – Mix in for a Coconut Raspberry variation for tropical flair.
These Raspberry Cookies will bring joy and sweetness to your gatherings, satisfying sweet cravings with fruit and flair!
Step‑by‑Step Instructions for Raspberry Cookies
Step 1: Make Raspberry Syrup
In a small saucepan over medium heat, combine your frozen raspberries and granulated sugar. Cook while stirring for about 5-7 minutes until the mixture thickens and resembles a syrup. You’ll know it’s ready when it’s glossy and coats the back of a spoon. Once thickened, remove from heat and let it cool completely.
Step 2: Prepare Dry Ingredients
In a large mixing bowl, combine gluten-free flour, cornstarch, baking powder, and kosher salt. Whisk these dry ingredients together until well blended, ensuring there are no lumps. This step is crucial for the texture of your Raspberry Cookies, as it helps create a consistent dough that holds together beautifully.
Step 3: Cream Butter and Sugar
Using an electric mixer, beat the unsalted butter and granulated sugar in a separate bowl on medium speed until the mixture is light and fluffy, about 3-4 minutes. You’ll notice a pale color and airy consistency. This step is essential for adding richness and creates a delightful melted-in-your-mouth texture.
Step 4: Mix Wet Ingredients
Add the cooled raspberry syrup, milk, and a splash of red food coloring (if using) to the creamed butter and sugar. Blend these ingredients together on low speed until just incorporated, ensuring everything is mixed smoothly without overmixing, which is key for your Raspberry Cookies’ chewy texture.
Step 5: Combine Ingredients
Gradually add the dry mixture to the wet mixture, mixing until just combined. Avoid overworking the dough, as this will affect the final cookie texture. Gently fold in the chopped frozen raspberries, making sure they are evenly distributed throughout the dough without breaking apart.
Step 6: Chill Dough
Cover the dough with plastic wrap and refrigerate it for at least 30 minutes. This chilling period is important as it helps the cookies maintain their shape during baking and enhances their chewy texture. While your dough is chilling, you can preheat the oven.
Step 7: Preheat and Prepare Baking Sheet
Preheat your oven to 350°F (175°C) as the dough chills. Meanwhile, line a baking sheet with parchment paper, creating a non-stick surface that helps your Raspberry Cookies bake evenly. This preparation ensures that they come out perfectly golden and easy to transfer after baking.
Step 8: Shape Cookies
Once chilled, roll tablespoon-sized portions of dough into balls and generously roll them in sugar before placing them on the lined baking sheet. Leave about 2 inches between each cookie, as they will spread while baking, becoming irresistibly chewy and soft in the center with a lightly crisp edge.
Step 9: Bake
Place the baking sheet in the preheated oven and bake the cookies for 10-12 minutes, or until the edges are golden and the centers look set. The cookies will continue to firm up as they cool. Allow them to cool on the baking sheet for a few minutes, then transfer to a wire rack to cool completely and let all those delightful raspberry flavors settle in.
Raspberry Cookies Variations & Substitutions
Feel free to personalize these Raspberry Cookies to suit your taste or dietary needs—let your creativity run wild!
- Vegan Version: Swap butter for vegan baking stick and use plant-based milk for a delightful dairy-free treat.
- Raspberry Almond: Incorporate a teaspoon of almond extract into the dough for a nutty, aromatic twist that complements the raspberries beautifully.
- Raspberry Lemon: Add lemon zest to the batter for a refreshing citrus kick that brightens the flavor profile.
- Sugar-Free Version: Use sugar alternatives like stevia or monk fruit to create a guilt-free dessert without sacrificing sweetness.
- Coconut Raspberry: Mix in shredded coconut for tropical flair and an enticing texture with every bite.
- Chocolate Chip Raspberry: Toss in a handful of dairy-free or semisweet chocolate chips for an indulgent chocolate-raspberry combo. Each cookie will be a rich, smooth surprise!
- Nutty Crunch: Fold in chopped walnuts or pecans for a satisfying crunch, balancing the soft texture of the cookies.
- Chili Raspberry: For a fiery twist, add a small pinch of cayenne pepper to the dough. It brings a captivating warmth that elevates the fruity flavor.
These variations provide an exciting opportunity to experiment, creating flavor combinations that fit any occasion. And if you’re in the mood for other delicious treats, check out my enchanting Spiral Cookies Whimsical or the luscious White Chocolate Raspberry recipe!
Expert Tips for Raspberry Cookies
-
Chill the Dough: Refrigerating the dough for at least 30 minutes helps prevent the cookies from spreading too much during baking, ensuring a thick and chewy texture.
-
Use Frozen Raspberries: These hold their shape better than fresh during baking. If using fresh, make sure they’re not overly ripe to avoid excess moisture in the dough.
-
Watch Baking Time: Keep a close eye on your cookies while baking; overbaking can lead to a drier texture. You want the edges golden while the center remains soft.
-
Avoid Overmixing: When combining wet and dry ingredients, mix gently until just combined. Overmixing can lead to tougher cookies.
-
Experiment with Flavors: Don’t hesitate to try different variations! Add almond extract for a Raspberry Almond twist or lemon zest for a Citrus kick—let your creativity shine with these delicious raspberry cookies!
Make Ahead Options
These Gluten-Free Raspberry Cookies are perfect for meal prep, allowing you to enjoy fresh-baked goodness even on your busiest days! You can prepare the raspberry syrup up to 3 days in advance; simply refrigerate it in an airtight container to maintain its vibrant flavor. Additionally, you can mix the dough and refrigerate it for up to 24 hours before baking. Make sure to cover it tightly to prevent dryness. When ready to bake, just roll the chilled dough into balls, coat in sugar, and bake for 10-12 minutes. Your cookies will be just as delicious and wonderfully soft, making for a delightful homemade treat with minimal effort!
How to Store and Freeze Raspberry Cookies
Room Temperature: Keep your Raspberry Cookies in an airtight container at room temperature for up to 5 days to maintain their softness and flavor.
Fridge: For longer freshness, store the cookies in the refrigerator. They can last up to 1 week, but you may want to let them come to room temperature before enjoying.
Freezer: To freeze, place the cookies in a single layer in an airtight container or freezer bag, separating layers with parchment paper. They can be frozen for up to 3 months.
Reheating: For a fresh-from-the-oven taste, reheat frozen Raspberry Cookies in a preheated oven at 350°F (175°C) for about 5-7 minutes, allowing them to become warm and chewy again.
What to Serve with Gluten-Free Raspberry Cookies?
These delightful cookies make every occasion sweeter. Pair them with comforting sides and delectable treats for a memorable experience.
-
Creamy Vanilla Ice Cream: The smoothness of vanilla ice cream complements the fruity bursts of raspberry, creating a delightful contrast in temperature and texture.
-
Fresh Lemonade: A refreshing glass of lemonade enhances the cookies’ sweet-tart flavor, making for a perfect summertime or afternoon treat.
-
Herbal Tea: Choose a soothing chamomile or mint tea to elevate your cookie enjoyment, adding warmth and a calming note to your snack time.
-
Chocolate Drizzle: A simple drizzle of melted dark chocolate over the cookies adds richness and contrasts beautifully with their fruity essence.
-
Yogurt Parfait: Layer the cookies with yogurt and fresh berries for a delectable parfait that combines crunch, creaminess, and flavor in every bite.
-
Coconut Whipped Cream: This light and airy topping pairs wonderfully with the raspberry flavor, adding a touch of tropical flair to your dessert experience.
-
Cheese Platter: Add a selection of cheeses like brie or goat cheese, contrasting the sweetness of the cookies with a savory touch—perfect for a sophisticated snack board.
-
Sparkling Water with Mint: Elevate your refreshment with sparkling water infused with fresh mint leaves to cleanse the palate between bites of sweet cookie goodness.
-
Berry Compote: A warm berry compote makes for an indulgent dip, enhancing the cookie experience with additional fruity goodness.
Enjoy these Raspberry Cookies with delightful pairings that will have everyone reaching for seconds!
Raspberry Cookies Recipe FAQs
How do I choose the best frozen raspberries for my cookies?
Absolutely! Look for frozen raspberries that are bright in color and without dark spots all over. You want to ensure they are plump and not clumped together, as this indicates they were frozen quickly after picking and retain their flavor.
What’s the best way to store Raspberry Cookies?
I recommend keeping your Raspberry Cookies in an airtight container at room temperature, where they’ll stay soft and delicious for up to 5 days. If you’d like them to last longer, you can refrigerate them for up to a week, but let them warm to room temperature before enjoying for the best taste!
Can I freeze Raspberry Cookies? If so, how?
Yes, you can freeze these delicious cookies! Just place them in a single layer in an airtight container or freezer bag, separating each layer with parchment paper to prevent sticking. They can be frozen for up to 3 months. When you’re ready to indulge, reheat them in a preheated oven at 350°F (175°C) for about 5-7 minutes. This will give you that freshly-baked cookie experience.
What can I do if my dough is too sticky to shape?
Very! If your dough feels overly sticky, I suggest adding a tablespoon of gluten-free flour gradually until it reaches a more workable consistency. Make sure to handle the dough gently to maintain the fluffy texture of your Raspberry Cookies.
Are these cookies suitable for people with nut allergies?
Absolutely! The main ingredients in the Raspberry Cookies are fruit, gluten-free flour, and sugar, which are generally safe for nut-free diets. However, if you plan to add variations like almond extract or are mixing in nuts, be sure to label them clearly and ensure no cross-contamination occurs.
Can I make these cookies vegan?
Definitely! To make these Raspberry Cookies vegan, simply swap the unsalted butter for a vegan baking stick, and use plant-based milk. This way, everyone can enjoy these delightful treats!
Delicious Raspberry Cookies That Everyone Will Love
Ingredients
Equipment
Method
- In a small saucepan over medium heat, combine frozen raspberries and granulated sugar. Cook while stirring for about 5-7 minutes until the mixture thickens.
- In a large mixing bowl, combine gluten-free flour, cornstarch, baking powder, and kosher salt. Whisk until well blended.
- Using an electric mixer, beat the unsalted butter and granulated sugar until light and fluffy, about 3-4 minutes.
- Add cooled raspberry syrup, milk, and red food coloring to the creamed mixture. Blend on low speed.
- Gradually add the dry mixture to the wet mixture, mixing until just combined. Fold in chopped frozen raspberries.
- Cover the dough with plastic wrap and refrigerate it for at least 30 minutes.
- Preheat your oven to 350°F (175°C) as the dough chills and line a baking sheet with parchment paper.
- Roll tablespoon-sized portions of dough into balls and roll them in sugar before placing them on the lined baking sheet.
- Bake for 10-12 minutes until the edges are golden and the centers look set. Cool on the baking sheet, then transfer to a wire rack.
Leave a Reply