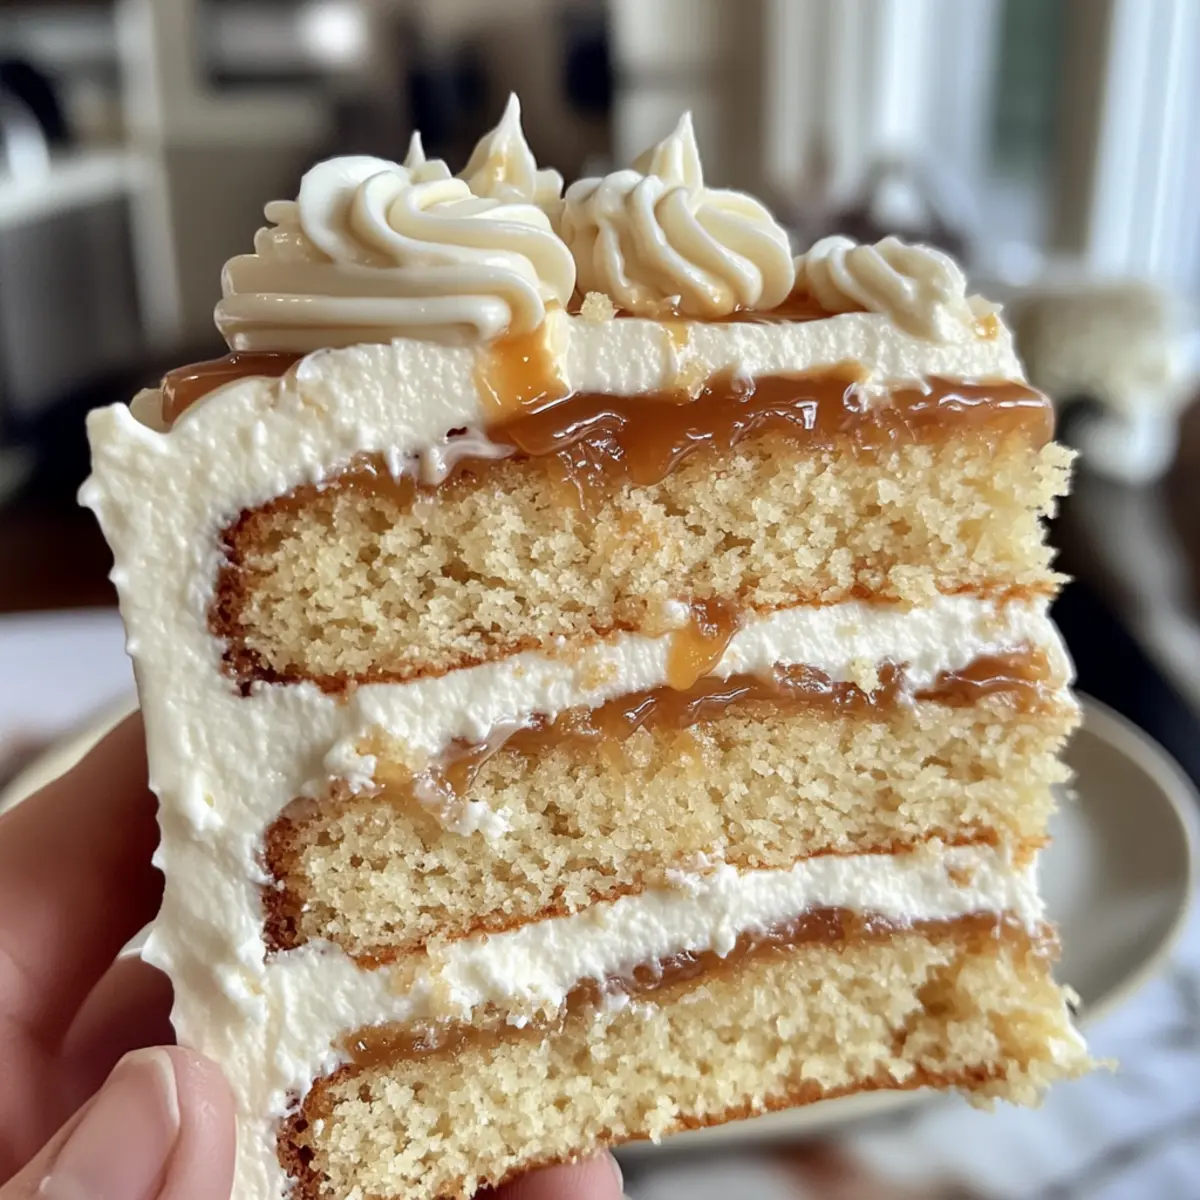
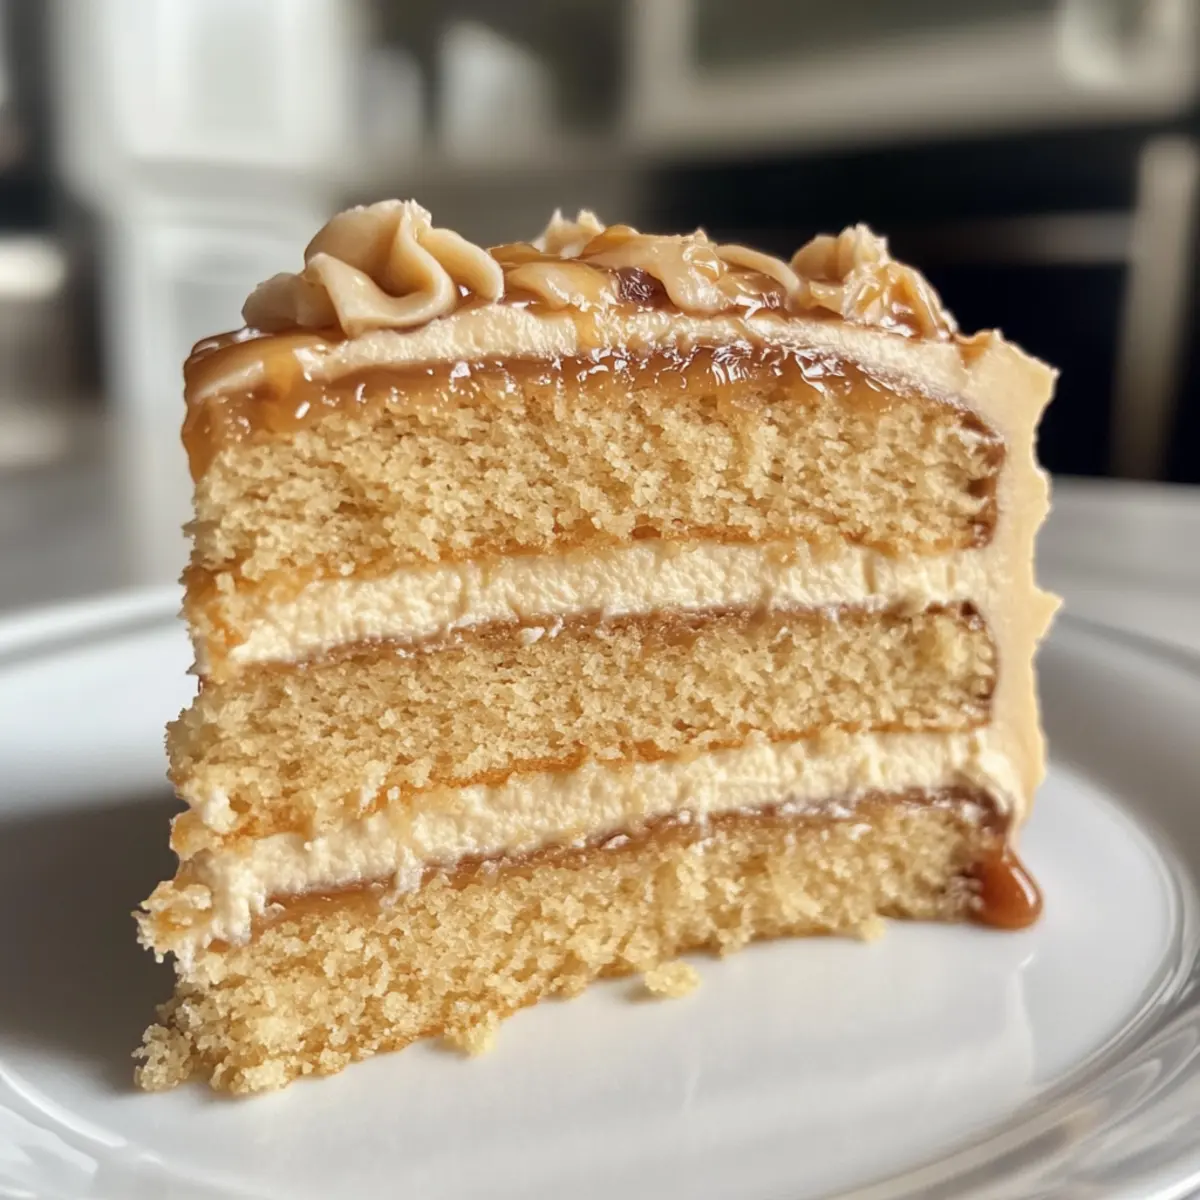
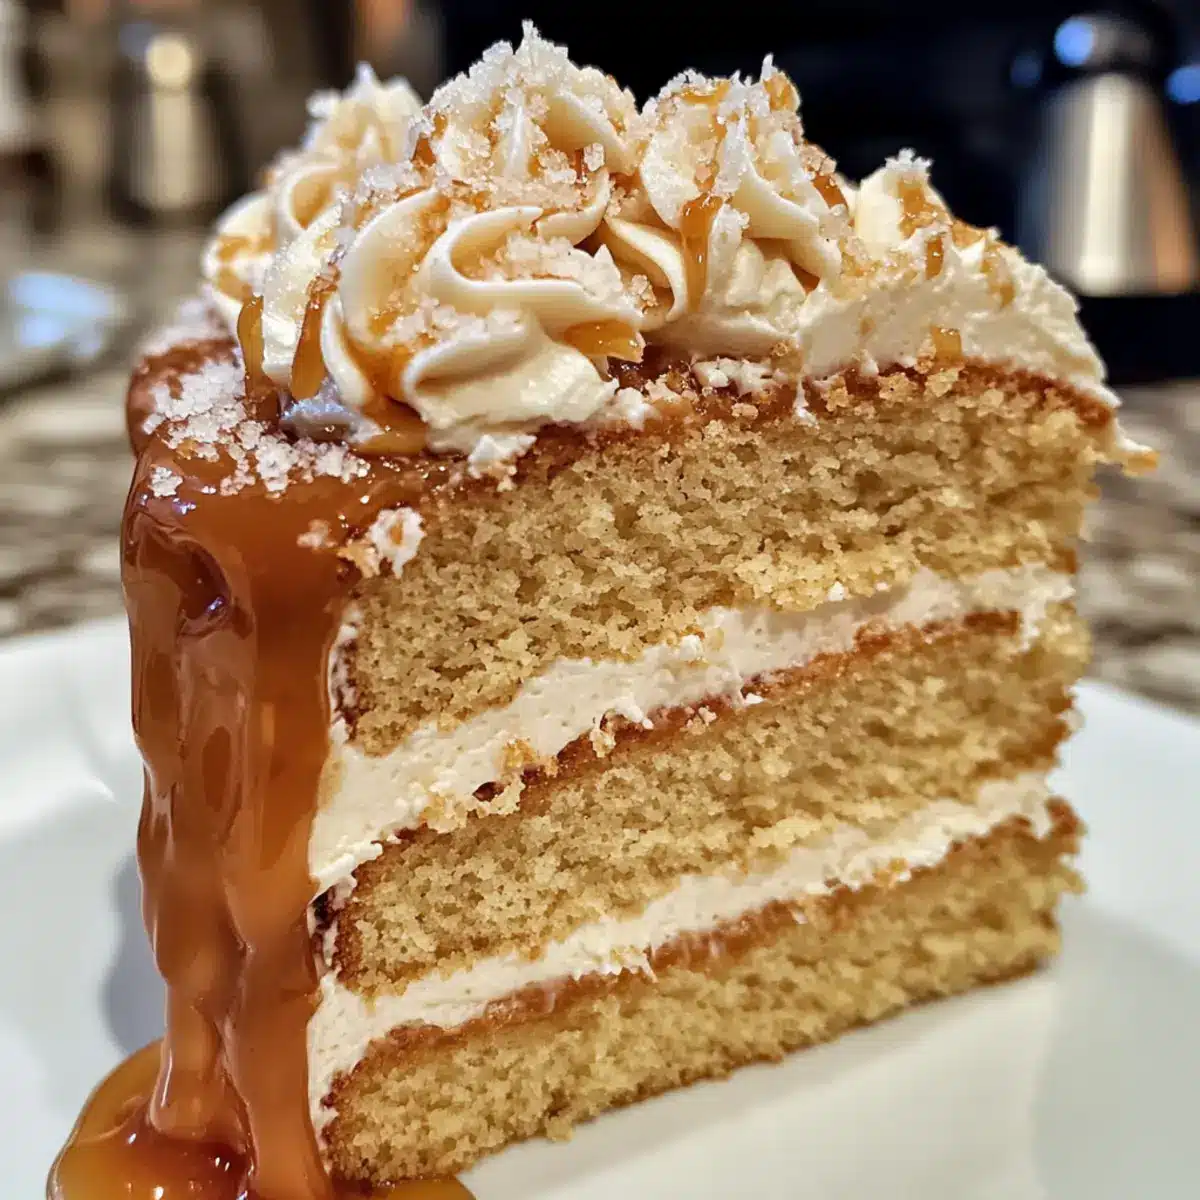
As I stood in my kitchen, the sweet aroma of caramel wafted through the air, transporting me to a cozy bakery tucked away in a quaint town. The key to this enchanting experience? My decadent Salted Caramel Cake. This recipe effortlessly combines moist vanilla cake layers with a luscious homemade salted caramel and a silky salted caramel buttercream that will make your taste buds dance. It’s not just a cake, but a show-stopping centerpiece perfect for birthdays, celebrations, or simply as a treat for yourself. Quick to prepare and immensely satisfying, this salted caramel delight offers the perfect antidote to fast-food monotony. Who could resist such indulgence? Join me as we dive into the tantalizing world of flavor and texture in this layered masterpiece!
Why is Salted Caramel Cake Irresistible?
Decadence Defined: This Salted Caramel Cake is pure indulgence, featuring moist vanilla layers that set a delightful base for the rich flavors above.
Homemade Goodness: You’ll adore crafting your own salted caramel—it’s simpler than you think and elevates the flavor to new heights!
Show-stopping Visuals: The layers of caramel buttercream provide a stunning presentation that impresses family and friends alike, making every slice a dazzling experience.
Versatile Treat: Whether it’s a birthday or just a cozy night in, this cake suits every occasion, much like the delightful Japanese Matcha Cake or the scrumptious Mango Mousse Cake.
Time-Efficient: Quick to whip up yet monumental in taste, it transforms any gathering into a celebration.
Satisfy your sweet cravings and bring warmth to your kitchen with this decadent delight!
Salted Caramel Cake Ingredients
Prepare yourself for layers of flavor!
For the Salted Caramel
- Granulated Sugar – Essential for sweetness and acts as the foundation for your homemade salted caramel.
- Water – Aids in dissolving the sugar during the caramelization process.
- Unsalted Butter – Adds richness to the caramel; make sure it’s at room temperature for better blending.
- Heavy Cream – Creates a velvety texture in your caramel; opt for full-fat for the best results.
- Sea Salt – Enhances the caramel’s flavor; sprinkle a bit more on top for that perfect salted finish!
For the Vanilla Cake
- All-Purpose Flour – Provides structure; substitute with a gluten-free blend if desired.
- Cornstarch – Helps lightening the flour mixture, ensuring a tender cake crumb.
- Baking Powder – A leavening agent that contributes to the cake’s rise.
- Baking Soda – Works alongside baking powder for a fluffy texture.
- Sour Cream – Keeps the cake moist and adds a tang; Greek yogurt makes a perfect alternative.
- Vegetable Oil – Ensures moisture; can use canola or sunflower oil if preferred.
- Vanilla Extract – Enhances the overall flavor; pure vanilla is highly recommended.
For the Salted Caramel Buttercream
- Unsalted Butter – Should be whipped to a light consistency as the base of your buttercream.
- Powdered Sugar – Sweetens and thickens the buttercream; sifting it will ensure a smooth finish.
- Cooled Salted Caramel – Adds deep flavor and creaminess; the star ingredient that complements the whole cake!
Dive into creating your own Salted Caramel Cake and experience the deliciousness firsthand!
Step‑by‑Step Instructions for Salted Caramel Cake
Step 1: Prepare the Salted Caramel
In a medium saucepan over medium heat, combine 1 cup of granulated sugar and 1/4 cup of water. Stir occasionally until the mixture turns a golden amber color, about 10-12 minutes. Once the color is achieved, remove from heat and carefully whisk in 6 tablespoons of unsalted butter followed by 1/2 cup of heavy cream and 1 teaspoon of sea salt. Allow the caramel to cool in the fridge while you prepare the cake batter.
Step 2: Make the Cake Batter
Preheat your oven to 340°F (170°C) and grease two 8-inch round cake pans. In a large bowl, whisk together 2 cups of all-purpose flour, 1/4 cup of cornstarch, 1 teaspoon of baking powder, and 1/2 teaspoon of baking soda. In another bowl, beat together 1 cup of granulated sugar and 1/2 cup of unsalted butter until creamy and fluffy. Then, add 2 eggs, 1 cup of sour cream, and 1 teaspoon of vanilla extract, mixing until well combined. Gradually add the dry ingredients until just incorporated.
Step 3: Bake the Cake
Divide the cake batter evenly between the two prepared pans. Bake in the preheated oven for 20-23 minutes or until a toothpick inserted into the center comes out clean. The cakes should be golden and spring back slightly when pressed. Once baked, remove from the oven and allow them to cool in the pans for 10 minutes before transferring to a wire rack to cool completely.
Step 4: Prepare the Salted Caramel Buttercream
In a large mixing bowl, beat 1 cup of unsalted butter on high speed until light and fluffy, about 3-4 minutes. Gradually add 3-4 cups of powdered sugar and continue to mix until well combined. Slowly pour in 1/2 cup of the cooled salted caramel and 1 teaspoon of vanilla extract, mixing until smooth and creamy. The consistency should be soft yet spreadable, adding more powdered sugar if necessary.
Step 5: Assemble the Cake
Once the cake layers are completely cooled, place one layer on a serving plate. Spread a generous layer of salted caramel buttercream on top, followed by a drizzle of the homemade salted caramel. Gently place the second cake layer on top and repeat the process. After stacking, chill the cake in the fridge for about 15 minutes to set the layers and filling.
Step 6: Finish with Frosting
After chilling, apply a thin crumb coat of the salted caramel buttercream around the sides and top of the entire cake. Return the cake to the fridge for another 10 minutes. Then, apply a final layer of buttercream, smoothing it out for a polished finish. Drizzle any remaining salted caramel on top and sprinkle with flaky sea salt for that extra touch of indulgence.
Storage Tips for Salted Caramel Cake
Fridge: Store any leftover Salted Caramel Cake in an airtight container for up to 3-4 days. This helps maintain its moisture and prevents any absorption of fridge odors.
Freezer: For longer storage, wrap individual slices tightly in plastic wrap and then place them in a freezer-safe container. They can be frozen for up to 3 months without losing flavor or texture.
Thawing: To thaw, simply remove from the freezer and place in the fridge overnight. Once thawed, you can enjoy the delicious layers of cake and caramel as if freshly made!
Reheating: If you prefer your cake slightly warm, microwave a slice for about 10-15 seconds. Just be careful not to overheat, as this can affect the creamy buttercream.
What to Serve with Salted Caramel Cake
Elevate your dessert experience with delightful pairings that bring out the rich flavors of this luscious treat.
-
Fresh Berries: The tartness of strawberries or raspberries cuts through the sweetness, adding a refreshing contrast and a pop of color to your plate.
-
Whipped Cream: A light dollop of homemade whipped cream complements the creamy textures of the salted caramel buttercream, enhancing its indulgence while balancing the sweetness.
-
Vanilla Ice Cream: Serve warm slices of the cake with a scoop of vanilla ice cream for a delightful experience that offers a creamy contrast to the rich caramel layers.
-
Espresso or Coffee: A strong cup of espresso balances the sweetness perfectly, enhancing the flavor profile and providing energy, making it an ideal pairing for late afternoon gatherings.
-
Chocolate Ganache: Drizzle some velvety chocolate ganache over the top for an extra layer of decadence, amplifying the sweet and salty elements of the cake.
-
Chopped Nuts: Adding a sprinkle of toasted pecans or walnuts provides a delightful crunch and an earthy flavor to balance the sweetness and richness of the cake.
-
Coconut Flavored Whipped Cream: Light and tropical, this airy topping adds a unique twist that resonates with the decadent flavors of the cake while giving it an exotic flair.
Indulge in these pairings to create a truly unforgettable dessert experience around your Salted Caramel Cake!
Make Ahead Options
These Salted Caramel Cake components are perfect for busy home cooks looking to save time without sacrificing flavor. You can prepare the salted caramel up to 3 days in advance; simply store it in an airtight container in the refrigerator to ensure it remains luscious and fresh. The cake layers can be baked and cooled, then wrapped tightly in plastic wrap and refrigerated for up to 24 hours. For the buttercream, it can also be made ahead and stored in the fridge; just give it a quick re-whip before frosting the cake. When you’re ready to assemble, layer the cooled cake with buttercream and drizzle with salted caramel for a stunning dessert that tastes just as indulgent!
Salted Caramel Cake Variations & Substitutions
Feel free to infuse your unique flair into this delightful recipe with these creative twists!
-
Chocolatey Delight: Swap out the vanilla cake layers for a rich chocolate cake, enhancing the indulgence of your salted caramel experience.
Achieving a decadent chocolate cake layer complements the sweet-and-salty theme beautifully, creating a dessert that’ll wow every chocolate lover. -
Store-bought Shortcut: If you’re pressed for time, consider using a high-quality store-bought caramel sauce instead of making it from scratch.
This allows you to whip up the cake quickly while still enjoying that delightful flavor. -
Nuts for Crunch: Incorporate chopped pecans or walnuts in between the layers for added texture and a nutty surprise!
The crunch from the nuts pairs beautifully with the soft cake and creamy buttercream, elevating the dessert to new heights. -
Fruit Fusion: Add layers of fresh sliced apples or pears between the cake and buttercream to introduce a fruity balance.
Not only does this add a fun twist, but the fruit complements the sweetness of the caramel perfectly! -
Heat It Up: If you love a little spice, try mixing cayenne or chili powder into the batter or buttercream for a warm kick.
The heat contrasts delightfully with the sweetness of the caramel, making each bite an exciting adventure. -
Gluten-Free Option: To make the cake gluten-free, substitute regular flour with a gluten-free all-purpose blend.
This ensures everyone can indulge in this marvelous cake without compromising on taste or texture! -
Plant-Based: For a vegan version, swap the butter and cream for plant-based alternatives and use flax eggs in the cake batter.
You’ll be amazed at how flavorful and satisfying this cake can still be while catering to a plant-based diet.
Don’t hesitate to explore your preferences by adding your favorite flavors or textures, much like the delightful Raspberry Caramel Millionaires or the refreshing notes of a Pistachio Blackberry Cake. Happy baking!
Expert Tips for Perfect Salted Caramel Cake
-
Room Temperature Ingredients: Ensure all ingredients, especially butter and eggs, are at room temperature for better blending and texture in your Salted Caramel Cake.
-
Caramel Color: Watch the caramel closely while cooking; it should turn a deep amber color. If it turns too dark, it may taste burnt.
-
Crumb Coat Trick: For a clean finish on your cake, apply a thin layer of buttercream (crumb coat) and chill. This helps catch any loose crumbs!
-
Testing Cake doneness: Use a toothpick to check the cake; insert it into the center—if it comes out clean, the cake is done.
-
Chill for Assembly: Chill the assembled cake briefly before applying the final layer of buttercream. This helps set the layers and create a neater finish.
-
Storage Solutions: Store any leftover Salted Caramel Cake in an airtight container in the fridge for freshness or freeze individual slices for later enjoyment.
Salted Caramel Cake Recipe FAQs
How do I choose ripe ingredients for the Salted Caramel Cake?
Absolutely! For the best results, select fresh ingredients. When choosing your eggs, look for ones that are clean, free of cracks, and have a healthy sheen. As for butter, make sure it’s fresh and has a pleasant smell. Quality vanilla extract also makes a difference—opt for pure vanilla for a more robust flavor!
How should I store leftover Salted Caramel Cake?
Very good question! Store any uneaten slices in an airtight container in the fridge for up to 3-4 days. This helps maintain the cake’s moisture and flavor. You can also wrap the cake tightly with plastic wrap to keep it fresh—just be careful not to squish the icing!
Can I freeze the Salted Caramel Cake?
Absolutely! Freezing is a great way to enjoy this cake later. To do so, wrap individual slices tightly in plastic wrap, then place them in a freezer-safe container. This will keep your cake fresh for up to 3 months. For the best results, label the container with the date so you can track how long it’s been in the freezer.
What should I do if my homemade salted caramel turns out too hard or grainy?
No worries! If your caramel is too hard, it may have cooked for too long. To rescue it, simply add a splash of heavy cream and gently reheat it on low heat while stirring until it reaches the desired consistency. If it’s grainy, try to dissolve the sugar further by giving it a gentle reheat, but if that doesn’t work, you can always start over. Cooking caramel can be tricky, but practice makes perfect!
Are there any dietary considerations for the Salted Caramel Cake?
Definitely! While this cake is a delightful treat, keep in mind that it contains gluten, dairy, and sugars which may not be suitable for everyone. If someone has gluten sensitivities, consider substituting with a gluten-free flour blend. Additionally, always check for nut allergies if you plan to add toppings like pecans or walnuts, as they can pose a risk to those with nut allergies. Enjoy baking with care!
How can I tell when the cake is perfectly baked?
Great question! When baking the Salted Caramel Cake, use a toothpick to check for doneness. Simply insert it into the center of the cake; if it comes out clean or with just a few crumbs clinging to it, the cake is ready! Additionally, the cakes should be golden brown and spring back slightly when gently pressed. If they spring back, pat yourself on the back—you’ve nailed it!

Decadent Salted Caramel Cake for Your Sweetest Moments
Ingredients
Equipment
Method
- Prepare the Salted Caramel: In a medium saucepan over medium heat, combine granulated sugar and water. Stir until golden amber, about 10-12 minutes. Remove from heat; whisk in butter, cream, and salt. Cool in fridge.
- Make the Cake Batter: Preheat oven to 340°F (170°C). Grease two 8-inch round cake pans. Whisk flour, cornstarch, baking powder, baking soda in one bowl. In another bowl, beat sugar and butter until creamy. Add eggs, sour cream, vanilla. Mix in dry ingredients until just incorporated.
- Bake the Cake: Divide batter evenly into pans. Bake for 20-23 minutes, or until a toothpick comes out clean. Cool in pans for 10 minutes, then transfer to wire rack.
- Prepare the Salted Caramel Buttercream: Beat butter until fluffy. Gradually add powdered sugar until combined. Mix in cooled salted caramel and vanilla until smooth and creamy.
- Assemble the Cake: Place one layer on a serving plate, spread buttercream, drizzle caramel, add second layer. Chill for 15 minutes.
- Finish with Frosting: Apply a crumb coat around the cake. Chill for another 10 minutes. Apply final layer of buttercream; drizzle remaining salted caramel on top and sprinkle with sea salt.
Leave a Reply