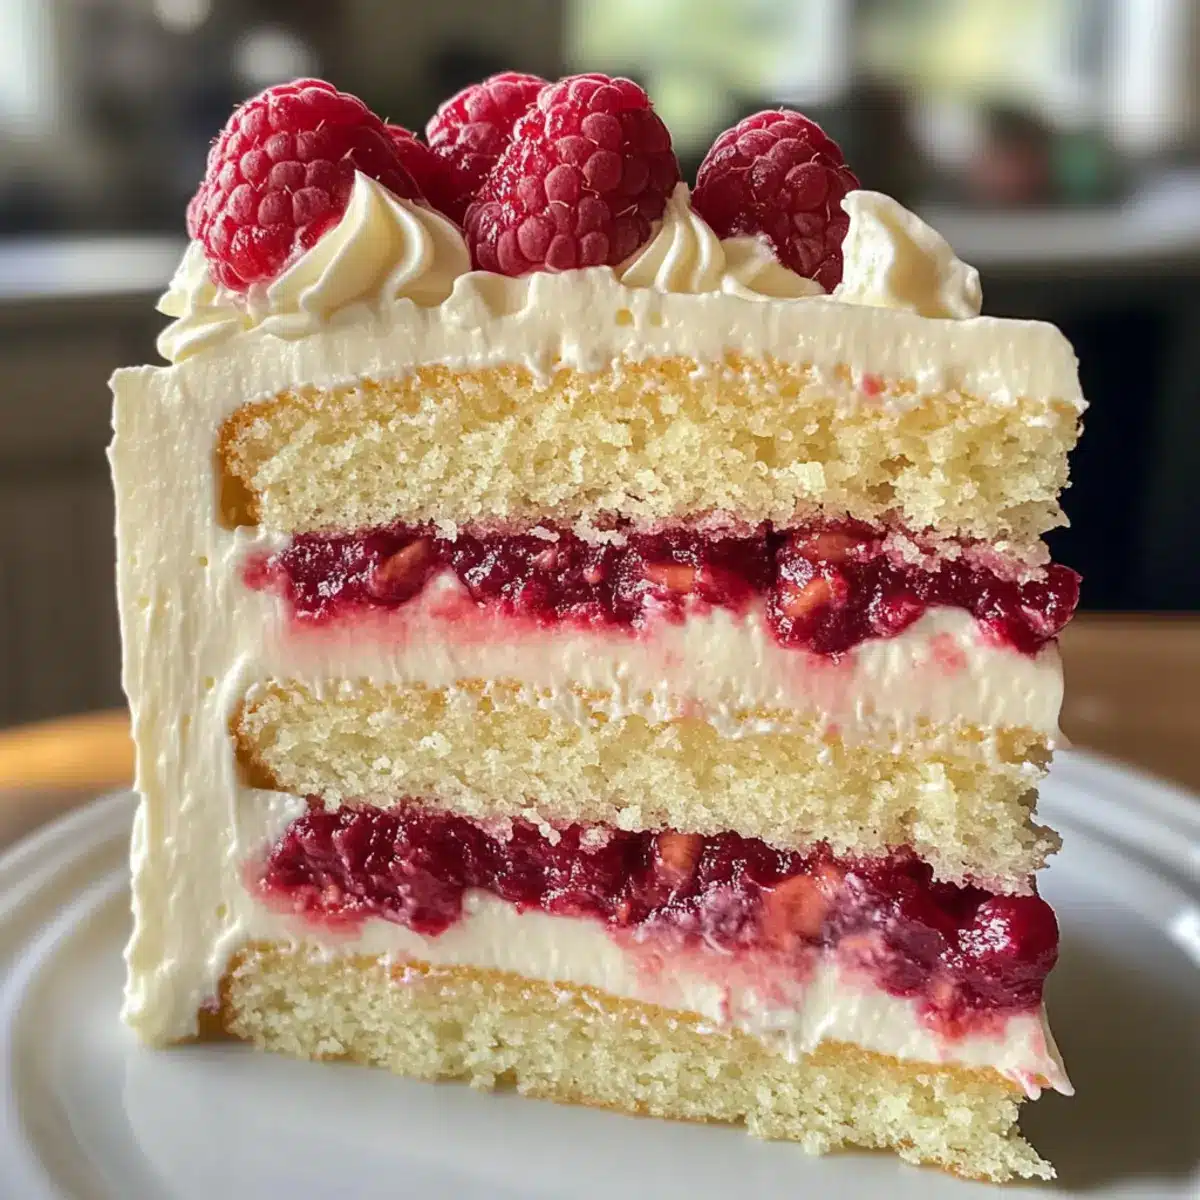
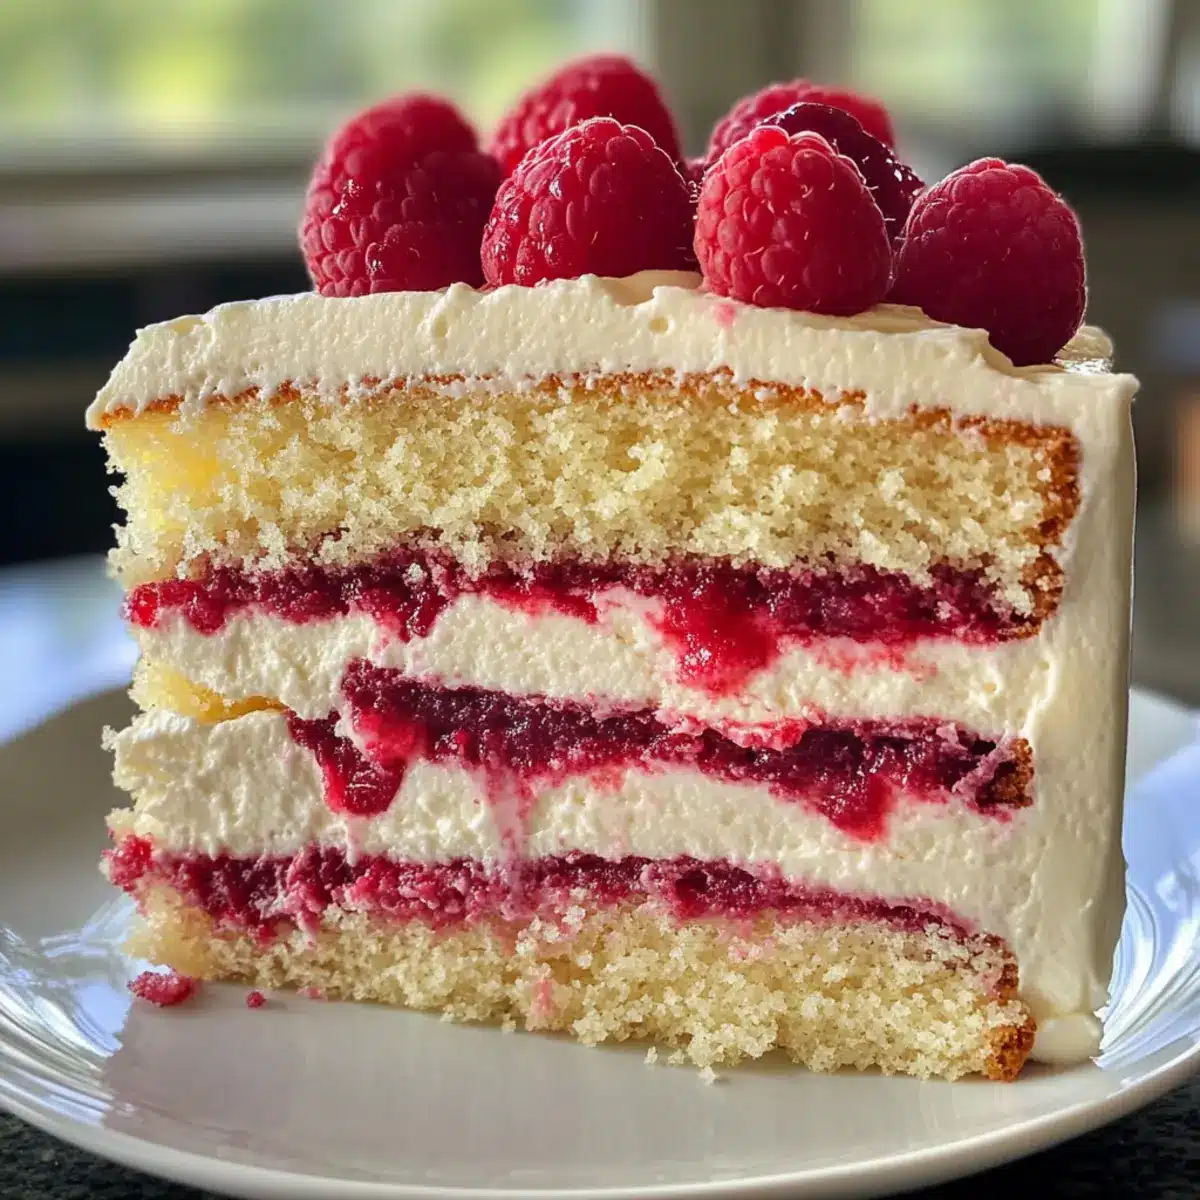
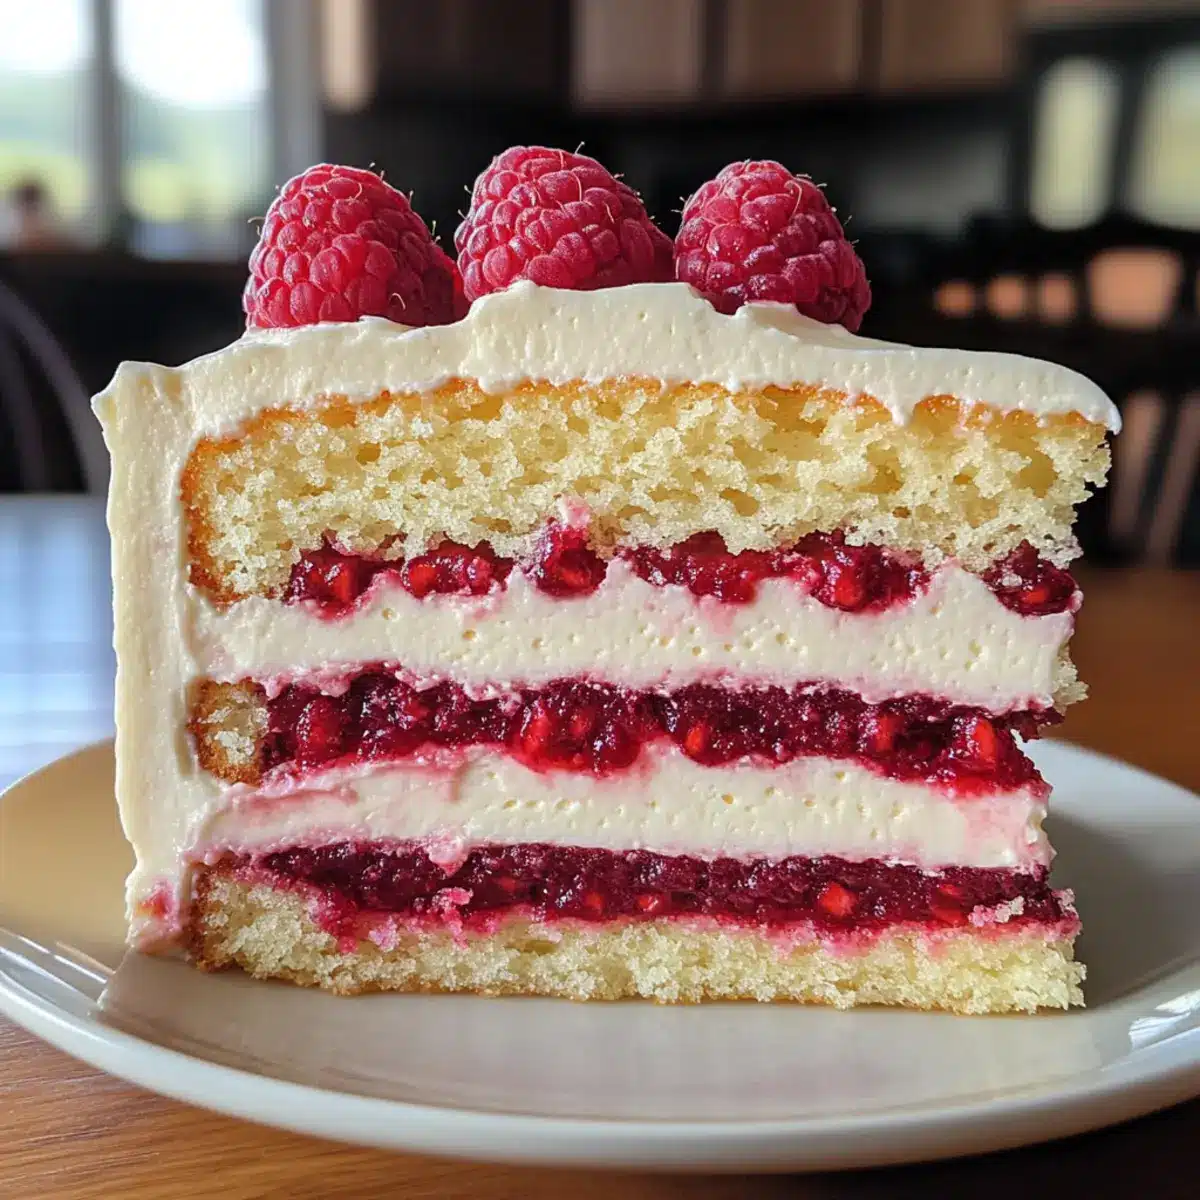
As I whisk together the creamy white chocolate and tart raspberries, a wave of nostalgia sweeps over me, bringing back memories of celebrations filled with laughter and joy. This White Chocolate Raspberry Dream Cake isn’t just a dessert; it’s a luxurious experience, balancing rich cake layers with a vibrant raspberry filling. Perfect for any festivity, this elegant cake serves as a delightful centerpiece that leaves everyone craving more. Not only is it a showstopper, but its quick preparation means you can spend less time in the kitchen and more time making memories with loved ones. Trust me, every bite of this cake offers a taste of indulgence that’s simply irresistible. So, are you ready to create your own slice of celebration magic?
Why is this cake so special?
Simplicity and Elegance: The White Chocolate Raspberry Dream Cake combines effortless preparation with a stunning presentation, making it perfect for any occasion.
Flavor Explosion: Experience the delightful contrast of sweet white chocolate and tart raspberries, a pairing that will intrigue your taste buds.
Crowd Pleaser: Ideal for gatherings, this cake is sure to impress friends and family, leaving them asking for the recipe!
Versatile Treat: Enjoy it for birthdays, weddings, or just because—it suits every celebration beautifully!
Quick Prep Time: Whip it up in no time, so you can get to the fun part—celebrating!
If you’re looking for similar delightful treats, check out this White Chocolate Raspberry dessert that will also wow your guests!
White Chocolate Raspberry Dream Cake Ingredients
For the Cake Layers
• All-purpose flour – Provides structure; can substitute with gluten-free flour blend.
• Baking powder – Leavening agent for cake rise; use fresh for the best results.
• Salt – Enhances flavor and balances sweetness; essential for depth of taste.
• Unsalted butter – Adds moisture and richness; can be replaced with vegan butter for a dairy-free option.
• Granulated sugar – Sweetens the cake; brown sugar can add a deeper flavor profile.
• Eggs – Provides binding and structure; substitute with flax eggs for a vegan version.
• Vanilla extract – Adds aromatic flavor; use pure vanilla for the best results.
• White chocolate chips – Contributes creaminess and sweetness; ensure they are baking-grade for better melting.
• Whole milk – Adds moisture and richness; substitute with almond or oat milk for dairy-free.
For the Raspberry Filling
• Fresh or frozen raspberries – Offers tart flavor and vibrant color; fresh is best, but frozen works too if thawed and drained.
• Sugar (for filling) – Sweetens the raspberry filling; can reduce for a less sweet filling.
• Lemon juice – Brightens the flavor of the filling; freshly squeezed is preferred.
• Cornstarch – Thickens the filling; arrowroot can be used as a substitute.
For the Frosting
• Powdered sugar – Sweetens and creates the right texture; less sweet alternatives can be used if desired.
• Milk (for frosting) – Adjusts the consistency of the frosting; use plant-based milk for dairy-free.
Optional Garnish
• Fresh raspberries – Adds a fresh touch for presentation; perfect for decoration.
• White chocolate curls – Elevates the cake’s appearance; use a vegetable peeler to create curls from a block of white chocolate.
• Mint leaves – Adds a pop of color and freshness; perfect for garnishing.
Dive into the delightful world of the White Chocolate Raspberry Dream Cake with these ingredients, and let every baking moment become a cherished memory!
Step‑by‑Step Instructions for White Chocolate Raspberry Dream Cake
Step 1: Prepare Cake Layers
Preheat your oven to 350°F (175°C), and grease three 8-inch round cake pans to prevent sticking. In a mixing bowl, whisk together the all-purpose flour, baking powder, and salt; set this perfect mixture aside. Using a mixer, cream the unsalted butter and granulated sugar until light and fluffy, about 3-5 minutes. Add eggs one by one, mixing well after each addition, and then incorporate the vanilla extract and melted white chocolate until well combined. Gradually mix in the flour mixture with the whole milk, alternating until just combined, retaining a nice, smooth batter.
Step 2: Bake
Divide the luscious batter evenly among the prepared cake pans. Place them in the preheated oven and bake for 25-30 minutes. You’ll know they are ready when the tops turn golden and a toothpick inserted into the center comes out clean. Once baked, allow the cakes to cool in the pans for about 10 minutes. Gently remove them from the pans and transfer to a cooling rack to cool completely before assembly.
Step 3: Make Raspberry Filling
For the vibrant raspberry filling, combine the fresh or thawed raspberries, sugar, lemon juice, and cornstarch in a saucepan over medium heat. Cook this delightful mixture while stirring frequently until it thickens, which should take about 5-7 minutes. Once thickened, remove from heat and let it cool completely. This step is crucial; a cooled filling ensures it won’t melt your frosting later!
Step 4: Prepare Frosting
While the raspberry filling cools, it’s time to make that smooth white chocolate frosting. In a mixing bowl, beat the softened butter on medium speed until creamy, about 2 minutes. Gradually add in the powdered sugar, continuing to mix until well combined. Then, incorporate the cooled melted white chocolate and vanilla extract, followed by enough milk to reach your desired consistency for spreading. The frosting should be velvety and easy to work with.
Step 5: Assemble Cake
Now it’s time to bring the White Chocolate Raspberry Dream Cake together! Level the cooled cake layers for an elegant presentation. Place one layer on a serving platter and spread an even layer of raspberry filling on top. Repeat this with the second layer, and then top with the final cake layer. Generously frost the top and sides of the cake with your luscious white chocolate frosting. To ensure neat slicing, chill the assembled cake in the refrigerator for about 30 minutes.
White Chocolate Raspberry Dream Cake Variations
Feel free to get creative with this recipe and make it your own—your taste buds will thank you!
-
Gluten-Free: Substitute all-purpose flour with a gluten-free flour blend for a similar texture without gluten.
-
Vegan Delight: Replace unsalted butter with vegan butter and eggs with flax eggs for a delightful plant-based version.
-
Fruit Swap: Experiment with different fruits like strawberries or blueberries for the filling to add a unique twist!
-
Flavor Boost: Add a splash of almond extract or a hint of orange zest to your frosting for an aromatic surprise.
-
Nutty Texture: Fold in some chopped nuts like almonds or pistachios for a crunchy contrast to the smooth frosting.
-
Mini Cakes: Turn this recipe into adorable mini cakes by baking in muffin tins for the cutest individual servings.
-
Decadent Layers: Stack more layers for a taller cake, alternating raspberry filling and frosting for a show-stopping presentation.
-
Garnished Perfection: Top with a sprinkle of crushed freeze-dried raspberries or edible flowers for a colorful and chic finish.
For more luscious desserts, don’t miss the chance to explore this delightful Blackberry Pistachio Dream treat that can also elevate your dessert table!
How to Store and Freeze White Chocolate Raspberry Dream Cake
Fridge: Store the cake in an airtight container for up to 4 days to maintain its freshness and flavor.
Freezer: Wrap individual slices in plastic wrap followed by aluminum foil to prevent freezer burn; they can be frozen for up to 2 months.
Thawing: To enjoy your delightful slices, transfer them to the fridge and let them thaw overnight before serving.
Reheating: If you prefer a warm dessert, you can gently warm slices in the microwave for about 10-15 seconds.
What to Serve with White Chocolate Raspberry Dream Cake
This elegant cake creates the perfect centerpiece for your next celebration, inviting sweet memories and joyful moments with each slice.
- Fresh Berries: A medley of strawberries, blueberries, and raspberries adds refreshing flavors and a colorful contrast to the rich cake.
- Whipped Cream: Light and airy, it complements the cake’s creamy frosting while adding a luscious texture that melts in your mouth.
- Chocolate Ganache: Drizzled on top or served on the side, this rich addition enhances the white chocolate without overpowering the raspberry flavor.
- Vanilla Ice Cream: Creamy and cold, it pairs beautifully with the cake’s sweetness, creating delightful contrasts in temperature and taste.
- Sparkling Wine: A light and bubbly drink that elevates the cake’s richness, making every celebration feel a bit more special.
- Mint leaves: A garnish that not only adds aesthetic appeal but also a hint of freshness to balance the dessert’s sweetness.
- Lemon Sorbet: Its tartness is a perfect foil to the sweet layers of the cake, cleansing the palate for more indulgence.
- Coffee or Espresso: Rich and robust, a cup enhances the dessert experience, making every bite delightful and satisfying.
- Caramel Sauce: Drizzled over the cake slices, this decadent addition introduces a new layer of flavor, enhancing the overall experience.
- Chocolate-Covered Raspberries: A romantic touch that beautifully complements the cake’s raspberry filling while serving as a fancy treat.
Make Ahead Options
This White Chocolate Raspberry Dream Cake is perfect for meal prep and saves you time on busy days! You can prepare the cake layers up to 24 hours in advance; simply bake, cool, and wrap them tightly in plastic wrap before refrigerating. The raspberry filling can be made ahead too and stored in an airtight container for up to 3 days in the fridge—just ensure it cools completely to maintain its thickness. When you’re ready to serve, layer the cooled cake and raspberry filling, then frost with your pre-made white chocolate frosting. This approach ensures that your elegant cake remains just as delicious, making your celebrations effortless and enjoyable!
Expert Tips for White Chocolate Raspberry Dream Cake
-
Room Temperature Ingredients: Ensure your butter, eggs, and milk are at room temperature. This helps create a smoother batter and better rise in your cake.
-
Avoid Overmixing: When combining your ingredients, mix just until they’re combined. Overmixing can lead to a dense cake instead of the fluffy White Chocolate Raspberry Dream Cake you want.
-
Cool Filling Completely: Allow your raspberry filling to cool completely before layering it in the cake. This prevents melting the white chocolate frosting when assembled.
-
Chill Before Slicing: After frosting, chill the entire cake for at least 30 minutes. This makes slicing much cleaner and enhances the presentation.
-
Substitutions Are Key: Don’t hesitate to personalize your cake! Swap out the milk for plant-based options and the butter for vegan varieties to suit dietary needs while keeping it delectable.

White Chocolate Raspberry Dream Cake Recipe FAQs
How do I choose ripe raspberries for the filling?
Absolutely! Look for fresh raspberries that are plump, firm, and bright in color. Avoid any with dark spots or softness, as these indicate overripeness. If using frozen, ensure they are thawed and drained properly to avoid excess moisture.
What’s the best way to store leftover cake?
To keep your White Chocolate Raspberry Dream Cake fresh, store it in an airtight container in the refrigerator for up to 4 days. If you don’t have a container, you can cover it with plastic wrap, but ensure it’s secured to minimize exposure to air.
Can I freeze this cake? How?
Very! To freeze your White Chocolate Raspberry Dream Cake, wrap individual slices tightly in plastic wrap followed by aluminum foil. This protects against freezer burn. You can freeze it for up to 2 months. When you’re ready to indulge, just thaw it overnight in the fridge before serving.
What should I do if my cake layers are domed on top?
No worries! If your cake layers have a dome, simply use a serrated knife to level them before frosting. By cutting off the top gently, you’ll ensure an even stacking process, showcasing a beautiful slice when serving.
Is this recipe suitable for people with dietary restrictions?
Absolutely! You can easily make this cake gluten-free by substituting the all-purpose flour with a gluten-free blend. Additionally, use vegan butter and flax eggs to create a delightful dairy-free and egg-free version without sacrificing flavor!
How long does this cake last once frozen?
Your frozen slices of White Chocolate Raspberry Dream Cake can last for up to 2 months. For the best quality, ensure they are tightly wrapped to prevent freezer burn, which can affect the cake’s texture and taste.
White Chocolate Raspberry Dream Cake: Pure Sweet Indulgence
Ingredients
Equipment
Method
- Preheat your oven to 350°F (175°C), and grease three 8-inch round cake pans to prevent sticking. In a mixing bowl, whisk together the all-purpose flour, baking powder, and salt; set this mixture aside. Using a mixer, cream the unsalted butter and granulated sugar until light and fluffy, about 3-5 minutes. Add eggs one by one, mixing well after each addition, and then incorporate the vanilla extract and melted white chocolate until well combined. Gradually mix in the flour mixture with the whole milk, alternating until just combined, retaining a nice, smooth batter.
- Divide the batter evenly among the prepared cake pans. Place them in the preheated oven and bake for 25-30 minutes. You'll know they are ready when the tops turn golden and a toothpick inserted into the center comes out clean. Once baked, allow the cakes to cool in the pans for about 10 minutes. Gently remove them from the pans and transfer to a cooling rack to cool completely before assembly.
- For the raspberry filling, combine the fresh or thawed raspberries, sugar, lemon juice, and cornstarch in a saucepan over medium heat. Cook this mixture while stirring frequently until it thickens, which should take about 5-7 minutes. Once thickened, remove from heat and let it cool completely.
- While the raspberry filling cools, beat the softened butter on medium speed until creamy, about 2 minutes. Gradually add in the powdered sugar, continuing to mix until well combined. Then, incorporate the cooled melted white chocolate and vanilla extract, followed by enough milk to reach your desired consistency for spreading.
- Level the cooled cake layers for an elegant presentation. Place one layer on a serving platter and spread an even layer of raspberry filling on top. Repeat this with the second layer, and then top with the final cake layer. Generously frost the top and sides of the cake with your white chocolate frosting. Chill in the refrigerator for about 30 minutes before slicing.
Leave a Reply