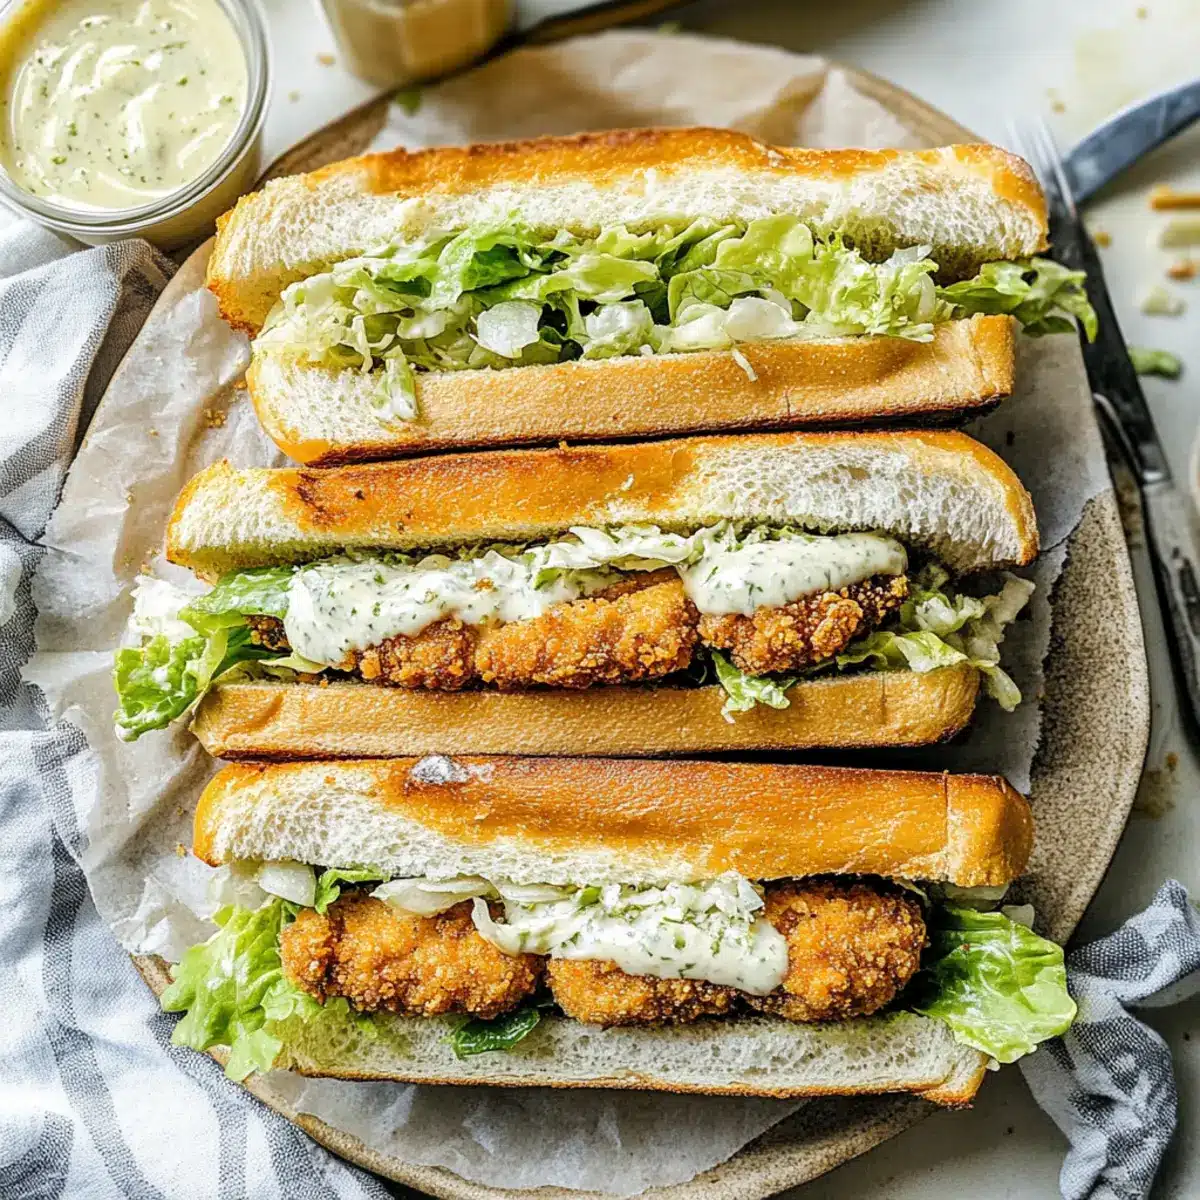
Every now and then, a culinary moment brings the simplicity of comfort food to life in the most delightful way. Today, I’m thrilled to share my recipe for Crispy Chicken Caesar Sandwiches with Garlic Butter Toast. Imagine sinking your teeth into golden, crispy chicken cutlets layered with crunchy romaine and a tangy Parmesan kick, all nestled within luscious garlic butter toasted bread. This easy-to-make delight not only comes together in just 30 minutes but is also a surefire crowd-pleaser that will make any meal feel special. Whether you’re crafting a quick lunch or an easy dinner, these sandwiches promise a satisfying experience that will elevate your dining table and impress family and friends alike. Ready to dive into this mouthwatering adventure? Let’s get cooking!

Why will you adore this sandwich?
Crispy Chicken: The golden exterior creates a satisfying crunch in every bite, making it an instant favorite.
Garlic Butter Toast: Infusing rich flavors into the bread elevates the sandwich to gourmet levels, ensuring each mouthful is decadently delicious.
Quick and Easy: With just 30 minutes of prep time, you can whip up a delightful meal perfect for busy days. No more settling for fast food when you have this on the menu!
Crowd-Pleasing Flavor: The combination of juicy chicken, creamy Caesar dressing, and fresh romaine caters to both kids and adults, making it a hit for family dinners or gatherings.
Versatile Pairing: Serve alongside chips or a light green salad for a balanced meal that’ll leave everyone satisfied. You’ll find this recipe a fantastic complement to other favorites like Roast Chicken Fennel or Greek Chicken Gyro.
Chicken Caesar Sandwiches Ingredients
For the Chicken
- Chicken Breasts – Main protein that lends heartiness and can be used fresh or thawed.
- Egg (whisked with milk) – Binds the breadcrumbs to the chicken; substitute with a vegan option if desired.
- Garlic Powder, Salt, Pepper – Essential seasonings that enhance flavor; feel free to adjust salt levels for low-sodium diets.
- Breadcrumbs & Panko – Create that signature crispy exterior; consider gluten-free options for dietary needs.
- Vegetable Oil – Used for frying; an olive oil substitution can add delightful flavor.
For the Garlic Butter
- Salted Butter – Adds richness and flavor to the toasted bread; margarine works as a substitute if necessary.
For the Caesar Dressing
- Mayo & Sour Cream (or Greek yogurt) – Base for the creamy dressing; use vegan mayo for a plant-based version.
- Parmesan Cheese – Introduces a sharp, salty essence; nutritional yeast serves as a vegan alternative.
- Lemon Juice – Brightens the dressing, ensuring freshness whether you opt for real or bottled juice.
- Dijon Mustard & Anchovy Paste – Adds depth and flavor; feel free to omit anchovies for a vegetarian approach.
For Assembly
- Hoagies/Baguette – Build the sandwich; swap with gluten-free bread as needed.
- Romaine Lettuce – Provides a crunchy texture; iceberg can be a suitable substitute in a pinch.
This ensemble of ingredients will ensure your Chicken Caesar Sandwiches turn out perfectly crispy and delicious!
Step‑by‑Step Instructions for Chicken Caesar Sandwiches
Step 1: Prepare Chicken Cutlets
Start by slicing chicken breasts horizontally to create 4-6 thin cutlets. Season both sides of the chicken with garlic powder, salt, and pepper. Dip each cutlet into a whisked mixture of egg and milk, ensuring even coating. Next, dredge the chicken in breadcrumbs and panko, pressing gently to adhere. This coating will give your Chicken Caesar Sandwiches that desirable crispy crunch.
Step 2: Fry Chicken
In a shallow pan, heat vegetable oil over medium-high heat to approximately 350°F. Carefully place the breaded chicken cutlets into the hot oil, frying for about 5 minutes on each side until they turn golden brown and crispy. Use a slotted spoon to transfer the cooked cutlets to a paper towel-lined plate to drain any excess oil, ensuring your sandwich remains light and crunchy.
Step 3: Make Garlic Butter Bread
While the chicken is frying, prepare the garlic butter by mixing softened salted butter with garlic powder in a bowl. Spread this mixture generously on both halves of your hoagie or baguette. Preheat your oven to 450°F, and place the bread halves on a baking sheet. Toast in the oven for about 3-4 minutes or until golden brown and fragrant, enhancing the overall experience of your Chicken Caesar Sandwiches.
Step 4: Prepare Caesar Dressing
In a separate bowl, whisk together mayo, sour cream (or Greek yogurt), freshly squeezed lemon juice, Dijon mustard, and anchovy paste if using. Add in grated Parmesan cheese and a pinch of salt; whisk until smooth and creamy. Toss romaine lettuce in this delicious dressing until evenly coated, ensuring every bite of your Chicken Caesar Sandwich is bursting with flavor and zest.
Step 5: Assemble Sandwiches
Now it’s time to assemble your Chicken Caesar Sandwiches! On the garlic butter toasted bread, layer the crispy fried chicken cutlets, followed by the dressed romaine lettuce. Sprinkle extra Parmesan cheese on top for a delightful finish. Carefully close the sandwich, pressing it down gently to bind all those scrumptious layers together, and prepare to serve this flavorful masterpiece!

Expert Tips for Chicken Caesar Sandwiches
-
Cook Freshly: Fry the chicken cutlets immediately after coating them to maintain maximum crispiness and avoid sogginess.
-
Right Temperature: Keep your frying oil at precisely 350°F for that perfect golden-brown color; a thermometer will assure accuracy.
-
Separate Assembly: Assemble the sandwiches right before serving to prevent the bread from getting soggy; keep components separate if needed.
-
Enhance Flavor: Try adding roasted red peppers or avocado for extra flavor and nutrition—this can elevate your Chicken Caesar Sandwiches experience.
-
Storage Insights: Leftover fried chicken can be stored in an airtight container for up to three days; reheat in the oven for best results.
Chicken Caesar Sandwiches Variations & Substitutions
Feel free to customize your Chicken Caesar Sandwiches to suit your taste buds and dietary needs! Let your imagination run wild with these exciting twists.
- Baked Alternative: Bake the breaded chicken at 400°F for 20-25 minutes, flipping halfway for a healthier option. This method keeps the chicken juicy while giving it a crispy finish without the added oil from frying.
- Dairy-Free: Substitute Parmesan cheese with nutritional yeast for a dairy-free alternative that still packs a cheesy flavor. This helps keep the rich taste without dairy while letting everyone enjoy a guilt-free treat.
- Gluten-Free: Swap regular hoagies or baguettes for gluten-free bread or wraps, ensuring everyone can savor this classic sandwich. Check the bakery section for great options that don’t compromise on taste.
- Flavor Boost: Add roasted red peppers or avocado slices to bring a fresh and vibrant addition to your sandwich. These toppings enhance both flavor and nutrition, creating a rainbow of taste in each bite.
- Spicy Kick: Incorporate sliced jalapeños or a splash of hot sauce in your Caesar dressing for those who crave heat. This spicy twist can take your sandwiches to a whole new level—perfect for adventurous eaters!
- Veggie Delight: Replace chicken with crispy eggplant or cauliflower cutlets for a delightful vegetarian option. The veggies soak up flavors beautifully while still giving you that satisfying crunch.
- Classic Creaminess: Use a traditional Caesar dressing instead of the mayo-based version for a richer, authentic taste. This swap still delivers that beloved Caesar flavor, causing tastebuds to dance with excitement!
- Herb Infusion: Mix fresh herbs like basil or chives into your Caesar dressing to elevate the flavor profile. These additions create a bright, aromatic blend that makes your sandwiches sing with freshness.
With these delightful variations, you can easily make your Chicken Caesar Sandwiches your own! Serve them alongside crispy potato chips or a light green salad for a perfectly balanced meal. You’ll find that these sandwiches are a fantastic match with other favorites like Monterey Chicken Spaghetti or Vietnamese Lemongrass Chicken. Enjoy the culinary adventure!
What to Serve with Crispy Chicken Caesar Sandwiches?
Bring the taste of a delightful meal to life with these perfect pairings that add balance and excitement to your sandwich experience.
- Crispy Waffle Fries: Their golden, crispy texture complements the juicy chicken perfectly, making every bite a satisfying crunch.
- Light Green Salad: A refreshing side with vibrant greens and tangy vinaigrette balances the richness of the sandwich delightfully.
- Garlic Roasted Potatoes: The savory depth of roasted potatoes enhances the flavor profile, creating a heartier meal that warms the soul.
- Classic Potato Chips: A nostalgic snack that adds a delightful crunch, providing the perfect contrast to the sandwich’s creaminess.
- Fresh Fruit Salad: The sweetness of fresh fruit offers a bright contrast, cleansing the palate between bites of that savory Chicken Caesar Sandwich.
- Iced Lemonade: This refreshing drink cuts through the richness and adds a zesty twist to your meal, making it utterly refreshing on a warm day.
- Chocolate Chip Cookies: A sweet ending with warm, gooey cookies brings comfort and satisfaction, making this meal feel complete and special.
- Sparkling Water with Lime: Light and bubbly, this drink refreshes while enhancing flavors, making it a sophisticated yet simple choice.
These pairings not only elevate your Chicken Caesar Sandwiches but also create a meal that is vibrant, balanced, and utterly enjoyable!
Make Ahead Options
These Chicken Caesar Sandwiches are perfect for meal prep enthusiasts! You can prepare the crispy chicken cutlets ahead of time—up to 3 days in advance—by frying and allowing them to cool completely before storing them in an airtight container in the refrigerator. The Caesar dressing can also be made up to 24 hours in advance; just remember to keep it covered to maintain its creamy texture. When you’re ready to serve, simply reheat the chicken in the oven to restore its crispiness (about 10 minutes at 350°F) and toast the garlic butter bread anew for an irresistible finish. This way, you can enjoy fresh, delicious Chicken Caesar Sandwiches with minimal effort on busy weeknights!
How to Store and Freeze Chicken Caesar Sandwiches
Fridge: Store assembled sandwiches wrapped tightly in plastic wrap or in an airtight container for up to 3 days. Reheat in the oven for optimal crispiness before enjoying.
Freezer: For longer storage, freeze uncooked breaded chicken cutlets in a single layer. Once frozen, transfer to a freezer-safe bag and keep for up to 3 months.
Reheating: Use the oven to reheat chicken cutlets or assembled sandwiches at 350°F until warmed through, approximately 10-15 minutes, to regain that crispy texture.
Make-Ahead Tip: Prepare the dressing and fried chicken in advance, but assemble the Chicken Caesar Sandwiches right before serving for the best flavor and texture.

Chicken Caesar Sandwiches Recipe FAQs
How do I choose ripe chicken breasts?
Absolutely! When selecting chicken breasts, look for those that are pink and plump with no dark spots or discoloration. Avoid any packages that feel slimy or have an unusual smell. Fresh is best, but if you’re using thawed chicken, ensure it’s still pink, firm, and free from any dark spots.
What is the best way to store leftover Chicken Caesar Sandwiches?
Very! Once assembled, wrap the leftover Chicken Caesar Sandwiches tightly in plastic wrap or place them in an airtight container. They can be stored in the refrigerator for up to 3 days. When you’re ready to enjoy them again, reheat in the oven at 350°F for about 10-15 minutes to regain that crispy texture.
Can I freeze the breaded chicken cutlets?
Absolutely! To freeze the uncooked breaded chicken cutlets, arrange them in a single layer on a baking sheet and freeze them until solid. Once frozen, transfer the cutlets to a freezer-safe bag, ensuring to remove as much air as possible. They can be stored for up to 3 months. When ready to cook, simply fry from frozen, adding a few extra minutes to the cooking time.
What if my chicken cutlets are not crispy?
Very! For the crispiest outcome, ensure your oil is hot enough (around 350°F) before adding the chicken. Fry the cutlets immediately after breading to keep them crunchy. If they do end up soggy, try re-frying them for a couple of minutes, or baking them in the oven at 400°F for 10 minutes to crisp up that exterior again.
Is this recipe suitable for people with dietary restrictions?
Yes, indeed! You can make adjustments for various dietary needs: use gluten-free breadcrumbs for those avoiding gluten, substitute with vegan mayo and yogurt for a plant-based version, and eliminate anchovy paste for vegetarians. Always be sure to double-check the ingredients for any allergies you might have, especially with the sauces and dressings.
How can I keep my sandwiches from getting soggy?
Absolutely! To avoid sogginess, store the dressing separate from the sandwich components until you’re ready to eat. Assemble the sandwiches right before serving, and consider toasting the bread with garlic butter just before adding the filling for an extra crunchy barrier.
Savory Chicken Caesar Sandwiches with Crispy Perfection
Ingredients
Equipment
Method
- Slice chicken breasts horizontally to create 4-6 thin cutlets. Season with garlic powder, salt, and pepper. Dip into egg mixture, then dredge in breadcrumbs and panko.
- Heat vegetable oil in a shallow pan to 350°F. Fry chicken cutlets for about 5 minutes on each side until golden brown. Drain excess oil on paper towel.
- Mix softened salted butter with garlic powder. Spread on hoagie or baguette halves. Toast in the oven at 450°F for about 3-4 minutes.
- Whisk together mayo, sour cream (or Greek yogurt), lemon juice, Dijon mustard, and anchovy paste if using. Add Parmesan cheese and salt; whisk until smooth.
- Assemble the sandwiches on garlic butter toasted bread with fried chicken cutlets and dressed romaine lettuce. Close and serve.
Leave a Reply