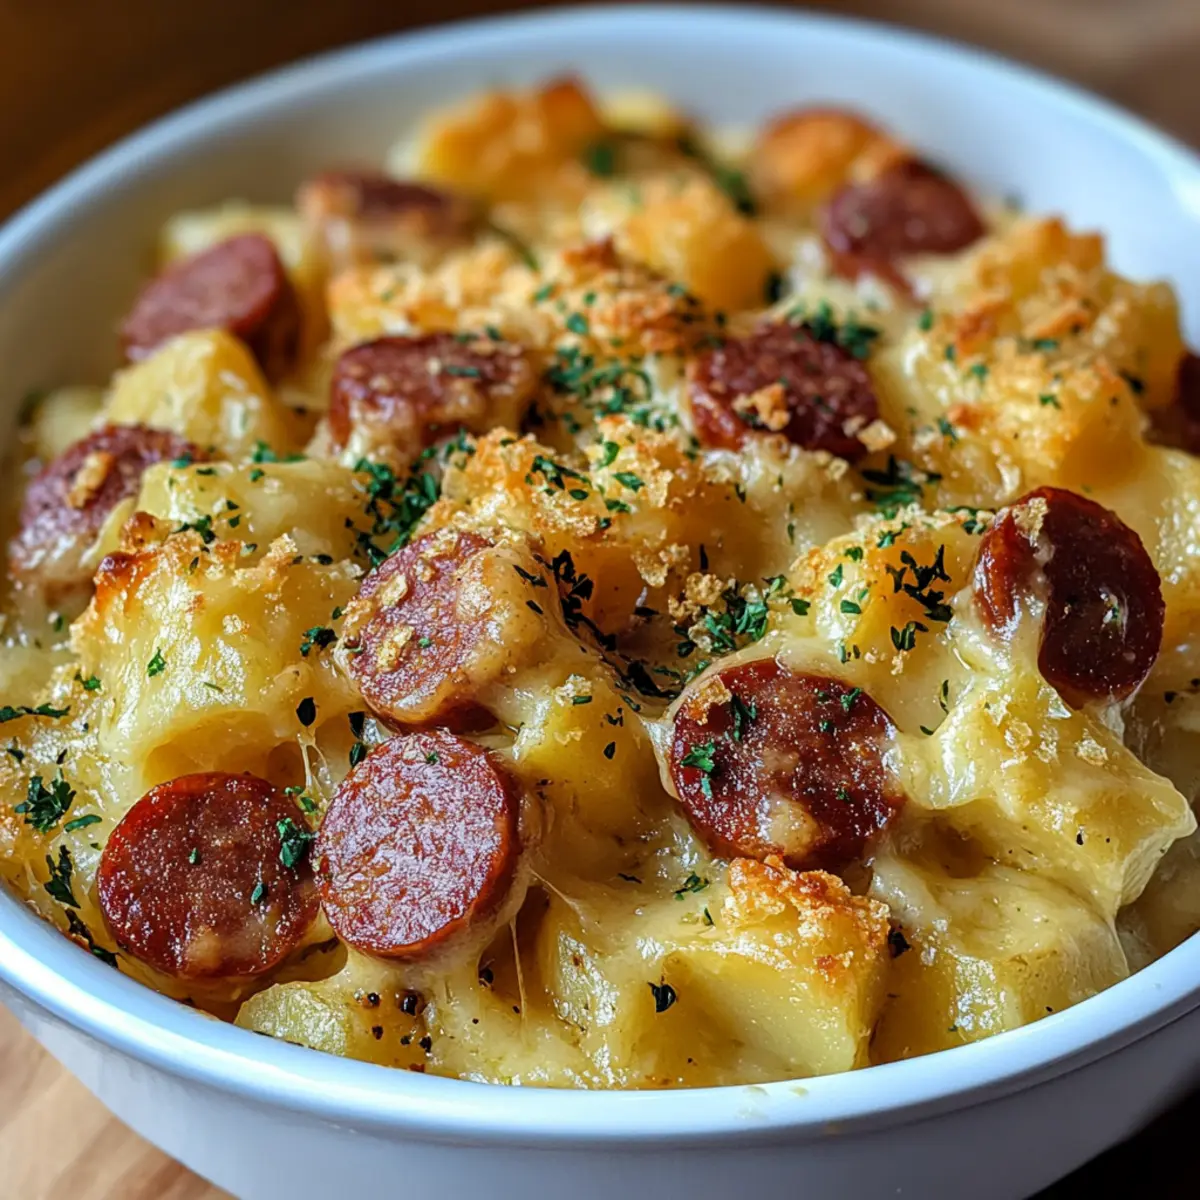
As the aroma of savory, smoky kielbasa fills the kitchen, I can’t help but feel a rush of nostalgia for the comforting meals of my childhood. This Kielbasa Sausage Cheesy Potato Casserole is my answer to those busy weeknights when you’re craving something hearty yet easy to prepare. It’s not just a delicious dish; it’s a guaranteed crowd-pleaser that brings smiles to the table with its creamy layers of tender potatoes and cheesy goodness. Plus, it’s perfect for sharing, making it ideal for family gatherings or relaxed dinners with friends. Why not dive into this cozy comfort food and create your own memories around the dinner table? Curious to see just how effortless and delightful this casserole can be? Let’s get cooking!

Why is this casserole a family favorite?
Comfort at Its Core: The Kielbasa Sausage Cheesy Potato Casserole offers the warmth and familiarity of home-cooked goodness, perfect for cozy evenings.
Crowd-Pleasing Flavor: Smoky kielbasa paired with cheesy, creamy potatoes makes for a dish everyone will love, much like my popular Mexican Layered Casserole.
Flexible Ingredients: Use what you have on hand! Swap in turkey sausage or fresh veggies for a twist.
Effortless Preparation: With minimal prep time, this recipe is a lifesaver for busy weeknights, reminding you of easy favorites like my Breakfast Potato Hash.
Perfect for Sharing: This casserole is not only filling but also perfect for potlucks or family gatherings, letting you share comfort and joy with others.
Kielbasa Sausage Cheesy Potato Casserole Ingredients
For the Base
• Kielbasa Sausage – Provides a smoky, savory flavor; substitute with turkey sausage for a lighter option.
• Frozen Diced Hash Brown Potatoes – Acts as the base for the casserole and provides texture; fresh shredded potatoes can be used if soaked to remove starch.
• Cream of Chicken Soup – Serves as the creamy sauce base, adding moisture and flavor; use cream of mushroom for a vegetarian alternative.
• Sour Cream – Adds tanginess and creaminess; Greek yogurt can be substituted for a lighter version.
For the Cheesy Goodness
• Shredded Cheddar Cheese – Delivers a bold flavor and melty texture; use sharp cheddar for more flavor or mozzarella for creaminess.
• Chopped Green Onions – Offers freshness and depth; sauté for a milder taste.
For Seasoning
• Garlic Powder – Enhances the overall flavor; adjust to taste.
• Black Pepper – Adds subtle heat; adjust to taste.
• Paprika – Provides a hint of smokiness; adjust based on your spice preference.
For Greasing and Crunch
• Melted Butter – Used for greasing and adds richness; olive oil can be an alternative.
• Optional Topping (Cornflakes/Ritz Crackers) – Provides a crunchy texture; can swap with crushed potato chips for variety.
Step‑by‑Step Instructions for Kielbasa Sausage Cheesy Potato Casserole
Step 1: Preheat and Prepare Baking Dish
Begin by preheating your oven to 375°F (190°C). While it warms, take a moment to generously grease a 9×13-inch baking dish with melted butter, ensuring an even coating to prevent sticking. This will create a lovely base for your Kielbasa Sausage Cheesy Potato Casserole, allowing it to cook evenly and come out easily when ready.
Step 2: Mix the Creamy Base
In a large mixing bowl, combine the cream of chicken soup, sour cream, 1.5 cups of shredded cheddar cheese, and chopped green onions. Add garlic powder, black pepper, and paprika, stirring until the mixture is smooth and well integrated. This creamy blend is the heart of your casserole and will give it that rich flavor everyone loves.
Step 3: Incorporate the Main Ingredients
Next, gently fold in the frozen diced hash brown potatoes and slices of kielbasa sausage into your creamy mixture. Using a spatula, mix until everything is well-coated, taking care not to overmix to keep some texture in the potatoes. This will form the delicious filling of your Kielbasa Sausage Cheesy Potato Casserole.
Step 4: Assemble the Casserole
Pour the mixture into your prepared baking dish, spreading it out evenly to ensure uniform baking. Top the casserole with the remaining shredded cheddar cheese, creating a melty, golden topping that will enhance the overall flavor. This layering will help make your dish both visually appealing and tempting when it’s done.
Step 5: Add Crunchy Topping (Optional)
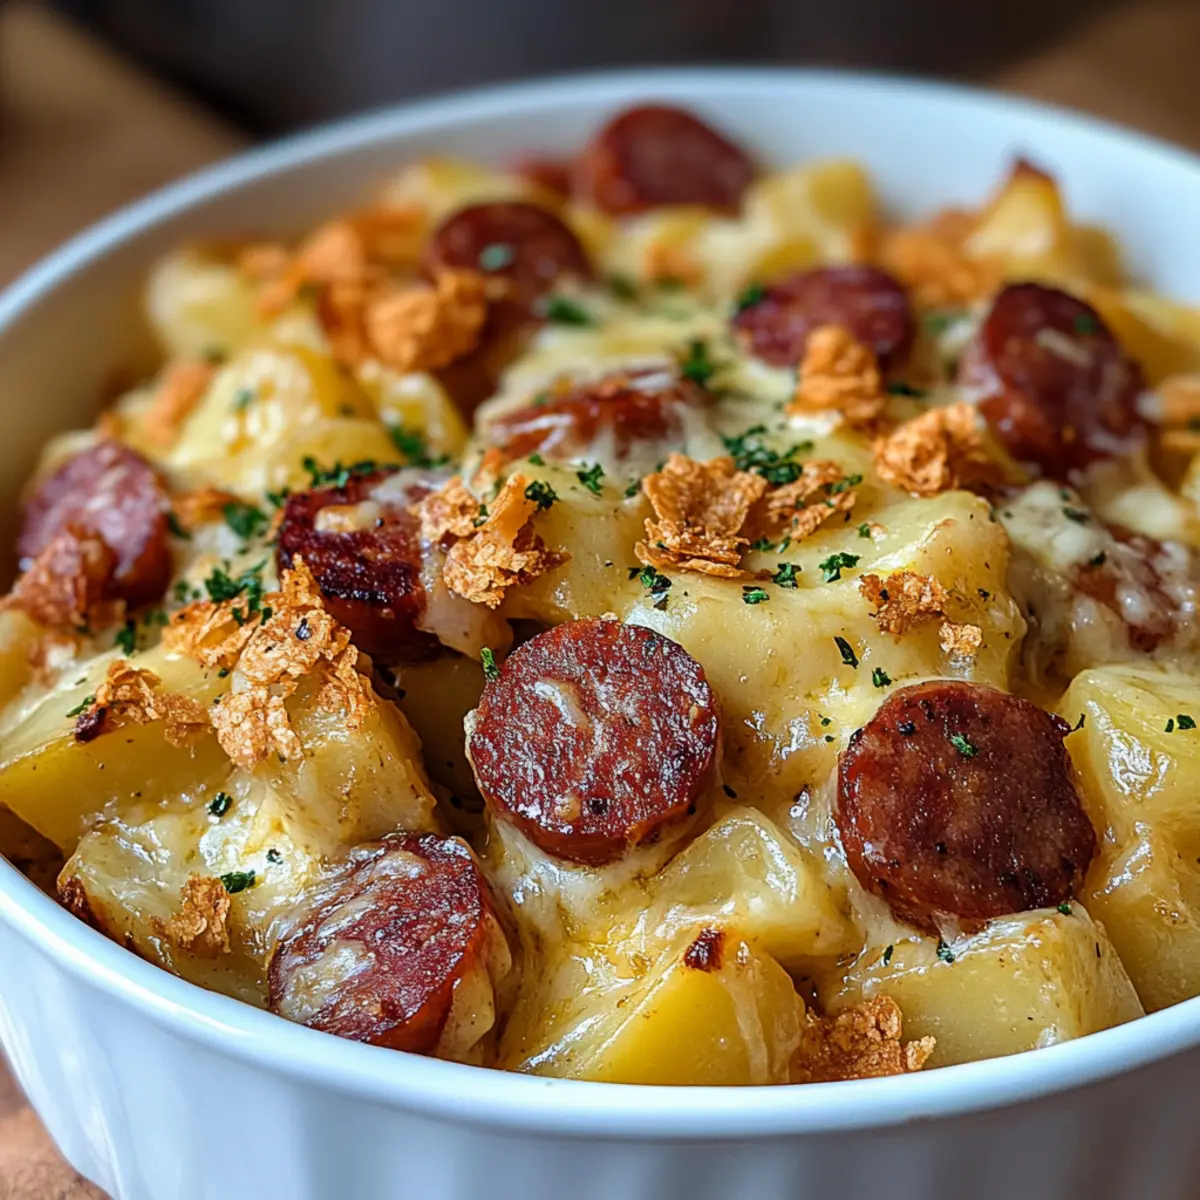
If you like a crunchy topping, mix crushed cornflakes or Ritz crackers with a bit of melted butter in a small bowl. Once combined, sprinkle this mixture evenly over the top of the cheese layer. This step adds a delightful textural contrast to your Kielbasa Sausage Cheesy Potato Casserole once browned and baked.
Step 6: Bake to Perfection
Place the casserole in your preheated oven and bake uncovered for 45-50 minutes. Look for the edges to bubble and the top to turn a beautiful golden brown. This visual cue indicates it’s ready to come out. Once baked, allow the casserole to sit for 5-10 minutes before serving—this will help it set up perfectly for scooping.

Kielbasa Sausage Cheesy Potato Casserole Variations
Dive into a world of delicious possibilities and customize your casserole just the way you like it!
- Breakfast Twist: Swap kielbasa with breakfast sausage and add scrambled eggs for a hearty morning casserole. It’s a delightful way to energize your day!
- Vegetable Boost: Incorporate diced bell peppers or spinach to add color and nutrition. The fresh veggies can brighten the dish and balance its richness.
- Spicy Kick: For heat lovers, add diced jalapeños or use spicy kielbasa to give that extra zing. Spice up your meal, making each bite exciting!
- Ranch Flavor: Mix in ranch seasoning for a flavorful twist that takes your creamy base to new heights. Your guests won’t be able to resist asking for the recipe!
- Smoky Satisfaction: Try using smoked cheddar cheese in place of regular for an enhanced smoky flavor. This addition will elevate the dish, just like my Cheesy Garlic Chicken.
- Creamy Alternative: For a lighter option, replace sour cream with Greek yogurt. It keeps the creaminess while adding a nutritious touch, akin to my Broccoli Cauliflower Casserole.
- Crunchy Variety: Instead of cornflakes or Ritz crackers, use crushed potato chips for a different crunchy texture. Experimenting with toppings can lead to delightful surprises!
- Herb Infusion: Add fresh herbs like rosemary or thyme for an aromatic boost. The garden-fresh flavors will wrap your dish in an inviting scent.
Make Ahead Options
These Kielbasa Sausage Cheesy Potato Casserole is perfect for busy cooks looking to streamline their meal prep! You can prepare the entire casserole up to 24 hours in advance and refrigerate it. To do this, follow the recipe up until the baking step, cover it tightly with plastic wrap or aluminum foil, and store it in the fridge. When you’re ready to enjoy, simply remove the cover and bake it in a preheated oven. You may need to add an extra 10-15 minutes to the baking time to ensure it heats through completely. This makes it a convenient option for weeknight dinners, allowing you to serve delicious comfort food with minimal effort!
What to Serve with Kielbasa Sausage Cheesy Potato Casserole
Pairing delicious sides with your creamy casserole creates a satisfying meal that warms the heart and fills the belly.
- Fresh Green Salad: A crisp, refreshing salad balances the richness of the casserole, adding a splash of color and crunch to your plate.
- Garlic Breadsticks: Soft, warm breadsticks complement the casserole perfectly, allowing you to scoop up cheesy goodness and add an inviting aroma.
- Steamed Broccoli: This vibrant vegetable brings a nutritional punch and a refreshing contrast to the hearty flavors of the casserole.
- Cranberry Sauce: The tartness of cranberry sauce cuts through the richness of the dish, offering a delightful contrast that enhances the overall meal experience.
- Roasted Vegetables: A mix of seasonal roasted veggies adds depth and warmth, contributing to a well-rounded, hearty dinner experience.
- Creamy Coleslaw: The tangy crunch of coleslaw pairs beautifully with the creamy casserole, creating a delightful textural contrast.
- Apple Crisp: For dessert, a warm apple crisp adds a sweet ending to the meal, harmonizing with the comfort flavors of the casserole.
Expert Tips for Kielbasa Sausage Cheesy Potato Casserole
- Prep Ahead: Make the casserole up to 24 hours in advance and store it in the refrigerator. Just remember to add extra baking time for a thorough heat-up!
- Don’t Skimp on Cheese: Using freshly shredded cheese instead of pre-shredded ensures better melting and flavor in your Kielbasa Sausage Cheesy Potato Casserole.
- Texture Matters: Avoid overmixing the hash browns to maintain a pleasing bite. You want some texture, not a mushy casserole!
- Greasing is Key: Ensure your baking dish is evenly greased with butter or oil to prevent any sticking. This simple step could save you from a messy situation!
- Customize Your Flavor: Adjust the amounts of garlic powder, black pepper, and paprika based on your family’s spice preference. Cooking should be fun and tailored!
How to Store and Freeze Kielbasa Sausage Cheesy Potato Casserole
Fridge: Store leftovers in an airtight container for up to 4 days, ensuring the casserole remains moist and flavorful.
Freezer: For longer storage, freeze the casserole wrapped tightly in plastic wrap and aluminum foil for up to 3 months.
Reheating: Thaw in the fridge overnight before reheating. Place in the oven at 350°F (175°C) for about 30–40 minutes until warmed through and bubbling.
Serving Tip: Always let the Kielbasa Sausage Cheesy Potato Casserole cool for a few minutes before serving to allow it to set and enhance the flavors.
Kielbasa Sausage Cheesy Potato Casserole Recipe FAQs
What kind of kielbasa sausage is best for this casserole?
When selecting kielbasa sausage, look for smoked varieties as they provide a rich, savory flavor that complements the cheesy potatoes beautifully. You can also opt for turkey sausage as a lighter alternative if you’re looking for a healthier option.
How should I store leftovers of the Kielbasa Sausage Cheesy Potato Casserole?
Store any leftovers in an airtight container in the refrigerator for up to 4 days. Ensure that the casserole is allowed to cool completely before sealing to maintain its moisture and flavor.
Can I freeze this casserole for later use?
Absolutely! To freeze, wrap the cooled casserole tightly with plastic wrap and then with aluminum foil. It can be stored in the freezer for up to 3 months. When ready to enjoy, thaw it in the refrigerator overnight and reheat in the oven at 350°F (175°C) for about 30-40 minutes or until heated through.
What should I do if my casserole seems too watery after baking?
If your casserole comes out a bit watery, it might be due to excess moisture from the fresh ingredients or frozen hash browns. To help prevent this, ensure your shredded potatoes are adequately drained if using fresh ones. If you’re still dealing with excess liquid after baking, you can always let it sit for a few extra minutes to allow the liquid to absorb.
Can I make this dish vegetarian-friendly?
Certainly! To make the Kielbasa Sausage Cheesy Potato Casserole vegetarian, substitute the kielbasa sausage with a plant-based alternative or omit it entirely. You can enhance the flavor by adding sautéed mushrooms or legumes, like black beans, for added protein and texture.
Is this casserole suitable for pets?
While this casserole is a comforting meal for humans, it’s best to avoid sharing it with pets. Ingredients like onion and excessive dairy can be harmful to them. Stick to pet-friendly treats to keep your furry friends safe!
Kielbasa Sausage Cheesy Potato Casserole: Comfort on a Plate
Ingredients
Equipment
Method
- Preheat your oven to 375°F (190°C) and grease a 9x13-inch baking dish with melted butter.
- In a large mixing bowl, combine the cream of chicken soup, sour cream, 1.5 cups of shredded cheddar cheese, and chopped green onions. Add garlic powder, black pepper, and paprika, stirring until smooth.
- Gently fold in the frozen diced hash brown potatoes and slices of kielbasa sausage into the mixture.
- Pour the mixture into your prepared baking dish, spreading evenly. Top with the remaining shredded cheddar cheese.
- If desired, mix crushed cornflakes or Ritz crackers with a bit of melted butter and sprinkle over the cheese layer.
- Bake uncovered for 45-50 minutes until edges bubble and top is golden brown. Let cool for 5-10 minutes before serving.
Leave a Reply