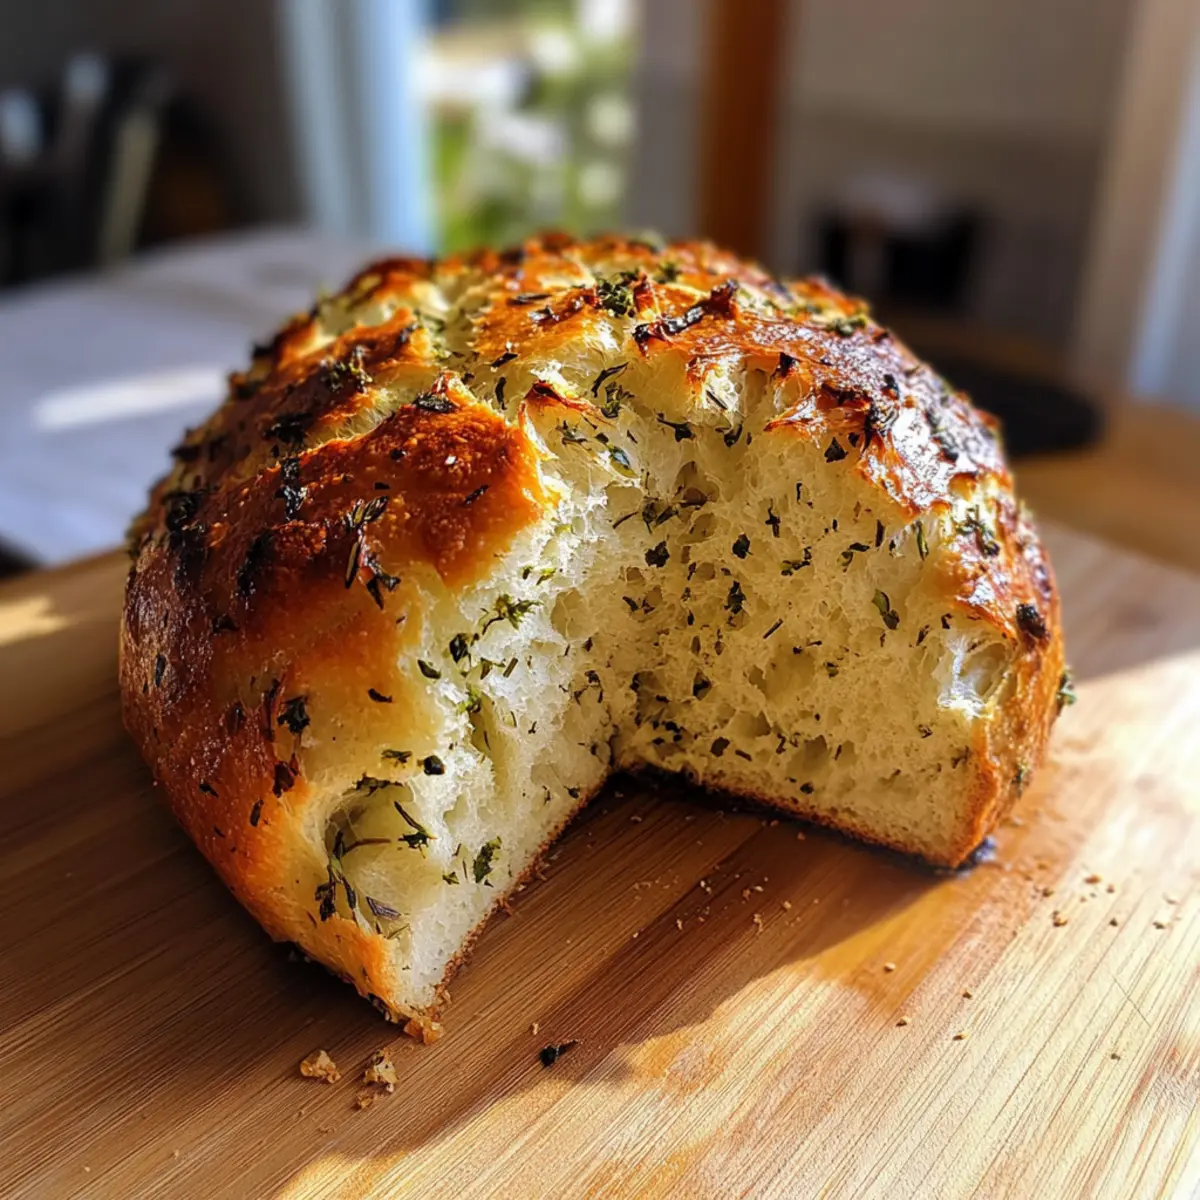
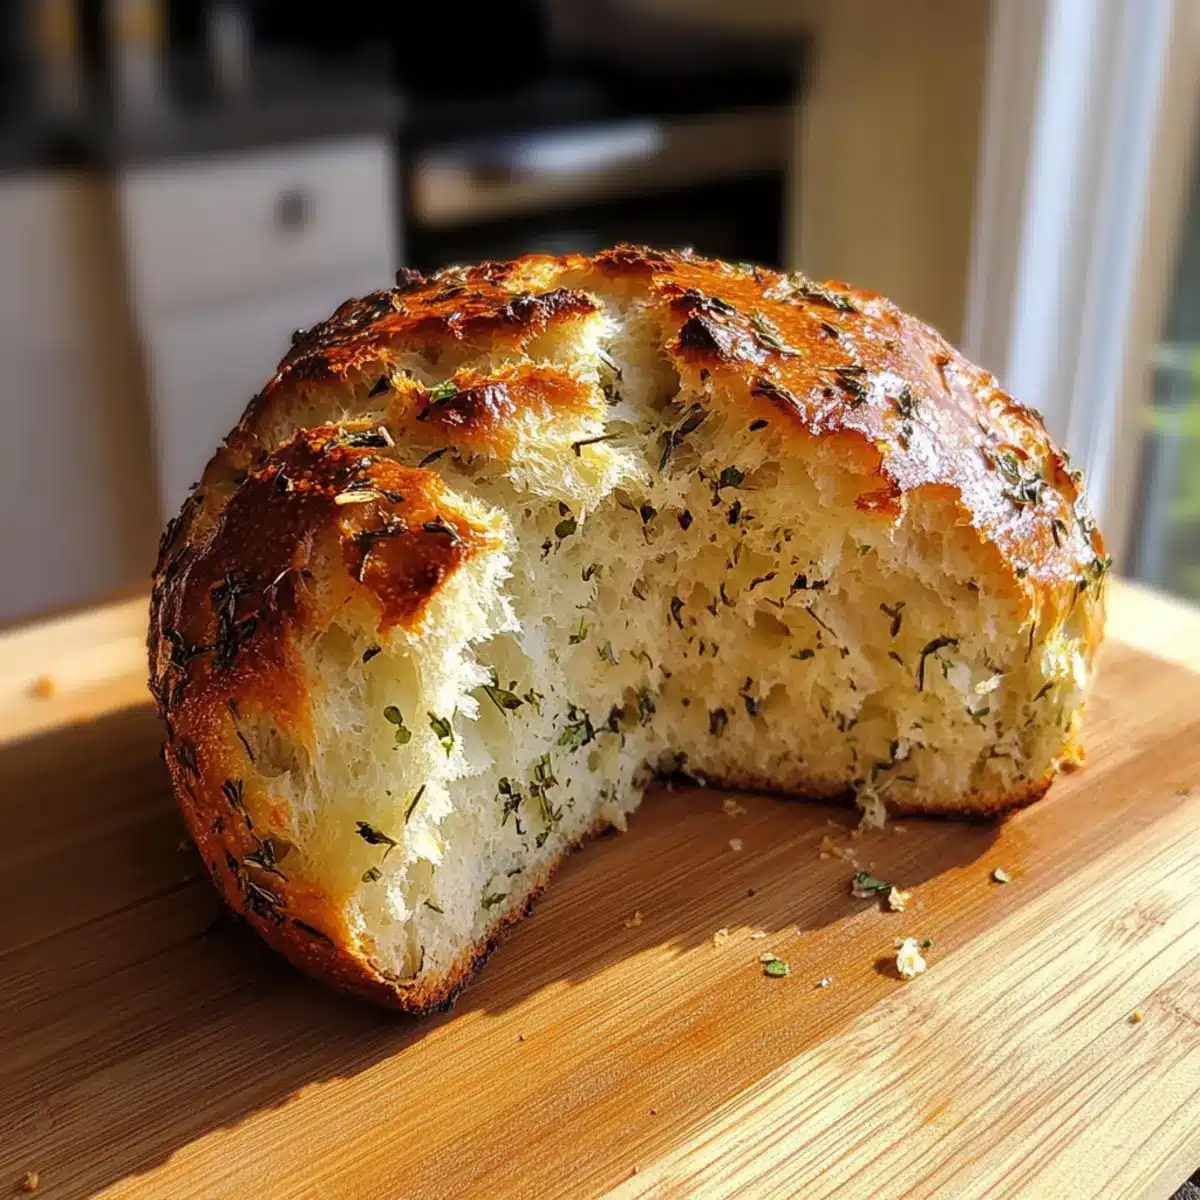
There’s something utterly enchanting about the aroma of bread baking in the oven, isn’t there? When I first pulled out my Dutch oven for this Garlic Herb Dutch Oven Bread, I was instantly transported to a cozy bakery where the warmth of freshly baked loaves feels like a warm hug. This simple, no-knead recipe brings the joy of homemade bread to anyone, whether you’re a seasoned chef or just starting your culinary journey. With minimal hands-on time and the magic of a few pantry staples, you can create a crusty, herb-infused masterpiece that’s perfect for pairing with soups or indulging with a pat of butter. So grab your apron, and let’s dive into a recipe that promises to elevate your homemade meals—what will you serve it with first?

Why is Garlic Herb Dutch Oven Bread special?
Delicious Aroma: The moment you open your oven, the whiff of garlic and fresh herbs fills your kitchen, creating an irresistible invitation to gather around the table.
Simple Technique: With this no-knead method, you’ll find that anyone, regardless of baking experience, can impress their friends and family.
Versatile Pairings: Whether served alongside a hearty soup, like a classic tomato basil, or used to make the perfect garlic toast, this bread will elevate any meal.
Customizable Flavor: Feel free to get creative—add cheese for an indulgent twist or use different herbs for a personal touch.
Perfect for Busy Days: The long rise time means you can set it and forget it, allowing you to focus on other meal prep without any fuss.
Garlic Herb Dutch Oven Bread Ingredients
For the Bread
• All-Purpose Flour – Provides structure and chewiness; you can substitute with bread flour for a denser texture.
• Salt – Enhances flavor and controls yeast activity; essential for seasoning the bread.
• Instant Yeast – Allows for a longer rise time without activation; replace with active dry yeast if you activate it first.
• Warm Water – Hydrates the flour and activates the yeast; ensure it’s between 100-110°F for optimal results.
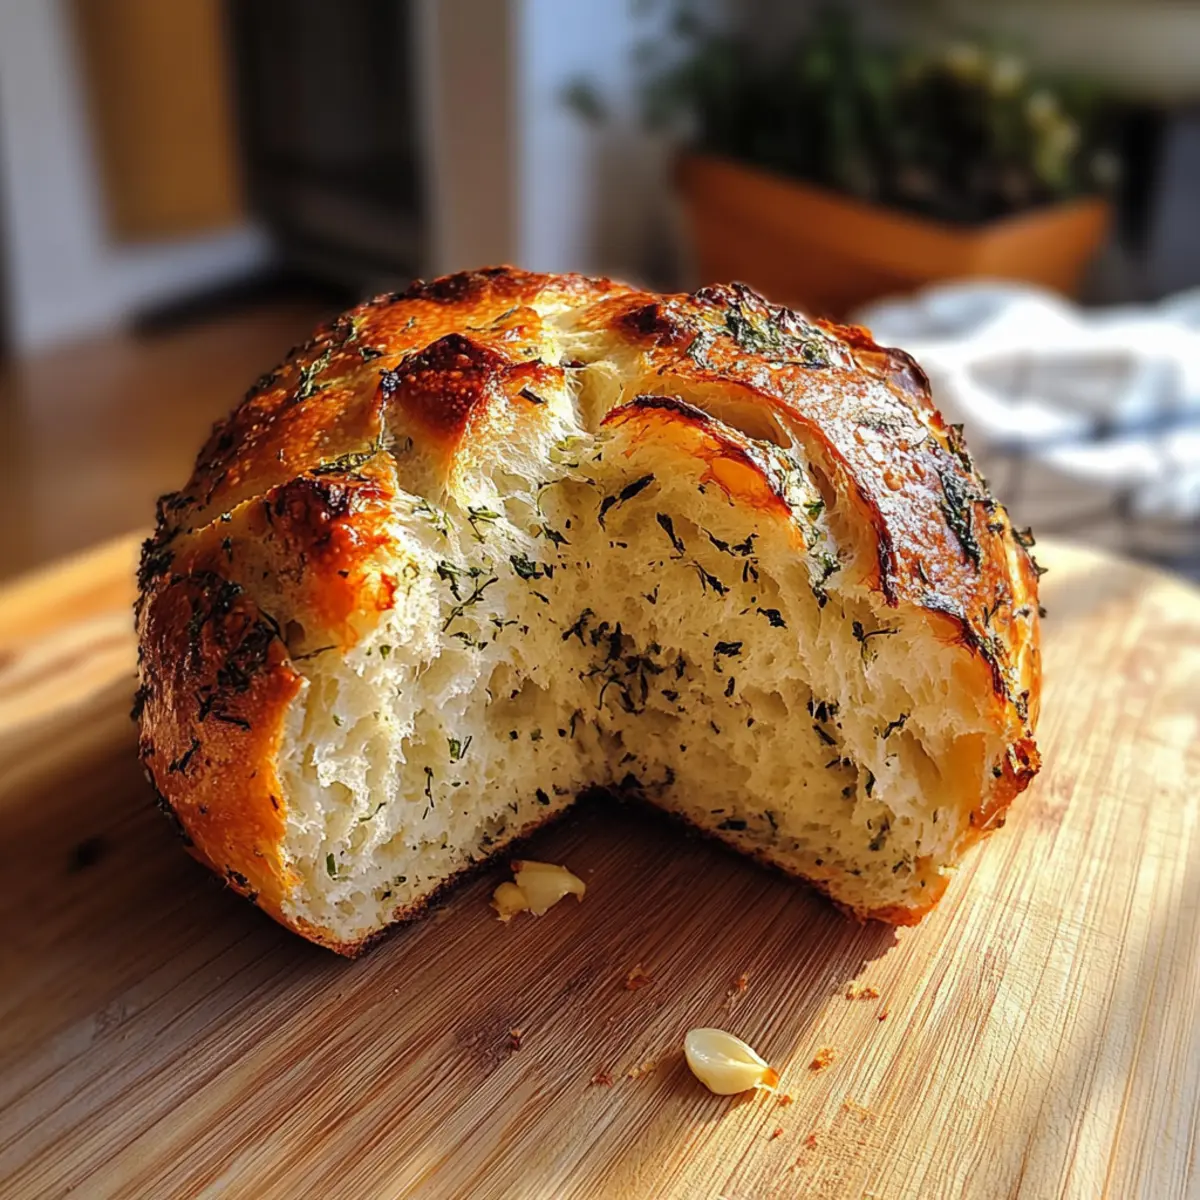
• Minced Garlic – Infuses the bread with aromatic flavor; you can increase it for a robust garlic punch.
• Fresh Herbs (e.g., rosemary, thyme) – Provide a burst of freshness; swap with your favorites or use dried herbs in a pinch.
• Olive Oil – Promotes a golden crust and prevents sticking; can use mild oils like canola or vegetable oil instead.
This delightful recipe for Garlic Herb Dutch Oven Bread covers all angles, making it easy to enjoy homemade goodness!
Step‑by‑Step Instructions for Garlic Herb Dutch Oven Bread
Step 1: Mix Dry Ingredients
In a large mixing bowl, combine 3 cups of all-purpose flour, 1.5 teaspoons of salt, and 0.25 teaspoons of instant yeast. Use a whisk or spoon to ensure the ingredients are well-blended, creating a uniform mixture. This step is crucial for evenly distributing the yeast and salt, setting the foundation for your Garlic Herb Dutch Oven Bread.
Step 2: Combine Wet Ingredients
Next, pour in 1.5 cups of warm water (between 100-110°F) into the dry mixture. Add 3 tablespoons of minced garlic and 2 tablespoons of your choice of fresh herbs, such as rosemary or thyme. Stir the mixture until a shaggy dough forms—this may take about 2-3 minutes. Don’t worry about any lumps; it’s meant to be rustic!
Step 3: Let Dough Rise
Once combined, cover the bowl tightly with plastic wrap or a clean kitchen towel to keep the moisture in. Allow the dough to rest at room temperature for 12 to 18 hours, letting it rise and develop flavor. You’ll know it’s ready when the surface is dotted with bubbles and the dough has doubled in size.
Step 4: Preheat the Oven
About 30 minutes before you’re ready to bake, preheat your oven to 450°F (230°C). Place a Dutch oven with its lid inside the oven as it preheats. This step ensures that your vessel is scorching hot, helping achieve that wonderfully crusty exterior for your Garlic Herb Dutch Oven Bread.
Step 5: Prepare the Dough
After the dough has risen, lightly flour a clean work surface and gently turn the dough out onto it. Using floured hands, shape the dough into a ball without excessive kneading—this should take about 30 seconds. Be careful not to overwork it; a loose shape leads to a nice airy crumb!
Step 6: Transfer to Dutch Oven
Carefully remove the hot Dutch oven from the oven and lift the lid. Drizzle a tablespoon of olive oil into the bottom, ensuring it coats the surface evenly. Gently place the shaped dough into the Dutch oven, covering it with the lid. This helps retain moisture for the perfect bake.
Step 7: Bake Covered
With your oven still set at 450°F, place the lid on the Dutch oven and bake for 30 minutes. This covered baking method will create steam, helping the bread develop a crusty exterior while keeping the inside soft and fluffy.
Step 8: Bake Uncovered
After 30 minutes, carefully remove the lid from the Dutch oven. Continue baking for an additional 15-20 minutes, watching closely until the bread is a golden brown color. The aroma will fill your kitchen, signaling that your Garlic Herb Dutch Oven Bread is almost ready!
Step 9: Cool and Slice
Once the bread has reached that delightful golden hue, carefully remove the Dutch oven from the oven and transfer the bread to a wire rack. Allow it to cool for at least 20 minutes before slicing. This cooling time ensures that the texture finishes setting, making for easier slicing and delicious results.
Storage Tips for Garlic Herb Dutch Oven Bread
Room Temperature: Store leftover Garlic Herb Dutch Oven Bread in a paper bag at room temperature for up to 3 days to maintain its delightful crust.
Fridge: If you prefer a longer storage option, slice the bread and wrap it tightly in plastic wrap. It can be kept in the fridge for up to a week, but the crust may soften.
Freezer: For even longer storage, freeze slices in an airtight container or freezer bag. This allows you to enjoy the bread for up to 3 months without losing flavor or texture.
Reheating: To enjoy previously frozen slices, thaw them in the fridge overnight and reheat in a 350°F (175°C) oven for about 10 minutes, bringing back that freshly baked quality.
Make Ahead Options
These Garlic Herb Dutch Oven Bread loaves are a fantastic option for meal prep enthusiasts! You can mix the dry ingredients and even combine the wet ingredients to form the shaggy dough up to 24 hours in advance, allowing the dough to rest at room temperature as it develops flavor. For optimal results, cover the bowl tightly with plastic wrap to maintain moisture. When it’s time to bake, simply preheat your Dutch oven and shape the dough according to the recipe directions, ensuring the crust turns out just as delicious. Enjoy the convenience of having homemade bread ready with minimal effort on busy days!
Expert Tips for Garlic Herb Dutch Oven Bread
• Preheat Properly: Ensure your Dutch oven is preheated for at least 30 minutes to achieve that perfect crust while baking your Garlic Herb Dutch Oven Bread.
• Avoid Overworking Dough: Shape your dough gently; over-kneading can lead to a dense texture instead of the desired airy crumb.
• Hydration is Key: Use warm water between 100-110°F for ideal yeast activation. Too hot or too cold can hinder the rise of your bread.
• Customize with Finesse: Don’t hesitate to experiment with herbs! Adding a mix of fresh or dried herbs can transform the flavor profile without complicating the process.
• Watch Baking Time: Keep a close eye during the last 15-20 minutes of baking to prevent over-browning. Adjust your time based on your oven’s performance.
• Cool Completely: Allow your bread to cool for at least 20 minutes before slicing so that the texture sets properly and each slice is perfect!
What to Serve with Garlic Herb Dutch Oven Bread?
Savoring a slice of warm, herb-infused bread creates memories best shared around a table, inviting delightful pairings to complete your meal.
-
Hearty Tomato Soup: The rich acidity of tomato soup perfectly complements the garlic and herb flavors, creating a comforting classic.
-
Garlic Butter Shrimp: Indulge in succulent shrimp sautéed in garlic butter, a dish that echoes your bread’s aromatic essence for a cohesive dining experience.
-
Fresh Garden Salad: A crisp salad with mixed greens, cherry tomatoes, and a light vinaigrette enhances the meal’s freshness while providing a lovely crunch.
-
Creamy Mashed Potatoes: Silky mashed potatoes deliver a creamy texture that harmonizes beautifully with the crunchy crust of the bread, creating a delightful contrast.
-
Savory Mushroom Risotto: The earthiness of mushrooms brings out the herbal notes of the bread, making for an indulgent and flavorful pairing.
-
Charcuterie Board: Serve with cured meats, cheeses, and olives to create a vibrant spread, where bread acts as the perfect base for all delicious bites.
-
Olive Oil and Balsamic Vinegar: Drizzle high-quality olive oil and a fruity balsamic vinegar for an exquisite dipping experience that complements the bread’s texture and flavor.
-
Red Wine: A glass of robust red wine enhances the bread’s earthy notes, offering a rich sip that pairs splendidly with your meal.
Garlic Herb Dutch Oven Bread Variations
Feel free to let your creativity shine in the kitchen with these fun variations that will make your Garlic Herb Dutch Oven Bread uniquely yours!
-
Cheesy Delight: Add 1 cup of shredded cheese, like mozzarella or cheddar, to the dough for a rich, cheesy flavor that complements the herbs perfectly. Imagine tearing into a warm loaf with gooey cheese pulling apart!
-
Herb Explosion: Experiment with a mix of your favorite fresh herbs such as basil, parsley, or dill for a fun twist. Each herb brings its own personality to the bread, making it a delightful surprise with every bite.
-
Spicy Kick: Incorporate a teaspoon of red pepper flakes or diced jalapeños to introduce a zesty heat. The warmth from the spices can elevate your dinner, especially when paired with soups or stews.
-
Nutty Flavor: Substitute a portion of all-purpose flour with whole wheat flour for a nuttier, more textured loaf. It’s a great way to add a wholesome touch while keeping the same comforting flavors.
-
Savory Add-Ins: Toss in caramelized onions or sun-dried tomatoes for a rich and savory twist. These additions bring sweetness and depth, creating a complexity that undeniably enhances your culinary experience.
-
Sweet Touch: For an interesting contrast, add a tablespoon of honey or a sprinkle of cinnamon into the dough. It adds a subtle sweetness that pairs deliciously with garlic, perfect for a unique breakfast option.
-
Olive Oil Variants: Try different oils, such as infused garlic or herb oil, to add an exquisite aroma. It can impart flavors you’ll cherish, especially when served fresh out of the oven.
-
Dough Variations: For a more rustic feel, use a mix of different flours like rye or spelt. This blend adds distinct flavors and textures that will take your baking to the next level.
Feel free to also check out our recipes for Cheesy Garlic Chicken or Garlic Paprika Shrimp to discover additional delicious pairings! Whatever spin you choose, your Garlic Herb Dutch Oven Bread will surely impress every time.
Garlic Herb Dutch Oven Bread Recipe FAQs
How do I choose the best garlic for my bread?
Absolutely! When selecting garlic, look for firm, plump bulbs with tight papery skins. Avoid garlic with soft spots or dark blemishes, as they indicate spoilage. Fresh garlic will provide a robust flavor, so if you notice dark spots all over the bulbs, it’s best to leave them behind!
What’s the best way to store leftover Garlic Herb Dutch Oven Bread?
I recommend storing leftover bread in a paper bag at room temperature for up to 3 days to keep that beautiful crust intact. If you want it to last longer, slice the bread and wrap it tightly in plastic wrap before placing it in the fridge for up to a week. Just remember, while it may last longer in the fridge, the crust might soften a bit!
Can I freeze Garlic Herb Dutch Oven Bread?
Yes, you can absolutely freeze it! Slice the bread and carefully place the slices in an airtight container or freezer bag, separating layers with parchment paper to prevent sticking. It can be frozen for up to 3 months. When you’re ready to enjoy, thaw overnight in the fridge and reheat in a 350°F (175°C) oven for about 10 minutes to restore that crusty goodness.
What should I do if my dough doesn’t rise?
If your dough fails to rise, there are a couple of troubleshooting steps to consider. Start by ensuring your yeast is fresh—check the expiration date. Next, temperature is crucial: the water should be warm, not hot, ideally between 100-110°F (37-43°C). If your kitchen is too cold, consider placing the bowl in a warmer area or near a preheated oven to encourage proper rising.
Are there any dietary considerations with this recipe?
Great question! This Garlic Herb Dutch Oven Bread is vegetarian and can be made vegan by using water instead of warm milk and ensuring the olive oil used is vegan-friendly. If you or anyone in your family has allergies, always double-check that your flour and other ingredients are free from potential allergens. Additionally, keep in mind that certain fresh herbs might not be suitable for pets, so it’s best to serve only to humans!
Garlic Herb Dutch Oven Bread That's So Easy to Bake
Ingredients
Equipment
Method
- In a large mixing bowl, combine 3 cups of all-purpose flour, 1.5 teaspoons of salt, and 0.25 teaspoons of instant yeast. Mix well.
- Pour in 1.5 cups of warm water. Add 3 tablespoons of minced garlic and 2 tablespoons of fresh herbs. Stir until a shaggy dough forms.
- Cover the bowl with plastic wrap and let the dough rise at room temperature for 12 to 18 hours.
- Preheat oven to 450°F (230°C) and place a Dutch oven inside to heat for 30 minutes.
- Turn the risen dough out onto a floured surface and shape it into a ball gently without overworking.
- Remove the hot Dutch oven, drizzle 1 tablespoon of olive oil, and place the dough inside. Cover with the lid.
- Bake covered for 30 minutes at 450°F to create steam for a crusty exterior.
- Remove the lid and continue baking for an additional 15-20 minutes until golden brown.
- Transfer the bread to a wire rack to cool for at least 20 minutes before slicing.
Leave a Reply