The aroma wafting from my kitchen took me back to those rainy afternoons at my grandmother’s house, where a simple oven and a handful of ingredients transformed into pure comfort. Today, I’m thrilled to share my favorite recipe for Dreamy Warm Baked Custard, a dish that perfectly captures that nostalgia with its creamy, velvety texture and warm hint of nutmeg. This easy dessert is not just a treat for the taste buds; it’s also gluten-free and meat-free, making it a great option for everyone at your dinner table. Plus, it pairs beautifully with seasonal fruits, allowing you to dress it up or down depending on the occasion. Are you ready to bring a slice of cozy warmth to your home? Let’s dive into the recipe!
Why is this custard a must-try?
Simplicity in preparation means anyone can whip it up! This creamy texture brings comfort in every bite, reminiscent of beloved family gatherings. Versatile enough to be dressed with fresh berries or caramel sauce, this custard adapts to any occasion. Plus, it’s gluten-free and meat-free, making it perfect for all dietary preferences. Combining nostalgia and modern ease, this Dreamy Warm Baked Custard is sure to impress your guests—just like Baked Lobster Tails or Twice Baked Breakfast Potatoes.
Dreamy Warm Baked Custard Ingredients
For the Custard
• Whole Milk – Provides creaminess and richness; substitute 2% milk for a lighter version.
• Eggs – Fundamental for structure and creaminess; make sure to use fresh, large eggs for the best results.
• Sugar – Adds sweetness to balance the custard’s savory notes; adjust based on your taste preference.
• Vanilla Extract – Offers a warm, aromatic flavor; real vanilla is preferred, but almond or citrus zest can give delightful variations.
• Salt – Enhances sweetness and balances flavors; just a small pinch can make a difference.
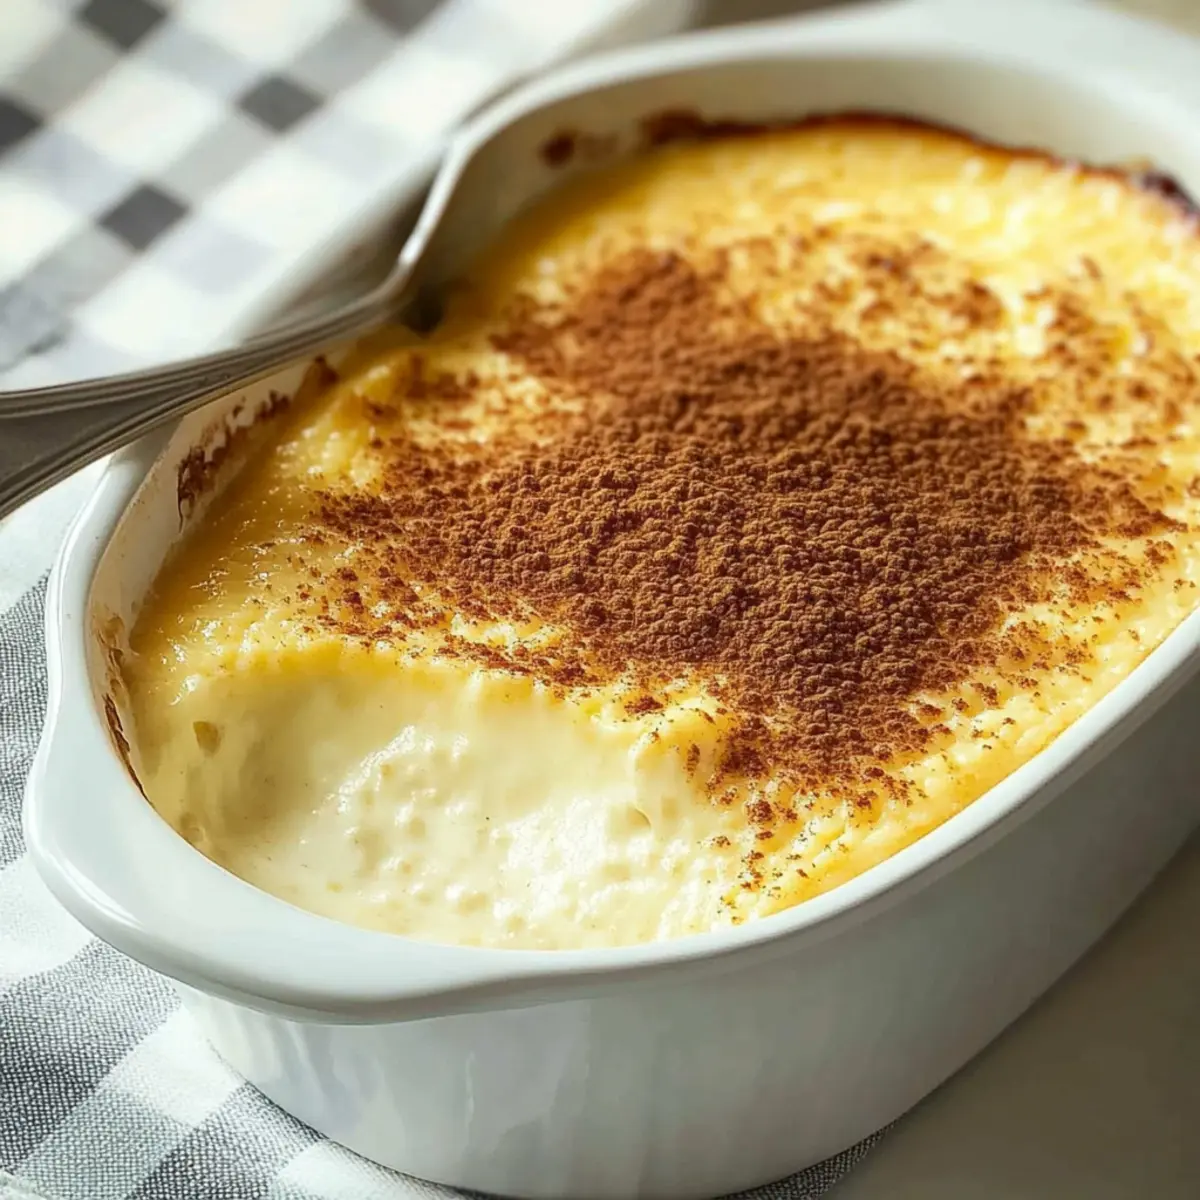
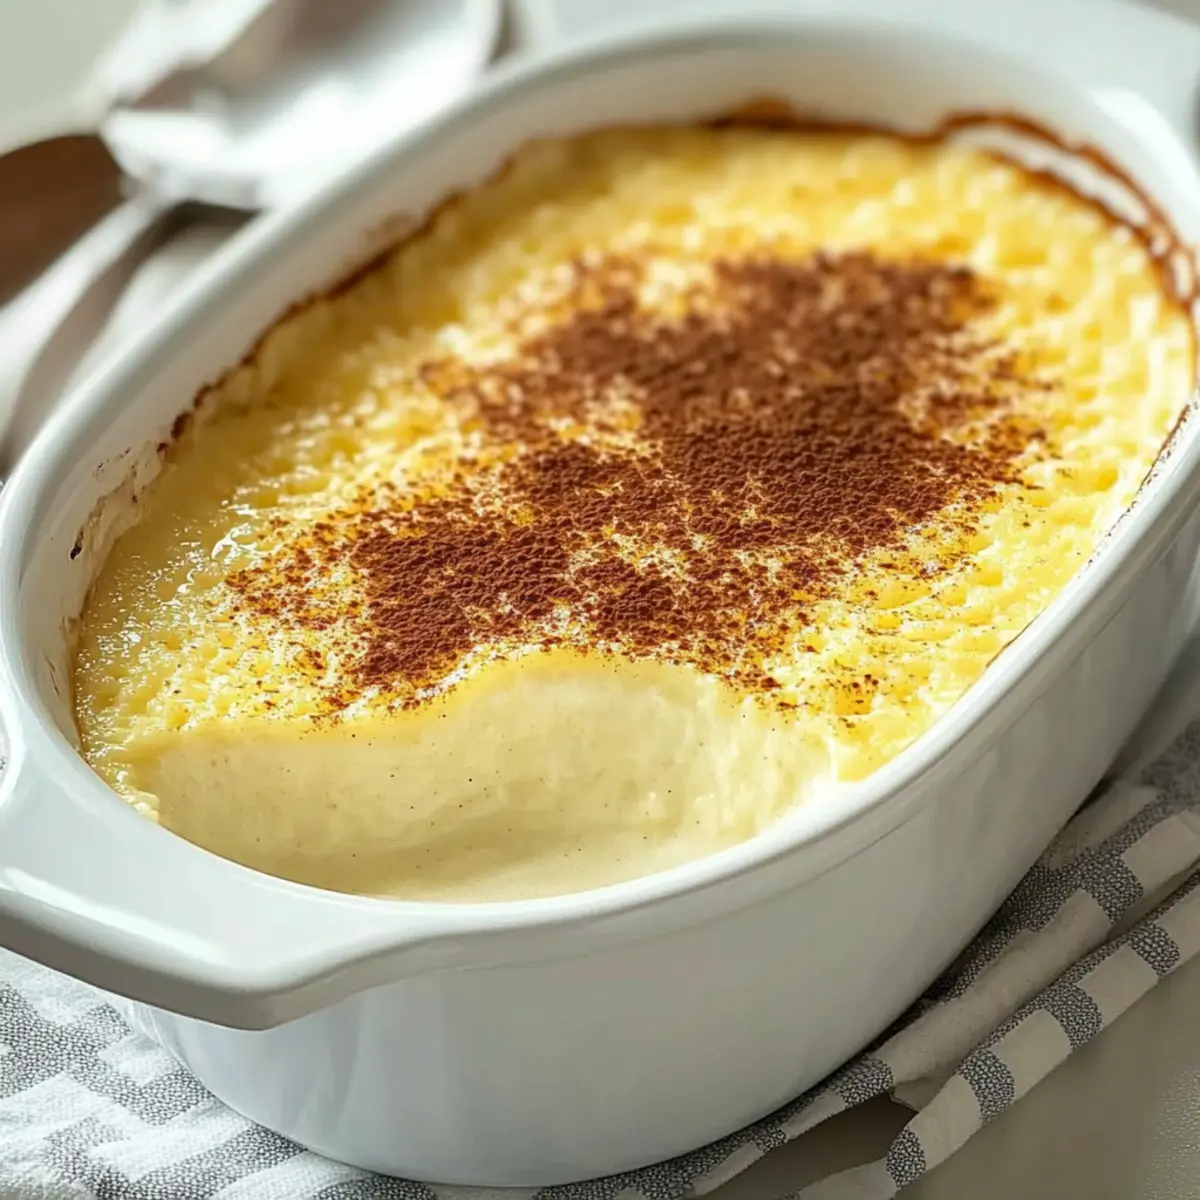
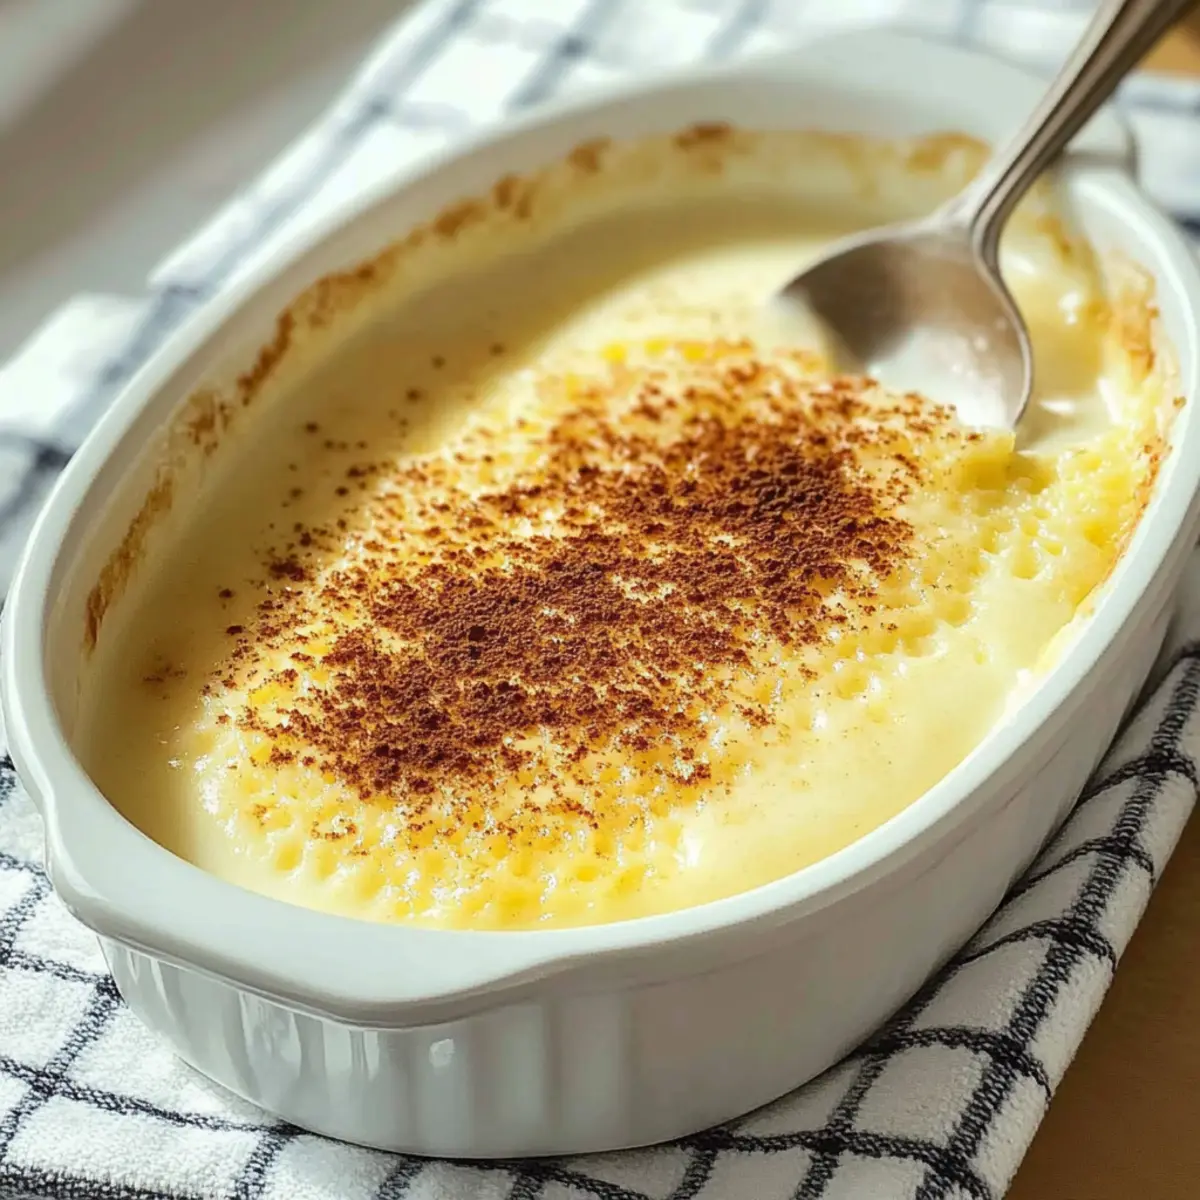
• Ground Nutmeg – Adds a warm kick and depth; freshly grated nutmeg will provide a stronger taste.
Optional Garnish
• Fresh Berries – Serves as a garnish to enhance flavor and presentation; seasonal fruits like berries or citrus are perfect choices.
Step‑by‑Step Instructions for Dreamy Warm Baked Custard
Step 1: Preheat the Oven
Begin by preheating your oven to 350°F (175°C). This initial temperature ensures a perfectly cooked custard that emerges creamy and smooth. While the oven warms up, gather a 1.5-quart round dish and a larger baking pan to create a water bath later.
Step 2: Heat the Milk
In a medium saucepan, gently warm the whole milk over low heat. Stir occasionally until you see small bubbles forming at the edges, about 5–7 minutes. Once warmed, remove the saucepan from heat and allow it to cool slightly before combining it with the eggs.
Step 3: Whisk the Eggs
In a large mixing bowl, crack in the eggs and add the sugar and a pinch of salt. Using a whisk, blend these ingredients together until just combined, ensuring not to introduce any air bubbles. This step is key for achieving your Dreamy Warm Baked Custard’s velvety texture.
Step 4: Combine Mixtures
Gradually pour the warm milk into the egg mixture, whisking continuously. This gentle blending helps prevent curdling, creating a rich custard base. Make sure everything is well combined, and watch for any visible lumps before moving on to the next step.
Step 5: Strain the Mixture
To ensure a silky smooth custard, strain the combined mixture through a fine wire strainer into your round dish. This will remove any unwanted bits or curdled egg. You should end up with a beautiful, golden liquid ready for baking.
Step 6: Add Nutmeg and Prepare the Water Bath
Sprinkle a light dusting of ground nutmeg over the top of the custard mixture, enhancing its warm flavor profile. Next, take your larger baking pan and place the dish inside it. Fill the outer pan with hot water until it reaches halfway up the sides of the custard dish, creating a gentle steam environment for baking.
Step 7: Bake the Custard
Carefully transfer the water bath with your custard to the preheated oven. Bake for approximately 55 minutes, or until the custard jiggles slightly in the center but appears set around the edges. This combination of time and temperature is crucial for that perfect creamy custard texture.
Step 8: Cool and Chill
Once baked, remove the Dreamy Warm Baked Custard from the oven and let it cool in the water bath for about 30 minutes. After cooling, refrigerate the custard for at least 2 hours, or overnight for the best flavor and texture. Enjoy this delightful dessert at your leisure!
How to Store and Freeze Dreamy Warm Baked Custard
Fridge: Keep your Dreamy Warm Baked Custard covered in the refrigerator for up to 3 days. This helps maintain its creamy texture and prevents odor absorption.
Freezer: For longer storage, freeze the custard in an airtight container for up to 2 months. However, it’s best enjoyed fresh to maintain its silky texture.
Thawing: When ready to serve, thaw the custard overnight in the fridge. Reheat gently in the microwave or warm water bath without boiling, to restore its creamy consistency.
Avoid Repeated Heating: Reheating multiple times can affect texture, so only reheat what you plan to serve right away.
Dreamy Warm Baked Custard Variations
Feel free to make this baked custard your own with these delightful twists and substitutions; each offers a unique flavor and experience.
- Dairy-Free: Substitute whole milk with almond or coconut milk for a dairy-free version while maintaining richness.
- Low-Sugar: Replace regular sugar with your choice of a sugar alternative, such as stevia or monk fruit, for a lighter dessert.
- Lemon Zest: Add a teaspoon of lemon zest to the egg mixture for a bright, citrusy burst that lifts the custard’s flavors.
- Herbal Infusion: Incorporate fresh herbs like rosemary or lavender in the milk while warming; strain and whisk for an aromatic twist.
- Spice It Up: Mix in a pinch of cinnamon or cardamom along with the nutmeg for an added layer of warmth and spice.
- Berry Bliss: Top with a luscious layer of fresh seasonal fruits, like strawberries or blueberries, for a beautiful and refreshing addition.
- Chocolate Indulgence: Stir in melted dark chocolate to the egg mixture for a rich, chocolatey take on your custard.
- Caramel Drizzle: Drizzle caramel sauce over the chilled custard before serving for that irresistible sweet finish.
With these variations, you can create a custard that not only satisfies but also ignites your creativity. Think about these delightful options while you savor your culinary adventure—just like you might experience with Baked Cauliflower Gratin or those comforting Twice Baked Breakfast Potatoes. Enjoy!
Make Ahead Options
These Dreamy Warm Baked Custard cups are perfect for meal prep, allowing you to enjoy a heavenly dessert with minimal last-minute effort. You can prepare the custard mixture and strain it up to 24 hours in advance, storing it covered in the refrigerator to maintain its creamy texture. Once ready to bake, just sprinkle the top with nutmeg and follow the remaining steps. For optimal flavor, it’s best to chill the baked custard for at least 2 hours or overnight before serving, ensuring a delightful treat that’s just as delicious as when freshly made. By prepping ahead, you’ll save precious time on busy weeknights without sacrificing quality!
Expert Tips for Dreamy Warm Baked Custard
-
Milk Temperature: Ensure the milk is warmed, not boiling. Too hot can curdle the eggs, ruining the texture.
-
Water Bath Importance: Always use a water bath while baking. It prevents uneven cooking, helping you achieve that signature smooth custard.
-
Egg Quality Matters: Use fresh, large eggs for the best results. Older eggs can affect the custard’s structure and flavor.
-
Check for Lumps: If your custard appears lumpy after baking, check your oven temperature next time. Consistency starts with proper mixing.
-
Cover While Cooling: Tightly cover the custard when refrigerating to avoid it absorbing any fridge odors, ensuring maximum flavor.
What to Serve with Dreamy Warm Baked Custard
Indulging in a lavish dessert experience invites the perfect side accompaniments to elevate your meal.
- Creamy Mashed Potatoes: Their buttery richness offers a delightful contrast to the smooth custard, creating a satisfying balance of flavors and textures.
- Roasted Seasonal Vegetables: The slight caramelization of veggies brings a savory edge that tempts the palate, enhancing the sweetness of the custard.
- Fresh Fruit Salad: Bright, juicy berries or citrus can refresh the rich custard, offering a light and zesty counterpoint that invigorates each bite.
- Whipped Cream: Light and airy, this lush topping adds a luxurious touch to the custard, making every spoonful feel decadent and indulgent.
- Caramel Sauce: Drizzle some over the custard for an extra layer of sweetness; its buttery flavor harmonizes beautifully with the nutmeg notes.
- Iced Herbal Tea: A refreshing drink option that balances the dessert’s warmth, herbal tea adds a soothing end to your meal.
- Chocolate Mousse: This rich dessert, when paired with the custard, creates a symphony of flavors that delight any chocolate lover in your midst.
- Apple Crisp: The warm spices from the crisp offer a nostalgic taste that echoes the custard’s comforting qualities, making it a memorable duo.
- Espresso or Dark Coffee: A bold cup of coffee complements the creamy sweetness of the custard, enhancing its flavors while providing a delightful contrast.
- Mini Fruit Tarts: Delicate and vibrant, they bring not only a visual appeal but also a playful texture that pairs charmingly with the custard’s creamy consistency.

Dreamy Warm Baked Custard Recipe FAQs
What type of milk should I use for the custard?
You should ideally use whole milk for the richest, creamiest texture. However, if you’re looking for a lighter version, feel free to substitute with 2% milk. Just keep in mind it may not be as indulgent.
How should I store the baked custard?
After preparing your Dreamy Warm Baked Custard, cover it tightly and store it in the refrigerator for up to 3 days. This keeps it fresh and helps retain that delightful creamy texture.
Can I freeze baked custard?
Absolutely! To freeze the custard, make sure it’s completely cooled, then place it in an airtight container. It can be frozen for up to 2 months. Just remember that thawing it slowly in the fridge is best to maintain its velvety texture.
My custard came out lumpy—what went wrong?
Lumps can occur if the egg mixture was not combined properly before baking or if the milk was too hot, leading to curdled eggs. For your next attempt, make sure to whisk the eggs just until combined, and never add boiling milk directly into the eggs. Additionally, straining the mixture through a wire strainer before baking can help achieve that silky smoothness!
Can I adjust the recipe for dietary restrictions?
Yes! The Dreamy Warm Baked Custard is naturally gluten-free and meat-free. If there are additional dietary considerations, such as dairy allergies, you could try using a dairy-free milk alternative like almond or coconut milk as long as they provide a comparable fat content.
What should I do if I don’t have nutmeg?
If you find yourself without nutmeg, don’t worry! You can either leave it out or substitute it with cinnamon for a different but still delicious flavor profile that pairs beautifully with the custard’s creaminess.
Dreamy Warm Baked Custard: A Cozy Dessert Delight
Ingredients
Equipment
Method
- Preheat your oven to 350°F (175°C).
- Gently warm the whole milk over low heat for 5–7 minutes until small bubbles form.
- Crack eggs into a bowl, add sugar and a pinch of salt. Blend with a whisk.
- Gradually pour warm milk into the egg mixture, whisking continuously.
- Strain the mixture through a fine wire strainer into your round dish.
- Sprinkle ground nutmeg over the top and prepare a water bath.
- Bake in the preheated oven for approximately 55 minutes.
- Let it cool in the water bath for about 30 minutes before refrigerating for at least 2 hours.
Leave a Reply