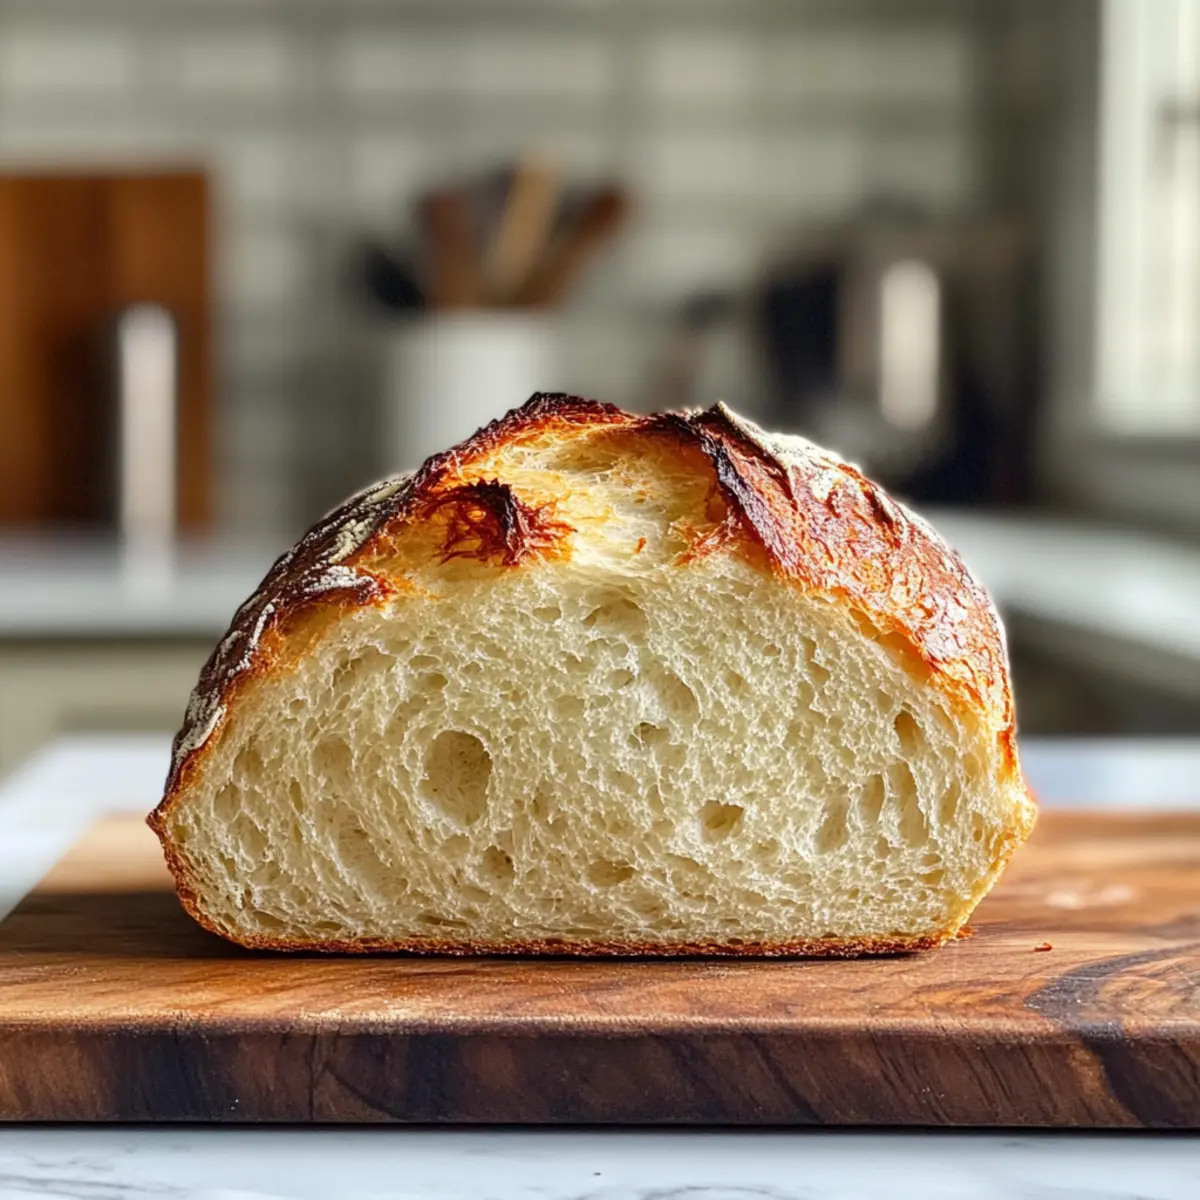
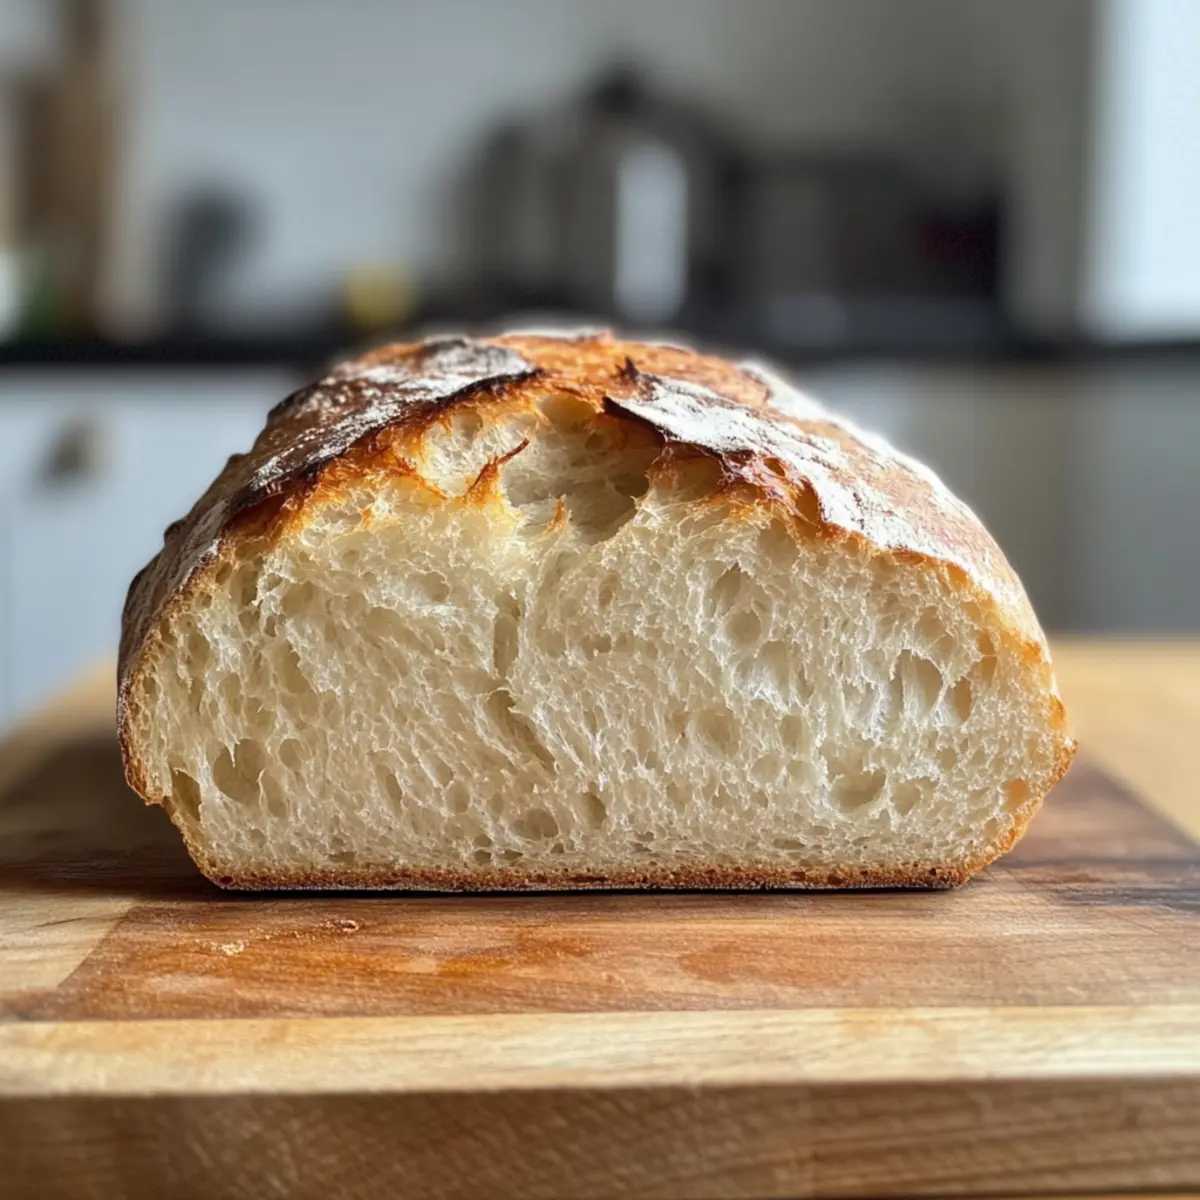
The first time I pulled a loaf of No-Knead Dutch Oven Bread from my oven, the magic took me by surprise. With a crackly golden crust and a soft interior that whispered artisan charm, it felt like I had just brought a bit of my favorite bakery home. This easy, beginner-friendly recipe requires only five minutes of prep, making it the perfect starting point for those ready to ditch fast food and embrace freshly baked glory. Not only will this bread elevate any meal—think warm slices for breakfast or as a show-stopping side at dinner—but the hands-off method means you can focus on other culinary delights. Are you ready to transform your kitchen into a haven of warmth and delightful aromas? Let’s dive into the world of homemade bread!
Why Is Dutch Oven Bread So Amazing?
Simplicity at Its Best: This no-knead method requires only a few ingredients and minimal effort, perfect for home cooks of all levels.
Impressive Results: The stunning golden crust and airy interior will leave your friends and family in awe, like you just stepped out of a bakery!
Versatility: Customize your loaf by adding herbs, seeds, or cheese for added flavor and texture. Enjoy it with butter or as a side to soups, just like with a classic Pumpkin Bread Pudding.
Time-Saving: With just five minutes of prep and hands-off rising, you can easily fit bread-making into your busy schedule.
Crowd Pleaser: This bread not only impresses diners at special occasions but is also the perfect treat for cozy weeknight dinners. Give it a try alongside a warm slice of Cranberry Orange Shortbread for dessert!
Dutch Oven Bread Ingredients
• Discover the essentials for an unforgettable loaf!
For the Dough
- Warm Water (1.5 cups) – Hydrates the flour and activates the yeast; substitute with lukewarm milk for extra flavor.
- All-Purpose Flour (3.25 cups) – Provides structure to the bread; use different flours cautiously, as they may require adjusting the liquid.
- Fine Grain Salt (1.5 tsp) – Enhances flavor and controls yeast activity; sea salt works as a great alternative.
- Yeast (1 packet / 2.25 tsp) – Leavens the bread through fermentation; you can use either active dry or instant yeast in this Dutch Oven Bread recipe.
Step‑by‑Step Instructions for No-Knead Dutch Oven Bread
Step 1: Combine Ingredients
In a large mixing bowl, add 1.5 cups of warm water, 2.25 teaspoons of yeast, and 1.5 teaspoons of fine grain salt. Stir gently until the yeast and salt dissolve completely. You’ll want the mixture to feel slightly warm to the touch, not hot, to ensure the yeast activates properly.
Step 2: Mix the Dough
Gradually incorporate 3.25 cups of all-purpose flour into the water mixture, using a sturdy wooden spoon or spatula. Continue to stir until a sticky, shaggy dough forms. The dough should be wet and tacky but not overly runny. This is your no-knead Dutch Oven Bread dough, ready for rising!
Step 3: Let the Dough Rise
Cover the bowl with plastic wrap or a clean kitchen towel and place it in a warm area of your kitchen. Allow the dough to rise for 2 to 3 hours, or until it has doubled in size. You’ll notice bubbles forming on the surface, indicating good fermentation.
Step 4: Shape the Loaf
Once risen, dust a piece of parchment paper with flour. Turn the dough out onto the floured surface and gently shape it into a loaf by folding the edges inward. Be careful to keep it soft and sticky; this is key for the bread’s airy texture in your Dutch Oven Bread.
Step 5: Score the Dough
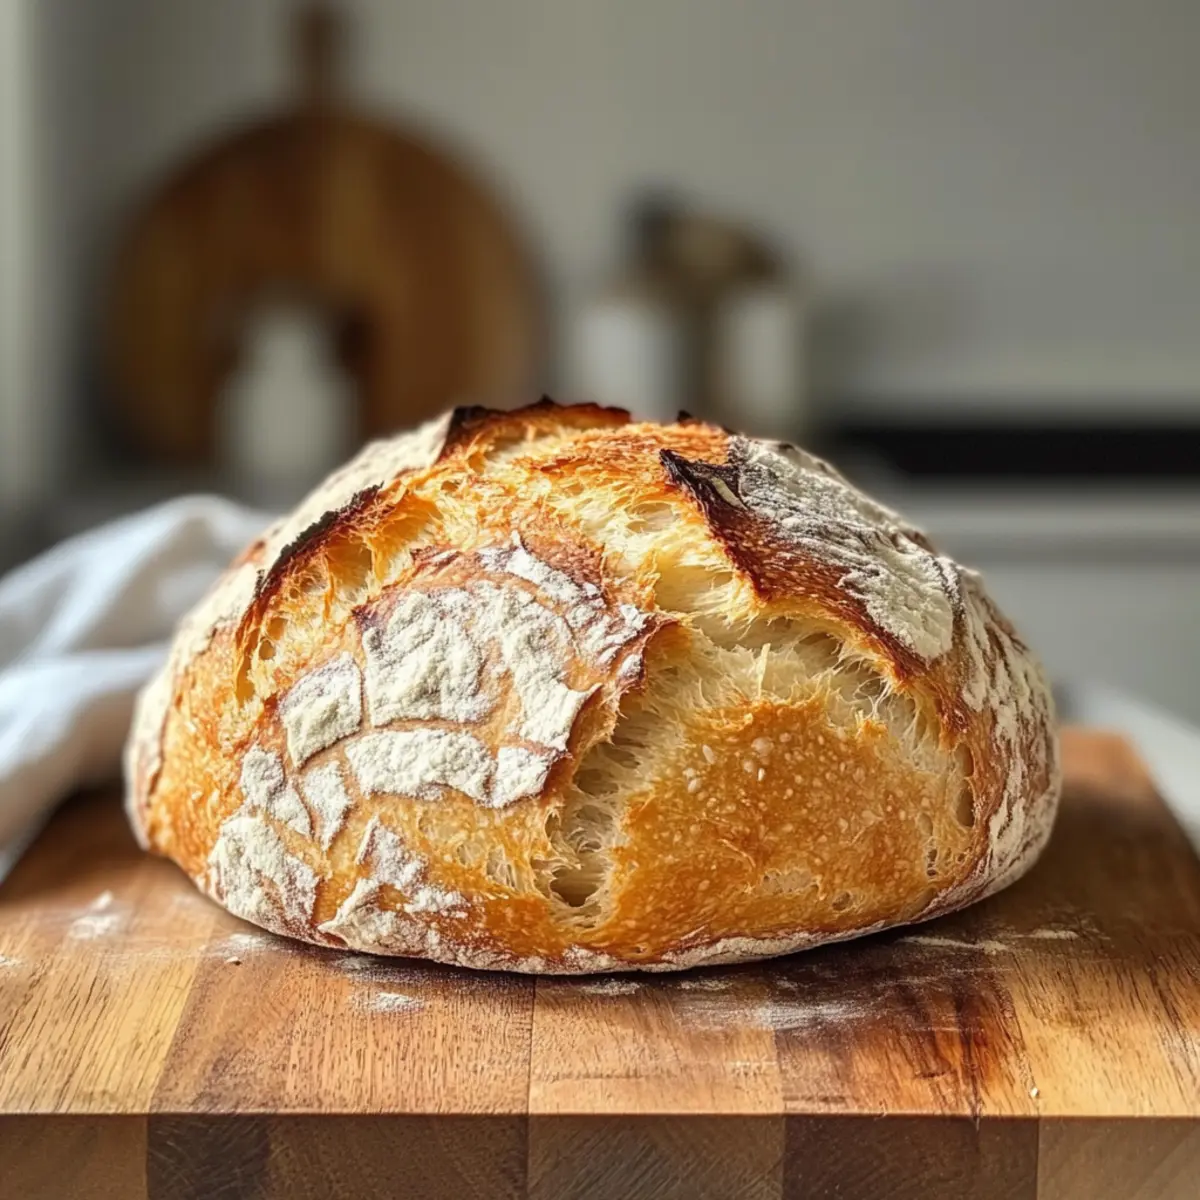
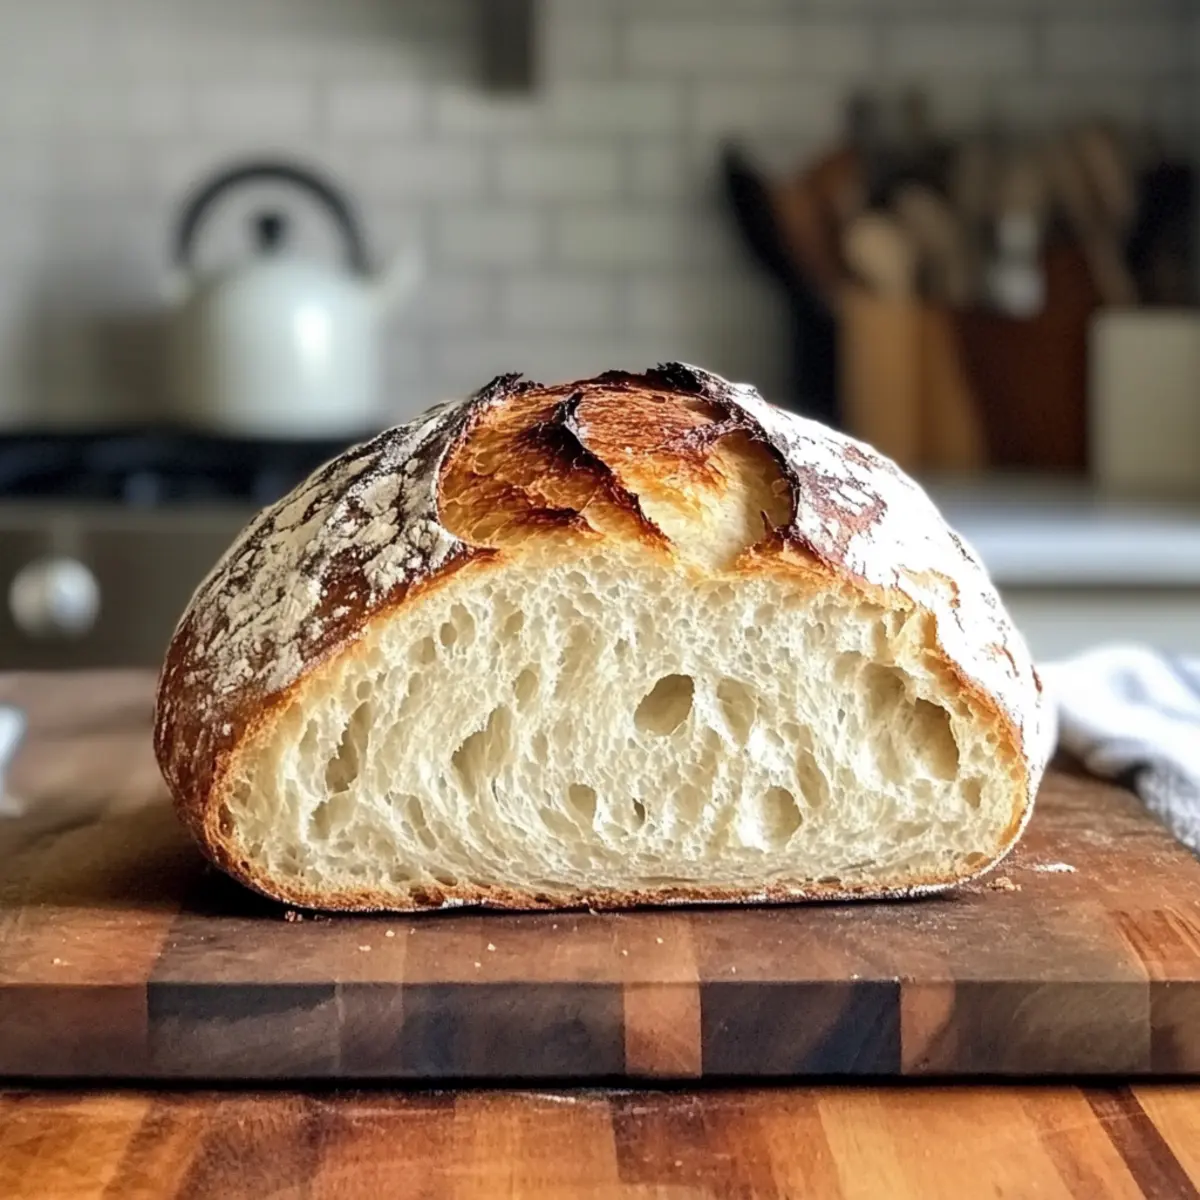
Optionally, score the top of the loaf with a sharp knife or razor blade, making shallow cuts. This will allow the bread to expand as it bakes, creating a beautiful crust. Place the shaped loaf back onto the parchment and cover it while you preheat the Dutch oven.
Step 6: Preheat the Dutch Oven
Preheat your oven to 450°F (232°C) and place a cast-iron Dutch oven with its lid inside to heat for about 30 minutes. Your Dutch oven needs to be very hot to create the perfect steam environment for your No-Knead Dutch Oven Bread, giving it that artisan quality.
Step 7: Transfer the Dough
Carefully remove the preheated Dutch oven from the oven—use oven mitts! Lift the parchment with the dough and place it into the hot Dutch oven. Cover it with the lid immediately to trap steam and facilitate a lovely crust during baking.
Step 8: Bake the Bread
Bake the bread covered for 35 minutes. After 35 minutes, remove the lid and bake uncovered for an additional 5 to 10 minutes. You want the bread to turn a beautiful golden brown color and sound hollow when tapped on the bottom—an important indicator that your No-Knead Dutch Oven Bread is ready!
Step 9: Cool Before Slicing
Once baked, carefully transfer the bread to a wire rack to cool for at least 30 minutes before slicing. This resting period allows the texture to set beautifully, ensuring each slice has that desired soft, airy crumb. Enjoy your freshly baked Dutch Oven Bread!
How to Store and Freeze Dutch Oven Bread
Room Temperature: Store your Dutch Oven Bread wrapped in a clean kitchen towel or in a paper bag at room temperature for up to 2 days. This keeps the crust crispy while allowing the interior to stay soft.
Freezer: For longer storage, slice the bread and freeze it in an airtight bag or container for up to 2 months. This makes it easy to grab a piece whenever you’re craving fresh bread!
Reheating: To reheat, preheat your oven to 350°F (175°C), place the slices on a baking sheet, and warm them for about 10 minutes. Enjoy the taste of freshly baked Dutch Oven Bread in no time!
Avoid Moisture: Avoid storing bread in the fridge as it can stale quicker due to moisture. If you’re not eating it right away, freezing is your best option!
What to Serve with No-Knead Dutch Oven Bread
Imagine the warmth of freshly baked bread filling your kitchen, ready to be paired with delicious accompaniments that elevate every bite.
- Creamy Garlic Soup: This velvety soup complements the crusty bread beautifully, allowing you to savor each dunk with delight.
- Herbed Olive Oil Dipping Sauce: A zesty blend of herbs and olive oil provides a burst of flavor, perfect for drizzling over warm slices.
- Classic Caesar Salad: Crisp romaine and tangy dressing create a refreshing counterpoint, beautifully balancing the bread’s hearty texture.
- Savory Tomato Basil Bruschetta: The bright, fresh toppings on your crunchy slices enhance your dining experience with vibrant flavors and textures.
- Stuffed Bell Peppers: Cheese and flavorful fillings provide a satisfying meal alongside your Dutch Oven Bread, creating a comforting combo.
- Roasted Winter Vegetables: Sweet, caramelized veggies add a delightful contrast, making every bite feel like a warm hug for your tastebuds.
- Decadent Chocolate Mousse: Finish your meal with this rich dessert; the lightness of the mousse pairs perfectly with the airy bread.
- Sparkling Lemonade: This refreshing drink complements the bread’s homemade charm with a bright, zesty twist, bringing your dining experience to life.
Make Ahead Options
Making No-Knead Dutch Oven Bread ahead of time is a fantastic way to streamline your meal prep for busy weeknights! You can mix the dough and let it rise up to 24 hours in the refrigerator to enhance its flavor. Simply follow the initial steps of combining the ingredients and allowing the dough to rise until doubled in size, then cover it tightly with plastic wrap or a lid to maintain freshness and moisture. When you’re ready to bake, just take it out, shape your loaf, and proceed with the preheating and baking steps as normal. This method ensures your bread will be just as delicious with warm, freshly baked goodness while saving you precious time!
Expert Tips for No-Knead Dutch Oven Bread
Sticky Dough Is Good: Ensure the dough remains sticky; this is a sign it’s well-hydrated and essential for creating a light texture in your Dutch Oven Bread.
Score for Success: Remember to score the top of the loaf to help it rise beautifully and to achieve that attractive crust.
Avoid Over-Flouring: Too much flour during shaping can dry out the dough. It’s important to keep the hydration level balanced for the best results.
Know When It’s Done: Tap the bottom of the loaf after baking; it should sound hollow indicating your bread is perfectly baked and ready to enjoy.
Steaming Is Key: The Dutch oven traps steam during baking, so don’t skip the lid! This moisture is crucial for a crisp crust and fluffy interior.
Dutch Oven Bread Variations & Substitutions
Feel free to personalize your Dutch Oven Bread with these delightful variations and substitutions that will tickle your taste buds.
-
Herb-Infused: Add 1-2 tablespoons of dried herbs like rosemary or thyme to the flour for a fragrant twist. It elevates your loaf with each bite!
-
Cheesy Delight: Stir in 1 cup of shredded cheese, such as cheddar or parmesan, for a savory, cheesy masterpiece. Your bread will be a decadent side dish!
-
Sweet Touch: Mix in 1/3 cup of sugar and a sprinkle of cinnamon for a subtly sweet version. Great for breakfast or as a treat with coffee!
-
Seed Sprinkle: Fold in 1/4 cup of your favorite seeds, like sunflower or sesame, before baking for a nutty flavor and crunch. It adds texture that’s oh-so-satisfying.
-
Garlic Lovers: Toss in 2-3 cloves of minced garlic to the dough for a flavorful aromatic touch. It’s perfect for serving alongside soups or pasta!
-
Whole Wheat Alternative: Substitute half of the all-purpose flour with whole wheat flour for a heartier loaf. Just adjust the water slightly, as whole wheat absorbs more.
-
Spicy Kick: Add red pepper flakes or minced jalapeños to the dough for a spicy twist that adds excitement to your meal. It’s sure to wake up your taste buds!
-
Nutritional Boost: Four tablespoons of ground flaxseed mixed into your dough can increase nutrients without altering the taste. That’s a delicious way to make your bread more wholesome!
Don’t shy away from experimenting! You might find that creative combinations will lead to your new favorite version of this wonderful bread. Enjoy it warm with butter, just like you would with some delightful Caramel Millionaires Shortbread or savor it alongside a warm bowl of soup. Your baking journey is just beginning!
No-Knead Dutch Oven Bread Recipe FAQs
What type of flour should I use for No-Knead Dutch Oven Bread?
All-purpose flour is recommended because it gives the structure needed for the bread. If you’re feeling adventurous, you could experiment with bread flour for a chewier crust or whole wheat flour for more fiber. Just keep in mind that different flours might require adjusting the amount of liquid in your dough, so keep an eye on the dough’s texture!
How long can I store my No-Knead Dutch Oven Bread, and what’s the best method?
Store your bread wrapped in a kitchen towel or in a paper bag at room temperature for up to 2 days. This helps maintain the crispy crust while keeping the inside soft! If you want it to last longer, consider freezing slices in an airtight bag for up to 2 months. You can easily pop a slice out whenever your bread cravings hit!
Can I freeze No-Knead Dutch Oven Bread, and how?
Absolutely! To freeze, slice the bread and place it in an airtight bag. Make sure to remove as much air as possible to prevent freezer burn. For best results, it can be frozen for up to 2 months. When you’re ready to enjoy it, simply preheat your oven to 350°F (175°C) and warm the slices for about 10 minutes. This will revive that wonderful fresh-baked taste!
What if my dough doesn’t rise?
If your dough isn’t rising, it could be due to a couple of reasons. First, make sure your yeast is fresh! Old or expired yeast can result in a dough that doesn’t rise properly. Secondly, check that you’re allowing the dough to rise in a warm, draft-free spot. If the area is too cool, it may take longer than expected for the dough to double in size. If you’ve covered all bases and it’s still not rising, allow it more time—sometimes it’s just a matter of patience!
Are there any dietary considerations for this bread recipe?
Great question! This No-Knead Dutch Oven Bread contains wheat and gluten, so those with gluten sensitivities or celiac disease should steer clear. For a gluten-free option, you could try using a gluten-free all-purpose flour blend; just ensure it contains xanthan gum for proper structure. If you’re serving others, be mindful of food allergies and consider marking your loaf clearly if you make any substitutions.
Ultimate Dutch Oven Bread: Bakery-Style at Home
Ingredients
Equipment
Method
- Combine Ingredients: In a large mixing bowl, add 1.5 cups of warm water, 2.25 teaspoons of yeast, and 1.5 teaspoons of fine grain salt. Stir gently until the yeast and salt dissolve completely.
- Mix the Dough: Gradually incorporate 3.25 cups of all-purpose flour into the water mixture, using a sturdy wooden spoon or spatula.
- Let the Dough Rise: Cover the bowl and place it in a warm area for 2 to 3 hours.
- Shape the Loaf: Dust parchment paper with flour, turn the dough out, and shape it gently.
- Score the Dough: Optionally score the top of the loaf with a sharp knife.
- Preheat the Dutch Oven: Preheat your oven to 450°F and place a cast-iron Dutch oven inside.
- Transfer the Dough: Carefully place the dough in the preheated Dutch oven.
- Bake the Bread: Bake covered for 35 minutes, then uncovered for 5 to 10 minutes.
- Cool Before Slicing: Transfer the bread to a wire rack to cool for at least 30 minutes.
Leave a Reply