“Can you believe it? Easter is just around the corner!” I overheard a friend exclaim as she flipped through baking magazines overflowing with spring-themed desserts. If you’re like me and find joy in whipping up treats for festive gatherings, these Easter Brownies will be your new go-to recipe. Rich, fudgy, and topped with a glossy layer of chocolate, these brownies are not only delightful but also surprisingly easy to make. With colorful pastel decorations, they add the perfect pop to your holiday table, capturing the essence of spring in every bite. Plus, these brownies are a wonderful crowd-pleaser—you can whip them up quickly and even customize them for fun variations, like coffee-infused delights or playful Easter Bunny designs. Ready to bring a little festive magic into your kitchen? Let’s dive into this delightful Easter Brownies Recipe together!
Why Are These Brownies So Special?
Irresistible Fudginess: Each bite of these brownies melts in your mouth, thanks to a rich, fudgy texture that makes them incredibly satisfying.
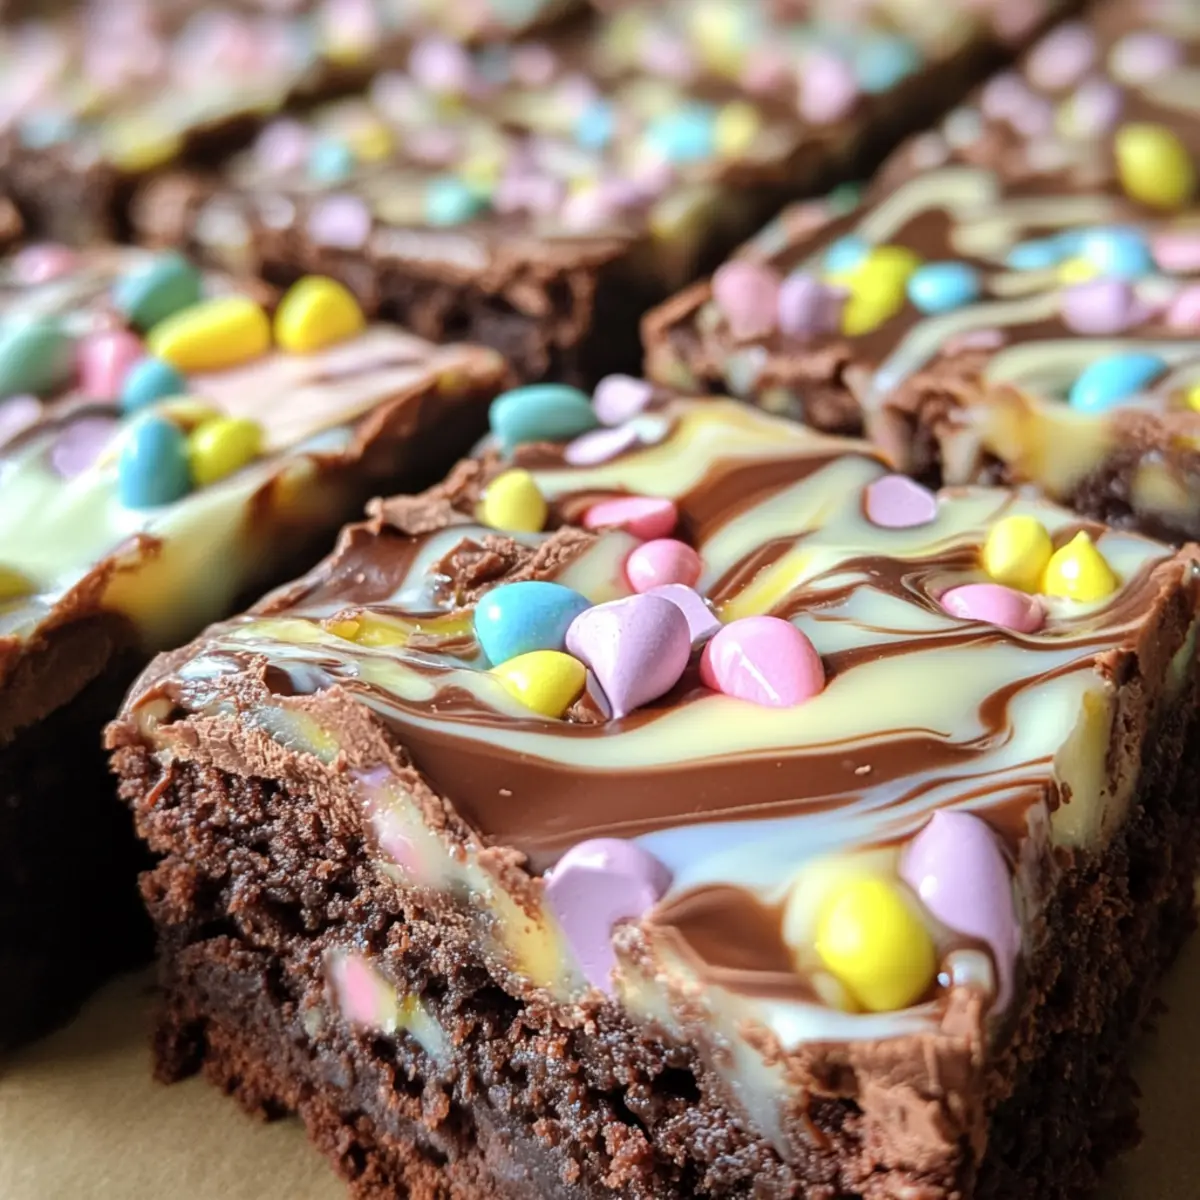
Vibrant Decorations: Adorned with pastel-tinted chocolate and playful sprinkles, these brownies bring a festive vibe to any gathering.
Customizable Delights: Love coffee? Try adding espresso for a boost! Feeling playful? Make Easter Bunny Brownies for a whimsical twist.
Crowd-Pleasing Treat: Perfect for holidays or family gatherings, these brownies are sure to impress guests of all ages.
Quick and Easy: Allow your creativity to shine without the hassle—these brownies come together effortlessly, making festive baking a breeze!
Easter Brownies Recipe Ingredients
• Create the perfect festive treat!
For the Brownies
- Butter – Provides richness and moisture; use unsalted butter for better control over salt levels.
- Granulated Sugar – Contributes to the crispy top layer; substitution not recommended.
- Brown Sugar – Adds moisture and a chewy texture; dark brown sugar enhances flavor depth.
- Eggs – Bind the ingredients together for a thick batter; ensure they are at room temperature for better mixing.
- Vanilla Extract – Enhances the flavor profile; substitute with almond extract for a different aroma.
- All-Purpose Flour – Gives structure to the brownies; for a gluten-free variation, substitute with a 1:1 gluten-free flour blend.
- Cocoa Powder – Adds intense chocolate flavor; use high-quality unsweetened cocoa for best results.
- Salt – Balances sweetness and enhances flavor; essential for taste; omit only if using salted butter.
- Chocolate Chips – Provide pockets of melty chocolate goodness; dark, semi-sweet, or milk chocolate can be used based on preference.
- Coffee (optional) – Enhances chocolate flavor without adding coffee taste; instant coffee or espresso powder works well.
For the Topping
- Coconut Oil – Used for melting the chocolate topping; can be substituted with vegetable oil.
- Gel Food Coloring – Used for tinting white chocolate to create vibrant decorations; avoid liquid coloring as it alters consistency.
Indulge in this Easter Brownies Recipe that seamlessly combines rich flavors with festive flair!
Step‑by‑Step Instructions for Easter Brownies Recipe
Step 1: Prepare the Batter
Begin by preheating your oven to 350°F (175°C). In a large mixing bowl, melt 1 cup of unsalted butter, then stir in 1 cup of granulated sugar and 1 cup of brown sugar until well combined. Add 4 large eggs and 2 teaspoons of vanilla extract, mixing until smooth and creamy. The mixture should be shiny and well-incorporated, ready for the dry ingredients.
Step 2: Mix Dry Ingredients
In a separate bowl, sift together 1 cup of all-purpose flour, 1 cup of unsweetened cocoa powder, and ½ teaspoon of salt. Gradually add these dry ingredients to the wet mixture, folding them gently with a spatula. Be careful not to overmix; the batter should be thick and cohesive, with no visible flour while still being fluffy and light.
Step 3: Incorporate Chocolate Chips
Fold in 1 cup of chocolate chips, combining them gently into the batter. This helps distribute the melty pockets of chocolate throughout the brownies. Make sure you do not overmix; just until the chocolate chips are evenly distributed is perfect. The batter will be rich and fragrant at this stage, promising a fudgy treat.
Step 4: Bake
Pour the brownie batter into a lined 9×13 inch baking pan, smoothing the top with a spatula. Bake in the preheated oven for 30–35 minutes, or until a toothpick inserted in the center comes out with a few moist crumbs. The top should appear set and slightly puffed, hinting at the chewy texture awaiting inside.
Step 5: Cool and Top
Once baked, remove the brownies from the oven and let them cool in the pan on a wire rack for about 30 minutes. This cooling time allows the brownies to firm up, making them easier to slice later. Ensure they are completely cooled before moving on to add the glossy layer of chocolate topping.
Step 6: Create Topping
In a small saucepan over low heat, melt 1 cup of chocolate chips together with 2 tablespoons of coconut oil, stirring until smooth and glossy. Remove the melted chocolate mixture from heat and let it cool slightly before spreading it over the cooled brownies. The topping should glisten beautifully and create a rich chocolate layer.
Step 7: Decorate
For a festive touch, melt white chocolate and mix in gel food coloring to tint it into pastel shades. Use a piping bag to create swirls atop the chocolate layer, then generously add colorful sprinkles and mini candy eggs for decoration. Allow the decorated brownies to set at room temperature, ensuring all toppings adhere perfectly.
Step 8: Slice and Serve
Once the topping has set, use a warm, sharp knife to slice the Easter brownies into squares. The heat from the knife will help you achieve clean edges, revealing the delicious layer of fudgy brownie and glossy topping. Serve these delightful treats at your spring gatherings, sharing the joy of your homemade Easter brownies!
Expert Tips for the Best Easter Brownies
-
Cool Completely: Let the brownies cool fully before adding the topping to prevent it from melting into the brownies.
-
Quality Cocoa: Use high-quality unsweetened cocoa powder for rich flavor; it significantly enhances your Easter Brownies recipe.
-
Don’t Overmix: Be gentle when combining dry ingredients with wet; overmixing can lead to a tough texture instead of the desired fudginess.
-
Use Gel Coloring: For vibrant decorations, opt for gel food coloring rather than liquid; this maintains consistency in your chocolate topping.
-
Warm Knife Trick: Dip your knife in warm water before slicing the brownies. This ensures clean edges and keeps your topping intact.
Make Ahead Options
These Easter Brownies are a fantastic choice for meal prep enthusiasts! You can prepare the brownie batter up to 24 hours in advance—simply mix all the wet and dry ingredients and store them in the refrigerator in an airtight container. To maintain their rich flavor and texture, it’s crucial to let the batter come to room temperature before baking. You can also bake the brownies ahead of time and keep them at room temperature for up to 3 days in an airtight container. When you’re ready to serve, melt the chocolate topping and add your colorful decorations to bring your festive creation to life. Enjoy the time saved and the deliciousness that follows!
Easter Brownies Recipe Variations & Substitutions
Feel free to explore these fun and tasty alternatives to make your Easter brownies even more special!
-
Gluten-Free: Substitute all-purpose flour with a 1:1 gluten-free flour blend for a deliciously similar texture.
-
Nutty Delight: Stir in 1 cup of chopped walnuts or pecans for a crunchy contrast to the fudgy brownies. The added richness from the nuts elevates each bite!
-
Minty Fresh: Add 1 teaspoon of peppermint extract to the batter for a refreshing twist that will remind you of your favorite mint chocolate treats. This subtle flavor will have everyone coming back for more!
-
Coffee Infusion: Introduce 2 teaspoons of instant coffee or espresso powder to intensify the chocolate flavor without overwhelming it. This will create a deep, complex taste that chocolate lovers adore.
-
Fruit-Infused: Incorporate 1/2 cup of raspberries or chunks of cherry into the batter for a juicy, tart balance. The fruit bursts through the chocolate, adding a delightful flavor pop!
-
Caramel Swirl: Drizzle melted caramel into the brownie batter before baking for a gooey, sweet surprise. Swirling brings a beautiful aesthetic and a rich taste that pairs well with chocolate.
-
Dairy-Free: Use coconut oil instead of butter and opt for dairy-free chocolate chips for a plant-based version of these treats, ensuring everyone can enjoy your festive creation.
-
Seasonal Theme: Get creative with themed toppings, like edible flowers or candied fruits, to match other seasonal celebrations. It adds a lovely touch of color and elegance to your brownies!
Remember, your baking adventure is all about crafting treats that bring joy. So utilize these variations to make the Easter brownies recipe your own! If you’re feeling extra festive, consider pairing them with a scoop of vanilla ice cream for a delightful dessert experience.
Storage Tips for Easter Brownies
Room Temperature: Keep brownies in an airtight container at room temperature for up to 3 days to maintain their fudgy texture and vibrant toppings.
Fridge: For longer freshness, store brownies in the refrigerator for up to a week. Just make sure they’re sealed tightly to prevent drying out.
Freezer: Freeze brownies for up to 3 months for future indulgence. Cut them into portions and wrap each piece in plastic wrap before placing them in a freezer bag.
Reheating: To enjoy your Easter Brownies warm, simply microwave a slice for about 10-15 seconds. This will melt the chocolate chips slightly, enhancing the experience!
What to Serve with Easter Brownies Recipe
Indulge in a delightful dessert spread that complements the rich, fudgy goodness of these festive brownies.
- Vanilla Ice Cream: The creamy texture balances the brownies’ richness, creating a comforting contrast with every bite.
- Fresh Berries: Juicy strawberries, raspberries, or blueberries add a refreshing burst, cutting through the sweetness while enhancing the presentation.
- Chocolate Sauce: Drizzle warm chocolate sauce over the brownies for an extra layer of decadence that chocolate lovers will adore.
- Coffee: A robust brew enhances the brownies’ subtle coffee flavors, making each bite feel even more luxurious.
- Mint Tea: The refreshing mint notes perfectly complement the sweetness of the brownies, offering a light finish to the meal.
- Whipped Cream: A dollop of light and airy whipped cream adds a deliciously fluffy texture that curbs the richness, creating a balanced treat.
- Nutty Cookies: Serve alongside crunchy cookies like biscotti or pecan sandies for a wonderful textural contrast that’s perfect for dipping.
- Chocolate Milkshake: For a fun twist, pair these brownies with a thick chocolate milkshake for an indulgent treat that kids and adults will love.
- Fruit Salad: A colorful medley of seasonal fruits brightens the plate, adding a refreshing touch that celebrates springtime flavors wonderfully.
Easter Brownies Recipe FAQs
What is the best way to select ripe ingredients for my Easter Brownies?
Absolutely! For this recipe, fresh eggs are key; choose ones that are clean and free from cracks. When selecting butter, ensure you grab unsalted for better control over the saltiness in your brownies. If you’re adding coffee, look for the freshest instant coffee or espresso powder to enhance that delicious chocolate flavor.
How should I store my Easter Brownies, and for how long will they last?
You can store your Easter Brownies in an airtight container at room temperature for up to 3 days, ensuring they remain fudgy and delicious. If you wish to extend their freshness, refrigerate them for up to a week. Just keep them sealed tightly to prevent any dryness!
Can I freeze my Easter Brownies, and if so, how?
Very! Freezing is a great option for longer storage. First, slice your cooled brownies into individual portions, then wrap each slice tightly in plastic wrap. Place these wrapped brownies into a freezer bag and they can last for up to 3 months! When you’re ready to enjoy one, simply thaw it in the refrigerator overnight or microwave it for about 10-15 seconds for a warm treat.
What should I do if my brownies come out too dry?
If you find your brownies are on the dry side, the primary cause could be over-baking. Trust the toothpick test! They should come out with a few moist crumbs. For next time, try reducing the baking time by a couple of minutes. Another tip: adding a little extra chocolate chips can help maintain moisture. If they are already dry, I recommend serving them with a scoop of vanilla ice cream – it’ll create a lovely contrast and elevate the fudginess!
Are these brownies suitable for people with dietary restrictions like nut allergies?
Absolutely! This Easter Brownies Recipe is nut-free, making it a safe option for gatherings. However, always check the labels on any chocolate products and other ingredients to confirm they are processed in a nut-free facility if allergies are a concern. If you’re creating a gluten-free version, simply substitute all-purpose flour with a 1:1 gluten-free flour blend for everyone to enjoy!
What can I do if my chocolate topping is not setting properly?
Don’t worry, it happens! If your chocolate topping isn’t setting, make sure that the chocolate mixture cools slightly before spreading it on the brownies. If it stays too hot, it can melt into the brownies. Should this occur, chill the brownies in the refrigerator for about 15-20 minutes to help the topping solidify. For a quick fix, you can always add a bit of powdered sugar to thicken the mixture if needed!
Easter Brownies Recipe: Fudgy Treats with Colorful Toppings
Ingredients
Equipment
Method
- Preheat oven to 350°F (175°C). Melt butter, stir in granulated and brown sugar until well combined.
- Add eggs and vanilla extract, mixing until smooth and creamy.
- Sift together all-purpose flour, cocoa powder, and salt. Gradually add to wet mixture, folding gently.
- Fold in chocolate chips carefully into the batter.
- Pour batter into a lined baking pan and bake for 30-35 minutes.
- Let the brownies cool in the pan on a wire rack for about 30 minutes.
- Melt chocolate chips and coconut oil in a saucepan; cool slightly and spread over cooled brownies.
- Melt white chocolate with gel food coloring, use piping bag for decoration with sprinkles and candy eggs.
- Slice into squares and serve.
Leave a Reply