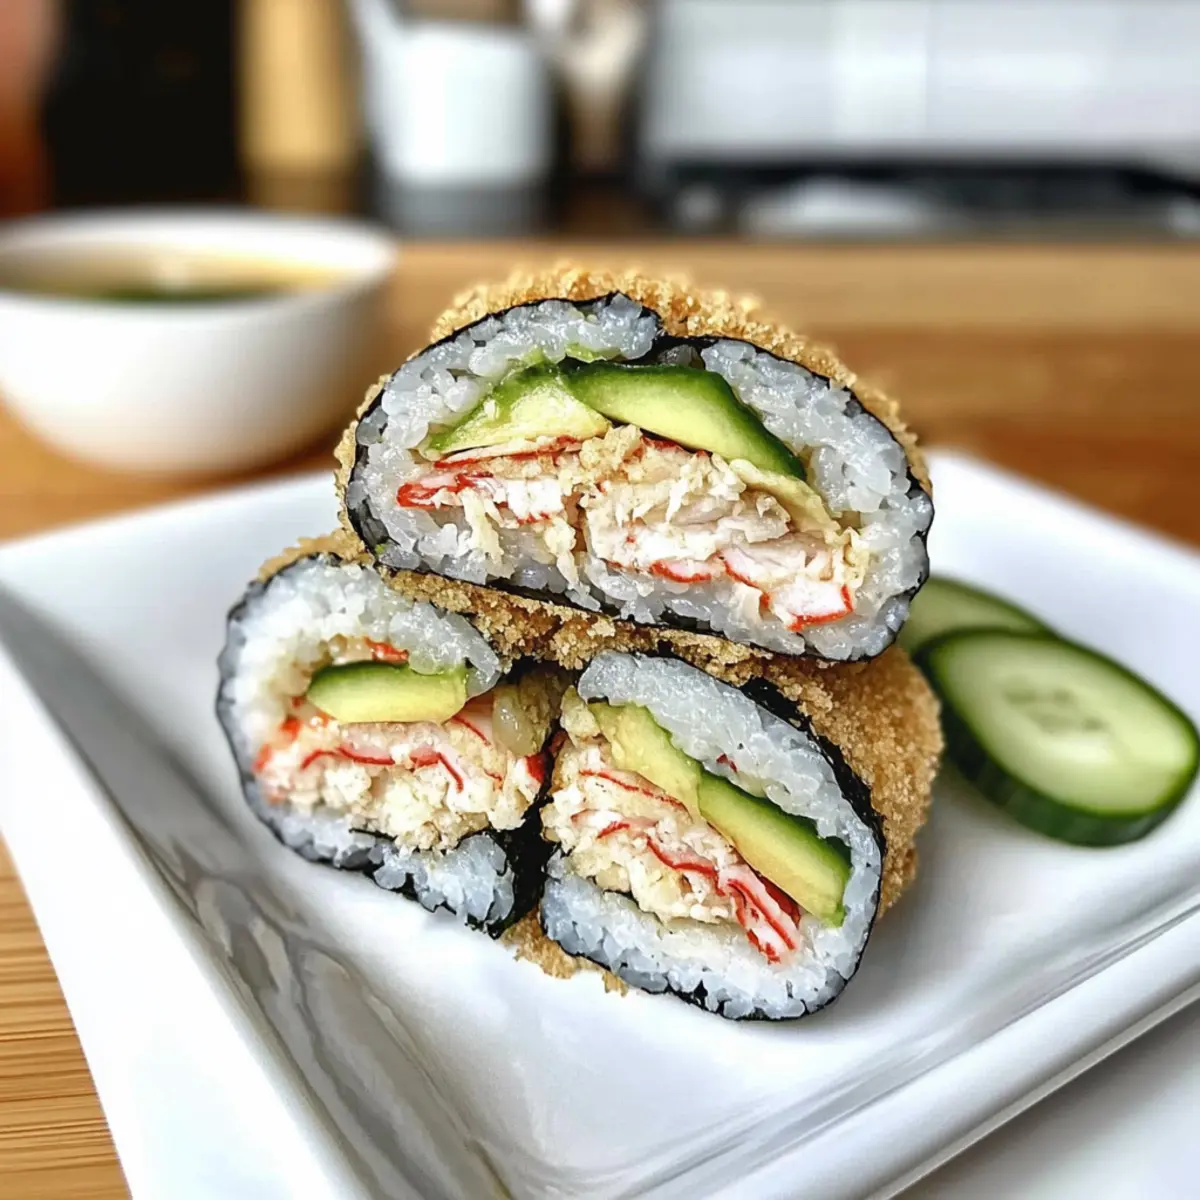
The sizzling sound of rice paper frying in a pan is music to my ears, a prelude to the delicious Crispy California Roll Rice Paper Sushi Sandwich about to unfold. This fun twist on traditional sushi not only satisfies your crunch cravings but also redefines quick meals with a portable sandwich form. Imagine sinking your teeth into layers of fresh imitation crab, creamy avocado, and crisp cucumber wrapped in golden fried rice paper. It’s a delightful option for anyone tired of fast food, giving a gourmet feel without the fuss, and can easily be tailored to suit vegetarian diets. Join me in discovering how effortless it is to whip up this sushi sandwich that brings all your favorite California roll flavors into one crunchy bite! Ready to impress your taste buds? Let’s dive in!
Why is this sushi sandwich a game-changer?
Crispy Texture: Experience the satisfying crunch of pan-fried rice paper that adds a delightful twist.
Quick to Make: This recipe is perfect for busy evenings, offering a delicious meal in minutes.
Flavor Explosion: A colorful mix of imitation crab, creamy avocado, and fresh cucumber delivers all your sushi favorites in every bite.
Versatile Option: Customize it easily—swap crab for shrimp, or make it vegetarian by loading it with extra veggies like bell peppers or carrots.
Portable Delight: Ideal for on-the-go meals, this sushi sandwich is as handy as a wrap, making it simple to enjoy anywhere.
Crowd Pleaser: Serve it at gatherings or just for a satisfying snack—this sushi sandwich is sure to impress! If you’re looking for more inventive rice-based dishes, check out One Pan Rice for a complete meal solution!
California Roll Rice Paper Sushi Sandwich Ingredients
For the Rice Mixture
• Sushi Rice – The foundation of your sandwich; its sticky texture helps hold everything together.
• Rice Wine Vinegar – A splash adds a tangy zest that brightens the rice.
For the Filling
• Imitation Crab – The star protein; feel free to substitute with real crab or cooked shrimp for a seafood kick.
• Sriracha – A drizzle delivers an exciting spicy punch; adjust according to your heat preference.
• Kewpie Mayo – Creamy and flavorful, this Japanese mayo elevates the filling; regular mayo works in a pinch.
• Persian Cucumber – Adds a refreshing crunch; cut into matchstick pieces for easy layering.
• Avocado – Provides a smooth, creamy layer that complements the crab; slice it thinly for even distribution.
• Furikake – A Japanese rice seasoning that enhances flavor; omit if it’s not on hand.
For Assembly
• Rice Paper – This is the key to that crunchy exterior; it crisps beautifully when pan-fried.
• Nori Sheets – Adds a touch of traditional sushi flavor, providing structure to your sandwich.
• Sesame Seeds – Optional but adds an appealing garnish and extra crunch.
For Cooking and Serving
• Neutral Oil – Necessary for frying to achieve that golden crunch; any high smoke point oil will work.
• Lime Juice – A squeeze brightens the spicy mayo; it’s optional but highly recommended for added flavor.
Enjoy creating this California Roll Rice Paper Sushi Sandwich, a deliciously fun and crisp alternative to traditional sushi!
Step‑by‑Step Instructions for California Roll Rice Paper Sushi Sandwich
Step 1: Prepare the Rice
Begin by rinsing 1 cup of sushi rice under cold water until the water runs clear. Cook the rice according to package instructions, typically simmering it in a rice cooker or pot for about 20 minutes until tender. Once cooked, stir in 2 tablespoons of rice wine vinegar and a pinch of salt, then spread it out on a plate to cool slightly while preparing the fillings.
Step 2: Make Crab Filling
In a mixing bowl, shred 5 ounces of imitation crab, ensuring it’s evenly broken up for easy layering. Fold in 2 tablespoons of sriracha and 3 tablespoons of kewpie mayo for a creamy, spicy filling. Taste and adjust the sriracha according to your heat preference. Set aside this flavorful crab mixture as you gather your other sandwich ingredients.
Step 3: Assemble Sandwich
Prepare a clean cutting board by lightly oiling it to prevent sticking. Fill a shallow dish with warm water and submerge two rice paper sheets for about 15 seconds, until soft but still pliable. Layer the softened rice papers on the cutting board, placing a nori sheet on top, then carefully cut a small slit in the nori to aid with folding.
Step 4: Add the Fillings
Spoon a portion of the crab mixture onto one side of the nori sheet, followed by a handful of matchstick cucumber and thin avocado slices. Carefully add a small amount of sushi rice without overstuffing. This layering will ensure that all the flavors of the California Roll Rice Paper Sushi Sandwich are perfectly balanced and not too messy when folding.
Step 5: Fold Sandwich
To seal the sushi sandwich, gently fold the bottom left corner of the nori sheet over the filling, then fold the right corner over to secure it. Finally, bring the top down and tuck it neatly, ensuring that the sandwich is compact and secure. This will help create a tidy package that holds everything delicious inside as you prepare to fry.
Step 6: Cook Sandwich
Heat a non-stick skillet over medium heat and add 2 tablespoons of neutral oil. Once the oil is shimmering, carefully place the folded sushi sandwiches seam-side down in the pan. Cook for 3-4 minutes until golden brown and crispy, then flip and fry the other side for an additional 3-4 minutes. Keep an eye on them to prevent burning, adjusting the heat as necessary for optimal crispiness.
Step 7: Prepare Spicy Mayo
While the sushi sandwiches are frying, whisk together 3 tablespoons of kewpie mayo, a squeeze of lime juice for brightness, and an extra dash of sriracha for a delightful dipping sauce. This spicy mayo will complement the flavors of your California Roll Rice Paper Sushi Sandwich beautifully, adding that creamy, zesty kick!
Step 8: Serve and Enjoy
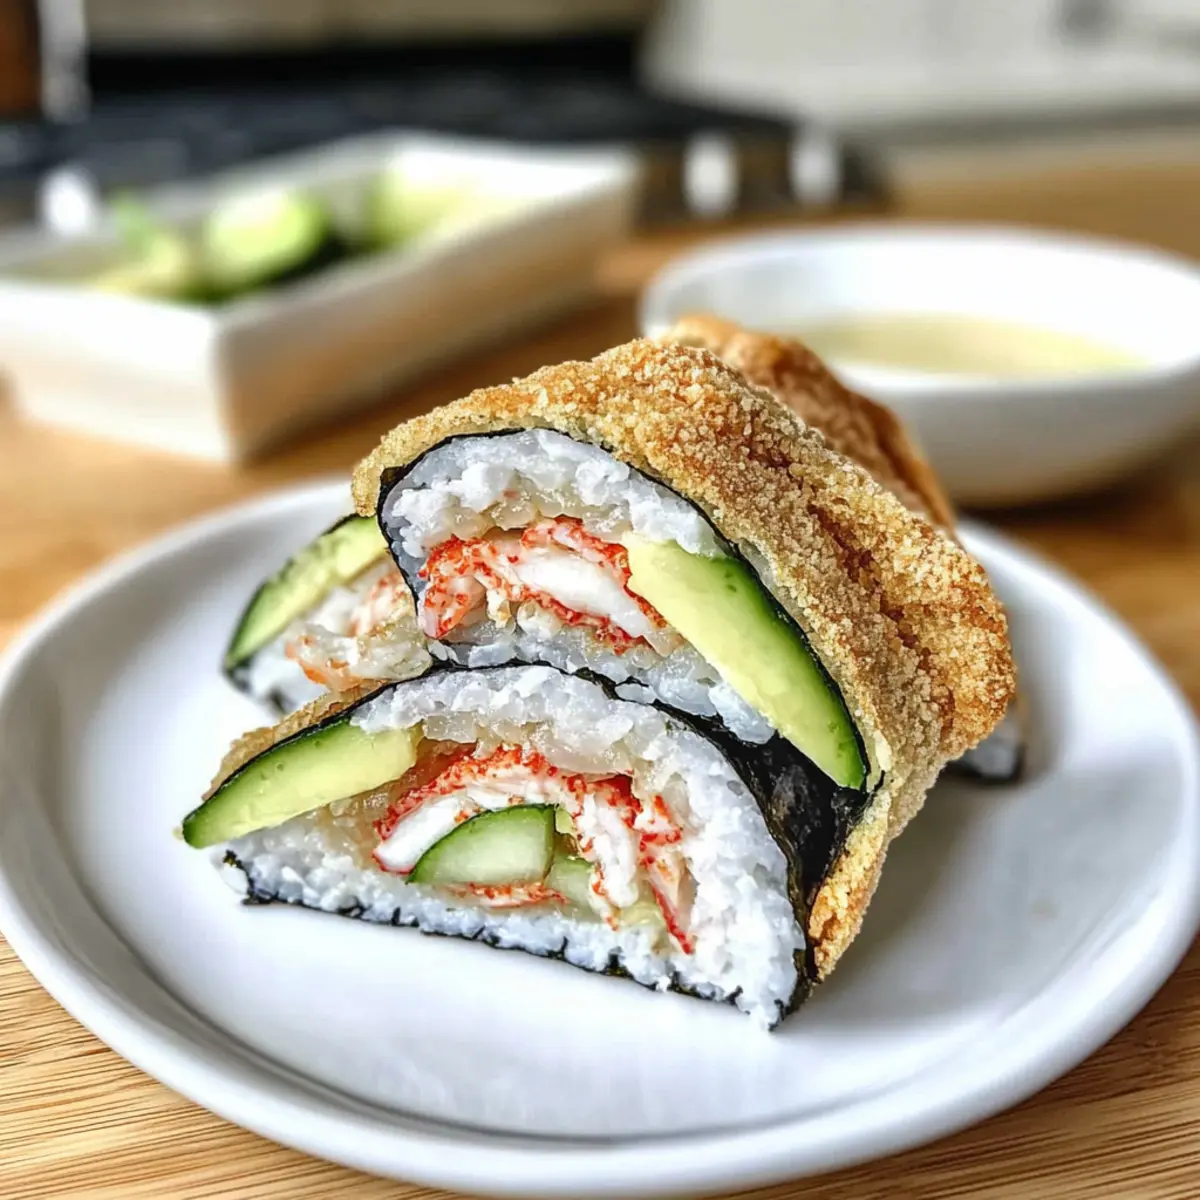
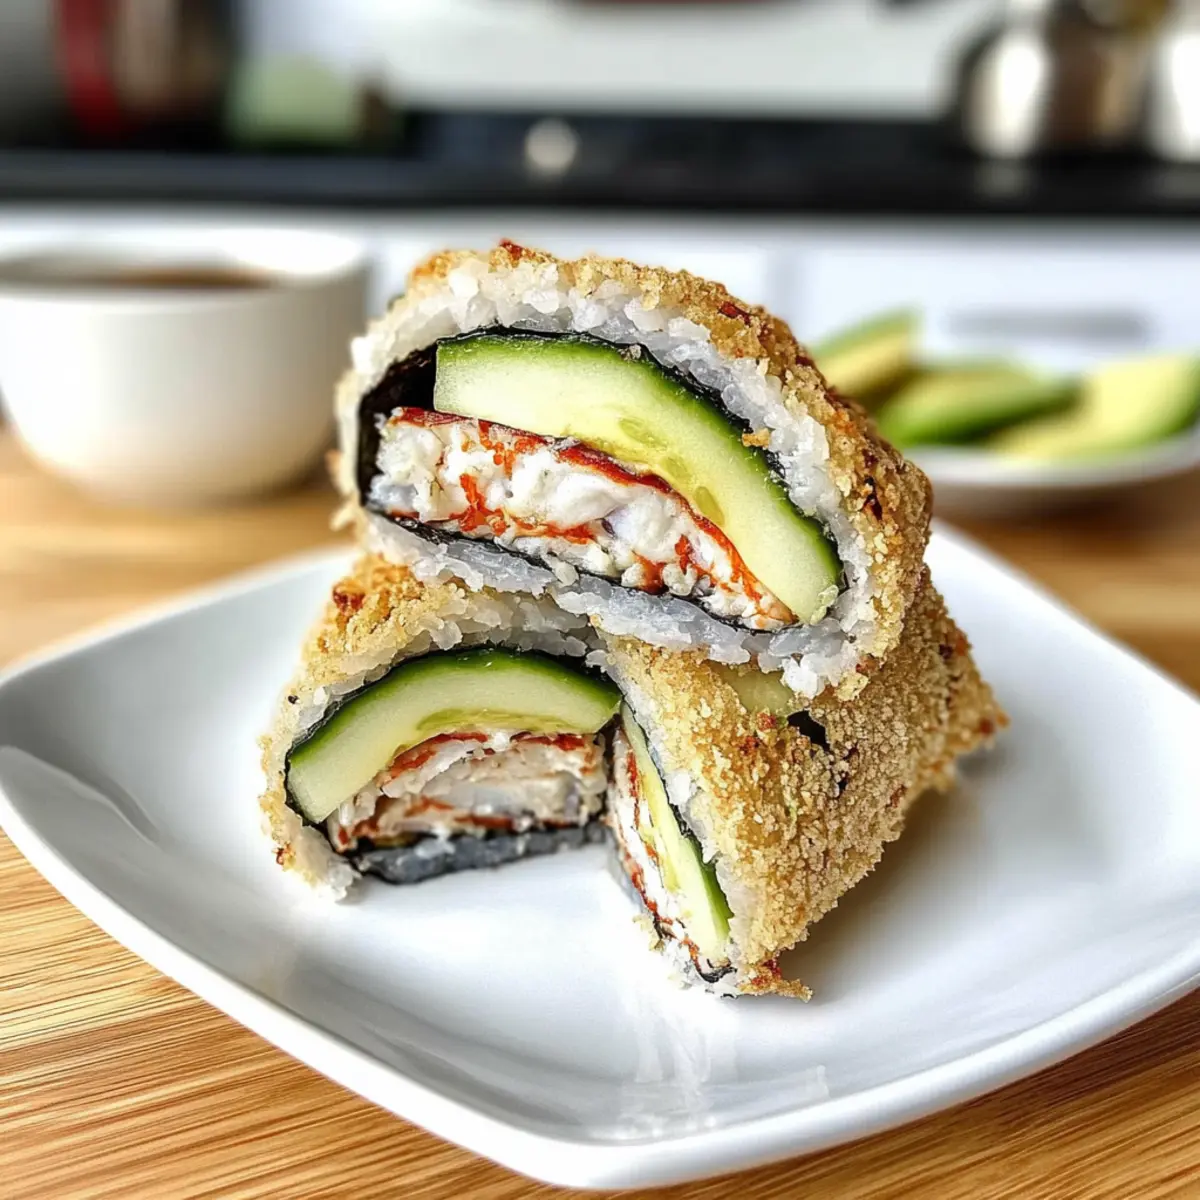
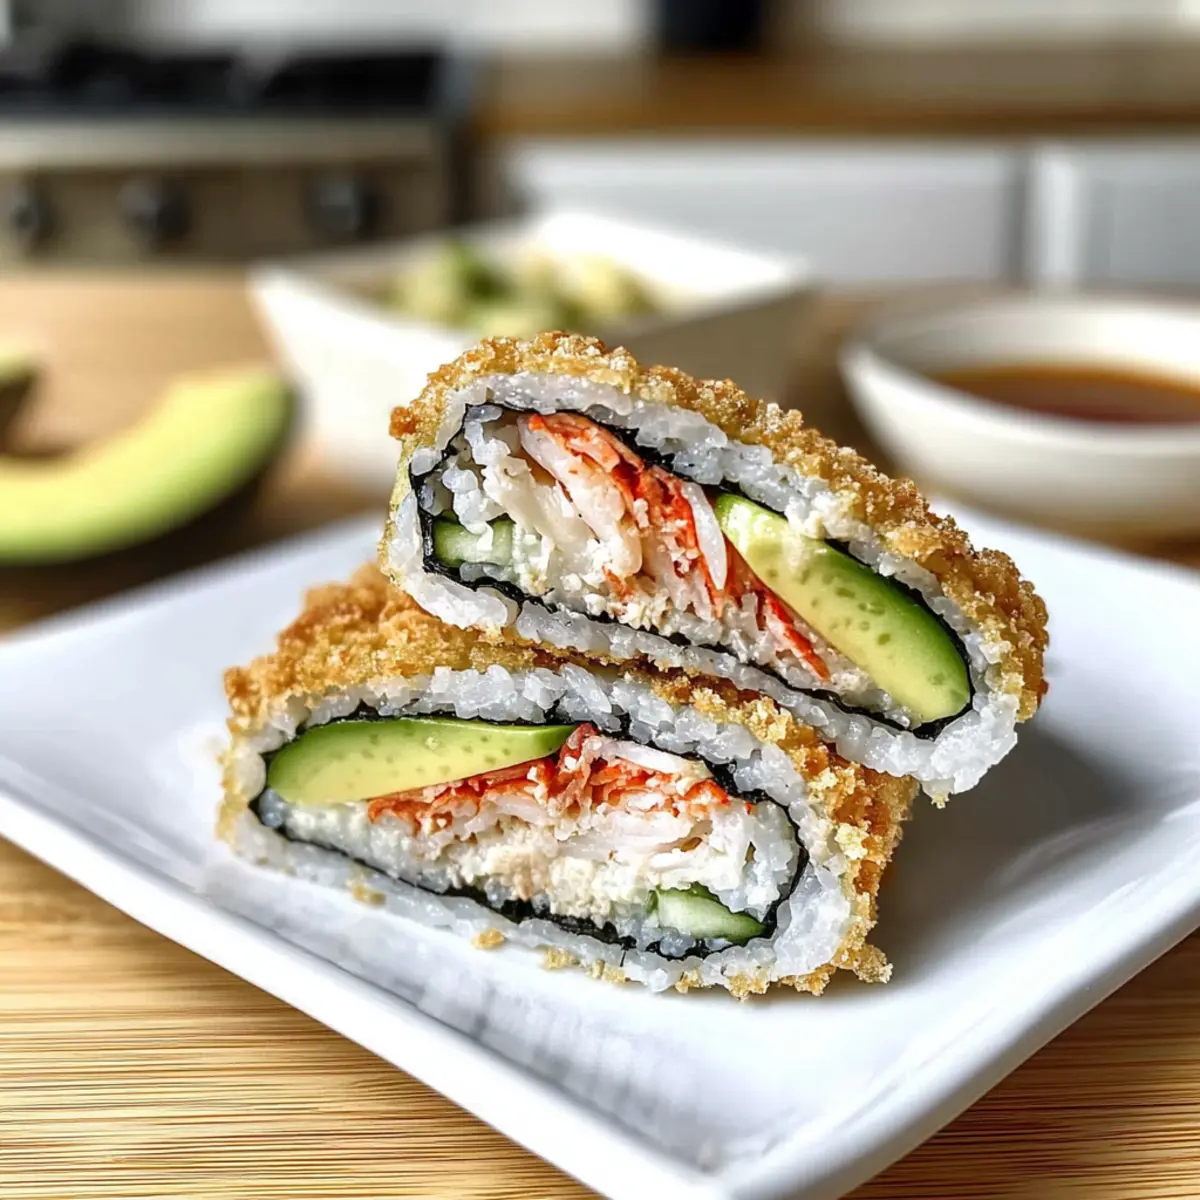
Once both sides of the sandwiches are golden brown and crispy, remove them from the skillet and let them cool slightly on a paper towel. Slice each sandwich in half to showcase the vibrant filling, and serve warm with the spicy mayo on the side. These delightful sushi sandwiches are ready to be devoured!
How to Store and Freeze California Roll Rice Paper Sushi Sandwich
Fridge: Store any leftover sushi sandwiches in an airtight container for up to 1 day. To maintain their crunch, eat them as soon as possible.
Freezer: These sushi sandwiches freeze well when wrapped individually in plastic wrap, lasting up to 1 month. Thaw in the fridge before reheating.
Reheating: For best results, reheat in a skillet over medium heat to restore that delightful crispiness. Avoid microwaving, as it can make them soggy.
Assembly Tips: If you plan to make sandwiches ahead, consider preparing and storing fillings separately to maintain freshness and texture in your California Roll Rice Paper Sushi Sandwich.
What to Serve with Crispy California Roll Rice Paper Sushi Sandwich
Delight in a symphony of flavors that complements the crispy sushi sandwich, enhancing your meal experience.
-
Miso Soup: Light and savory, this classic Japanese soup adds warmth and depth, perfect for dipping alongside your sandwich.
-
Edamame: These tender, steamed soybeans offer excellent protein and a pop of color, balancing the richness of the sushi sandwich. Their subtle flavor and texture make them a delightful side.
-
Seaweed Salad: Refreshing and slightly tangy, this dish complements the sushi sandwich beautifully, brightening your palate with each bite. The chewy texture adds contrast to the crunchy goodness of the sandwich.
-
Pickled Ginger: A zesty and sharp addition that cleanses the palate, pickled ginger perfectly enhances each mouthful of your sushi sandwich, leaving you craving more.
-
Crispy Tempura Vegetables: Lightly battered and fried veggies offer a satisfying crunch that mirrors the sandwich’s exterior, while their mild flavor enriches the overall experience.
-
Sparkling Green Tea: This crisp beverage not only refreshes but also pairs well with the flavors in your sushi sandwich, making each bite resonate with the drink’s effervescence.
-
Chocolate Mochi Ice Cream: For dessert, indulge in this sweet treat that combines the chewy texture of mochi with a creamy chocolate center—an unexpected finish that will leave you smiling.
Expert Tips for California Roll Rice Paper Sushi Sandwich
Warm Rice: Ensure sushi rice is slightly warm or at room temperature when assembling to help all the components stick together better.
Don’t Overstuff: Avoid filling the sandwich too much; it can make folding and frying challenging, leading to messy results.
Monitor Frying: Keep a close eye while frying to prevent burning. Adjust the heat as needed to achieve that perfect golden crisp.
Use Fresh Veggies: Fresh ingredients make a notable difference—opt for ripe avocados and crunchy cucumbers for the best flavors in your California Roll Rice Paper Sushi Sandwich.
Experiment with Fillings: Feel free to customize by swapping ingredients—try adding extra veggies, or use real crab for a different seafood taste!
Serve Immediately: Enjoy warm for the best texture; if needed, reheat in a pan to revive the crispiness before serving.
California Roll Rice Paper Sushi Sandwich Variations
Feel free to get creative with this sushi sandwich and tailor it to your taste buds!
-
Seafood Swap: Replace imitation crab with real crab or cooked shrimp for a more luxurious flavor. Fresh, succulent seafood transforms this dish into a seafood lover’s dream.
-
Creamy Twist: Substitute avocado with cream cheese for an extra creamy bite. This change brings a new level of richness, perfect for those who adore that creamy texture.
-
Vegetarian Delight: Omit crab entirely and load up on assorted veggies like bell peppers, carrots, and even roasted sweet potatoes. This not only makes for a colorful sandwich but also a hearty, satisfying option!
-
Spicy Upgrade: Add finely diced jalapeños or a drizzle of chili oil for a fiery kick. Elevating the heat levels can turn a mellow meal into a spicy adventure!
-
Herb Infusion: Sprinkle fresh herbs like cilantro or basil into the filling for a burst of flavor. These greens offer a refreshing twist, perfectly complementing the seafood elements.
-
Sushi Rice Variations: Swap sushi rice for cauliflower rice for a lighter, low-carb version. This tweak adds nutritional value while keeping the delightful sushi experience intact.
-
Tropical Flair: Incorporate diced mango or pineapple into the mix for a sweet and tropical twist. This brightens the flavor profile, making each bite feel like a mini-vacation!
-
Extra Crunch: Add toasted panko or sesame seeds inside the sandwich for an extra layer of crunch. This texture contrasts beautifully with the creamy ingredients and rice paper.
If you’re looking for more inventive rice-based recipes, try out Mango Sticky Rice for a delicious dessert, or explore Cauliflower Fried Rice for a healthy alternative!
Make Ahead Options
These Crispy California Roll Rice Paper Sushi Sandwiches are perfect for meal prep enthusiasts! You can prepare the sushi rice and crab filling up to 24 hours in advance, storing them separately in airtight containers in the refrigerator. To maintain quality, ensure the sushi rice cools completely before refrigerating, as this prevents unwanted moisture. Additionally, slice the cucumber and avocado just prior to assembly to keep them fresh and vibrant. When you’re ready to enjoy your sushi sandwich, simply assemble the ingredients and pan-fry as directed for that crispy finish. This way, you can enjoy a delightful meal with minimal effort on busy weeknights!
California Roll Rice Paper Sushi Sandwich Recipe FAQs
What type of rice is best for making sushi?
Absolutely! Sushi rice is made from short-grain rice because it becomes sticky when cooked, which is essential for holding your California Roll Rice Paper Sushi Sandwich together. I recommend using Japonica rice, which has the perfect texture and flavor.
How should I store leftover sushi sandwiches?
For the best freshness, store any leftover sushi sandwiches in an airtight container in the fridge for up to 1 day. If you want to maintain that delightful crunch, eat them as soon as possible. They tend to lose their crispiness the longer they sit.
Can I freeze California Roll Rice Paper Sushi Sandwiches?
Yes, these sushi sandwiches can be frozen as long as they are individually wrapped in plastic wrap. They will keep well in the freezer for up to 1 month. When you’re ready to enjoy them, thaw in the fridge overnight, then reheat in a skillet over medium heat to restore their signature crispiness.
What should I do if my rice paper tears while assembling?
If rice paper tears, don’t panic! You can simply layer another rice paper on top of the torn one to reinforce it. Soften another sheet in warm water, then gently press it onto the first one, ensuring a smooth area to work with for your fillings. This way, you’ll still have a sturdy base for your California Roll Rice Paper Sushi Sandwich.
Is this recipe suitable for vegetarians?
Very! You can easily make this sushi sandwich vegetarian by omitting the imitation crab and loading it with extra veggies like bell peppers, carrots, or even crispy tofu if you want some protein. This way, everyone can enjoy a delightful and crunchy treat!
How long will the sushi rice stay fresh?
Sushi rice is at its best when freshly made. However, you can store leftover rice in an airtight container in the fridge for up to 3 days. If you notice the rice drying out, try adding a few drops of water before reheating to restore moisture, then warm it gently on the stovetop.
Crispy California Roll Rice Paper Sushi Sandwich Delight
Ingredients
Equipment
Method
- Rinse sushi rice under cold water until clear. Cook in rice cooker or pot for about 20 minutes.
- Stir in rice wine vinegar and a pinch of salt. Spread rice to cool.
- Shred imitation crab in a mixing bowl. Fold in sriracha and kewpie mayo.
- Prepare a cutting board. Submerge rice paper sheets in warm water for 15 seconds.
- Layer softened rice papers on the board, place a nori sheet on top, cut a slit in the nori.
- Add crab mixture, cucumber, avocado, and sushi rice onto the nori sheet.
- Fold the nori sheet over the fillings neatly and compactly.
- Heat oil in skillet over medium heat. Fry sushi sandwiches for 3-4 minutes each side until golden brown.
- Whisk together kewpie mayo, lime juice, and sriracha for dipping sauce.
- Remove sushi sandwiches, let cool slightly, slice in half, and serve warm with dipping sauce.
Leave a Reply