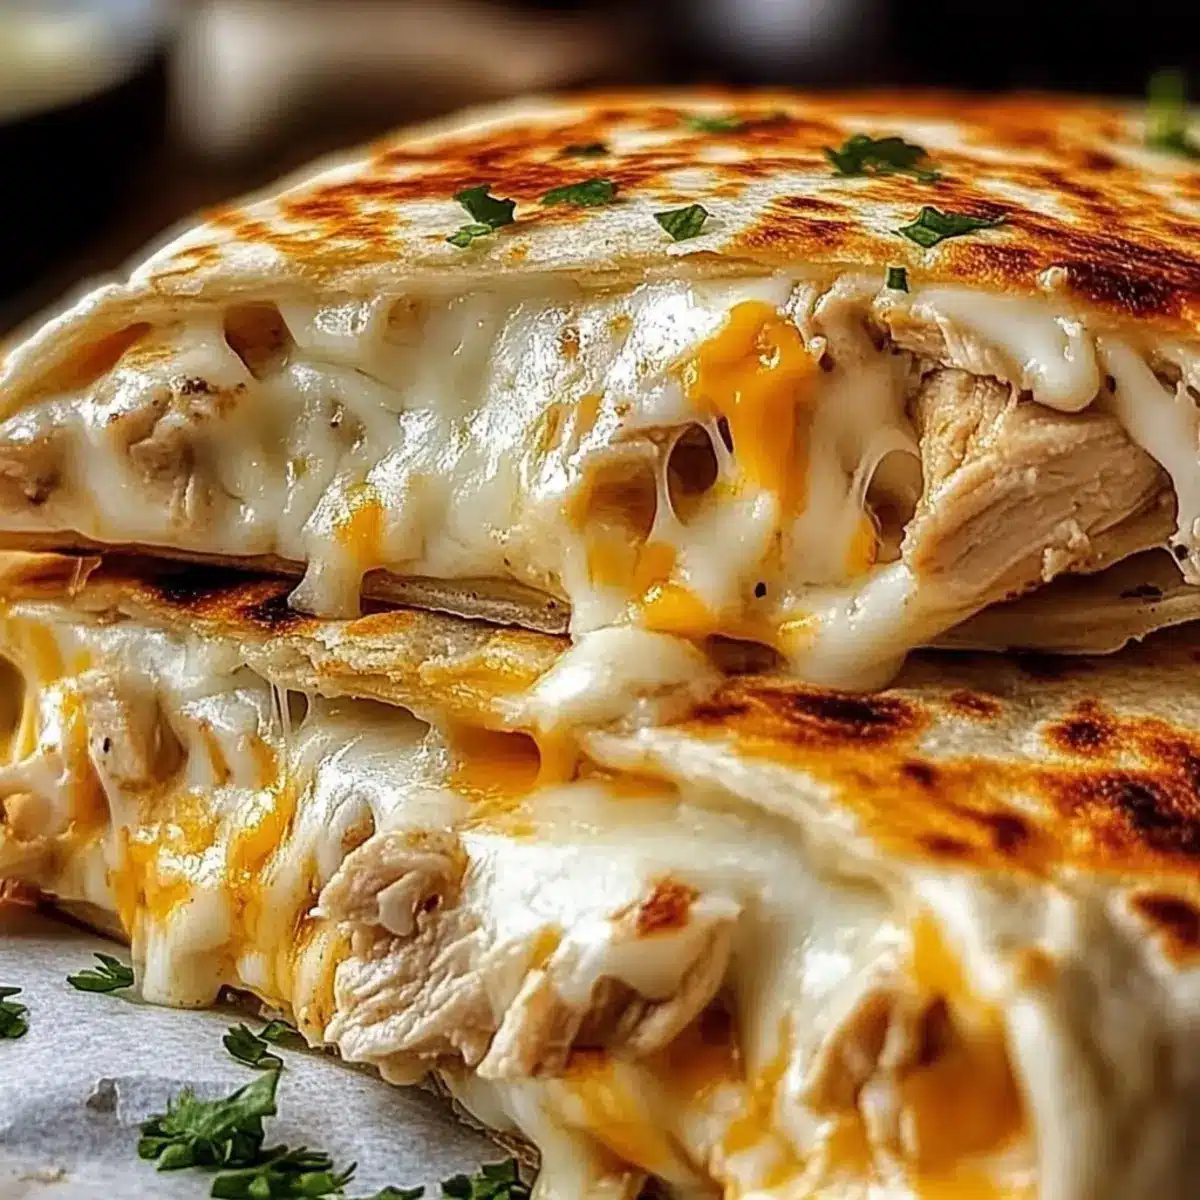
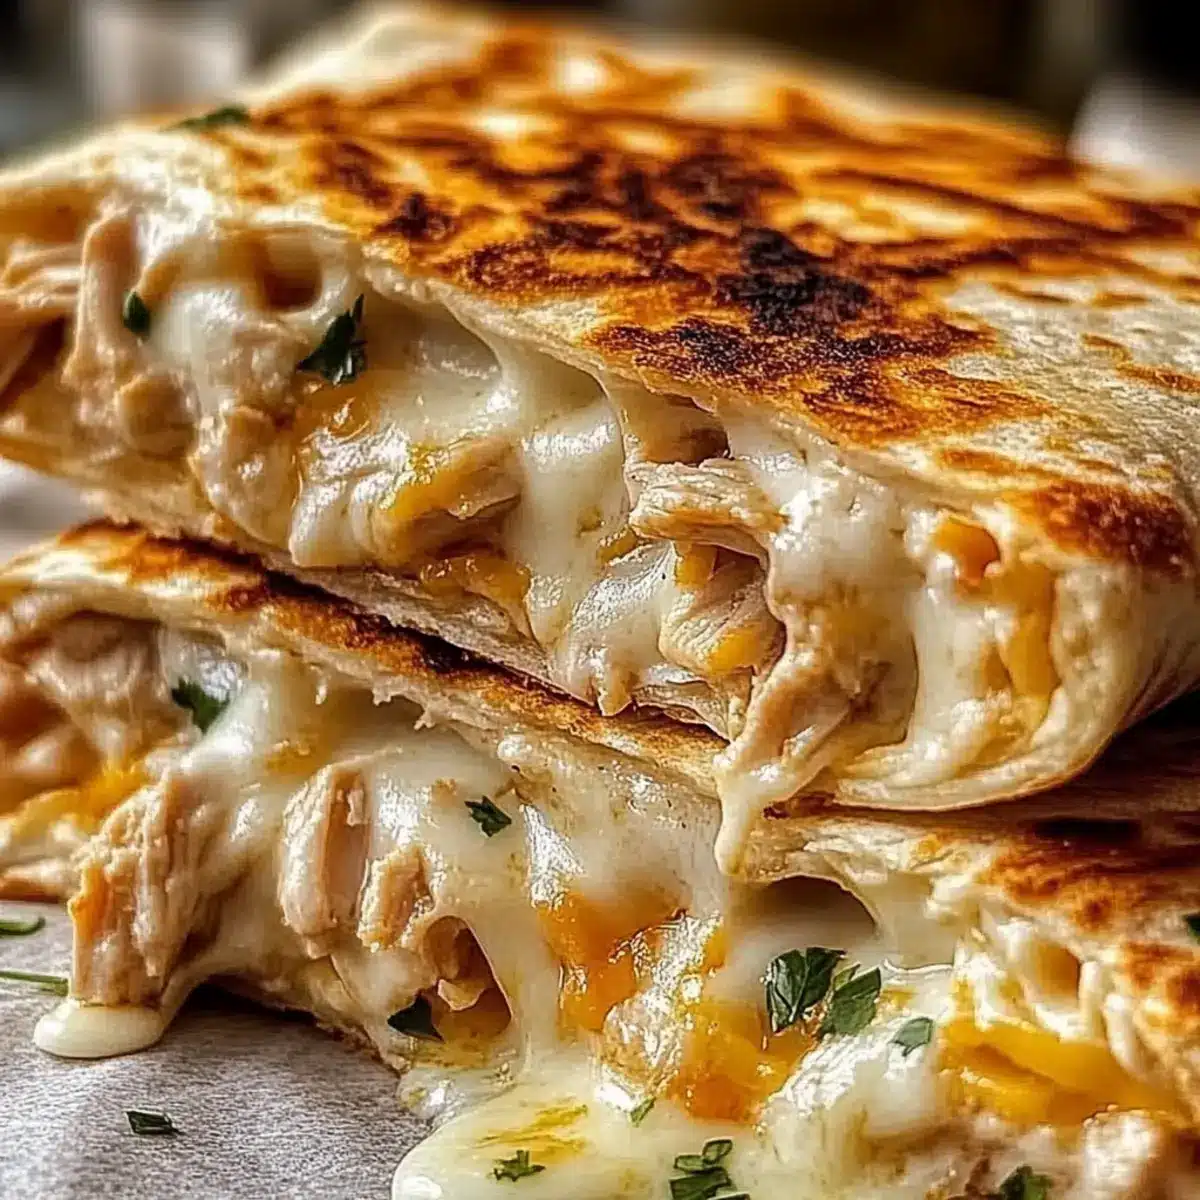
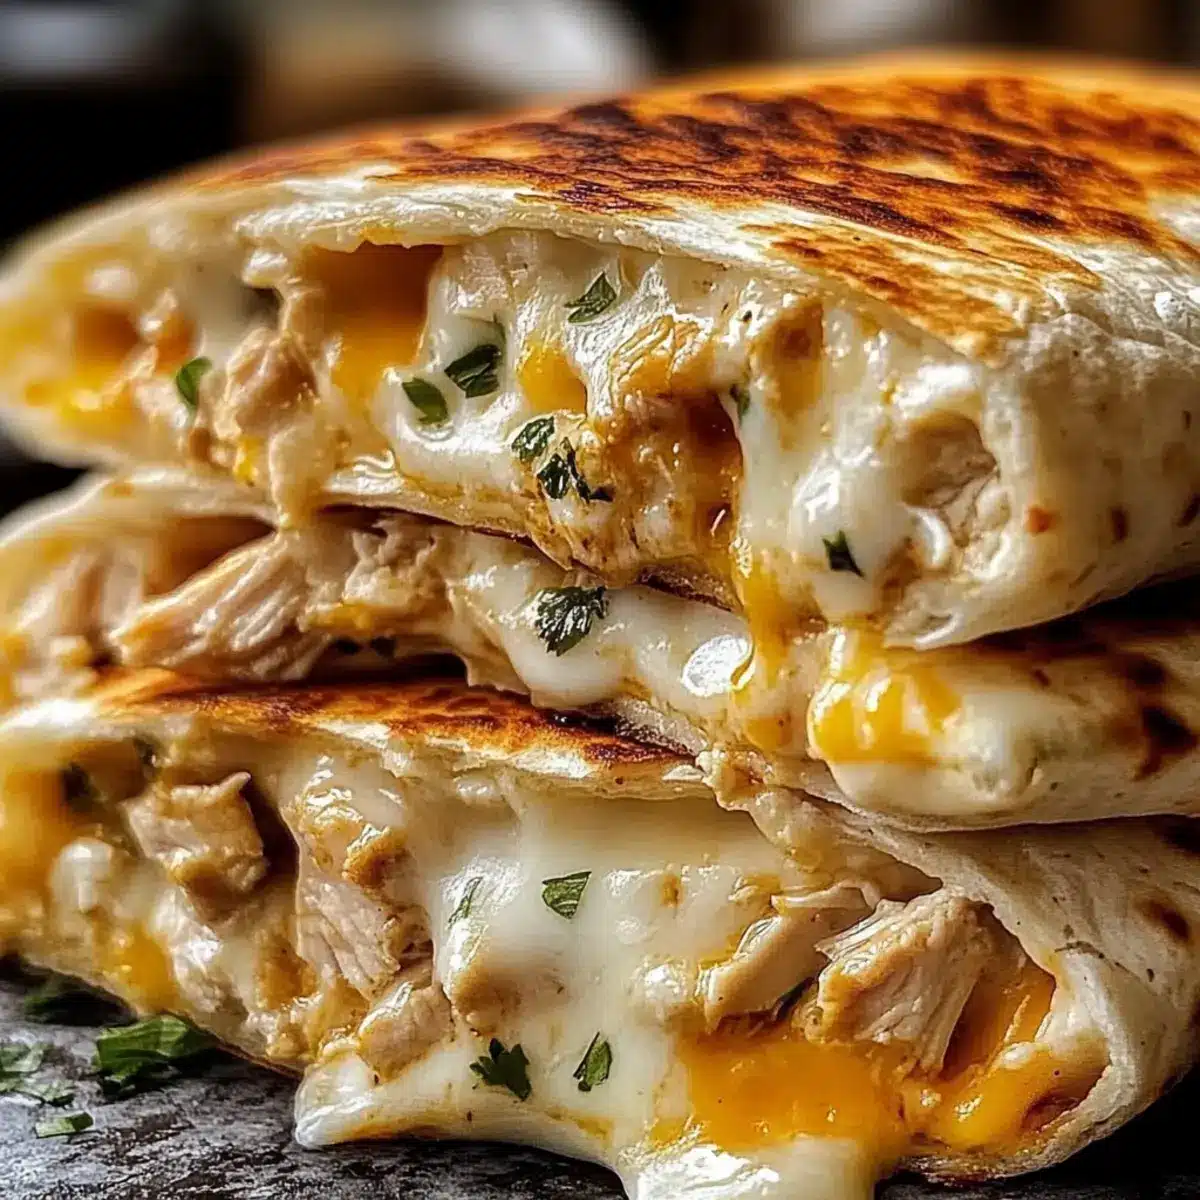
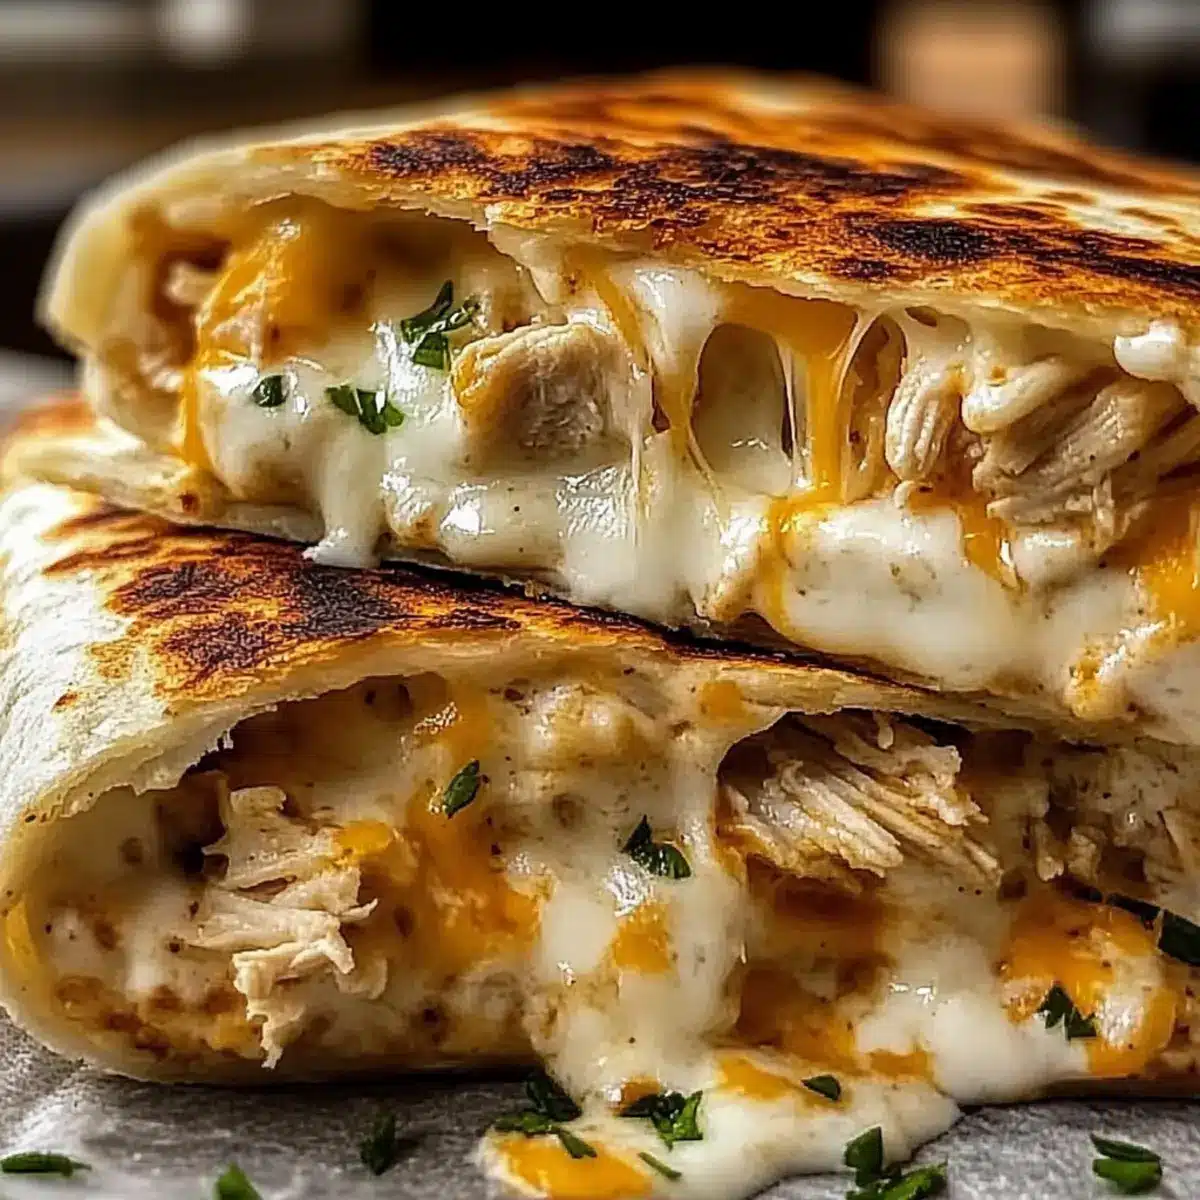
I once found myself staring down a mountain of leftovers, wondering how to transform them into something delightful. Enter the Cheesy Garlic Chicken Wraps—a savior in my kitchen! These versatile wraps are not only incredibly quick to whip up but also pack a comforting punch of flavor that warms the soul. Imagine tender chicken enveloped in a creamy, cheese-infused goodness, all wrapped in a golden, buttery garlic shell. Perfectly portable and infinitely customizable, they cater to every preference, whether you’re in the mood for the classic chicken or a vegetarian twist with grilled veggies. With minimal prep time and maximum satisfaction, these savory delights could easily become your new weeknight hero. What creative twists will you add to your own version of these cheesy wraps?
Why Are Cheesy Garlic Chicken Wraps the Best?
Easy to Customize: Whether you prefer chicken, turkey, or a plant-based option, these wraps can adapt to any palate.
Savory Creaminess: The combination of rich cheeses melds beautifully with juicy chicken for a comforting flavor explosion.
Quick and Convenient: Ready in just minutes, these wraps are a go-to solution for busy weeknights when you crave something delicious yet easy.
Perfect for Leftovers: Transform your leftovers into a delightful meal—no waste and maximum enjoyment.
Family-Friendly Appeal: Even the pickiest eaters will enjoy these cheesy, crispy wraps, making them a hit for everyone at the table!
Cheesy Garlic Chicken Wraps Ingredients
For the Filling
• Cooked Shredded Chicken – The star ingredient that adds heartiness; try pulled turkey or grilled tofu for a vegetarian option.
• Mozzarella Cheese – Offers a delightful melty texture; swap it out for provolone for a different experience.
• Cheddar Cheese – Provides sharpness and richness; Monterey Jack is a tasty substitute if desired.
• Cream Cheese – Contributes a creamy element to the filling that ties it all together.
• Mayonnaise – Adds moisture and richness; consider Greek yogurt for a lighter alternative.
• Chopped Fresh Parsley – Brightens up the mixture and adds a pop of color; dried parsley works in a pinch.
For the Spice Blend
• Garlic Powder – Infuses deep aromatic flavors into the filling; essential for that cheesy garlic essence.
• Onion Powder – Heightens savory notes for extra depth of flavor.
• Salt and Pepper – Important to taste for that perfect balance of flavors.
For the Wrap
• Large Flour Tortillas – The perfect vessel for your filling; substitute with whole wheat or gluten-free tortillas as preferred.
• Melted Butter – Used for brushing on the exterior of the wraps, adds flavor and a crispy finish.
• Minced Garlic – Amplifies the garlic flavor in the buttery mixture for an indulgent touch.
Optional Vegetables
• Baby Spinach – Adds nutritional value and a fresh element to your cheesy filling.
• Shredded Lettuce – Provides crunch and freshness; can be added to your wrap before serving.
• Sliced Tomatoes – For a juicy, vibrant addition that brightens up each bite.
These Cheesy Garlic Chicken Wraps are not only easy to prepare but also adaptable, allowing you to infuse your own creativity into each wrap!
Step‑by‑Step Instructions for Cheesy Garlic Chicken Wraps
Step 1: Prepare the Filling
In a large mixing bowl, combine the cooked shredded chicken, garlic powder, onion powder, salt, pepper, mozzarella, cheddar, cream cheese, mayonnaise, and chopped parsley. Use a spatula to thoroughly mix the ingredients until you achieve a creamy, well-blended filling. This rich mixture will be the heart of your Cheesy Garlic Chicken Wraps, ensuring each bite is packed with flavor.
Step 2: Assemble the Wraps
Lay out your large flour tortillas on a clean, flat surface. Spoon about a quarter of the filling onto the center of each tortilla. Fold the sides inward, then roll tightly from the bottom up to create a secure wrap. Ensure the filling is evenly distributed within the wrap, so every Cheesy Garlic Chicken Wrap remains delightful to bite into.
Step 3: Brush the Wraps
Melt butter in a small bowl and stir in minced garlic for added flavor. Generously brush the melted garlic butter mixture on the outside of each wrap. This step will ensure a beautiful, golden brown exterior when cooked and infuse the wraps with a rich garlic aroma, elevating the overall experience of your Cheesy Garlic Chicken Wraps.
Step 4: Toast the Wraps
Preheat a skillet over medium heat, then place the wraps seam-side down onto the hot skillet. Toast each wrap for 2–3 minutes until they are golden brown and crisp, then flip and toast the other side for an additional 2–3 minutes. You’ll know they’re done when the exterior is crispy and the cheese inside is wonderfully melted.
Step 5: Serve the Wraps
Once toasted, remove the Cheesy Garlic Chicken Wraps from the skillet and let them cool slightly. Cut each wrap in half for easier handling and serve warm with your favorite dipping sauce, such as ranch or garlic aioli. The combination of savory filling and crispy exterior invites you to indulge in these delightful wraps!
Make Ahead Options
These Cheesy Garlic Chicken Wraps are perfect for meal prep enthusiasts! You can prepare the filling by mixing together the cooked shredded chicken, cheeses, and seasonings up to 3 days in advance. Simply refrigerate it in an airtight container to maintain its creamy texture. For even more convenience, you can assemble the wraps entirely and freeze them un-toasted for up to 3 months. Just be sure to wrap them tightly to prevent freezer burn. When you’re ready to enjoy, thaw the wraps overnight in the fridge, then brush with garlic butter and toast as directed. You’ll have delectable, crispy Cheesy Garlic Chicken Wraps ready with minimal fuss!
Expert Tips for Cheesy Garlic Chicken Wraps
• Filling Consistency: Ensure your filling is creamy but not too runny. If it’s too wet, it may leak during toasting.
• Wrap Technique: Tightly roll the wraps from bottom to top, tucking the sides in. This helps keep the filling secure while cooking.
• Heat Control: Toast the wraps over medium heat to prevent burning the outside while ensuring the cheese inside melts perfectly.
• Experiment with Veggies: Add optional vegetables like baby spinach or sliced tomatoes for extra nutrition and a fresh burst in your Cheesy Garlic Chicken Wraps.
• Storage Tips: Allow wraps to cool completely before refrigerating. This prevents condensation that can make them soggy.
• Reheating Best Practices: For optimal texture, reheat on a skillet or in the oven rather than microwaving, to keep that satisfying crispness!
What to Serve with Cheesy Garlic Chicken Wraps
These tantalizing wraps are the perfect centerpiece for a cozy meal, inviting you to explore delightful pairings!
- Crisp Side Salad: A refreshing mix of greens and veggies balances the rich flavors, adding crunch and vibrant colors to your plate.
- Seasoned Fries: The crispy potatoes are the ideal sidekick, with their satisfying crunch complementing the gooey wrap.
- Creamy Tomato Basil Soup: A warm, velvety soup enhances the comfort factor, providing a lovely dipping option for your wraps.
- Garlic Breadsticks: Enhance the garlic essence, creating a delightful harmony between the wraps and these buttery, garlicky treats.
- Roasted Veggies: Colorful, caramelized vegetables bring earthiness and contrast, mingling beautifully with the cheesy flavors.
- Coleslaw: A tangy, crunchy slaw adds a refreshing element that cuts through the richness of the wraps.
Feel free to mix and match based on your flavor preferences—each pairing creates a comforting and satisfying meal experience!
How to Store and Freeze Cheesy Garlic Chicken Wraps
Fridge: Store wrapped in foil or airtight containers for up to 3 days. Make sure they cool completely before refrigerating to maintain texture.
Freezer: For longer storage, freeze un-toasted wraps tightly wrapped in plastic wrap and aluminum foil. They can last for up to 3 months if properly sealed.
Reheating: For the best texture, reheat them in a skillet over medium heat or in the oven rather than using a microwave to preserve crispness.
Make-Ahead: Prepare wraps in advance and freeze before toasting; simply thaw overnight in the fridge before cooking for a quick meal.
Variations & Substitutions for Cheesy Garlic Chicken Wraps
Feel free to let your culinary creativity shine—these wraps can be customized for any taste or dietary preference!
- Dairy-Free: Use vegan cream cheese and dairy-free cheese for a lactose-free alternative. You won’t miss the creaminess!
- Vegetarian: Swap chicken for grilled vegetables like zucchini, bell peppers, or mushrooms. A delicious way to enjoy a meatless meal!
- Spicy Twist: Mix in some diced jalapeños or a dash of hot sauce for added heat. Spice lovers will rejoice in this fiery upgrade!
- Herb Boost: Incorporate fresh basil or cilantro into the filling for a vibrant flavor profile. These fresh herbs will elevate each bite.
- Smoky Flavor: Add smoked gouda cheese for a distinctive, smoky taste. It adds a fun twist that’s sure to impress!
- Whole Grain: Use whole wheat tortillas instead of regular flour tortillas for a healthier spin. You’ll enjoy the nutty flavor and added fiber.
- Extra Crunch: Toss in some crunchy vegetables like shredded carrots or diced cucumbers for additional texture and nutrition. They make a delightful contrast to the creamy filling!
With these variations, your Cheesy Garlic Chicken Wraps can go from classic comfort dish to a personalized masterpiece every time you make them. If you’re looking for more inspiration, consider pairing these with a refreshing Caesar salad or some crispy seasoned fries for a complete meal!
Cheesy Garlic Chicken Wraps Recipe FAQs
What type of chicken is best for Cheesy Garlic Chicken Wraps?
Absolutely! Cooked shredded chicken is the main ingredient, providing heartiness to the wraps. For a fantastic vegetarian alternative, try using grilled tofu or roasted vegetables like mushrooms and bell peppers, which can bring a delightful flavor profile to your wraps.
How can I store Cheesy Garlic Chicken Wraps?
To keep your wraps fresh, store them wrapped in foil or in airtight containers. This will maintain their texture. They can last up to 3 days in the fridge. Make sure to cool them completely before refrigerating to prevent sogginess.
Can I freeze Cheesy Garlic Chicken Wraps?
Very! You can freeze un-toasted wraps for up to 3 months. To do this effectively, tightly wrap them in plastic wrap followed by aluminum foil. When you’re ready to enjoy them, simply thaw them overnight in the fridge and toast them directly in a skillet or oven for optimal freshness.
How should I reheat Cheesy Garlic Chicken Wraps?
For the best results, I recommend reheating them in a skillet over medium heat or in the oven. This method helps maintain their crispiness. Avoid microwaving, as it can make the wraps soggy.
What if my wraps are too runny after mixing the filling?
If you find your filling is too wet, you can thicken it up by adding a bit more cream cheese or even some breadcrumbs to absorb excess moisture. Ensure the mixture is creamy without being runny to prevent it from leaking during the toasting process.
Are these wraps suitable for kids or individuals with dietary restrictions?
Absolutely! Cheesy Garlic Chicken Wraps are family-friendly and can be easily adapted for various dietary needs. You can make them vegetarian by substituting chicken with grilled vegetables, and for gluten-free options, simply use gluten-free tortillas. Always check for any specific allergens based on your family’s needs!
Cheesy Garlic Chicken Wraps for Quick, Comforting Meals
Ingredients
Equipment
Method
- Prepare the Filling: In a large mixing bowl, combine the cooked shredded chicken, garlic powder, onion powder, salt, pepper, mozzarella, cheddar, cream cheese, mayonnaise, and chopped parsley. Mix until creamy.
- Assemble the Wraps: Lay out tortillas, spoon filling onto the center, fold sides inward, and roll tightly to create wraps.
- Brush the Wraps: Melt butter, stir in minced garlic, and brush on the outside of each wrap.
- Toast the Wraps: Preheat skillet over medium heat, toast wraps seam-side down for 2-3 minutes each side until golden brown.
- Serve the Wraps: Remove from skillet, let cool slightly, cut in half, and serve warm with dipping sauce.
Leave a Reply