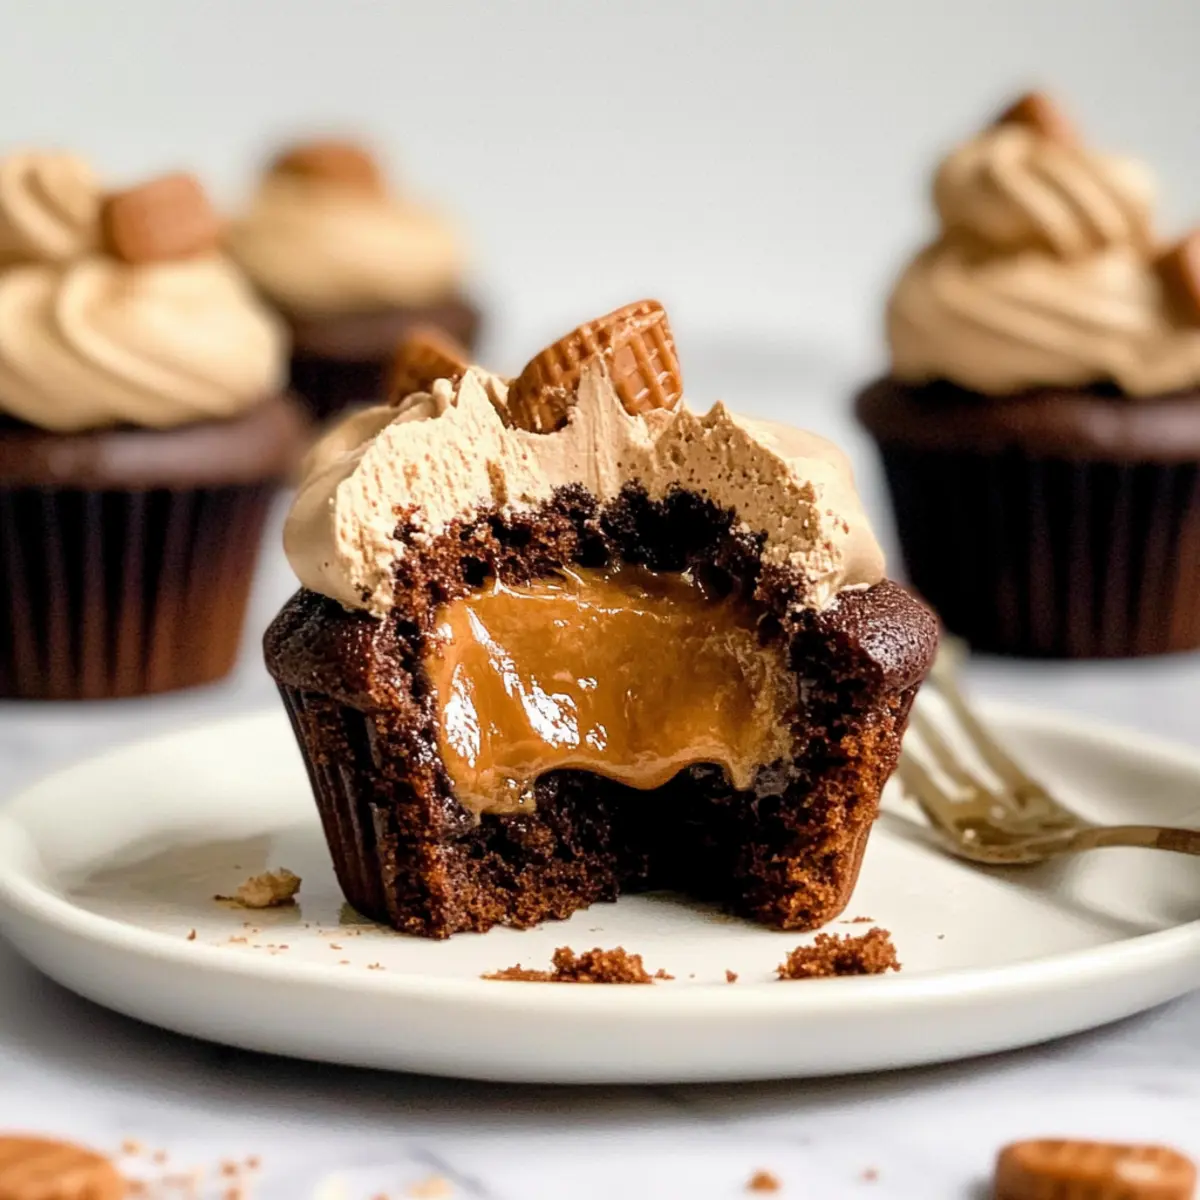
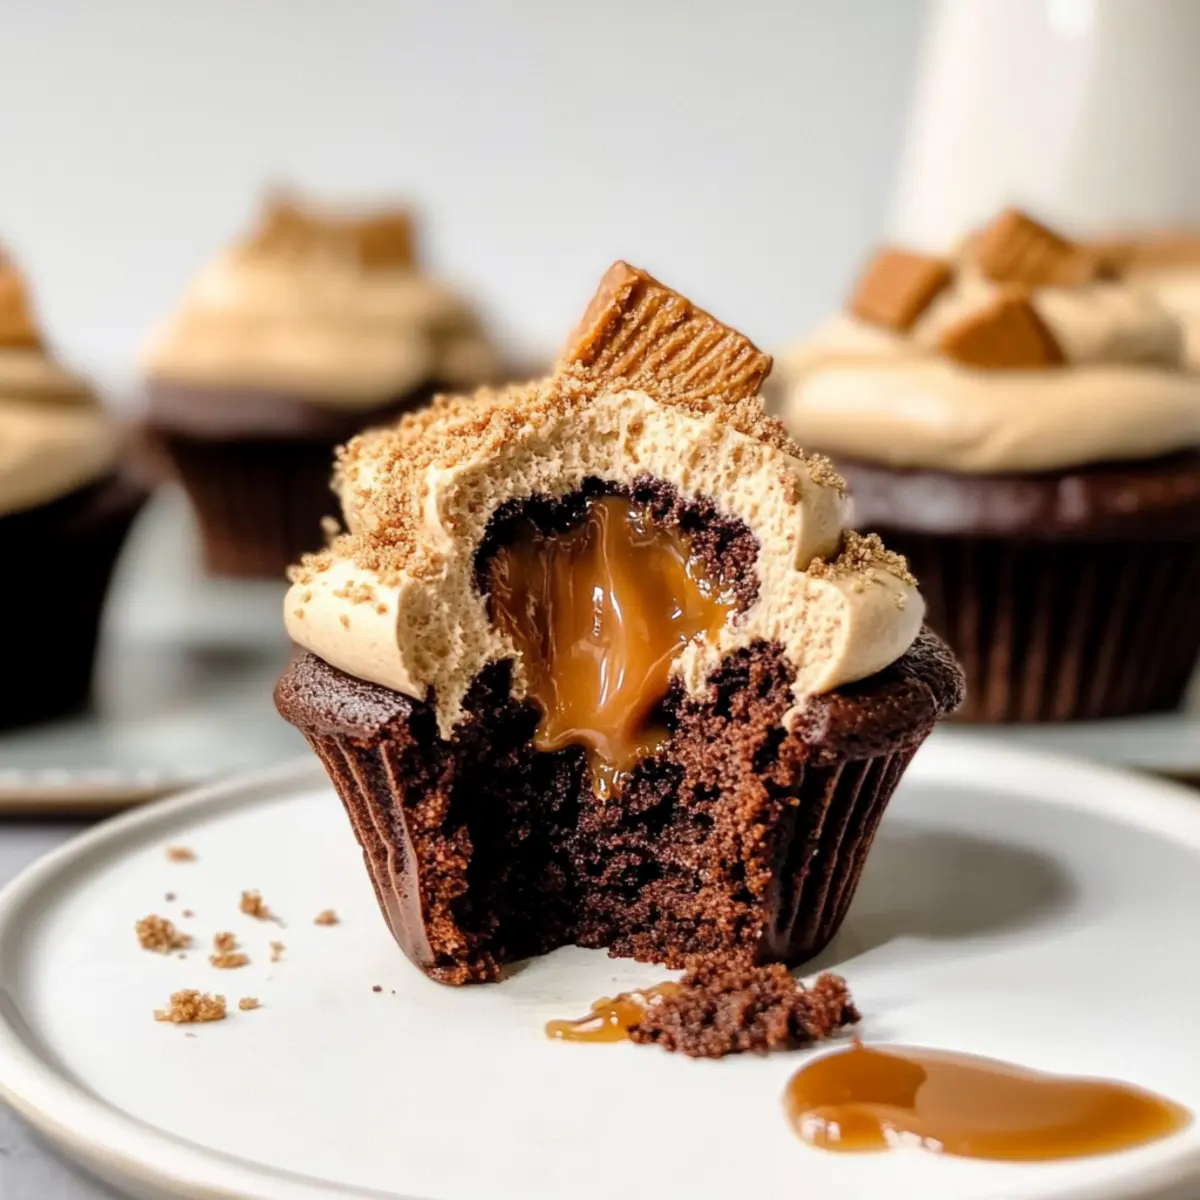
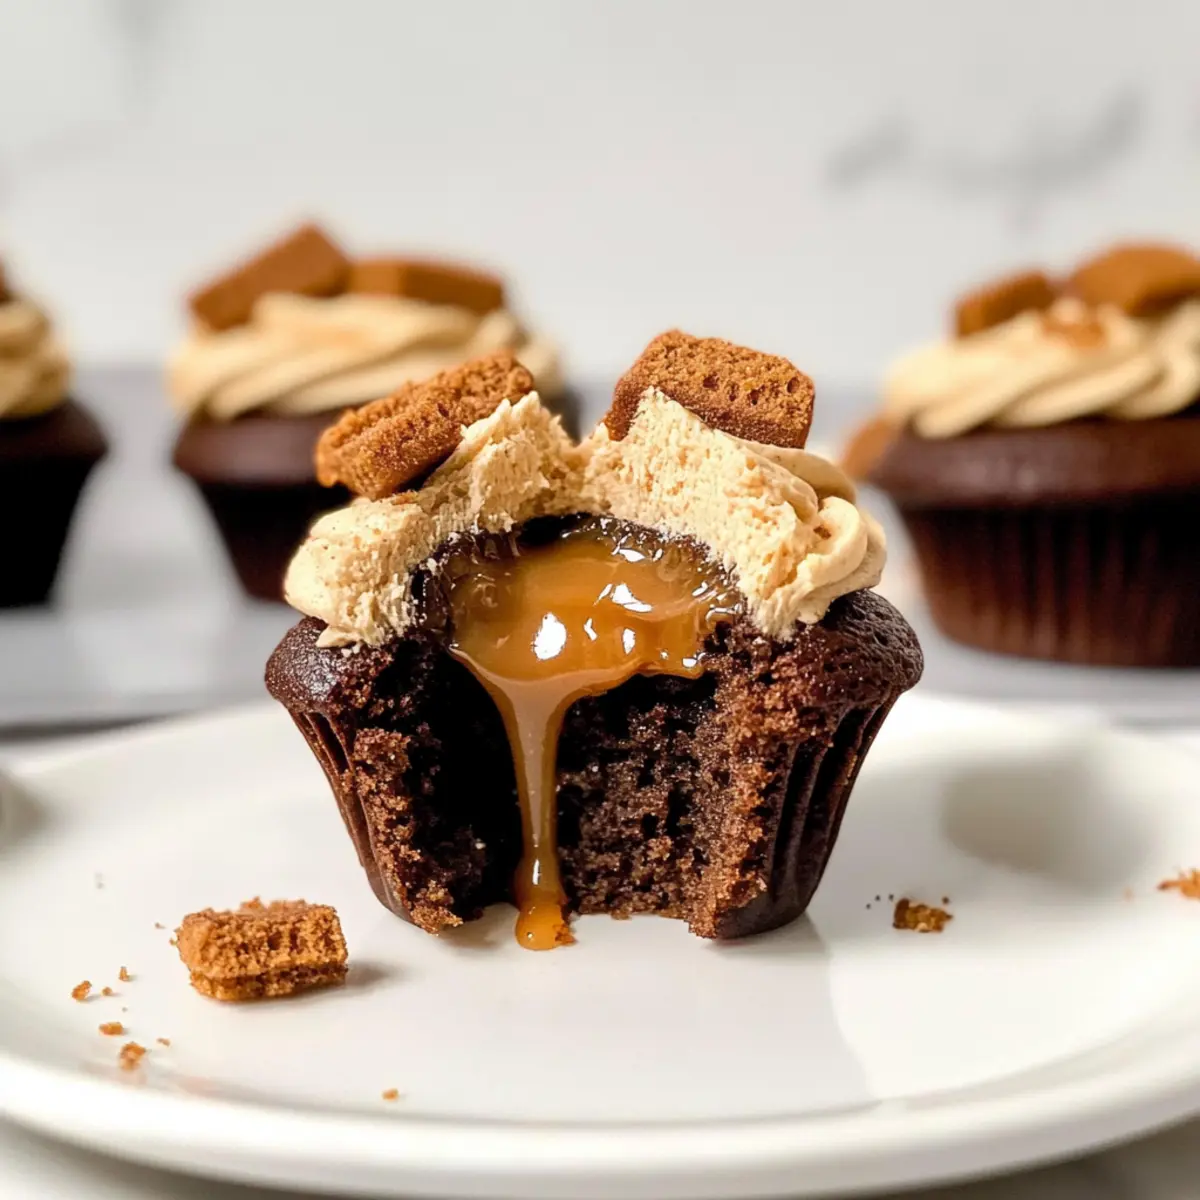
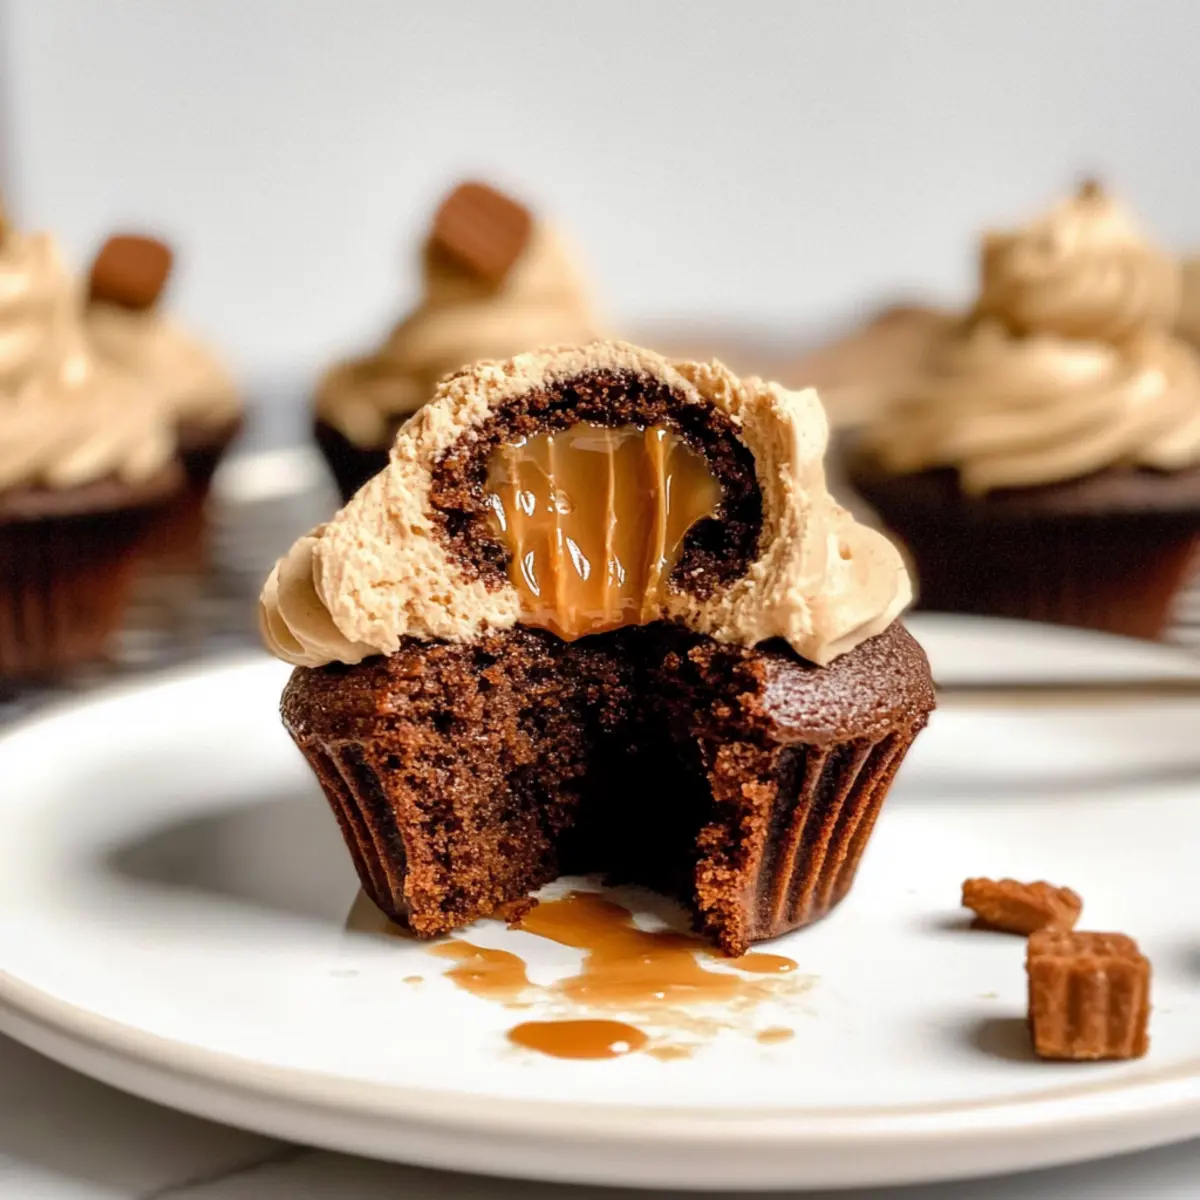
As I was scrolling through my pantry one Saturday afternoon, the sight of a half-empty jar of Biscoff spread sparked an instant idea: why not create something truly delightful? That’s how these Chocolate Biscoff Cupcakes came to life! Imagine sinking your teeth into fluffy chocolate cake, only to discover a heart of ooey-gooey Biscoff caramel waiting inside. These filled cupcakes aren’t just quick to whip up; they’re also a guaranteed crowd-pleaser, perfect for your next gathering or a cozy night in. Whether you’re a passionate home-chef or simply someone looking to break free from fast food, these cupcakes blend indulgent chocolate and spiced cookie butter for a dreamy dessert experience. Are you ready to treat yourself to an unforgettable bite of happiness?
Why Are You Going to Love These Cupcakes?
Irresistible Chocolate Biscoff Cupcakes are not just a dessert; they’re an experience waiting to happen. Decadent and delightful, each bite reveals a gooey Biscoff filling that elevates the classic chocolate cupcake. Quick to prepare, you’ll have these beauties in the oven in no time, making them perfect for busy days. Versatile options like using Nutella or swapping in different fillings keep your treats exciting. An impressive crowd-pleaser, they’re sure to wow guests, whether at a dinner party or a simple family gathering. For another indulgent experience, you might want to check out our Luxurious Dubai Chocolate or Chocolate Dipped Orange recipes!
Chocolate Biscoff Cupcakes Ingredients
• For the perfect bake, gather these essential components to create your delightful Chocolate Biscoff Cupcakes!
For the Cupcake Batter
- All-Purpose Flour – Provides structure and stability to the cake; you can substitute with gluten-free flour blend for a gluten-free version.
- Granulated Sugar – Adds sweetness to balance out the cocoa bitterness; reduce for a less sweet cupcake if desired.
- Cocoa Powder – Deepens the chocolate flavor; consider using Dutch-processed cocoa for a richer taste.
- Baking Powder – Ensures the cupcakes rise beautifully; don’t use baking soda alone as a substitute.
- Salt – Enhances flavor and balances the sweetness; it’s essential for a well-rounded taste, so don’t skip it.
- Unsalted Butter – Contributes to moisture and richness; feel free to swap it with vegetable oil for a dairy-free option.
- Eggs – Provide binding and structure; for a vegan alternative, use flax eggs (1 tbsp ground flaxseed + 2.5 tbsp water per egg).
- Milk – Adds moisture and combines all dry ingredients well; almond milk or oat milk works great for a dairy-free cupcake.
For the Gooey Filling
- Biscoff Spread – Fills the center with creamy, spiced cookie goodness; you can switch it with Nutella for an alternate flavor twist.
Embrace the baking adventure ahead and enjoy creating these magnificent Chocolate Biscoff Cupcakes that will leave everyone craving more!
Step‑by‑Step Instructions for Chocolate Biscoff Cupcakes
Step 1: Preheat the Oven and Prepare the Pan
Preheat your oven to 350°F (175°C) and line a cupcake pan with liners. This step is crucial for ensuring an even bake. As you wait for the oven to heat, gather your ingredients and equipment to keep the workflow smooth. The familiar warm aroma of baking will soon fill your kitchen!
Step 2: Mix Dry Ingredients
In a large mixing bowl, whisk together the all-purpose flour, granulated sugar, cocoa powder, baking powder, and salt until well combined. This step helps aerate the flour and evenly distribute the leavening agents. You want a light and fluffy Chocolate Biscoff Cupcake, so be thorough but gentle in your mixing.
Step 3: Cream Butter and Combine Wet Ingredients
In a separate bowl, beat the unsalted butter until it’s creamy and light—this should take about 2-3 minutes. Add the eggs one at a time, mixing well after each addition, and then pour in the milk, blending until smooth. This combination of wet ingredients adds richness and moisture, making your cupcakes deliciously tender.
Step 4: Combine Wet and Dry Mixtures
Slowly add the wet mixture to the dry ingredients, stirring until just combined. Be careful not to overmix; a few lumps are perfectly fine! This ensures your Chocolate Biscoff Cupcakes will be fluffy. The batter should be thick and luscious, awaiting the delightful Biscoff filling that’s coming next.
Step 5: Fill Cupcake Liners
Spoon the cupcake batter into the prepared liners, filling each about halfway. This will allow space for the Biscoff spread that you’ll add shortly! Using an ice cream scoop can make this step easier and more consistent for each cupcake. The anticipation of that gooey filling is building!
Step 6: Add Biscoff Filling
Next, add a generous dollop of Biscoff spread right in the center of each cupcake batter-filled liner. This is the secret to achieving that ooey-gooey center that melts in your mouth. Ensure the spread is positioned directly in the middle to prevent overflow while baking.
Step 7: Top with Remaining Batter
Now, carefully spoon the remaining batter over the Biscoff spread, covering it completely. This seals in the filling, creating that delightful surprise when you bite into your Chocolate Biscoff Cupcakes. Make sure they are filled to about 3/4 full for optimal rising in the oven.
Step 8: Bake the Cupcakes
Place your filled cupcake pan in the preheated oven and bake for 18-20 minutes. You’ll know they’re done when a toothpick inserted into the center comes out clean, with just a few moist crumbs. The tops should be slightly domed and look dry to the touch, promising an irresistible treat.
Step 9: Cool the Cupcakes
Once baked, allow the cupcakes to cool in the pan for about 5 minutes. This helps them set before transferring. Afterward, gently transfer them to a wire rack to cool completely. This step is essential; it allows the flavors to develop and the gooey filling inside to set perfectly.
Step 10: Serve and Savor
Once cooled, your Chocolate Biscoff Cupcakes are ready to serve! Consider garnishing with a swirl of whipped cream or a dusting of powdered sugar for that extra touch. Each bite reveals a delightful burst of Biscoff caramel, making them the ultimate indulgent dessert. Enjoy the sweet moments!
How to Store and Freeze Chocolate Biscoff Cupcakes
Room Temperature: Store your Chocolate Biscoff Cupcakes in an airtight container at room temperature for up to 3 days to maintain freshness and flavor.
Fridge: If you’d like to extend shelf life, keep them in the refrigerator for up to 5 days. Just remember to seal them well to prevent drying out!
Freezer: For longer storage, freeze the cupcakes individually wrapped in plastic wrap, then place them in a freezer bag for up to 3 months.
Reheating: To enjoy your frozen cupcakes, thaw them in the fridge overnight and warm them gently in the microwave for a few seconds before serving.
Make Ahead Options
These delightful Chocolate Biscoff Cupcakes are perfect for meal prep enthusiasts looking to save time during busy weekdays! You can prepare the cupcake batter up to 24 hours ahead; simply mix the dry and wet ingredients and refrigerate the combined batter. This keeps it fresh and ready to bake when you need it. Additionally, you can spoon the batter into the liners and add your Biscoff filling, then cover and refrigerate for up to 3 days before baking. Just remember to allow the batter to come to room temperature for about 30 minutes before popping it in the oven. With these make-ahead tips, you’ll enjoy delicious, freshly baked cupcakes with minimal effort whenever you’re ready to indulge!
Expert Tips for Chocolate Biscoff Cupcakes
-
Room Temperature Ingredients: Make sure your butter, eggs, and milk are at room temperature. This allows for better mixing and results in a smoother batter for your Chocolate Biscoff Cupcakes.
-
Accurate Baking Time: Keep an eye on your cupcakes while they bake. Overbaking can dry them out, while underbaking could lead to a gooey mess. The toothpick test is your best friend!
-
Proper Filling Placement: Position the Biscoff spread right in the center of the batter. This helps prevent it from leaking out during baking, ensuring that delicious gooeyness is contained within.
-
Cool Completely: Allow your cupcakes to cool completely before serving. This enhances the flavors and ensures the gooey filling sets nicely, providing that delightful surprise when you take a bite.
-
Experiment with Flavors: Don’t hesitate to explore variations! Swapping Biscoff for other spreads like Nutella or creating your own filling could lead to new favorites—your taste buds will thank you!
What to Serve with Chocolate Biscoff Cupcakes
Indulge in a well-rounded dessert experience that perfectly complements the sweet and spiced flavors of these delicious treats.
-
Whipped Cream:
A light dollop on top adds a creamy contrast, enhancing the rich chocolate flavor with a fluffy texture. -
Vanilla Ice Cream:
The classic pairing provides a refreshing coolness that balances the sweetness of the cupcakes and highlights their gooey center. -
Fresh Berries:
Raspberries or strawberries introduce a tartness that cuts through the sweetness, making each bite even more delightful. -
Chocolate Sauce:
Drizzling warm chocolate sauce over the cupcakes elevates the chocolatey goodness, turning them into a decadent masterpiece. -
Coffee or Espresso:
Sipping on a rich cup of coffee amplifies the chocolate flavor and provides a warm, comforting experience that complements the cupcakes beautifully. -
Peppermint Mocha:
For a festive touch, pair with a minty coffee drink to create a lovely contrast that enhances the spiced notes of the Biscoff filling.
These fabulous pairings invite you to craft a memorable dessert spread that delights everyone, turning a simple indulgence into a special occasion!
Chocolate Biscoff Cupcakes Variations & Substitutions
Feel free to get creative with these delightful Chocolate Biscoff Cupcakes and customize them to suit your taste!
- Gluten-Free: Use a gluten-free flour blend instead of all-purpose flour for a celiac-friendly treat.
- Dairy-Free: Swap unsalted butter with vegetable oil and milk with almond or oat milk for a completely dairy-free cupcake.
- Nutty Delight: Incorporate chopped walnuts or pecans into the batter for a delightful crunch and added texture.
- Flavorful Swirl: Mix in a couple of tablespoons of espresso powder to the batter for a mocha-infused twist.
- Rich Filling: Replace Biscoff spread with your favorite chocolate hazelnut spread like Nutella or even a homemade salted caramel for a luxurious surprise.
- Frosting Fun: Top with a swirl of your favorite frosting—try cream cheese frosting for a tangy complement to the sweetness!
- Spicy Kick: Add a pinch of cayenne pepper to the batter for a subtle heat that beautifully contrasts the sweetness of chocolate and Biscoff.
- Zesty Twist: Incorporate a teaspoon of orange zest into the batter for a refreshing citrus hint, perfect for summer gatherings.
Don’t hesitate to explore these ideas and make these Chocolate Biscoff Cupcakes uniquely yours! Looking for more inspiration? Check out our indulgent Dark Chocolate Almond treats or whip up a batch of airy Cotton Cheesecake Cupcakes for even more dessert options!
Chocolate Biscoff Cupcakes Recipe FAQs
What should I look for when selecting ingredients for these cupcakes?
Absolutely! When selecting your ingredients, choose all-purpose flour that feels light and fluffy, and ensure your cocoa powder is fresh for the best flavor. Look for unsalted butter that is at room temperature—this helps create a smooth batter. For the Biscoff spread, opt for one that has a creamy texture, ideally from a jar that’s not been opened for too long.
How should I store my Chocolate Biscoff Cupcakes?
To keep your Chocolate Biscoff Cupcakes fresh, store them in an airtight container at room temperature for up to 3 days. If you want to extend their shelf life, you can refrigerate them for up to 5 days, but ensure they are well-sealed. This prevents them from drying out and losing their scrumptious appeal.
Can I freeze Chocolate Biscoff Cupcakes, and what’s the best way?
Absolutely! To freeze your delicious cupcakes, first let them cool completely. Wrap each cupcake tightly in plastic wrap, and then place them in a sealed freezer bag. They can be frozen for up to 3 months. When you’re ready to enjoy, simply thaw them overnight in the fridge and warm them in the microwave for a few seconds if you prefer them slightly warm!
Why did my cupcakes overflow while baking?
This can happen if the Biscoff filling isn’t properly centered in the cupcake. To prevent this, ensure that you dollop the filling directly in the center and seal it well with the remaining batter. Additionally, be careful not to overfill the liners—filling them about 3/4 full is ideal for allowing them to rise without overflowing.
Are these cupcakes suitable for people with allergies?
Great question! These Chocolate Biscoff Cupcakes contain common allergens like eggs, dairy, and gluten. For a dairy-free version, you can substitute the milk with almond milk or oat milk and use vegetable oil instead of butter. To make them vegan, replace the eggs with flax eggs. Just make sure to check the labels of your ingredients to avoid cross-contamination.
How long can I keep Chocolate Biscoff Cupcakes in the fridge?
If stored correctly in an airtight container, your Chocolate Biscoff Cupcakes can be kept in the refrigerator for up to 5 days. Make sure to check for any signs of spoilage, like a change in texture or smell, before eating!
Irresistible Chocolate Biscoff Cupcakes with Gooey Filling
Ingredients
Equipment
Method
- Preheat your oven to 350°F (175°C) and line a cupcake pan with liners.
- In a large mixing bowl, whisk together the all-purpose flour, granulated sugar, cocoa powder, baking powder, and salt until well combined.
- In a separate bowl, beat the unsalted butter until creamy, then add eggs one at a time, followed by the milk.
- Slowly add the wet mixture to the dry ingredients, stirring until just combined.
- Spoon the cupcake batter into prepared liners, filling them about halfway.
- Add a generous dollop of Biscoff spread in the center of each cupcake batter-filled liner.
- Cover the Biscoff spread with the remaining batter, ensuring it is sealed.
- Bake in the preheated oven for 18-20 minutes, until a toothpick comes out clean.
- Cool in the pan for about 5 minutes, then transfer to a wire rack to cool completely.
- Serve and enjoy, optionally garnished with whipped cream or powdered sugar.
Leave a Reply