While waiting for my morning coffee to brew, I caught a whiff of citrus zest drifting through the kitchen, reminding me how the simplest ingredients can transform everyday moments. This Classic Homemade Orange Candy showcases just that! With only two pantry staples—fresh oranges and granulated sugar—you can create a quick snack that’s not only vegan and gluten-free but also make-ahead friendly. These candied orange slices are chewy, tangy, and versatile, perfect for elevating your desserts or adding a pop of color to your cocktail garnishes. Imagine serving these stunning jewel-like treats at your next gathering; they’ll undoubtedly impress your guests! Curious about how to whip up this delightful candy? Let’s dive into the recipe!
Why Is This Candy So Special?
Simplicity at its Best: With just two ingredients, this Classic Homemade Orange Candy is a breeze to make, perfect for those who want to create something delicious without a fuss.
Versatile Treat: Enjoy them not only as a snack but as an elegant garnish for desserts or cocktails, transforming ordinary moments into special occasions.
Naturally Vegan and Gluten-Free: This recipe caters to various dietary preferences, making it an excellent alternative to processed sweets that everyone can enjoy!
Make-Ahead Friendly: Prep these candied delights in advance, allowing you more time to relax and entertain when friends come over.
Gorgeous Presentation: The vibrant color and glossy finish of these chewy slices offer a visual feast, ensuring your guests will be wowed. If you’re craving something equally delightful, why not try these Brownie Bliss Fudgy treats for dessert as well?
Classic Homemade Orange Candy Ingredients
For the Candy
- Oranges (3 small or tangelos) – Ensure they are fresh and firm for the best flavor; you can substitute with lemons or limes for a tangy twist.
- Granulated Sugar (3 cups) – This sugar is crucial for the candy-making process; reducing the amount will affect the texture.
- Water (3 cups) – Needed to create the syrup; no substitutions are necessary for this recipe.
Optional Finishes
- Granulated Sugar (for rolling) – Rolling the slices in this sugar adds an extra touch of sweetness and a sparkling finish.
- Melted Dark Chocolate (for dipping) – Drizzling or dipping in chocolate elevates the flavors and adds a rich depth to the Classic Homemade Orange Candy.
Step‑by‑Step Instructions for Classic Homemade Orange Candy
Step 1: Prepare Oranges
Begin by washing the oranges thoroughly to remove any impurities. Using a sharp knife or mandoline, slice the oranges into thin ¼-inch rounds, ensuring even thickness for consistent cooking. Arrange the slices on a clean surface, and be careful with your knife skills to avoid any accidents.
Step 2: Make Syrup
In a large skillet or saucepan, combine 3 cups of granulated sugar and 3 cups of water. Heat the mixture over medium-high heat, stirring regularly until the sugar completely dissolves. As the syrup starts to boil, keep an eye on it, allowing it to reach a gentle boil without stirring further, ensuring a smooth syrup base for your Classic Homemade Orange Candy.
Step 3: Simmer Oranges
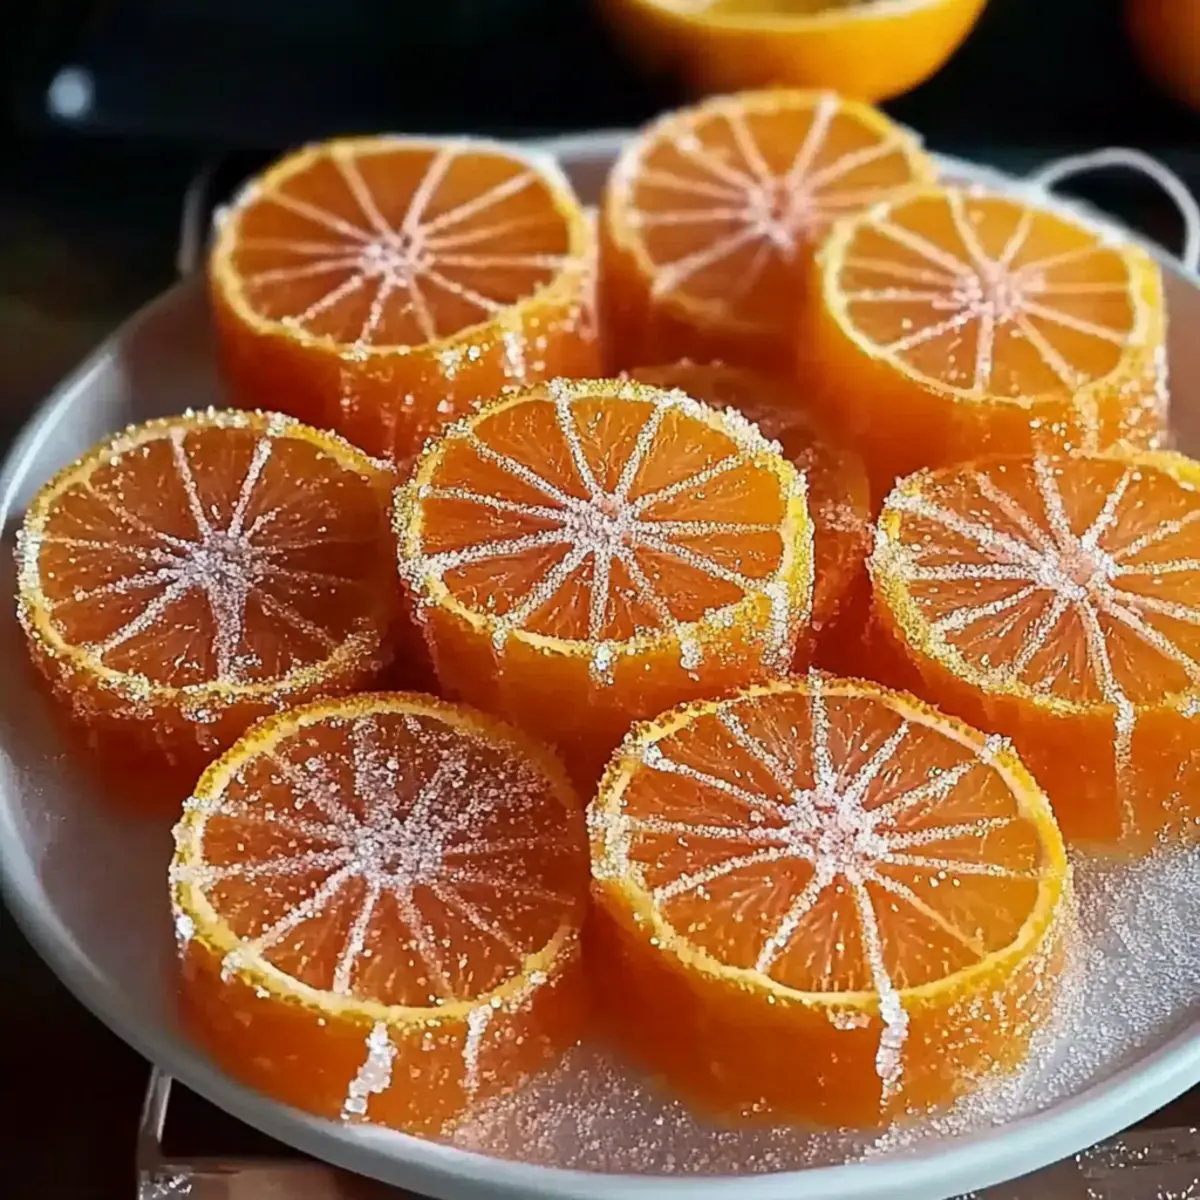
Once the syrup is boiling, reduce the heat to maintain a gentle simmer. Carefully add the orange slices in a single layer, avoiding overcrowding. Let them simmer for 45 to 60 minutes, turning the slices gently every 15 minutes. The goal is to achieve translucent peels that indicate doneness, signaling that your candied slices are on their way to perfection.
Step 4: Dry Slices
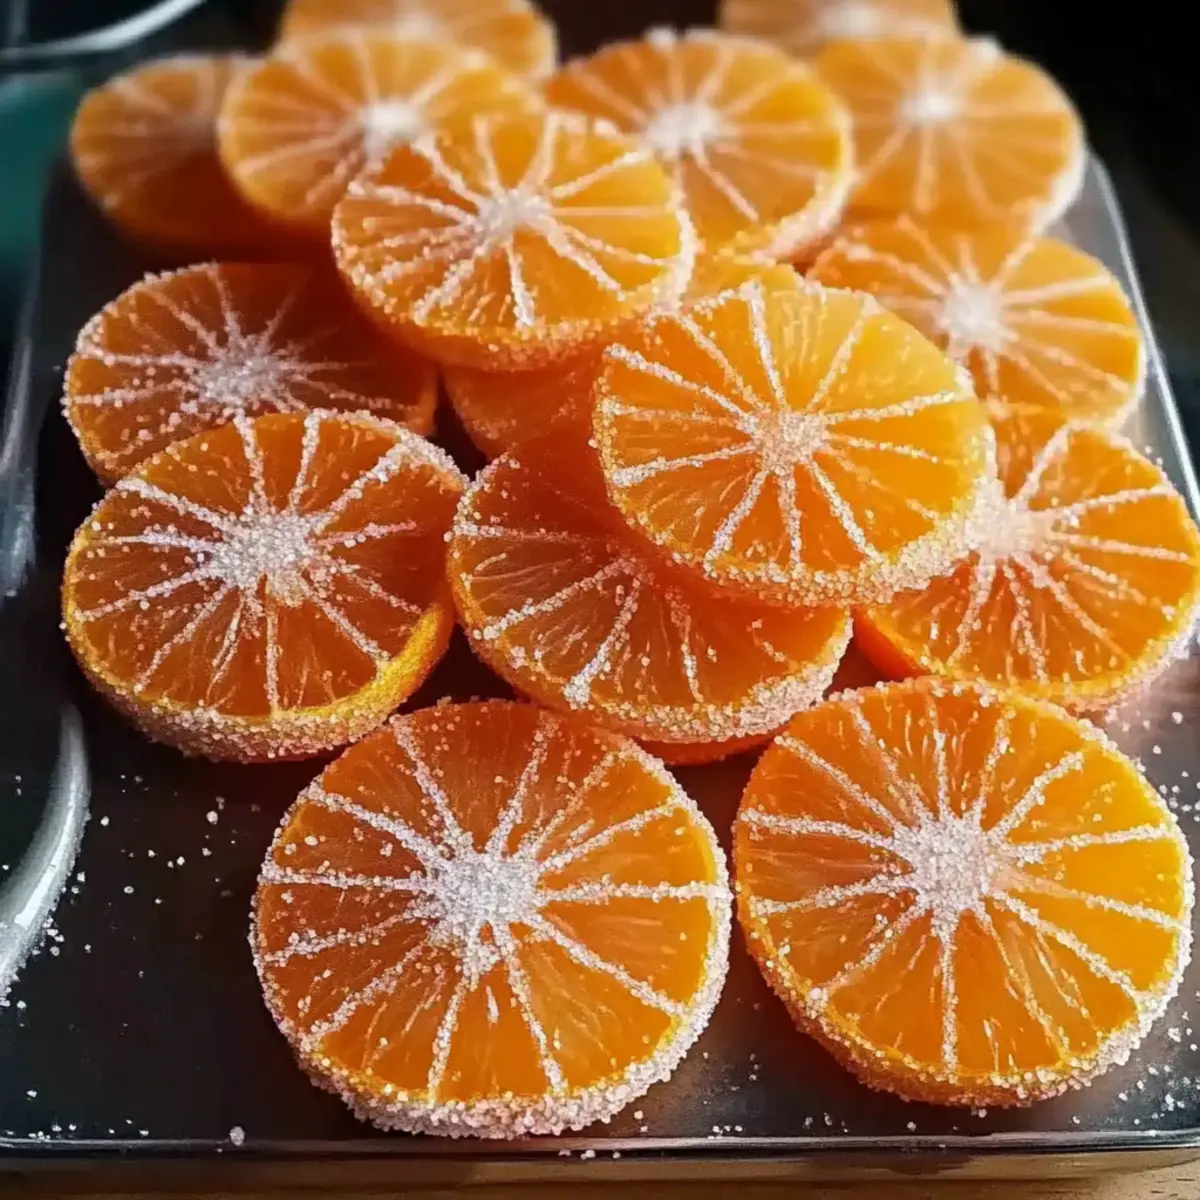
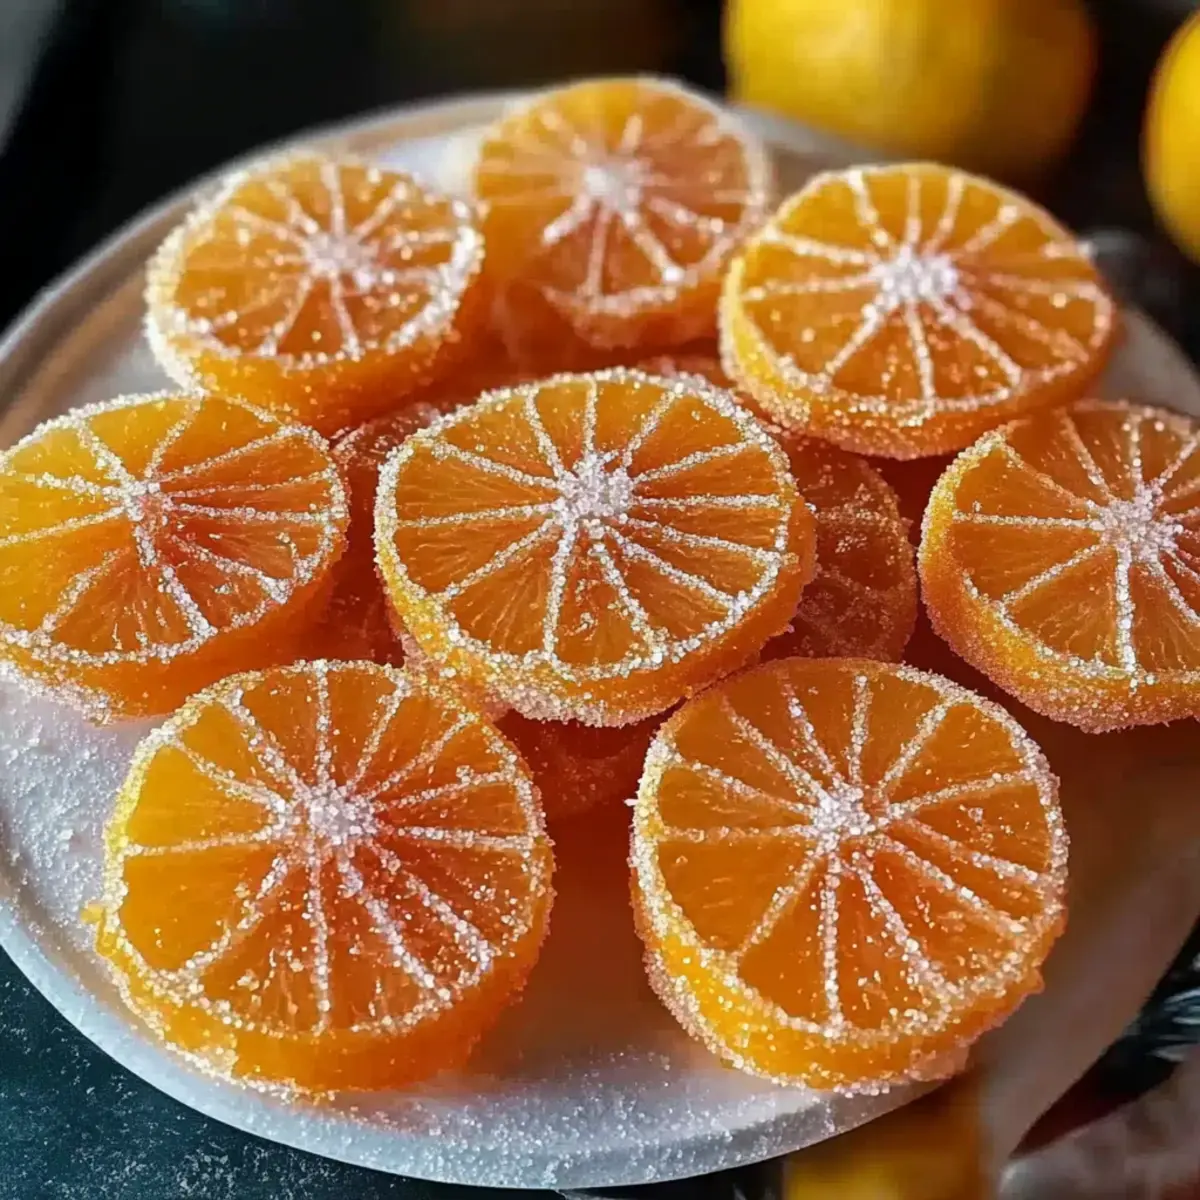
Using tongs, carefully remove the candied orange slices from the syrup and lay them flat on a wire rack. Make sure they don’t touch. Allow them to dry uncovered at room temperature for 24 to 48 hours. The slices should become tacky but firm, with a slight sheen, indicating you have successfully created your Classic Homemade Orange Candy.
Step 5: Optional Finishes
For an extra layer of flavor and presentation, consider rolling the dried slices in granulated sugar or dipping them in melted dark chocolate. If opting for sugar, gently coat the slices, resulting in a sparkling finish. If using chocolate, let the slices cool on parchment paper after dipping, elevating your candy to an even more delightful treat.
Classic Homemade Orange Candy Variations
Customize your candy experience with delightful twists on this classic treat!
-
Citrus Swap: Swap out oranges for blood oranges or grapefruits for a unique flavor twist. Each variety offers its own vibrant hue and taste.
-
Bite-Sized Gems: Use small clementines or mandarins, cutting them into thicker rounds for deliciously fun, bite-sized treats. Kids will love these easily snackable goodies!
-
Flavor Infusion: Add a splash of vanilla extract to the syrup for an aromatic enhancement that beautifully complements the citrus flavors.
-
Spicy Kick: Toss in a pinch of cayenne pepper when simmering to spice things up! This surprising twist creates a delightful contrast to the sweetness.
-
Chocolate Drizzle: Instead of dipping, drizzle melted dark chocolate over the cooled slices, adding a touch of luxury that elevates their appeal.
-
Herbaceous Note: Infuse the syrup with fresh herbs like mint or rosemary for a refreshing flavor profile that adds depth to your candy.
-
Zesty Finish: Dust the dried slices with lemon zest or lime zest right before serving to enhance the flavor and brightness of your candied oranges.
-
Garnish Potential: Use these candied beauties as a garnish for cakes, salads, or to elevate your favorite cocktails. Imagine a beautiful drink topped with a candied slice – simply stunning! If you’re looking for a chocolate dessert to pair, you might also want to check out these Brownie Bliss Fudgy treats for a delectable combination!
Whether you stick with the classic recipe or explore these variations, customizing your Classic Homemade Orange Candy is sure to create sweet memories. Enjoy!
How to Store and Freeze Classic Homemade Orange Candy
Room Temperature: Store the candied orange slices in an airtight container at room temperature for up to a month. Keep them away from direct sunlight to maintain their vibrant color.
Fridge: While refrigeration is not necessary, if preferred, you can store the slices in the fridge in an airtight container to extend their freshness for up to 2 months.
Freezer: For longer storage, freeze the slices in a single layer on a baking sheet before transferring them to a freezer-safe bag. They can last for up to 6 months.
Reheating: If desired, simply bring the frozen slices to room temperature before enjoying or using them as a garnish for desserts and cocktails.
Expert Tips for Classic Homemade Orange Candy
-
Choose Fresh Oranges: Select firm, ripe oranges for the best flavor. Avoid any that feel soft or have blemishes to ensure a successful candy outcome.
-
Don’t Rush the Simmer: Simmer the orange slices long enough for the peels to become translucent. Under-cooked slices can result in a chewy texture that doesn’t hold well.
-
Proper Drying Technique: Allow the slices to dry completely on a wire rack to achieve the right texture. Humidity can cause them to turn sticky or soggy if not dried well.
-
Use Parchment Paper: When storing your Classic Homemade Orange Candy, layer the slices with parchment paper in between to prevent sticking. Keep them in an airtight container for up to a month.
-
Experiment with Other Citrus: Don’t hesitate to try different citrus fruits, such as blood oranges or grapefruits, for a unique flavor twist in your candy-making journey.
Make Ahead Options
These Classic Homemade Orange Candy slices are fantastic for meal prep enthusiasts! You can slice and simmer the oranges up to 24 hours in advance, allowing the flavors to seep in beautifully. After simmering, allow the slices to dry at room temperature for 24 to 48 hours, then store them in an airtight container—this helps maintain their chewy texture and vibrant color. For the best quality, roll them in granulated sugar just before serving to keep them looking fresh and sparkling. When ready to serve, simply garnish your desserts or cocktails with these delightful homemade treats, saving you time and effort while impressing everyone!
What to Serve with Classic Homemade Orange Candy
Delight your senses as you explore scrumptious pairings that will complement these vibrant orange slices!
-
Cheesecake Topping: Candied orange slices beautifully enhance the creamy richness of cheesecake, adding a bright tangy flavor contrast.
-
Chocolate Mousse: The chewy orange treats provide a refreshing finish to this rich dessert, balancing indulgence and citrus freshness in each bite.
-
Sparkling Water Garnish: Elevate your beverages by adding these candied slices, giving a touch of sweetness and a pop of color to your refreshments.
-
Fruit Salad: Toss them into a fruit medley for an uplifting citrus kick, harmonizing perfectly with berries and melons for a fresh and vibrant dish.
-
Herbed Goat Cheese: Serve alongside creamy goat cheese and fresh herbs on a charcuterie board, where the sweet orange slices cut through the richness beautifully.
-
Basil Lemonade: A refreshing drink like basil lemonade pairs wonderfully with the zesty notes of orange candy, creating an invigorating combination of flavors.
-
Vanilla Ice Cream: Crown your dessert with candied orange slices atop vanilla ice cream, where the cold creaminess meets sweet citrus for pure bliss.
-
Dark Chocolate Bark: Dip candied slices in dark chocolate for a decadent treat that melds sweet, tangy, and rich flavors in a delightful bite-sized indulgence.
-
Mimosas: Enhance your brunch with a festive mimosa, garnished with these stunning orange slices, adding a splash of color and a hint of sweetness to your bubbly.

Classic Homemade Orange Candy Recipe FAQs
What type of oranges should I use for this recipe?
Absolutely, I recommend using fresh, firm oranges, like small navel oranges or tangelos, for the best flavor. Look for fruit without blemishes or soft spots, as this ensures your candy has that perfect chewy texture. If you’re feeling adventurous, you can swap them out for lemons or limes to add a zesty twist.
How should I store my candied orange slices?
To store your Classic Homemade Orange Candy, place the slices in an airtight container at room temperature. They’ll stay fresh for up to 30 days. If you want to keep them longer, consider layering the slices with parchment paper to prevent sticking!
Can I freeze candied orange slices?
Yes, you can! To freeze the slices, lay them in a single layer on a baking sheet and pop them in the freezer for about 1-2 hours until they’re firm. Then, transfer the slices to a freezer-safe bag. They can last for up to 6 months. When you’re ready to enjoy them, just let them thaw at room temperature.
What if my syrup caramelizes while making the candy?
If you notice your syrup starting to caramelize, don’t panic! Simply rinse the pan to remove the caramelized bits and start fresh with a new batch of syrup. Make sure to keep a close eye on the cooking process to avoid this in the first place; continuous stirring helps prevent unwanted caramelization.
Are candied orange slices safe for pets?
It’s best to keep candied orange slices away from pets, particularly dogs. While the ingredients themselves (sugar and citrus) are not toxic, the high sugar content can be harmful to pets if consumed in large quantities. Always check with your vet if you’re unsure about certain treats!
How do I know when my orange slices are done cooking?
The key indicator for perfectly cooked orange slices is their translucence. After simmering for 45 to 60 minutes, the peels should look clear rather than opaque. If they still appear firm or shiny, give them a bit more time to ensure they’re the chewy delight you’re aiming for!
Classic Homemade Orange Candy: Delightfully Chewy & Vegan
Ingredients
Equipment
Method
- Prepare Oranges: Wash the oranges thoroughly and slice into thin ¼-inch rounds.
- Make Syrup: Combine 3 cups of sugar and 3 cups of water in a skillet, heating until sugar dissolves.
- Simmer Oranges: Add orange slices to the syrup and simmer for 45 to 60 minutes.
- Dry Slices: Remove slices and lay them flat on a wire rack to dry for 24 to 48 hours.
- Optional Finishes: Roll in sugar or dip in chocolate if desired.
Leave a Reply