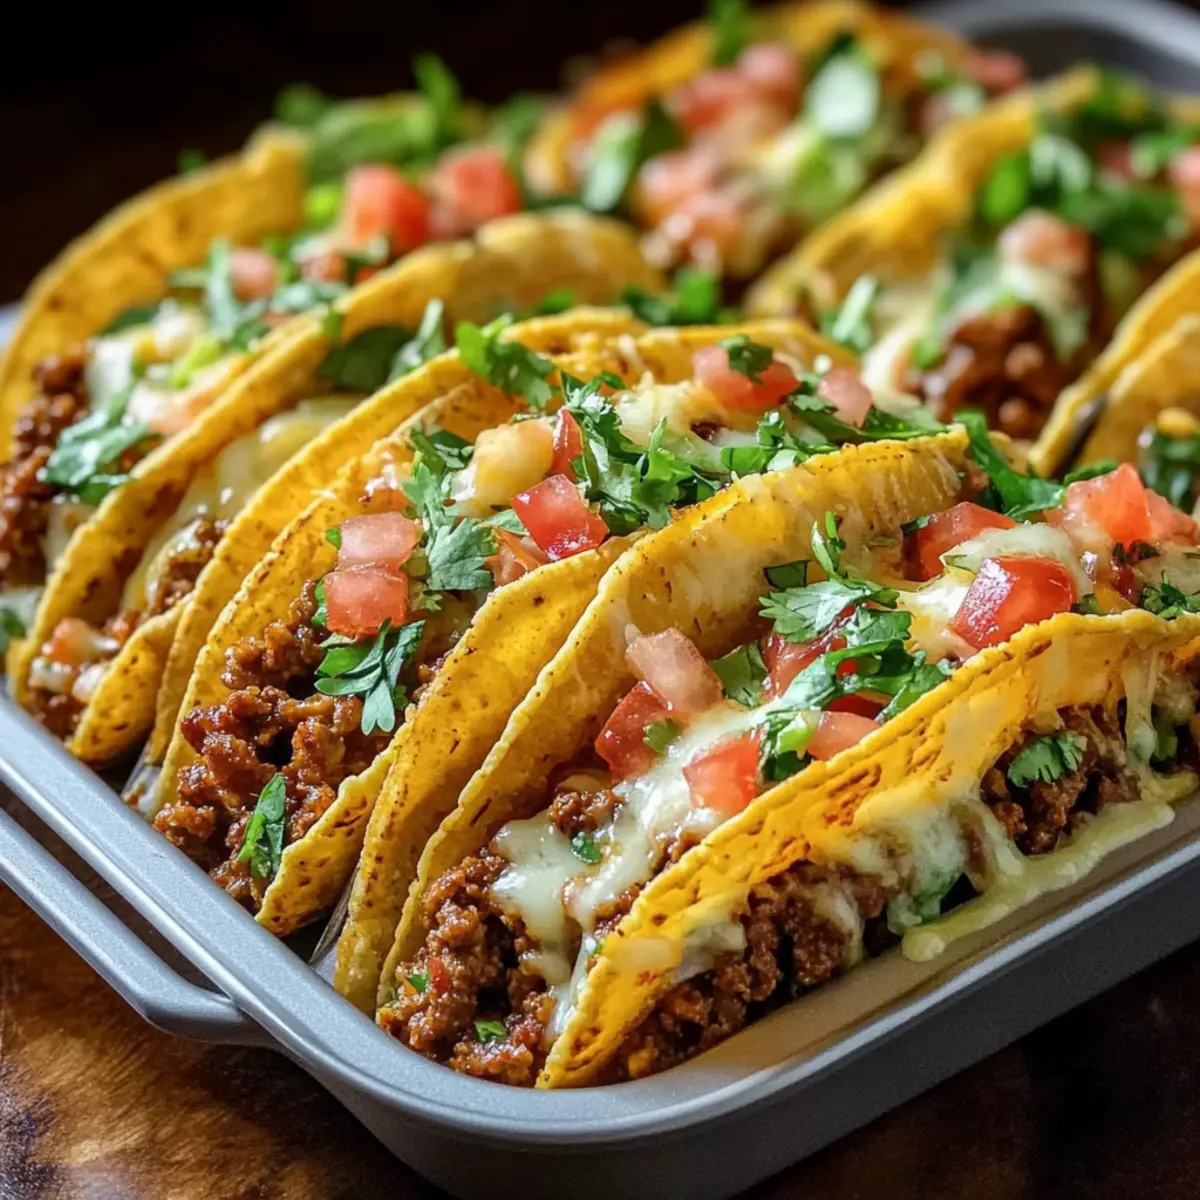
As I rummaged through my pantry one evening, searching for a way to revive the weeknight blues, I stumbled upon the perfect solution—Oven-Baked Cheesy Tacos. This simple yet delicious recipe transforms a few basic ingredients into a crispy sensation that’s sure to please everyone at the table. In just about 30 minutes, these loaded tacos bring comfort food magic to life, serving as a delightful alternative to greasy takeout. And let’s not forget the joys of customization! With options for gluten-free shells and a variety of fresh toppings, everyone can create their perfect taco masterpiece. Can you think of a better way to elevate taco night? Let’s dive into the savory details of this mouthwatering dish!
Why Are These Tacos So Irresistible?
Quick and Easy: Whip up these tacos in just 30 minutes, making them an ideal choice for busy weeknights.
Customizable: With options for gluten-free shells and an array of fresh toppings, everyone can tailor their tacos to suit their tastes.
Crowd-Pleaser: Loaded with flavor and texture, these cheesy tacos are sure to delight friends and family, making them a perfect party dish.
Healthy Alternatives: Swap ground beef for turkey, chicken, or plant-based options to cater to various dietary preferences!
Less Mess, More Fun: Baking these beauties minimizes mess and cleanup—grab a plate, and dive in! Try pairing them with sides like Cheesy Garlic Chicken or a fresh Broccoli Cauliflower Casserole for a complete meal that satisfies every craving.
Oven-Baked Cheesy Tacos Ingredients
-
For the Taco Shells
• Hard Taco Shells – Ensure shells are sturdy to hold fillings without breaking. -
For the Filling
• Ground Beef – Main protein source, adds flavor; you can substitute with ground turkey, chicken, or plant-based alternatives like lentils or black beans.
• Onion – Adds sweetness and depth; use finely diced for even cooking.
• Garlic – Enhances flavor; fresh minced is preferred for optimal taste, or garlic powder can work in a pinch.
• Taco Seasoning – Delivers essential spices for flavor; feel free to use store-bought or homemade for better ingredient control.
• Tomato Sauce/Salsa – Acts as moisture and flavor enhancer for the meat mixture; can swap for diced tomatoes or a spicier salsa if desired. -
For the Cheesy Layer
• Shredded Cheese – Necessary for melting and binding flavors together; cheddar or Monterey Jack is recommended, but you can use dairy-free cheese. -
For the Fresh Toppings
• Fresh Toppings (lettuce, tomatoes, red onion, cilantro) – Adds color and freshness; customize with any fresh veggies or condiments like sour cream or guacamole.
Ready to make some delicious Oven-Baked Cheesy Tacos? Let’s start cooking!
Step‑by‑Step Instructions for Oven-Baked Cheesy Tacos
Step 1: Preheat the Oven
Start by preheating your oven to 400°F (200°C). This step is crucial for achieving that perfect crispy texture on your taco shells. While the oven warms up, gather your ingredients and get ready for a delightful cooking experience. The heat will ensure your cheesy tacos come out beautifully browned and delicious.
Step 2: Arrange the Taco Shells
Once the oven is heated, place your hard taco shells upright in a baking dish. Make sure they are sturdy and positioned closely together to prevent tipping and spilling during the baking process. This will create a warm and cozy environment for your savory filling, making them irresistibly crunchy.
Step 3: Sauté the Meat and Onion
In a skillet over medium heat, add your ground beef along with a finely diced onion. Cook this mixture for about 5 to 7 minutes, stirring regularly until the beef is browned and the onions are translucent. After cooking, drain any excess fat to keep your Oven-Baked Cheesy Tacos deliciously satisfying without being greasy.
Step 4: Add Flavor with Garlic and Seasoning
Next, stir in minced garlic and taco seasoning into the meat and onion mixture. Sauté for about 1 minute, allowing the flavors to blend well. You’ll notice a lovely aroma wafting through your kitchen—this is a sign that your filling is coming together beautifully for your cheesy tacos.
Step 5: Incorporate Tomato Sauce or Salsa
Pour in your tomato sauce or salsa and simmer the mixture for an additional 5 minutes over low heat. The sauce will add moisture and richness to your filling while also enhancing the flavor profile of your Oven-Baked Cheesy Tacos. Give it a good stir and let the flavors meld together.
Step 6: Fill the Taco Shells
Now it’s time to fill the taco shells! Carefully spoon the beef mixture into each shell, ensuring they are generously filled but not overstuffed. Once filled, sprinkle a generous amount of shredded cheese on top. This will create that gooey, melty layer that makes these tacos so irresistible.
Step 7: Bake Until Crispy and Golden
Place the filled taco dish into your preheated oven and bake for about 10 to 15 minutes. Keep an eye on them until the cheese is melted and bubbly, and the taco shells turn a lovely golden brown. The aroma will fill your home, tempting your taste buds as you await the delicious final result.
Step 8: Add Fresh Toppings and Serve
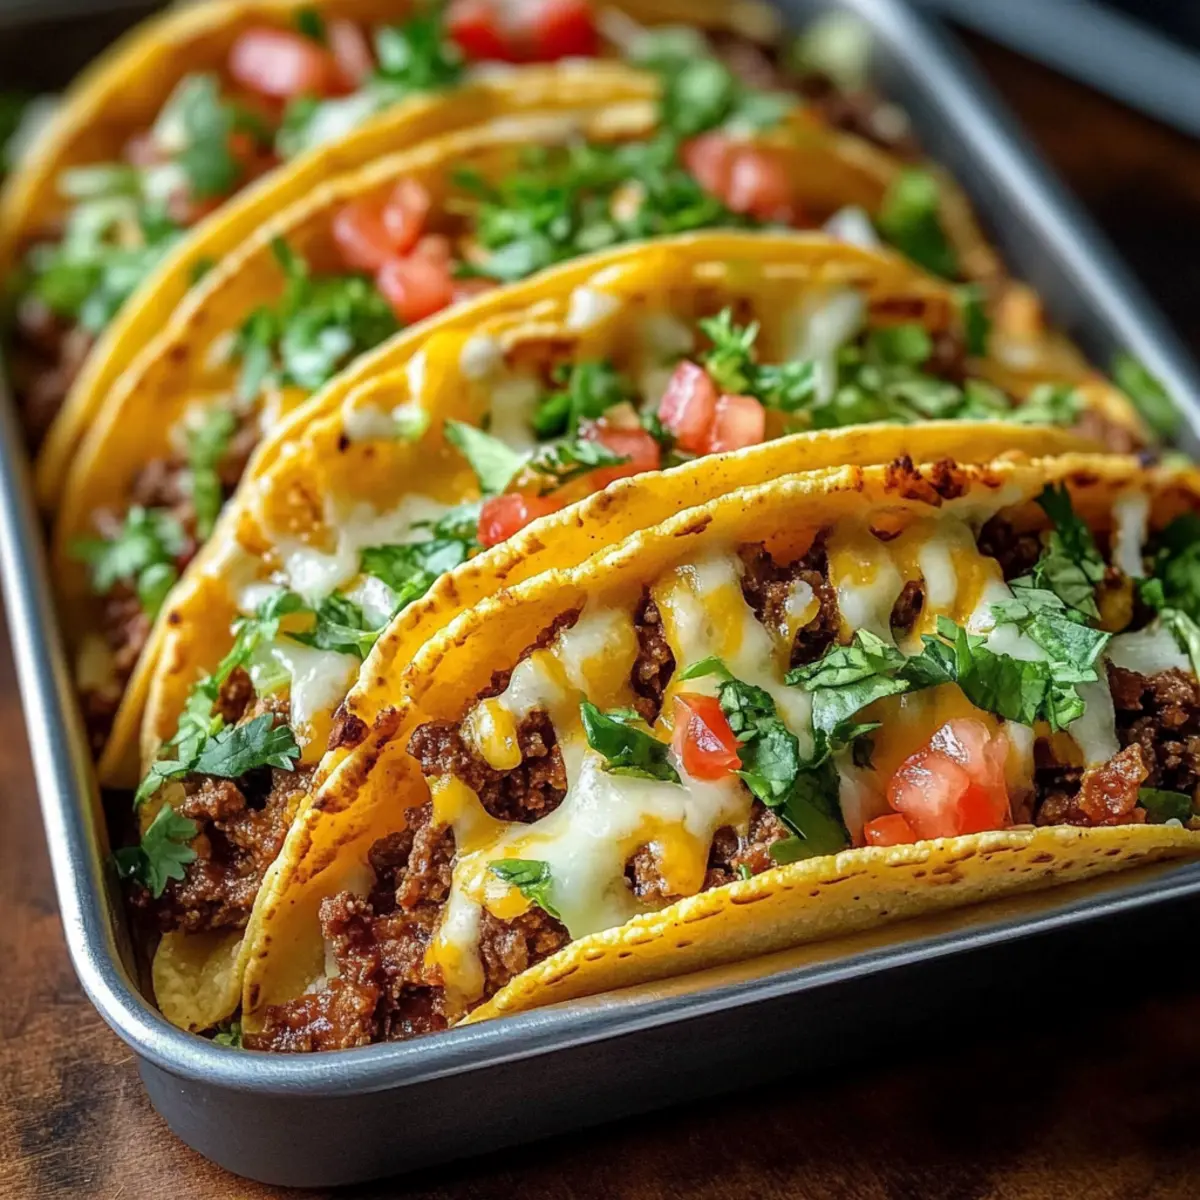
Once baked to perfection, remove your Oven-Baked Cheesy Tacos from the oven and let them cool slightly. Top with fresh ingredients such as lettuce, diced tomatoes, red onions, and cilantro to add a vibrant crunch. Serve warm and enjoy a quick meal that everyone will love!
How to Store and Freeze Oven-Baked Cheesy Tacos
Fridge: Store leftover Oven-Baked Cheesy Tacos in an airtight container for up to 3 days. Reheat in the oven at 350°F (175°C) for about 10 minutes to maintain crispness.
Freezer: Assemble tacos without baking, wrap individually in plastic wrap, then foil. Freeze for up to 3 months. Bake from frozen at 400°F (200°C), adding 5-10 minutes to the cooking time.
Make-Ahead: You can prepare the beef filling ahead of time, allowing it to cool before filling the taco shells. Store in the fridge for up to 2 days until ready to bake.
Reheating: Always reheat in the oven for the best texture; the microwave can make them soggy, losing that inviting crunch.
Oven-Baked Cheesy Tacos Variations
Feel free to get creative with these delicious Oven-Baked Cheesy Tacos to suit your taste preferences and dietary needs!
-
Ground Turkey: Swap ground beef for ground turkey for a lighter and leaner option that still packs flavor.
-
Plant-Based Options: Use lentils or black beans instead of meat for a healthy, vegetarian twist; they absorb seasoning beautifully.
-
Spicy Kick: Add diced jalapeños or a sprinkle of cayenne pepper to the beef mixture for a delightful heat that’ll excite your taste buds.
-
Flavorful Cheeses: Experiment with flavorful cheese varieties like pepper jack or gouda for an exciting, melty twist that elevates your tacos.
-
Gluten-Free Shells: Use gluten-free taco shells to ensure everyone at the table can enjoy these tasty treats without worry.
Feel free to customize your toppings too! Top with fresh ingredients like crispy lettuce, juicy tomatoes, or a drizzle of zesty guacamole for a fresh burst of flavor. If you love a touch of creaminess, consider serving with sides of Cheesy Garlic Chicken or a fresh Broccoli Cauliflower Casserole to create a balanced meal with that comforting comfort food vibe.
Expert Tips for Oven-Baked Cheesy Tacos
• Perfect Shells: Ensure your taco shells are sturdy to avoid breakage when filled. Weak shells will crumble under the weight of delicious toppings.
• Flavor Boost: Homemade taco seasoning can elevate the taste significantly. Customize your spices for the perfect blend to complement your Oven-Baked Cheesy Tacos.
• Avoid Overfilling: Fill taco shells moderately. Overstuffing can cause toppings to spill and shells to break, leading to a messy situation.
• Make Ahead: Prepare the filling ahead of time and store it in the fridge. This allows for a super quick assembly when you’re ready to bake.
• Baking Time: Keep an eye on the tacos while they bake. Once the cheese is bubbly and the shells are golden, remove them to prevent burning.
• Delicious Leftovers: Store any leftovers in an airtight container in the fridge for up to three days. Reheat in the oven to retain that delightful crispiness.
Make Ahead Options
These Oven-Baked Cheesy Tacos are perfect for busy home cooks looking to make mealtime a breeze! You can prepare the beef mixture up to 3 days in advance; simply cook the beef, onion, garlic, and seasoning, then let it cool before storing it in an airtight container in the refrigerator. The taco shells can also be filled and stored in the fridge for up to 24 hours—just be careful not to overfill them, to prevent sogginess. When you’re ready to enjoy, simply preheat the oven, top with cheese, and bake until golden and bubbly. You’ll have delicious tacos on the table with minimal effort, freeing up your time for other evening activities!
What to Serve with Oven-Baked Cheesy Tacos?
Maximize the joys of taco night by adding delightful sides that elevate the entire experience.
-
Creamy Guacamole: Perfectly creamy and tangy, guacamole adds a refreshing contrast to the cheesy filling, enhancing each bite. Don’t forget the crispy tortilla chips for dipping!
-
Zesty Mexican Street Corn: This dish, with its sweet corn, lime, and cotija cheese, mirrors the flavors of the tacos while adding a unique, satisfying crunch. It’s a vibrant addition to your table!
-
Fiesta Black Bean Salad: A colorful mix of black beans, corn, and bell peppers burst with flavor and nutrition, providing a light and refreshing counterpart to the rich tacos. It’s both delicious and wholesome!
-
Sour Cream Drizzle: A dollop of sour cream atop your cheesy tacos adds creaminess and balances the spices perfectly. This simple ingredient can elevate each taco into chilly and smooth perfection.
-
Refreshing Cucumber Salsa: Cool, diced cucumbers with cilantro, lime, and tomatoes add a fresh crunch. This salsa complements the tacos by refreshing the palate between bites!
-
Crispy Nachos: Serve these seasoned nachos to share the love! Adding cheese, jalapeños, and your favorite toppings makes an irresistible munchie that pairs beautifully with your main dish.
-
Chips and Salsa Combo: Start the meal with crispy tortilla chips accompanied by tangy salsa. This classic pairing sets the stage for a fun, interactive dining experience.
-
Cold Beverages: Pair your tacos with a refreshing limeade or iced tea, complementing the flavors and leaving guests feeling refreshed and satisfied.
Turn any ordinary taco night into a fiesta with these delicious and complementary side options!
Oven-Baked Cheesy Tacos Recipe FAQs
What type of taco shells should I use for the best results?
I recommend using sturdy hard taco shells to hold all the delicious fillings without breaking. Look for shells that are crisp and not overly fragile—this guarantees they’ll stand up to the savory meat and toppings beautifully.
How long can I store leftover Oven-Baked Cheesy Tacos?
Leftover tacos should be kept in an airtight container in the fridge for up to 3 days. To reheat, simply place them in the oven at 350°F (175°C) for about 10 minutes. This will help maintain that delightful crispiness that makes these tacos so special!
Can I freeze Oven-Baked Cheesy Tacos?
Absolutely! To freeze, assemble the tacos without baking them. Wrap each taco individually in plastic wrap and then in foil. They can be frozen for up to 3 months. When ready to eat, bake them straight from the freezer at 400°F (200°C), adding 5-10 extra minutes to the cooking time for optimal results.
What if my taco shells break while filling?
It’s crucial to avoid overfilling your taco shells, as this can certainly lead to breakage. Fill your shells moderately and ensure you’re using sturdy shells. If a shell does break, don’t worry! You can always layer the filling in a bowl and create a deconstructed taco delight.
Are there any dietary considerations for this recipe?
Yes, there are! You can easily make this a gluten-free dish by using gluten-free taco shells. Additionally, if you’re cooking for someone with dietary restrictions, consider swapping out ground beef for ground turkey, chicken, or a plant-based alternative like lentils or black beans. This versatility allows for friendly customization without sacrificing flavor!
How can I make these tacos vegetarian or vegan?
To create a vegetarian or vegan version of the Oven-Baked Cheesy Tacos, substitute the ground beef with cooked lentils or black beans, and opt for a dairy-free shredded cheese. This way, you can still enjoy the comforting essence of tacos while accommodating different dietary preferences!
Oven-Baked Cheesy Tacos: Crispy Comfort Made Easy
Ingredients
Equipment
Method
- Preheat your oven to 400°F (200°C).
- Place hard taco shells upright in a baking dish.
- In a skillet over medium heat, add ground beef and finely diced onion. Cook for 5-7 minutes until browned.
- Stir in minced garlic and taco seasoning, sauté for 1 minute.
- Pour in tomato sauce or salsa and simmer for 5 minutes over low heat.
- Fill taco shells with meat mixture and sprinkle with shredded cheese.
- Bake for 10-15 minutes until cheese is melted and shells are golden brown.
- Top with fresh ingredients and serve warm.
Leave a Reply