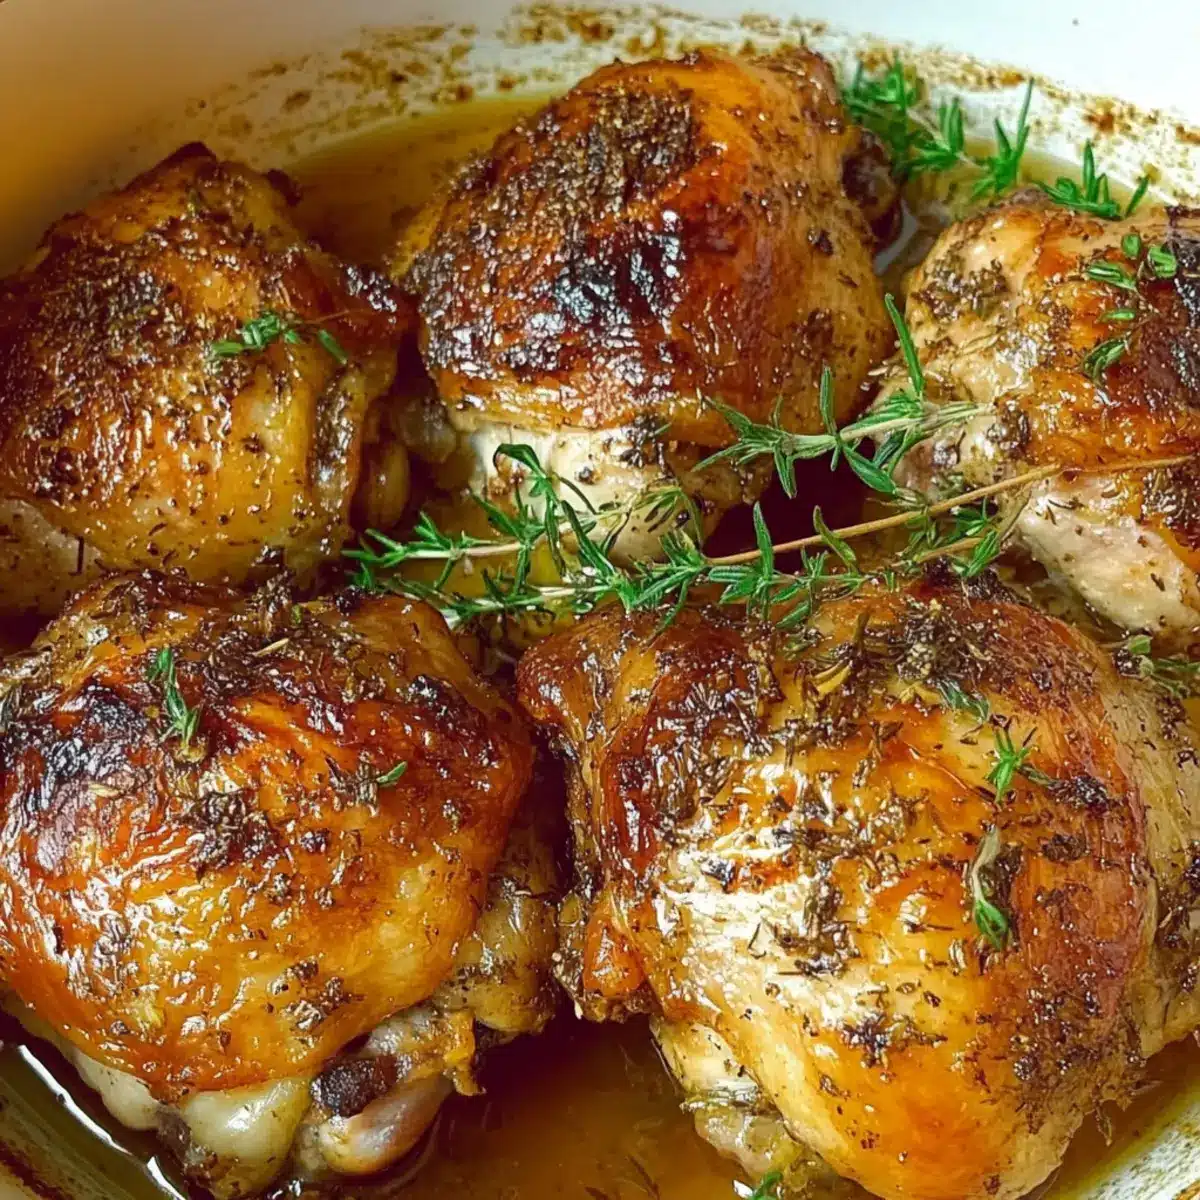
As I watched the golden skin of these oven-baked chicken thighs sizzle to perfection, I felt a rush of excitement; the smell was simply irresistible. This recipe is not just for busy weeknights—it’s tailored for anyone seeking comfort in simple, homemade meals. With juicy, tender meat and an ultra-crisp skin, these oven-baked chicken thighs will soon become your go-to dish, impressing both family and friends with minimal effort. Plus, the easy preparation means cleanup is a breeze, allowing you to savor the moments around the dinner table, worry-free. Are you ready to elevate your weeknight dinner game? Let’s dive into this delicious recipe together!
Why are Oven-Baked Chicken Thighs a Must-Try?
Simplicity at its finest: You’ll be delighted by how straightforward this recipe is, making it perfect for busy weeknights.
Irresistible flavors meld together beautifully, thanks to the harmonious blend of spices and herbs.
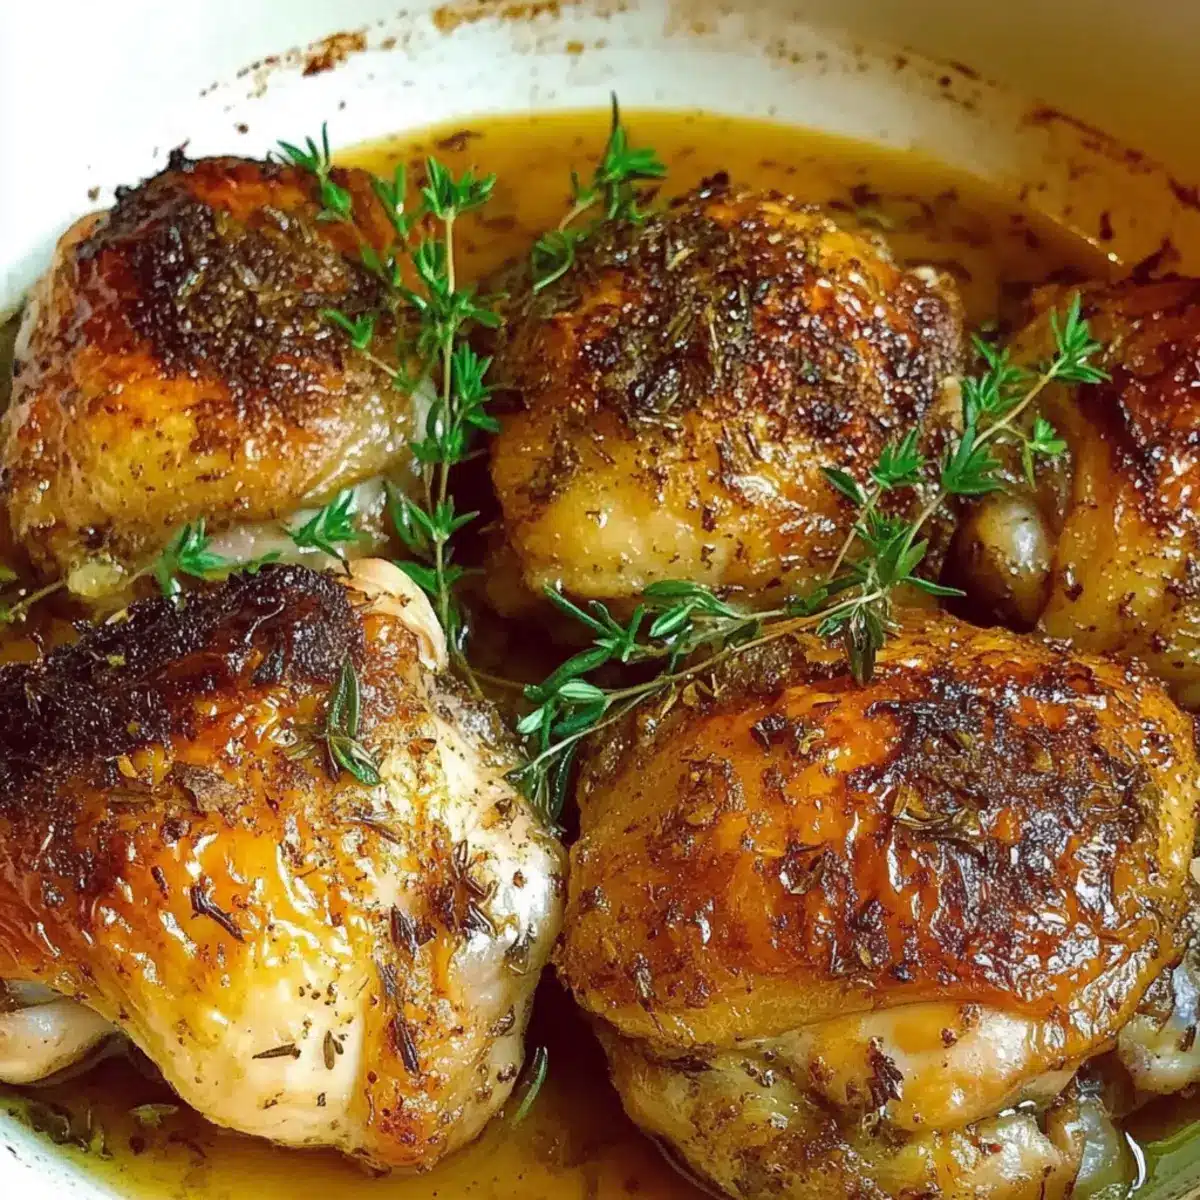
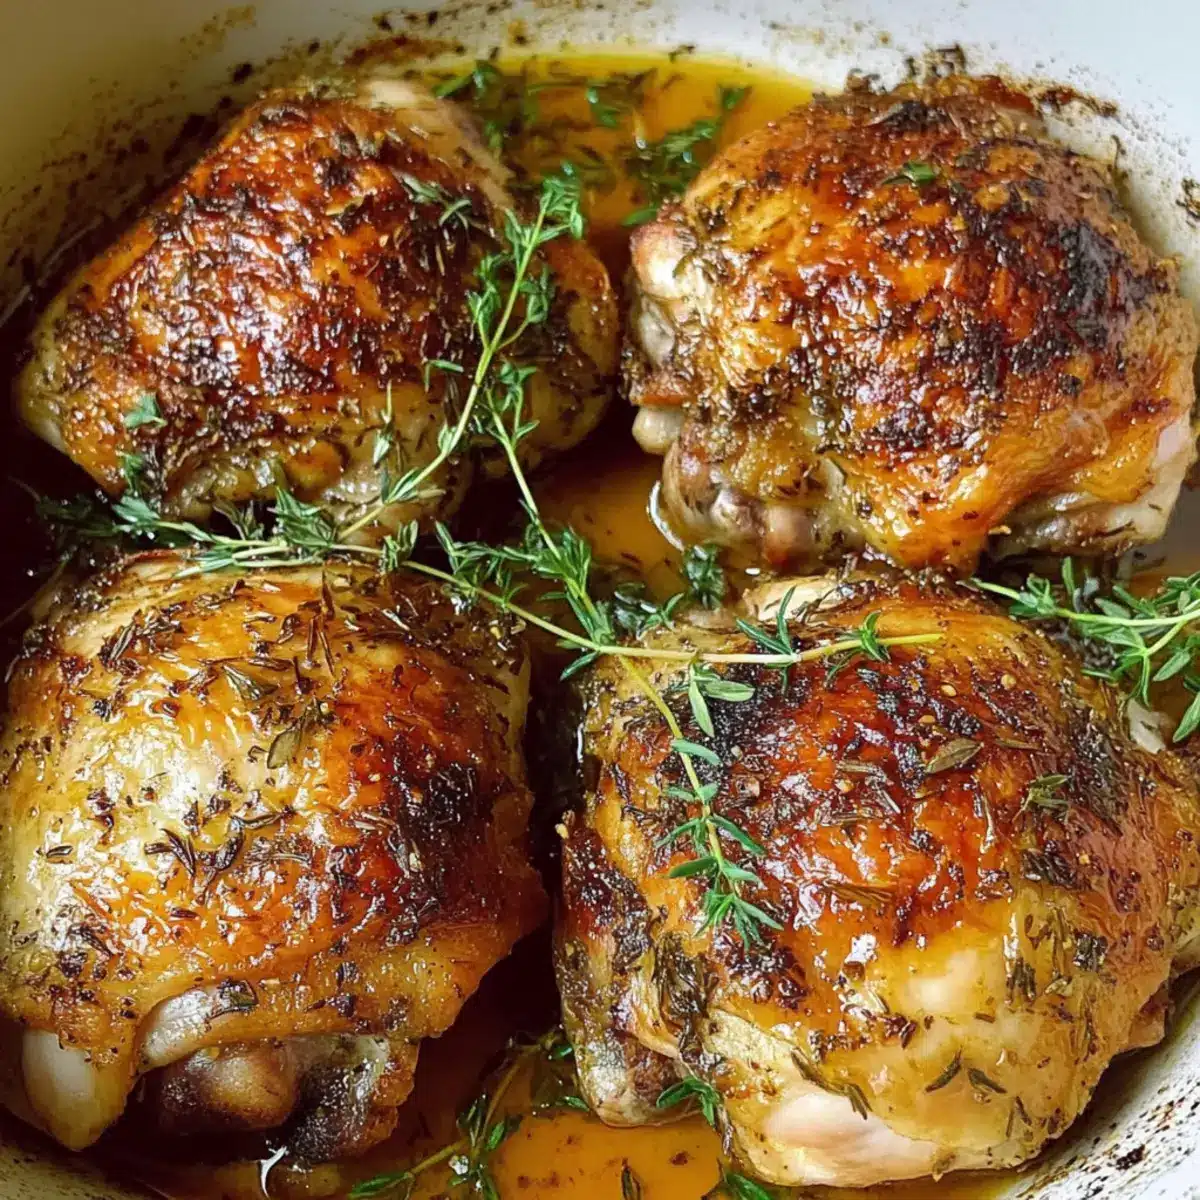
Perfectly crispy skin creates a satisfying crunch that contrasts with the juiciness of the meat underneath.
Versatile serving options abound—pair it with roasted vegetables, creamy mashed potatoes, or a light salad for a well-rounded meal.
Family-friendly appeal makes this dish a hit with everyone at the table, whether they’re kids or adults.
Minimal cleanup means you can spend more time enjoying your meal and less time washing dishes—who doesn’t love that?
Elevate your dinner routine today with these Oven-Baked Chicken Thighs that are bound to impress! They’re as delicious as Greek Chicken Gyro and as comforting as a plate of Chicken Wellington Effortlessly.
Oven-Baked Chicken Thighs Ingredients
For the Chicken
• Bone-in, skin-on chicken thighs – The ideal choice for juicy meat and crisp skin, though boneless, skinless options can be used with a shorter cooking time.
• Olive oil – Helps to lock in moisture and achieve that coveted crispy skin; vegetable oil works as a suitable substitute if needed.
For Seasoning
• Salt – Essential for enhancing flavors; adjust according to any seasoning blends you might use.
• Black pepper – Adds a touch of warmth and depth, elevating the overall taste.
• Garlic powder – Infuses an aromatic flavor that pairs perfectly with chicken.
• Onion powder – Brings sweetness and umami to the dish.
• Italian seasoning – A blend of herbs that imparts a classic flavor; consider using fresh herbs like rosemary, thyme, and oregano for a vibrant twist.
• Paprika – Adds a beautiful color and a mild smokiness to your oven-baked chicken thighs.
Elevate your culinary game with these simple ingredients, and watch how they come together to create a mouthwatering dish that everyone will crave!
Step‑by‑Step Instructions for Oven-Baked Chicken Thighs
Step 1: Preheat the Oven
Begin by preheating your oven to 400°F (200°C). This temperature is crucial for achieving that perfectly crispy skin on your oven-baked chicken thighs. While the oven warms up, take a moment to gather your ingredients and prepare your work area, setting the stage for hassle-free cooking.
Step 2: Prepare the Baking Sheet
Line a large baking sheet with aluminum foil. This will not only help with the easy cleanup but also ensure that your chicken thighs cook evenly. Take a minute to press the foil down snugly across the sheet, making sure it’s ready to catch all the delicious juices that will create a flavorful base.
Step 3: Dry the Chicken Thighs
Using paper towels, pat the bone-in, skin-on chicken thighs dry. This step is essential for promoting crispiness; moisture can ruin that desired texture. Feel free to admire how the skin tightens as it dries, setting the stage for a flavorful, crispy finish when the oven-baked chicken thighs are done.
Step 4: Arrange the Chicken Thighs
Place the dried chicken thighs in a single layer on the lined baking sheet, making sure they aren’t overlapping. This allows the heat to circulate evenly around each piece, ensuring consistent cooking. The thighs should have a little space between them as they prepare to become perfectly golden and delicious.
Step 5: Drizzle with Olive Oil
Generously drizzle olive oil over all surfaces of the chicken thighs, ensuring each piece is well coated. Use your hands to rub the oil into the skin, which will help achieve that irresistible crispiness. The oil will also lock in moisture, guaranteeing juicy meat beneath the crunchy exterior of your oven-baked chicken thighs.
Step 6: Mix the Seasoning
In a small bowl, combine salt, black pepper, garlic powder, onion powder, Italian seasoning, and paprika. Stir well until the spices are fully incorporated. This aromatic blend will elevate the flavors of your oven-baked chicken thighs, creating a delicious crust that complements the tender meat beautifully.
Step 7: Season the Chicken
Sprinkle the spice mixture generously over both sides of the chicken thighs. Each piece should be well-seasoned to bring out the best flavors. As you do this, take a moment to appreciate the vibrant colors of the spices coming together, hinting at the delicious meal that awaits.
Step 8: Bake the Chicken Thighs
Transfer the baking sheet into your preheated oven and bake the chicken thighs for 35-45 minutes. Avoid flipping them during cooking; instead, let the heat work its magic. Keep an eye on them, and look for that enticing golden-brown color to develop, indicating they are close to perfection.
Step 9: Check for Doneness
Once the baking time is nearly up, check the internal temperature of the chicken thighs with a meat thermometer. They should reach at least 165°F (74°C) in the thickest part, ensuring they are fully cooked while remaining juicy inside. This step is crucial for both safety and achieving the best flavor in your oven-baked chicken thighs.
Step 10: Let Them Rest
After removing the chicken thighs from the oven, allow them to rest for about 5 minutes before serving. This resting period helps the juices redistribute within the meat, ensuring every bite is as juicy as can be. As you wait, take in the mouthwatering aroma filling your kitchen, a sure sign you’ve created a delightful dish!
What to Serve with Classic Oven-Baked Chicken Thighs
Set the stage for a delicious home-cooked feast by pairing your golden, crispy chicken thighs with these delightful options.
-
Creamy Mashed Potatoes:
These fluffy, buttery potatoes create a comforting base, soaking up the flavorful juices from the chicken. -
Roasted Vegetables:
A colorful medley of seasonal veggies adds a lovely crunch and sweetness, creating a vibrant contrast to the savory chicken. -
Fresh Garden Salad:
Crisp greens and tangy vinaigrette brighten the meal, offering a refreshing bite to balance the richness of the chicken. -
Garlic Bread:
This warm, toasted delight is perfect for mopping up all the delicious juices from your oven-baked chicken thighs. -
Coleslaw:
Its cool, crunchy texture beautifully complements the tender, juicy chicken while adding a pop of brightness. -
Herb-Infused Quinoa:
Light and nutty, this nutrient-packed grain soaks up flavors, providing a healthy counterpoint to the glazed chicken. -
Chilled White Wine:
A glass of crisp Chardonnay or Sauvignon Blanc enhances the meal, cutting through the richness and elevating the dining experience.
How to Store and Freeze Oven-Baked Chicken Thighs
Fridge: Store leftover oven-baked chicken thighs in an airtight container and refrigerate for up to 3-4 days to keep them fresh and juicy.
Freezer: For longer storage, place cooled chicken thighs in freezer-safe bags, removing as much air as possible, and freeze for up to 3 months.
Reheating: To restore crispiness, reheat the chicken thighs in the oven at 350°F (175°C) for about 15-20 minutes, ensuring they are heated through.
Thawing: When ready to enjoy, thaw frozen chicken thighs in the fridge overnight or use the microwave’s defrost setting before reheating for the best results.
Oven-Baked Chicken Thighs Variations
Feel free to get creative and tailor these oven-baked chicken thighs to your taste, enhancing the delightful experience with every bite!
-
Spicy Cajun: Swap Italian seasoning for Cajun spices to add a fiery kick to your dish. The vibrant flavors will have your taste buds dancing!
-
Barbecue Twist: Use a smoky BBQ rub instead of traditional spices for a sweet and tangy explosion. This variation is perfect for summer vibes and outdoor dinners.
-
Herb-Infused: Replace dried Italian seasoning with fresh minced herbs like rosemary and thyme for a fragrant flavor boost. Imagine how refreshing that herb essence will be!
-
Asian Flair: Marinade chicken thighs in soy sauce, ginger, and garlic before baking to create a deliciously savory dish. Serve it over rice for a delightful fusion meal.
-
Zesty Citrus: Add the juice and zest of a lemon or orange to the olive oil before drizzling it on the chicken. The citrus notes will brighten up the flavors remarkably!
-
Sweet Honey Glaze: Drizzle honey over the chicken thighs during the last 10 minutes of baking for a sticky sweet finish that contrasts beautifully with the savory spices.
-
Garlic Lovers: Load up on fresh minced garlic or garlic powder for an enhanced aromatic experience. You’ll relish in that irresistible garlicky aroma wafting through your kitchen!
-
Nutty Crust: Coat the chicken with crushed nuts like almonds or pecans after oiling for a crunchy texture. The added nuttiness will surprise and delight your palate!
Serving these variations will take your oven-baked chicken thighs from ordinary to extraordinary! If you’re looking for more inspiration, why not try pairing them with some homemade Cheesy Garlic Chicken or exploring the vibrant flavors of Vietnamese Lemongrass Chicken?
Make Ahead Options
These Oven-Baked Chicken Thighs are perfect for meal prep enthusiasts looking to save time during busy weeknights! You can season the chicken thighs up to 24 hours in advance by following steps 1-7, then simply cover and refrigerate them to keep the flavors intact. When you’re ready to bake, just preheat your oven and pop them in for 35-45 minutes until they reach an internal temperature of 165°F (74°C). This approach not only reduces your cooking time but also enhances the flavor as the spices have more time to infuse. Rest assured, even when prepped ahead, your chicken thighs will turn out just as delicious and juicy, delivering a comforting meal your family will love.
Expert Tips for Oven-Baked Chicken Thighs
Crispy Skin Essential: Pat the chicken thighs dry thoroughly before seasoning to ensure that they’ll crisp up beautifully in the oven.
Season Generously: Don’t skimp on the spice mix; generously coating the chicken with seasoning enhances flavor and texture.
Avoid Overcrowding: Place the chicken thighs in a single layer without overlapping for even cooking and a perfectly crispy skin.
Use a Meat Thermometer: For optimal juiciness, check the internal temperature at the thickest part to reach 165°F (74°C)—stay clear of the bone.
Resting Period: Let the chicken rest for about 5 minutes after baking; this allows juices to redistribute for maximum tenderness in your oven-baked chicken thighs.
Check Baking Time: Keep an eye on the chicken, as cooking times can vary based on the size of your thighs; start checking at the 35-minute mark.

Oven-Baked Chicken Thighs Recipe FAQs
How do I choose the right chicken thighs?
Absolutely! Look for bone-in, skin-on chicken thighs as they offer the best texture and flavor. Ensure the skin is intact and the meat appears moist but not slimy. Avoid any with dark spots all over or an off smell, as these can indicate spoilage.
What is the best way to store leftover chicken thighs?
To keep your leftover oven-baked chicken thighs fresh, store them in an airtight container in the refrigerator. They’ll stay delightful for up to 3-4 days. Just make sure to let them cool down completely before sealing them to avoid condensation, which can reduce crispiness.
Can I freeze oven-baked chicken thighs?
Very! For longer storage, you can freeze your oven-baked chicken thighs. Cool them completely, then place them in freezer-safe bags, squeezing out as much air as possible. They can be frozen for up to 3 months! When you’re ready to enjoy, thaw them in the fridge overnight, and for the best texture, reheat in the oven at 350°F (175°C) for about 15-20 minutes to get that skin crispy again.
What if my chicken thighs are not crispy enough?
No worries! If your chicken thighs didn’t get that golden, crispy skin you were hoping for, here are a few troubleshooting tips:
- Make sure to pat the chicken dry before seasoning to eliminate excess moisture.
- Increase the oven temperature by 25°F (about 15°C) and keep an eye on them as baking time may decrease.
- Consider using a broiler for the last 2-3 minutes of cooking to enhance crispiness, but watch closely to prevent burning.
Are these chicken thighs suitable for kids with allergies?
Very good question! The standard recipe is suitable for many diets, but if your child has allergies, please be mindful especially of the spices used (like garlic and onion powder). You can modify the seasoning with safe substitutes like herbs or omit them entirely. Always check packaging for potential allergens when purchasing pre-made spice blends.
How can I reheat chicken thighs while keeping them crispy?
To revive the crispiness of your oven-baked chicken thighs, preheat your oven to 350°F (175°C). Place the leftovers on a baking sheet and reheat for about 15-20 minutes, ensuring they are heated through. This method helps keep the skin crackly and flavorful while ensuring the meat stays juicy!
Oven-Baked Chicken Thighs for Irresistible Crispy Juiciness
Ingredients
Equipment
Method
- Preheat your oven to 400°F (200°C).
- Line a large baking sheet with aluminum foil.
- Pat the chicken thighs dry with paper towels.
- Arrange the chicken thighs in a single layer on the lined baking sheet.
- Drizzle olive oil over all surfaces of the chicken thighs.
- In a small bowl, mix together salt, black pepper, garlic powder, onion powder, Italian seasoning, and paprika.
- Sprinkle the seasoning mix generously over both sides of the chicken thighs.
- Bake the chicken thighs for 35-45 minutes.
- Check the internal temperature; it should reach 165°F (74°C).
- Allow the chicken to rest for about 5 minutes before serving.
Leave a Reply