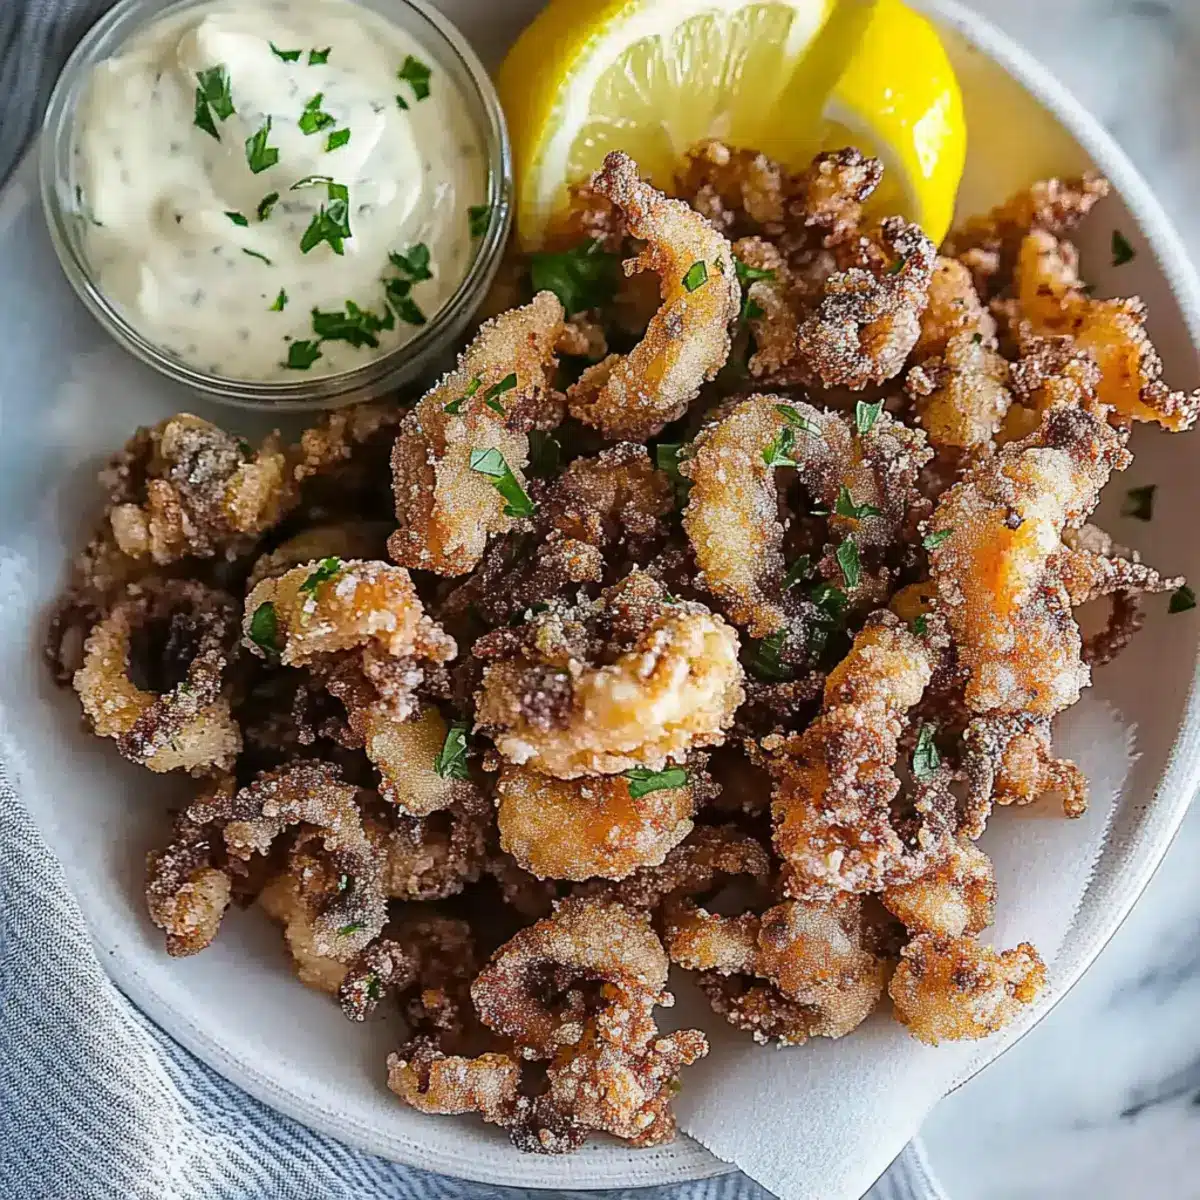
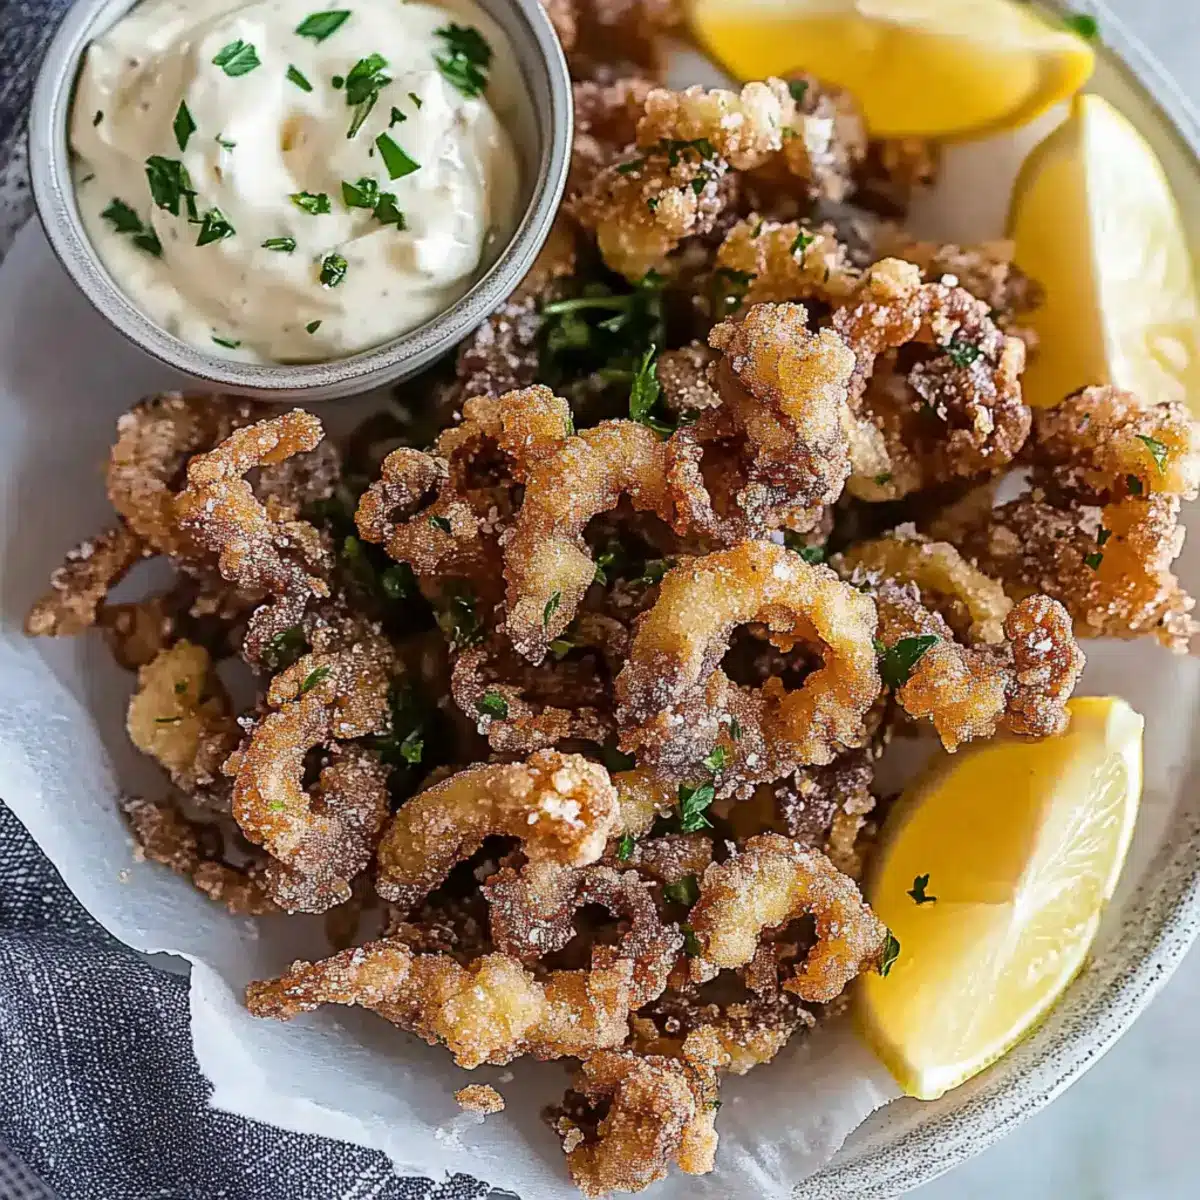
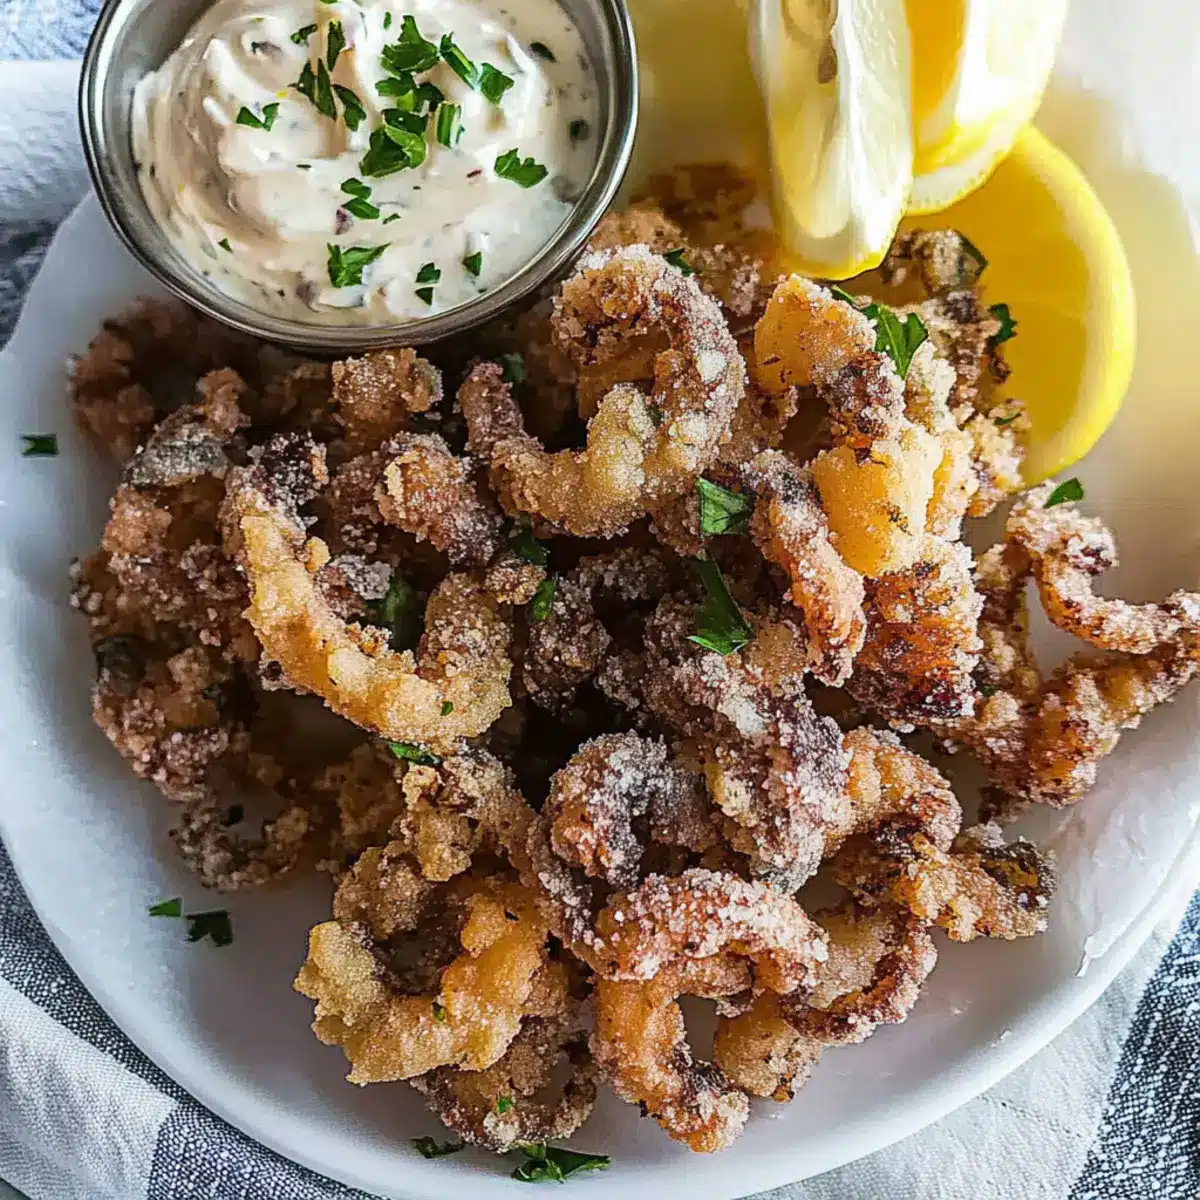
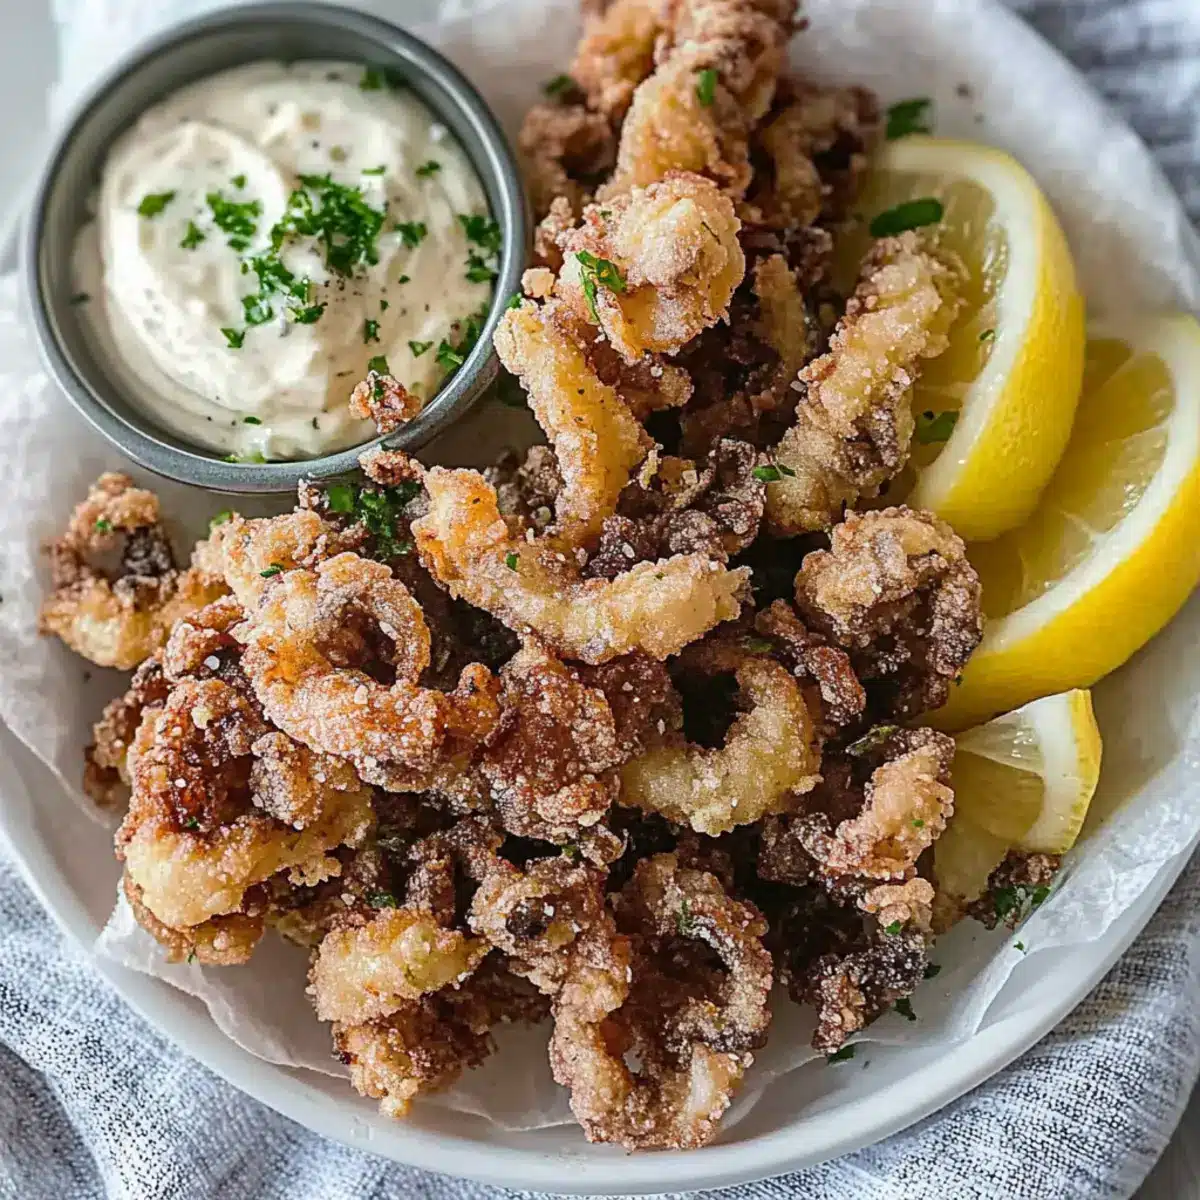
As I stood in my kitchen, the fragrant aroma of hot oil igniting my senses, I couldn’t help but feel excited about creating a dish that so many love—Crispy Salt and Pepper Fried Calamari. This Mediterranean-inspired appetizer is not only a showstopper for gatherings but also a quick indulgence for a weeknight dinner. With its perfectly golden exterior and tender squid inside, it’s hard to resist the delightful crunch with each bite. Plus, the pairing of fresh lemon and creamy garlic mayo elevates this dish to another level of enjoyment. Whether you’re looking to impress guests or satisfy your late-night cravings, this simple recipe is sure to become your new go-to. How about diving into this culinary adventure together?
Why is Crispy Fried Calamari a Must-Try?
Irresistible Crunch: The crispy coating creates a delightful crunch that pairs perfectly with the tender squid inside, making each bite satisfying.
Quick and Easy: With simple ingredients and straightforward steps, you can whip up this culinary treat in no time, perfect for both novice and seasoned cooks.
Versatile Appetizer: Serve these golden delights on their own or elevate your meal with a refreshing salad or as part of a Mediterranean spread alongside a refreshing Vegan Pineapple Fried.
Flavor Boost: With just salt and pepper, you can enjoy a straightforward yet robust flavor; add some cayenne for a spicy twist if you wish!
Crowd-Pleasing: Ideal for gatherings, this dish is always a hit, creating a fun atmosphere around dipping and sharing.
Salt and Pepper Fried Squid Ingredients
For the Calamari
- Squid – The star of the dish, ensuring a tender bite; you can also use shrimp for a delicious variation.
- Flour – A key ingredient for creating a crispy coating; substitute with gluten-free flour if needed.
- Cornstarch – Helps enhance the crunch factor; feel free to use more flour if cornstarch is unavailable.
- Baking Powder – Lightens the batter for that fluffy texture; it’s optional if avoiding chemical leaveners.
- Salt – Essential for flavor enhancement; adjust to your personal taste.
- Black Pepper – Adds a subtle spice; experiment with cayenne pepper for an extra kick!
For Frying
- Oil – A high smoke point oil like vegetable or canola oil is best for frying.
For the Dipping Sauce
- Mayonnaise – Provides creaminess for the sauce; swap with Greek yogurt for a lighter option.
- Garlic – Freshly minced garlic enhances the mayo’s flavor; use as much as you like for a robust taste.
- Lemon Wedges – The perfect finishing touch, adding brightness and cut through the richness of the fried squid.
Step‑by‑Step Instructions for Salt and Pepper Fried Squid
Step 1: Prep the Squid
If your squid is frozen, place it in the refrigerator overnight to defrost. Once thawed, drain and pat the squid dry using paper towels to remove excess moisture. If using whole squid, cut them into thick rings, about half an inch in width, to ensure even cooking. This step is vital for achieving that crispy coating when you fry the salt and pepper fried squid.
Step 2: Make the Coating
In a large mixing bowl, combine flour, cornstarch, baking powder, salt, and black pepper. Whisk these dry ingredients together until evenly incorporated, creating a light and airy batter. The baking powder will help the coating puff slightly during frying, ensuring a perfect crunch. This mixture will be crucial for coating your squid in the next step to achieve sensational crispy salt and pepper fried squid.
Step 3: Dredge the Squid
Add your cleaned squid rings into the flour mixture and toss them well to ensure an even coating. Make sure each piece is fully covered and separate from each other to prevent clumping. This step is essential for that enticing crispiness; a well-dredged squid will fry up beautifully. Let the coated squid rest for about 5 minutes to allow the coating to adhere better.
Step 4: Heat the Oil
In a large pot or Dutch oven, pour enough oil to submerge the squid about 2-3 inches deep. Heat the oil over medium-high heat until it reaches around 350°F (175°C). You can test if the oil is ready by dropping in a small amount of the coating; if it sizzles immediately, you’re ready to fry. This hot oil is crucial for achieving that golden-brown color and crispy texture with your salt and pepper fried squid.
Step 5: Fry the Squid
Shake off any excess flour from the squid rings before carefully dropping them into the hot oil in batches. Fry each batch for about 2-3 minutes or until they turn golden brown and crispy. Avoid overcrowding the pot, which can lower the oil temperature and prevent even cooking. Once done, use a slotted spoon to remove the squid and place it on a paper towel-lined plate.
Step 6: Drain the Squid
After frying, let the fried squid drain on paper towels or a wire rack to absorb any excess oil. This step helps maintain the crispiness of your salt and pepper fried squid. If you desire, sprinkle a touch more salt over the top while they are still hot for an extra flavor boost. Allow them to cool slightly before serving, as they will be extremely hot.
Step 7: Prepare the Dipping Sauce
In a small bowl, mix together mayonnaise and freshly minced garlic until well combined. Adjust the amount of garlic based on your flavor preference, but a good baseline is about one clove for every half cup of mayo. This creamy garlic mayo acts as the perfect dipping sauce, balancing the richness of the fried squid while enhancing its flavor incredibly.
Step 8: Serve
To serve your delicious salt and pepper fried squid, arrange them on a platter accompanied by the garlic mayo dip. Add fresh lemon wedges on the side for squeezing over the squid, which brightens the flavors beautifully. This final step makes for an inviting presentation and elevates the tasting experience, turning your crispy fried calamari into a fantastic treat for any occasion.
Salt and Pepper Fried Squid Variations
Feel free to explore these delightful twists to customize your crispy calamari experience!
-
Gluten-Free: Substitute regular flour with gluten-free flour to cater to dietary needs while keeping that delicious crunch.
-
Spicy Kick: Add cayenne pepper or chili flakes to the flour mixture for a fiery twist that will tingle your taste buds. A little heat balances the rich flavor of the squid beautifully!
-
Herbal Infusion: Incorporate dried herbs like oregano or thyme into the coating for an aromatic surprise. This will not only enhance flavor but also add a wonderful essence to your calamari.
-
Air-Fryer Alternative: Use an air fryer instead of deep frying for a healthier option. Just spray the coated squid lightly with oil before cooking to achieve that desired crispiness everyone adores.
-
Zesty Lemon Pepper: Spice up your seasoning by adding lemon zest into the flour. This bright touch complements the squid and elevates each bite with a refreshing zing.
-
Panko Crunch: Mix panko breadcrumbs with your flour for an extra crispy texture. The larger breadcrumb size creates a delightful crunch that contrasts wonderfully with the tender squid.
-
Substitute with Shrimp: Try using shrimp instead of squid for a different but equally delicious seafood flavor. Simply adjust cooking time for perfectly tender bits.
-
Tempura Style: For a lighter batter, use a simple tempura mixture—this will result in an even fluffier coating! Perfect for those who prefer a less rich option while savoring the squid’s essence.
Feel free to pair your fried squid with a refreshing salad or dive into a plate of Cauliflower Fried Rice to counterpoint the richness of the dish. Happy cooking!
How to Store and Freeze Salt and Pepper Fried Squid
Fridge: Store leftover fried squid in an airtight container for up to 2 days. For optimal flavor and texture, enjoy it fresh, but if you need to store it, keeping it sealed will help retain moisture.
Freezer: While it’s best enjoyed fresh, you can freeze un-fried coated squid. Place them in a single layer on a baking sheet until frozen, then transfer to a freezer bag for up to 3 months.
Reheating: To reheat leftover fried squid, preheat your oven to 375°F (190°C). Place the squid in a single layer on a baking sheet and heat for about 10-15 minutes until crispy again. This method helps regain that delicious crunch!
Serving Suggestion: If you’re enjoying fried squid as leftovers, serve it alongside the garlic mayo and a squeeze of fresh lemon to refresh the flavors!
Expert Tips for Crispy Salt and Pepper Fried Calamari
-
Dry Thoroughly: Ensure the squid is well-dried before frying to prevent excess oil splatter, leading to a cleaner cooking process.
-
Heat Control: Maintain the oil temperature around 350°F (175°C). Too hot can burn the salt and pepper fried squid; too low will result in sogginess.
-
Batch Frying: Fry the squid in smaller batches to avoid overcrowding the pot. This ensures even cooking and a crispy finish for every piece.
-
Coating Resting Time: Allow the coated squid to rest for about 5 minutes before frying. This helps the coating adhere better, leading to a crunchier texture.
-
Finish Strong: A quick sprinkle of salt immediately after frying enhances the flavor and keeps the final dish savory and appealing.
Make Ahead Options
These crispy salt and pepper fried calamari are perfect for those bustling weeknights when time is of the essence! You can prepare the squid by cleaning and cutting it into rings up to 24 hours in advance, then store it in an airtight container in the fridge. The coating mixture of flour, cornstarch, and seasoning can also be prepped ahead; keep it sealed in a separate container for up to 3 days. When you’re ready to serve, simply dredge the squid in the coating and fry it fresh for that irresistible crunch. Keeping the components separate until cooking helps maintain quality, ensuring that your fried calamari are just as delicious as when freshly made!
What to Serve with Crispy Salt and Pepper Fried Calamari
Elevate your culinary experience by pairing this crunchy delight with complementary sides and drinks that enhance every bite.
-
Garlic Bread: The buttery, toasted bread not only acts as a base for dipping but also complements the rich flavors of the garlic mayo.
-
Mediterranean Salad: A crisp, refreshing salad with cucumbers, tomatoes, and olives brings a burst of freshness, balancing the dish’s richness.
-
Tzatziki Sauce: This cool, creamy Greek dip adds a refreshing tang that beautifully counteracts the savory crunch of the fried calamari.
-
Pineapple Cilantro Rice: The sweet and zesty flavors of this rice dish add a wonderful contrast, making every bite an adventure in flavors.
-
Sweet Potato Fries: Their natural sweetness and crispy texture pair well with fried squid, offering a delightful balance of flavors and textures.
-
Chilled White Wine: A glass of chilled Sauvignon Blanc or Pinot Grigio complements the calamari’s oceanic flavors while enhancing the overall dining experience.
-
Lemon Sorbet: A light, zesty palate cleanser that refreshes the senses after indulging in the squids’ richness, making it an excellent dessert choice.
-
Herbed Quinoa: Served warm or cold, this nutty side is packed with protein and flavor, giving a wholesome, nutritious touch to your meal.
-
Sparkling Water with Lime: Elevate your dining experience with this effervescent drink that adds a bubbly zest, perfectly matching the calamari’s crispiness.
Salt and Pepper Fried Squid Recipe FAQs
How do I select the freshest squid?
Absolutely! When choosing squid, look for firm, glossy skin and a mild, briny scent. Fresh squid should have no dark spots or discoloration. If you can, ask your fishmonger for squid that’s been caught that day for the best flavor and texture.
What’s the best way to store leftover fried squid?
Very! Store leftover fried squid in an airtight container in the fridge for up to 2 days. To maintain crispiness, avoid stacking them on top of each other. Reheat in the oven to restore their crunch—just place them on a baking sheet at 375°F (190°C) for about 10-15 minutes.
Can I freeze un-fried coated squid?
Yes, indeed! To freeze un-fried coated squid, spread them out in a single layer on a baking sheet first, and freeze until solid. Then, transfer them to a zip-top freezer bag for storage. They can last up to 3 months in the freezer. When you’re ready, just fry them straight from frozen—no need to thaw!
What should I do if my coating doesn’t stick to the squid?
No worries! First, ensure the squid is patted dry thoroughly to remove moisture. After dredging, let the coated squid rest for about 5 minutes. This resting time allows the coating to adhere better. If you’re still having trouble, a light dusting of cornstarch before the flour mixture can assist with adhesion.
Is this dish safe for people with shellfish allergies?
Very! This recipe contains only squid and common allergens like flour, so it is generally safe for those without seafood allergies. However, those with shellfish allergies should avoid it altogether, as squid is a cephalopod, which is considered a type of shellfish. Always check ingredient labels to ensure safety!
How can I make this dish gluten-free?
Absolutely! Simply substitute the all-purpose flour with a gluten-free flour blend. Make sure to verify the cornstarch is gluten-free as well, and adjust to your taste. Follow the other steps as normal, and you’ll enjoy delicious, gluten-free salt and pepper fried squid!
Crispy Salt and Pepper Fried Squid for a Perfect Snack
Ingredients
Equipment
Method
- If your squid is frozen, place it in the refrigerator overnight to defrost. Once thawed, drain and pat the squid dry using paper towels to remove excess moisture. If using whole squid, cut them into thick rings, about half an inch in width.
- In a large mixing bowl, combine flour, cornstarch, baking powder, salt, and black pepper. Whisk these dry ingredients together until evenly incorporated.
- Add your cleaned squid rings into the flour mixture and toss them well to ensure an even coating. Let the coated squid rest for about 5 minutes.
- In a large pot, pour enough oil to submerge the squid about 2-3 inches deep. Heat the oil over medium-high heat until it reaches around 350°F (175°C).
- Shake off any excess flour from the squid rings before carefully dropping them into the hot oil in batches. Fry each batch for about 2-3 minutes until golden brown.
- After frying, let the fried squid drain on paper towels or a wire rack to absorb any excess oil.
- In a small bowl, mix together mayonnaise and freshly minced garlic until well combined. Adjust garlic based on your flavor preference.
- To serve, arrange the fried squid on a platter accompanied by the garlic mayo dip and fresh lemon wedges.
Leave a Reply