If you’ve ever thought about how the simplest ingredients can unite to create pure magic, you’re not alone. Take chocolate chip cookies, for instance; they’ve been bringing smiles for generations. These Chewy Classic Chocolate Chip Cookies offer that irresistible combination of crispy edges and a soft, gooey center that makes homemade baking a true delight. With minimal fuss and a straightforward method, you can whip up a batch that satisfies every sweet tooth in the house. Plus, they’re adaptable, allowing you to mix in your favorite add-ins, whether it’s nuts for that extra crunch or a sprinkle of sea salt for a gourmet touch. So, are you ready to embrace the joy of baking and dive into the world of these delightful treats?
Why are these cookies a must-bake?
Simplicity at Its Best: With just a handful of ingredients, these cookies come together effortlessly, making them perfect for both novice and seasoned bakers.
Irresistibly Chewy: Enjoy a delightful texture that’s crispy on the edges and soft in the center, creating a satisfying bite that everyone loves.
Customizable: Whether you want to add nuts or a hint of espresso, the variations are endless—let your creativity shine!
Crowd-Pleasing: These classic chocolate chip cookies are sure to impress at any gathering, from casual family dinners to festive celebrations. Pair them with a glass of cold milk or a scoop of vanilla ice cream for the ultimate experience!
Quick to Make: Ready to bake in just under 15 minutes, they’re the perfect solution for last-minute sweet cravings or cozy nights in. Get ready to fill your kitchen with the warm aroma of freshly baked goodness!
Classic Chocolate Chip Cookie Ingredients
• Classic Chocolate Chip Cookie Ingredients to satisfy your sweet tooth!
For the Cookie Dough
- All-purpose flour – Provides the structure; whole wheat flour can give a heartier bite.
- Granulated sugar – Adds sweetness and contributes to a crispy texture; consider coconut sugar as a healthier alternative.
- Brown sugar – Brings moisture and flavor depth; light or dark variations work well interchangeably.
- Unsalted butter – Elevates flavor richness; ensure it’s room temperature for blending ease; vegan butter is a great substitute.
- Eggs – Acts as a binder and adds moisture; swap for flax eggs (1 tablespoon ground flax + 2.5 tablespoons water) for a vegan option.
- Vanilla extract – Enhances the overall flavor; opt for pure vanilla extract for the best results.
- Baking soda – A leavening agent for the perfect cookie rise; avoid substitutes unless necessary.
- Salt – Balances sweetness and enhances flavor; sea salt or kosher salt add a gourmet touch.
- Chocolate chips – The star of the show, sweet and melty; substitute with dark or white chocolate chips for a fun twist.
Optional Toppings and Mix-Ins
- Nuts – Add walnuts or pecans for extra crunch and flavor.
- Espresso powder – A teaspoon can amplify the chocolate taste dramatically.
- Dried fruits – Mix in cranberries or shredded coconut to add a fruity zest to your cookies.
These delicious ingredients come together to craft your favorite Classic Chocolate Chip Cookies, ensuring that every bite is a mouthwatering experience!
Step‑by‑Step Instructions for Chewy Classic Chocolate Chip Cookies
Step 1: Preheat the Oven
Begin by preheating your oven to 350°F (175°C). While the oven heats, line a baking sheet with parchment paper to prevent the cookies from sticking. This step ensures that your Chewy Classic Chocolate Chip Cookies will bake evenly, achieving that perfect golden color on the edges.
Step 2: Cream the Butters and Sugars
In a large mixing bowl, combine the softened unsalted butter with granulated sugar and brown sugar. Using a hand mixer or a wooden spoon, cream them together on medium speed until the mixture becomes light and fluffy, approximately 2-3 minutes. This process incorporates air into the batter, contributing to a delightful texture in your cookies.
Step 3: Add in Eggs and Vanilla
Next, beat in the eggs, one at a time, ensuring each is fully incorporated before adding the next. Add the vanilla extract and mix until the ingredients are smooth and cohesive. This mixture will enhance the overall flavor of your Chewy Classic Chocolate Chip Cookies, making them irresistibly tasty.
Step 4: Combine Dry Ingredients
In a separate bowl, combine all-purpose flour, baking soda, and salt. Gradually add this dry mixture to your wet ingredients, stirring gently until just combined. Be careful not to overmix, as this can lead to tough cookies. You want the dough to remain slightly soft and evenly blended for the best texture.
Step 5: Fold in the Chocolate Chips
Gently fold in the chocolate chips with a spatula or wooden spoon, ensuring they are evenly distributed throughout the dough. This will ensure every bite of your Chewy Classic Chocolate Chip Cookies is packed with sweet, melty chocolate goodness.
Step 6: Scoop the Dough
Using a cookie scoop or spoon, drop balls of dough onto the prepared baking sheet, leaving about 2 inches between each cookie for spreading. Make sure the dough is evenly spaced to allow for even baking. This ensures that your cookies won’t merge together while cooking, keeping them perfectly shapely.
Step 7: Bake the Cookies
Place the baking sheet in the preheated oven and bake for 10-12 minutes. Look for golden edges with soft centers that are set but not overcooked. This is crucial for achieving that ideal chewy consistency in your cookies. Once baked, remove them from the oven to cool slightly on the baking sheet.
Step 8: Cool and Transfer
Allow the cookies to sit on the baking sheet for a few minutes before transferring them to a wire rack to cool completely. This step helps them firm up while maintaining that soft, gooey center we all love in Chewy Classic Chocolate Chip Cookies. Enjoy their warm, comforting aroma as they cool!
Storage Tips for Classic Chocolate Chip Cookies
-
Room Temperature: Store your cookies in an airtight container at room temperature for up to 1 week. This keeps them soft and chewy, ready for whenever a sweet craving strikes!
-
Fridge: If you prefer a firmer cookie, store them in the refrigerator for up to 2 weeks. Just allow them to come back to room temperature before enjoying.
-
Freezer: For long-term storage, freeze the cookies in a single layer on a baking sheet, then transfer to a freezer-safe bag for up to 2 months. Thaw naturally or pop them in the microwave for a few seconds to revive their gooey goodness.
-
Reheating: To revive cookies after freezing, reheat in the oven at 350°F for 5-7 minutes. This recreates that freshly baked texture, making your Classic Chocolate Chip Cookies feel brand new!
Make Ahead Options
These Chewy Classic Chocolate Chip Cookies are perfect for meal prep enthusiasts! You can prepare the dough up to 24 hours in advance by mixing all the wet ingredients, adding the dry ingredients, and folding in the chocolate chips. Once combined, simply cover the bowl with plastic wrap and refrigerate it to maintain freshness and prevent the dough from drying out. When you’re ready to bake, scoop the chilled dough onto a lined baking sheet and let it come to room temperature for about 10 minutes before baking. This method not only saves you time on busy days but ensures your cookies have that just-baked, deliciously chewy texture every time!
No Bake Chocolate Chip Cookie Variations
Feel free to explore the delightful world of customization with these classic cookies, transforming each batch into a personal masterpiece.
- Chewy Twist: Chill the dough before scooping to enhance chewiness—a secret that transforms the texture beautifully.
- Nutty Addition: Fold in half nuts like walnuts or pecans for crunch and an exciting flavor boost. The combination of chocolate and nuts adds an irresistible depth to every bite.
- Flavor Boost: Incorporate a teaspoon of espresso powder into your dry ingredients. This trick amplifies the chocolate flavor, creating a richer, more complex taste.
- Dried Fruit Delight: Mix in dried fruits, such as cranberries or chopped apricots, for a sweet and tangy twist that complements the chocolate.
- Different Chocolates: Swap out chocolate chips for dark, milk, or even white chocolate—each offers a different experience. A combination of chocolates creates layers of flavor you’ll love!
- Coconut Crunch: Add shredded coconut to the dough for a tropical twist that pairs beautifully with chocolate’s richness. The texture will surprise and delight your taste buds.
- Salted Caramel Drizzle: Drizzle melted caramel on top of the cooled cookies for an indulgent dessert experience. Don’t forget a sprinkle of sea salt to balance the sweetness!
- Experiment with Extracts: Try almond or hazelnut extract instead of vanilla for a unique flavor profile—it’s a simple change that yields delicious results.
For more incredible dessert ideas, don’t forget to check out my Japanese Cotton Cheesecake or indulge in a rich Chocolate Raspberry Cheesecake. Each recipe is designed to inspire your next baking adventure!
Expert Tips for Chewy Classic Chocolate Chip Cookies
-
Avoid Overmixing: Mix the dough just until combined after adding flour to prevent tough cookies. Remember, it’s okay if there are a few floury streaks!
-
Chill the Dough: For chewier cookies, chill your dough for at least 30 minutes before baking. This helps the flavors meld beautifully and enhances texture.
-
Room Temperature Butter: Make sure your butter is softened at room temperature, not melted, to achieve that rich, chewy consistency in your cookies.
-
Pinch of Sea Salt: For a gourmet touch, sprinkle sea salt on top before baking. This enhances the chocolate flavor, making your cookies unforgettable!
-
Watch the Baking Time: Keep an eye on your cookies while they bake. They should be golden at the edges and soft in the center for the perfect chewy texture.
Feel free to have fun with this classic recipe and make it truly yours!
What to Serve with Chewy Classic Chocolate Chip Cookies
Indulging in warm, freshly baked cookies creates the perfect cozy ambiance for gatherings or quiet evenings at home.
-
Cold Glass of Milk: A timeless pairing that perfectly balances sweetness, complementing the rich chocolate flavor while enhancing the cookie’s texture.
-
Vanilla Ice Cream Scoop: The creamy coldness melts beautifully over warm cookies, creating a delightful contrast that’s sure to satisfy your sweet tooth.
-
Fresh Berries: Juicy berries like strawberries or raspberries add a refreshing tartness, brightening the flavors and balancing the richness of the cookies.
-
Espresso or Coffee: A warm cup of coffee or espresso elevates the chocolate taste. The bitterness of the drink enhances the sweetness of the cookies, creating a delightful harmony.
-
Hot Chocolate: For chocolate lovers, nothing beats pairing these cookies with a steaming cup of rich hot chocolate for an indulgent treat.
-
Whipped Cream: Light and fluffy whipped cream on the side serves as a perfect dip, adding a creaminess that pairs beautifully with the chewy cookies.
-
Chocolate Fondue: Dip pieces of cookie into warm chocolate fondue for a luxurious dessert experience that will surely impress family and friends.
-
Caramel Sauce Drizzle: A warm drizzle of caramel sauce on top creates a luscious finish, adding depth to the dessert experience with its buttery sweetness.
-
Fruit Salad: A fresh fruit salad can provide a refreshing crunch, offering a lighter contrast to the decadence of the cookies.
Classic Chocolate Chip Cookies Recipe FAQs
What type of flour should I use for these cookies?
All-purpose flour is ideal for achieving the perfect structure in your chewy classic chocolate chip cookies. However, you can use whole wheat flour if you prefer a heartier texture. Just keep in mind that it may slightly alter the flavor. I often recommend sticking with all-purpose flour for traditional chewyness.
How should I store leftover cookies?
To keep your cookies fresh, store them in an airtight container at room temperature for up to 1 week. If you want to extend their shelf life, you can refrigerate them for up to 2 weeks in a tightly sealed container. This method works well, especially if you enjoy chilled cookies!
Can I freeze the cookie dough?
Absolutely! To freeze your cookie dough, scoop individual portions onto a baking sheet lined with parchment paper. Flash freeze them for about 30 minutes, then transfer the dough balls into a zip-top bag or airtight container. They can be stored in the freezer for up to 3 months. When you’re ready to bake, you can bake them directly from the freezer; just add a couple of extra minutes to the baking time.
What should I do if my cookies turn out too flat?
If your cookies spread too much, there are a few things to check. First, ensure your butter is at room temperature, not melted. Next, make sure you’re measuring your flour correctly—too little flour can lead to flat cookies. Chill the dough for at least 30 minutes before baking to help maintain shape. Lastly, check your baking soda freshness; expired baking soda can affect the rise.
Are there any allergy considerations for this recipe?
Yes, always consider any allergies among those who will enjoy these cookies. For nut allergies, avoid chocolate chips with nuts or opt for nut-free chocolate. If dairy is a concern, vegan butter can be used instead of regular butter. Also, be cautious with egg replacements if someone has an egg allergy; flax eggs (1 tablespoon ground flaxseed plus 2.5 tablespoons water) work well as a substitute for a vegan option.
Can I make these cookies gluten-free?
Definitely! You can use a 1:1 gluten-free baking flour blend that contains xanthan gum, which helps with elasticity. Be sure to check for chocolate chips that are gluten-free as well. This option allows everyone to enjoy the magic of chewy classic chocolate chip cookies, which is always the goal!
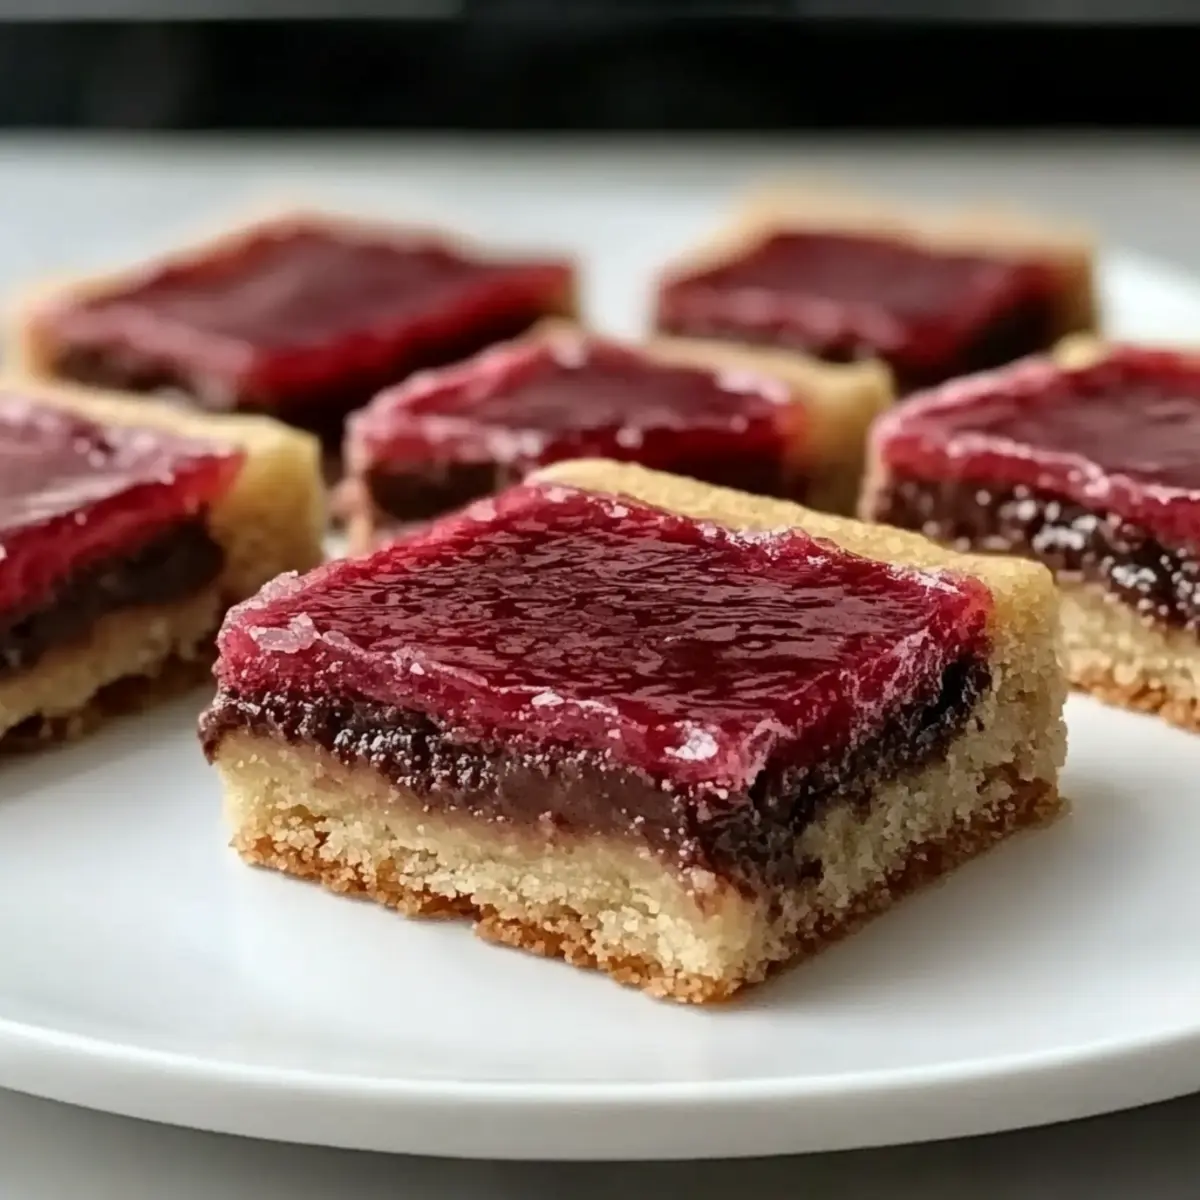
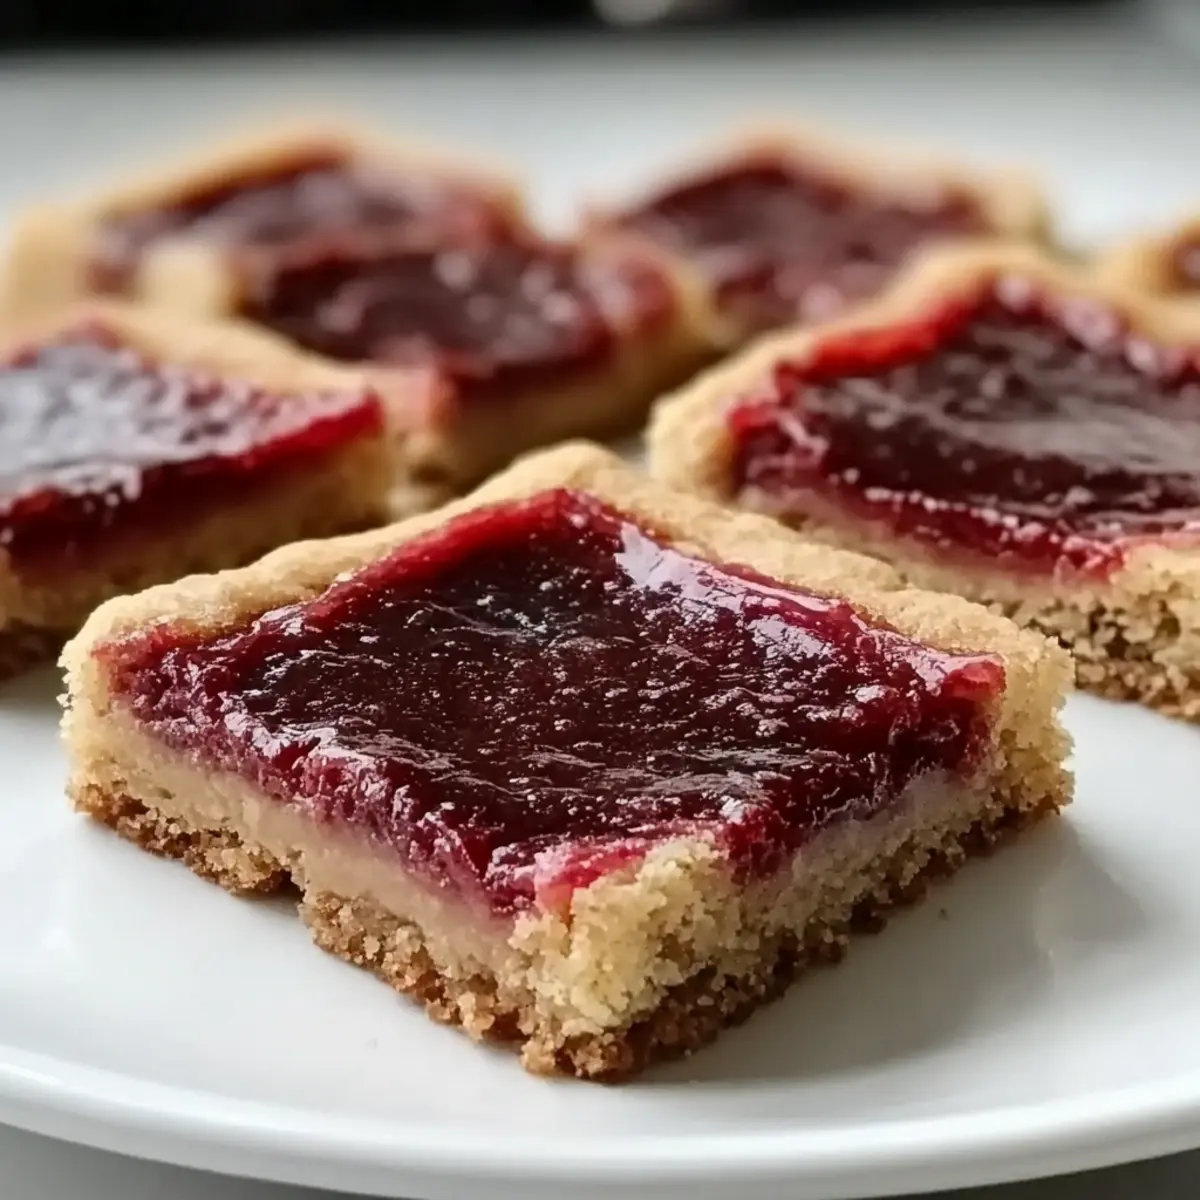
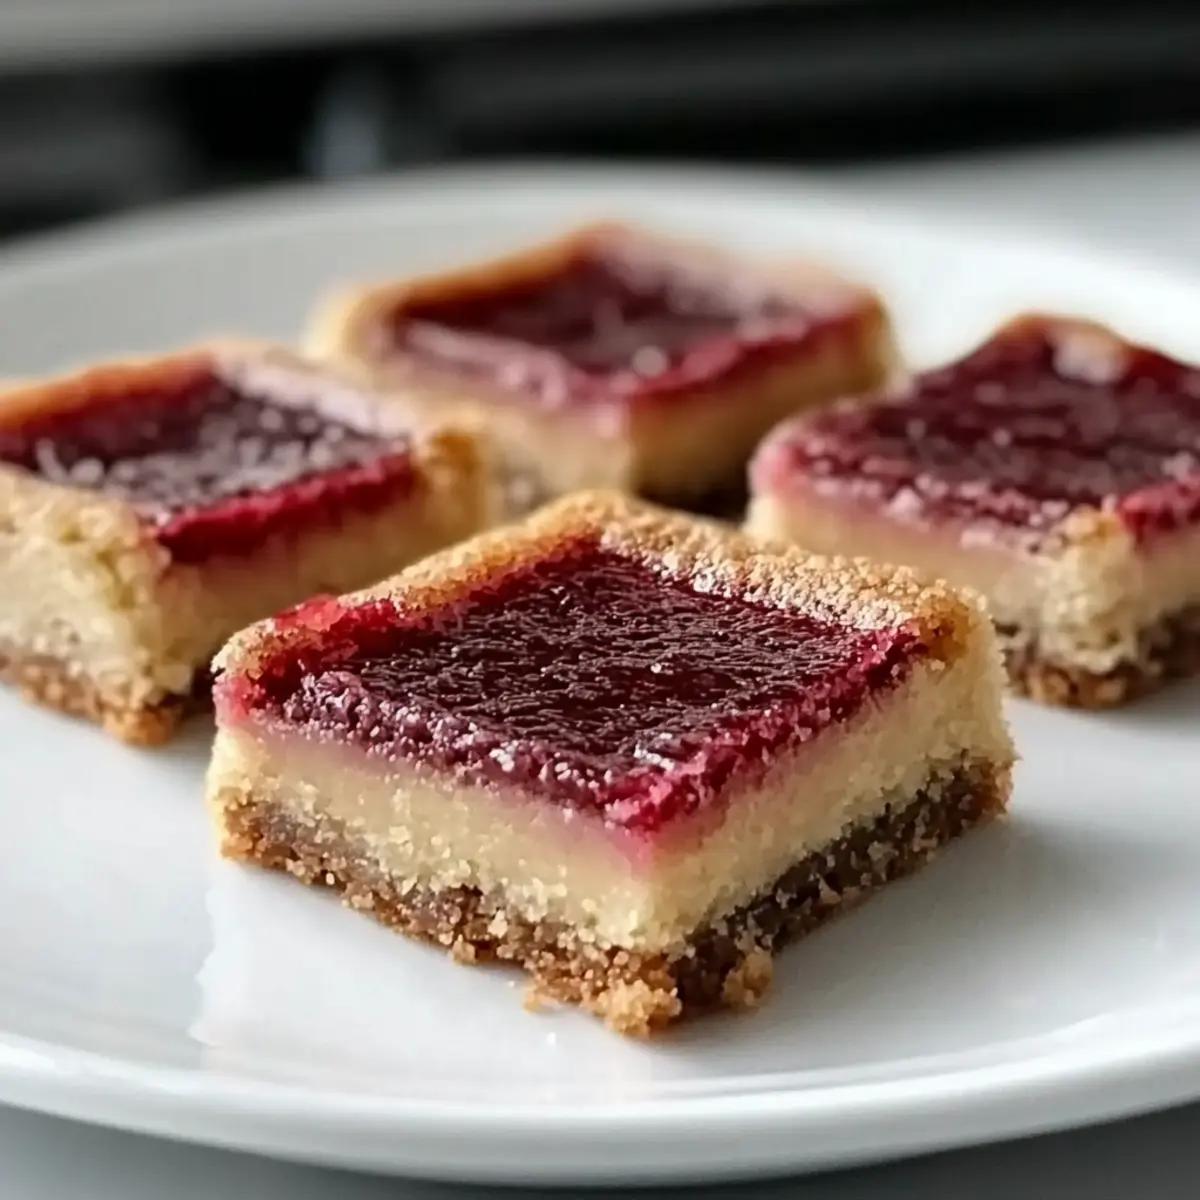
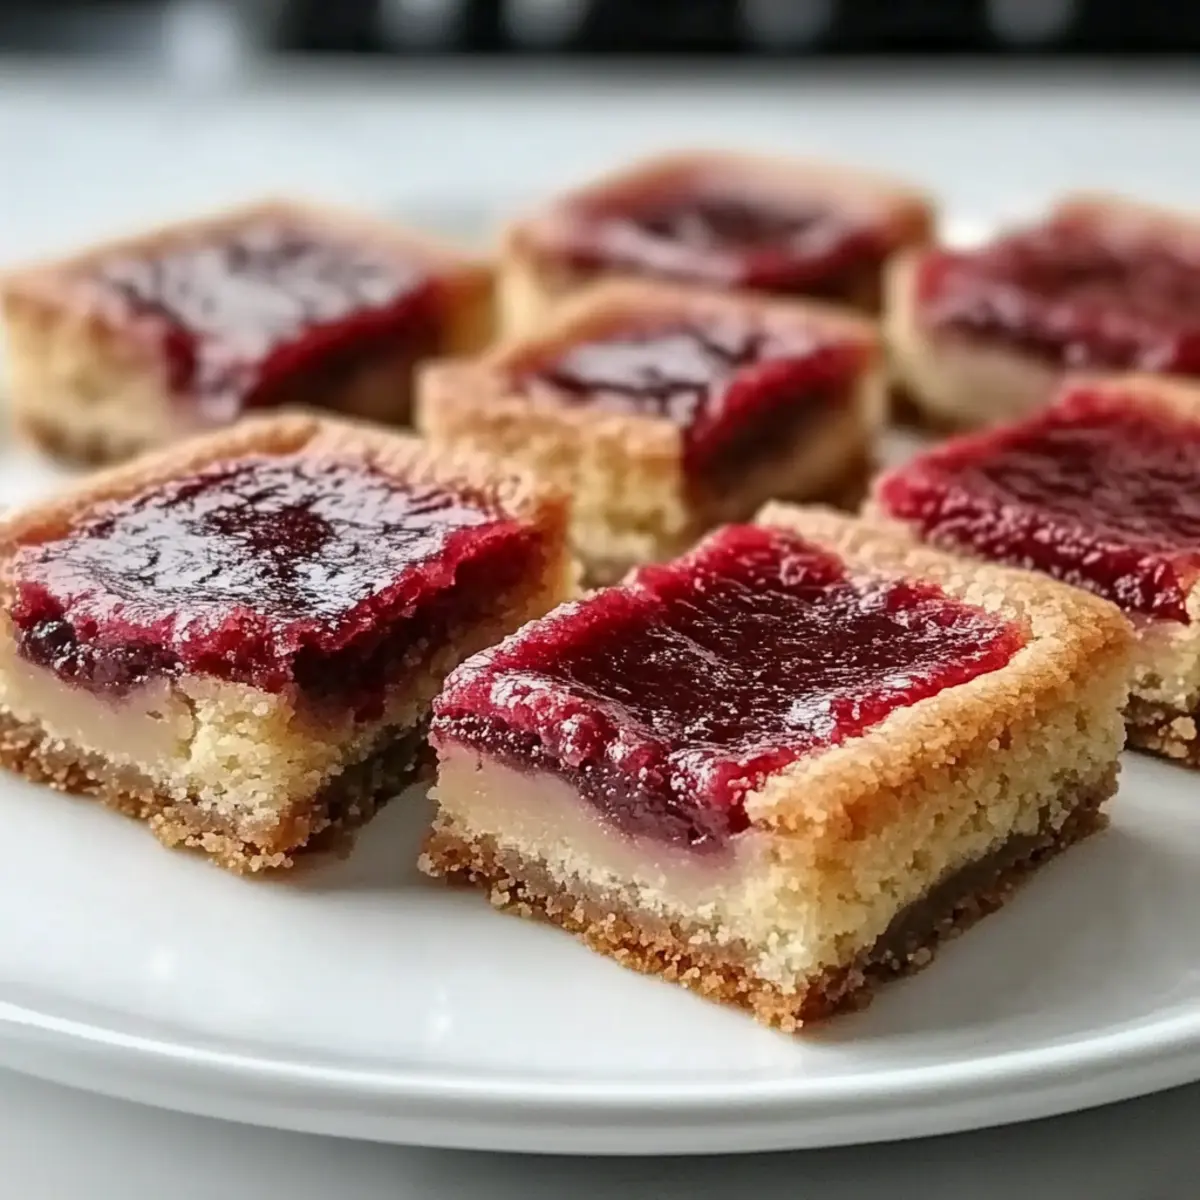
No Bake Rhubarb Cheesecake Squares You'll Love Forever
Ingredients
Equipment
Method
- In a mixing bowl, combine graham cracker crumbs, sugar, and melted butter until evenly mixed. Press into the bottom of a 9x9 inch baking dish.
- In another bowl, beat softened cream cheese with powdered sugar and vanilla until smooth and creamy.
- Fold in the cooked rhubarb and whipped cream until well incorporated.
- Spread the filling over the crust, smoothing the top. Refrigerate for at least one hour to set.
- Cut into squares and serve chilled. Enjoy your delicious no bake rhubarb cheesecake squares!
Leave a Reply