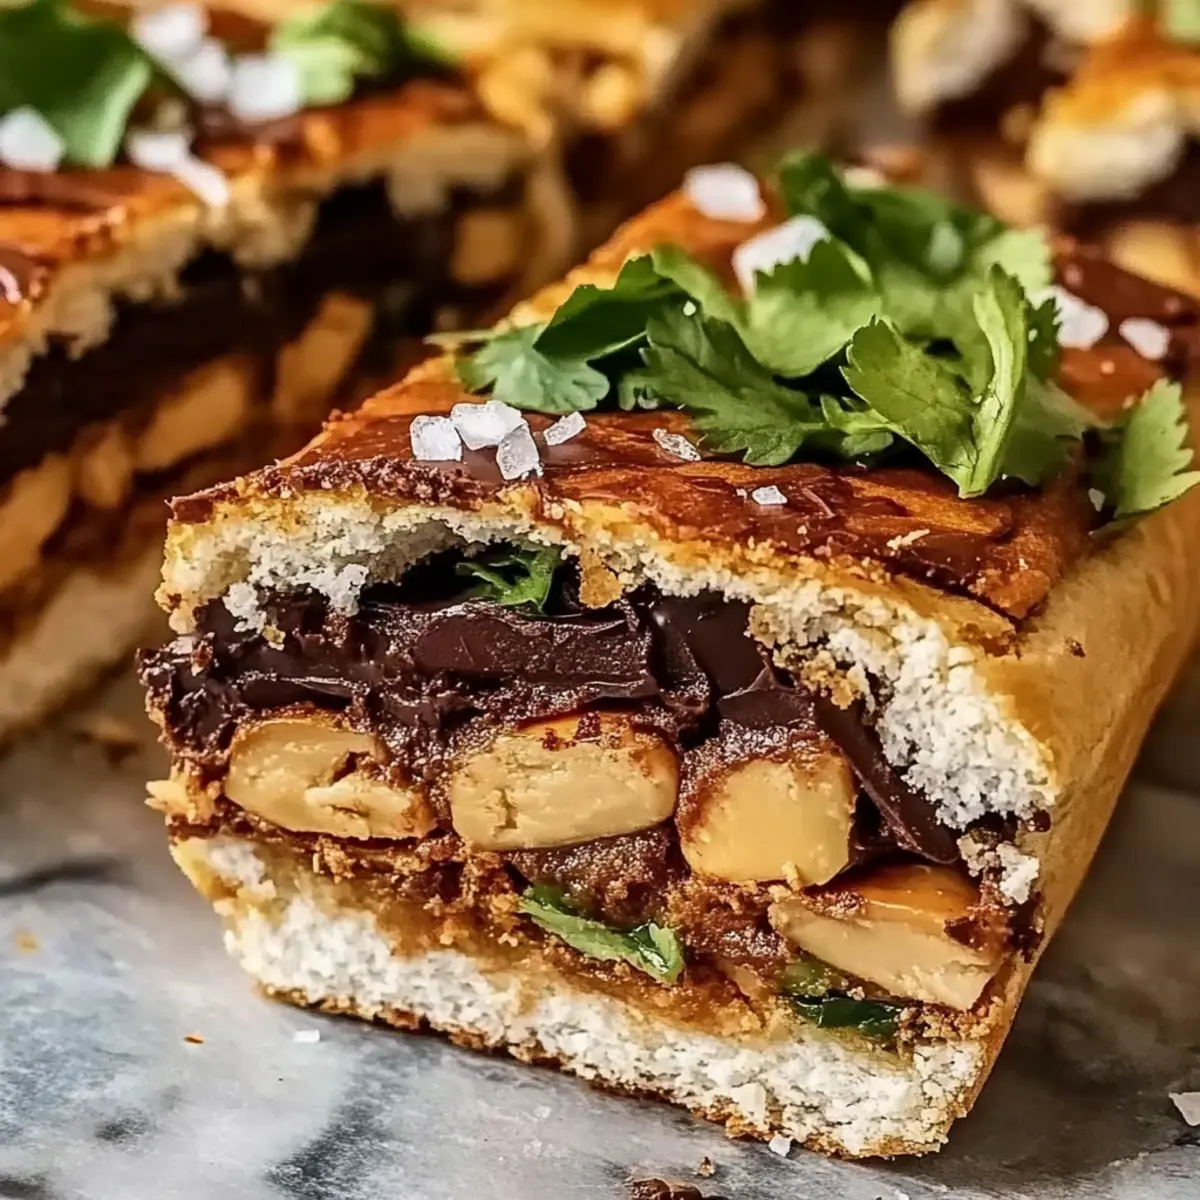
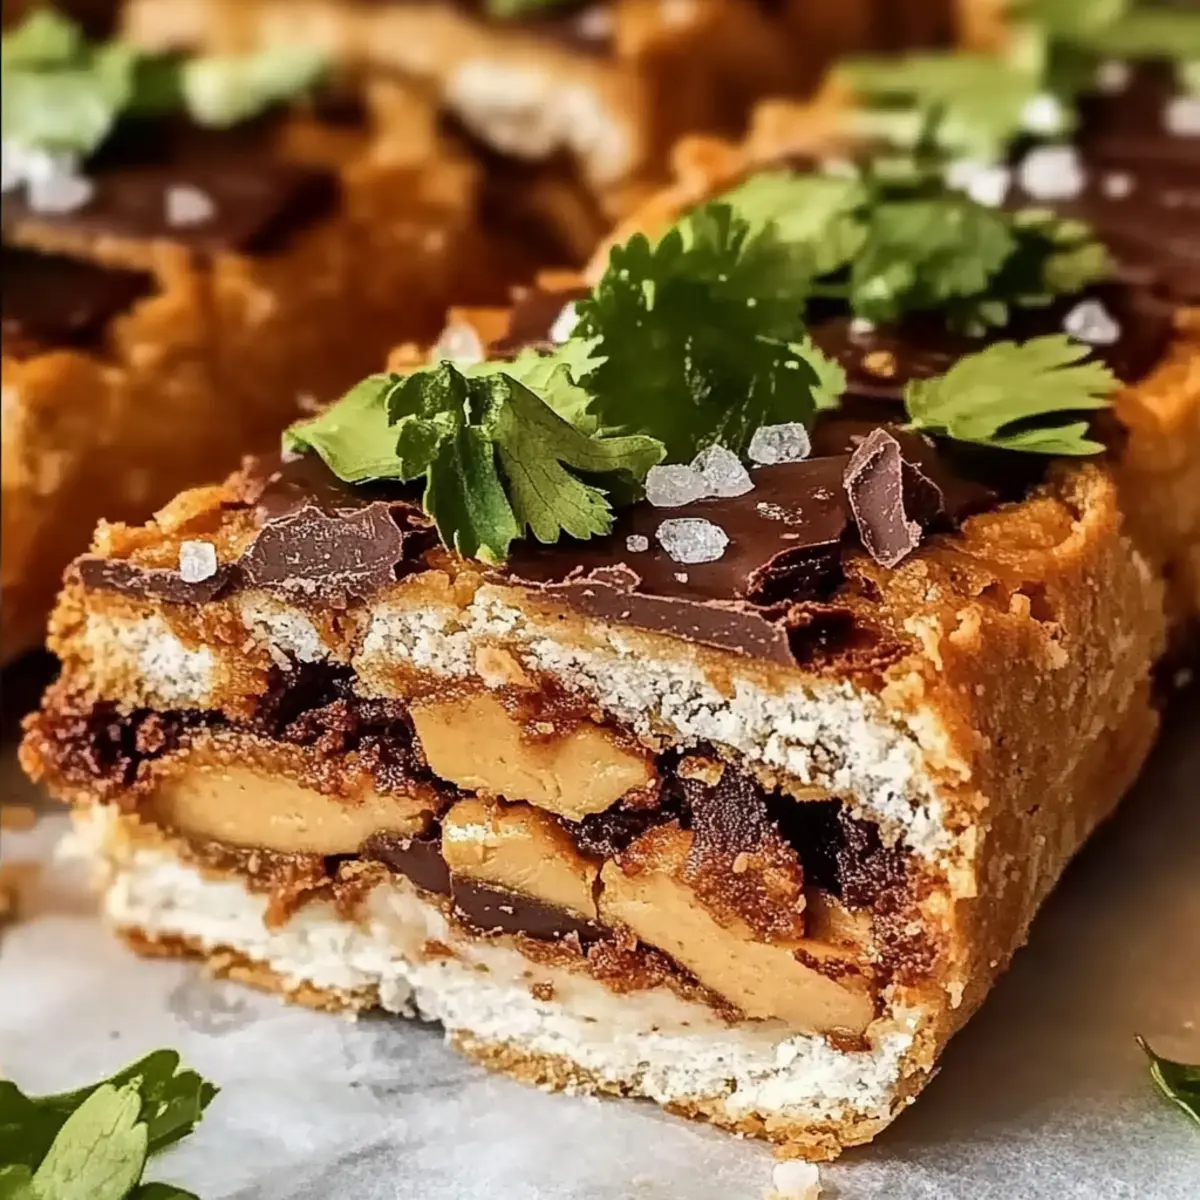
As I bit into the first piece of my No-Bake Chocolate Peanut Butter Bars, I was instantly transported back to carefree childhood days, where sweet treats were enjoyed without guilt. These bars masterfully blend creamy peanut butter and rich chocolate, offering a chewy texture that feels like a hug for your taste buds. What I love most about this recipe is that it not only requires no baking—meaning no heat in the kitchen—but it also packs a high-protein punch, making it a guilt-free snack or dessert option. Plus, with just a handful of simple ingredients, you can whip these up in no time, perfect for when the sweet cravings hit or need a quick energy boost. Ready to indulge in a delicious, hassle-free treat that’s sure to impress? Let’s dive into this recipe and discover your new favorite snack!
Why are these bars a must-try?
Guilt-Free Indulgence: Perfect for satisfying your sweet cravings without the oven.
Protein-Packed Goodness: With high-protein ingredients like peanut butter and oats, they provide a nutritious energy boost.
Quick Preparation: Whip them up in minutes with minimal fuss, ideal for busy days or unexpected guests.
Versatile Add-Ins: Customize your bars by adding nuts, dried fruits, or even seeds for a tasty twist.
These No-Bake Chocolate Peanut Butter Bars prove that delicious treats can also be wholesome and satisfying. Perfect for pairing with a cup of almond milk or enjoyed solo! Looking for another easy yet delicious idea? Check out my Cheesy Garlic Chicken for a savory adventure!
No-Bake Chocolate Peanut Butter Bars Ingredients
For the Base
- Peanut Butter – A creamy base; opt for natural, unsweetened for the best flavor.
- Oats – Adds structure and chewiness; use quick oats for a smoother texture.
- Cocoa Powder – Brings rich chocolate flavor; Dutch-processed cocoa provides a smoother taste.
- Honey (or Maple Syrup) – A natural sweetener and binding agent; choose maple syrup for a vegan option.
- Vanilla Extract – Enhances overall flavor; pure vanilla gives the best quality taste.
- Salt – Balances sweetness; a pinch goes a long way to elevate flavors.
These ingredients come together for a delicious treat that’s not just a sweet adventure but also a no-bake solution perfect for quick snacking or dessert!
Step‑by‑Step Instructions for No-Bake Chocolate Peanut Butter Bars
Step 1: Combine the Base Ingredients
In a large mixing bowl, add 1 cup of creamy peanut butter, 1/2 cup of honey (or maple syrup), and 1 teaspoon of vanilla extract. Use a spatula to mix these ingredients until smooth and well combined, which takes about 1-2 minutes. The mixture should have a creamy consistency, with no lumps, setting the foundation for your delicious No-Bake Chocolate Peanut Butter Bars.
Step 2: Add Cocoa and Salt
Next, incorporate 1/3 cup of cocoa powder and a pinch of salt into the peanut butter mixture. Stir well until everything is fully integrated, ensuring the cocoa is evenly distributed. This process usually takes about 1-2 minutes. The rich chocolate aroma should start to fill your kitchen, getting you excited about making these flavorful bars.
Step 3: Fold in Oats
Gradually fold in 1 cup of quick oats to the chocolate-peanut butter mixture. Use a spatula to combine until the oats are evenly coated, resulting in a thick, sticky batter. Spend about 2-3 minutes on this step, as you want to ensure the oats are thoroughly mixed for perfect texture. This is where your No-Bake Chocolate Peanut Butter Bars start to take shape!
Step 4: Press into the Baking Dish
Line an 8×8-inch baking dish with parchment paper for easy removal. Carefully transfer the mixture into the dish, using the spatula to press it down firmly and evenly throughout the bottom. This step is crucial to ensure the bars hold their shape once set, taking about 3-5 minutes. The top should be smooth and level, ready for chilling.
Step 5: Refrigerate to Set
Place the baking dish in the refrigerator for at least 2 hours to allow the No-Bake Chocolate Peanut Butter Bars to firm up. This chilling process solidifies the mixture, resulting in perfectly textured bars. After the waiting period, check the firmness; they should feel set yet slightly soft to the touch for the best bite.
Step 6: Slice and Serve
Once set, remove the bars from the baking dish using the parchment paper. Use a sharp knife to cut them into squares or rectangles, depending on your preferred serving size. Enjoy them chilled for a refreshing treat or at room temperature for a softer bite. Each piece reflects the rich flavors and protein-packed goodness that makes these bars irresistible!
Flavor-Packed Chicken Torta Sandwich Variations
Feel free to get creative with your Flavor-Packed Chicken Torta Sandwich to make it truly your own!
-
Spicy Twist: Add sliced jalapeños for a delightful kick. The added heat brings an exciting flavor layer perfect for spice lovers.
-
Vegetarian Option: Substitute chicken with roasted vegetables or jackfruit for a hearty yet plant-based take that packs the same flavor punch.
-
Avocado Boost: Layer sliced avocado for creamy richness that complements the flavors beautifully. It’s like a mini fiesta of textures!
-
Wrap It Up: Turn your sandwich into a wrap by using whole wheat or spinach tortillas. This is an easy and fun way to enjoy the flavors on the go.
-
Cheesy Goodness: Top with Monterey Jack cheese and pop under the broiler for a gooey, melty goodness that will have everyone coming back for seconds.
-
Fresh Herb Infusion: Mix in fresh cilantro or parsley for a burst of freshness that enhances the taste and elevates the sandwich experience.
-
Salsa Verde Drizzle: Drizzle salsa verde over the top for a tangy kick that brightens every bite. It’s a perfect match with the savory chicken.
-
Classic Twist: Keep it simple with layered lettuce and tomato for a crunchy texture and extra freshness. It’s a timeless addition that never disappoints.
These variations ensure your Flavor-Packed Chicken Torta Sandwich can adapt to any mood or dietary need! For a quick side, why not pair it with my delicious Cheesy Garlic Chicken for a complete meal?
Make Ahead Options
These No-Bake Chocolate Peanut Butter Bars are fantastic for meal prep, saving you valuable time during busy weeks! You can mix together the base ingredients (peanut butter, honey, vanilla, cocoa powder, and salt) up to 24 hours in advance, refrigerating the mixture in an airtight container. Additionally, you can fold in the oats and press the mixture into the baking dish up to 3 days ahead of time; just keep it covered in the fridge to maintain freshness. When you’re ready to enjoy, simply chill for at least 2 hours until set, slice, and serve. This way, you’ll have delicious, homemade bars ready for snacking or dessert with minimal effort!
Expert Tips for No-Bake Chocolate Peanut Butter Bars
-
Firm Pressing: Make sure to press the mixture down firmly in the baking dish; this helps the bars hold together after chilling.
-
Chill Longer if Needed: If the bars feel too soft after 2 hours, refrigerate them for an additional hour or two for the perfect texture.
-
Chocolate Topping Option: Drizzle or spread melted chocolate over the cooled bars before serving for an extra flavor boost and visual appeal.
-
Ingredient Swaps: Experiment with almond butter or sunflower seed butter for nut-free options; both contribute to the high-protein aspect.
-
Mix-Ins for Variety: Include chopped nuts, dried fruit, or mini chocolate chips in your No-Bake Chocolate Peanut Butter Bars for additional flavor and texture.
What to Serve with No-Bake Chocolate Peanut Butter Bars
These delectable bars are the perfect companion for a complete and satisfying meal experience.
- Fresh Fruit: Sliced bananas or juicy strawberries provide a refreshing contrast that balances the richness of the bars.
- Greek Yogurt Parfait: Layered with yogurt and berries, this creamy treat complements the chewy texture of the bars, boosting the protein content.
- Almond Milk Smoothie: A cold, nutty smoothie brings a refreshing sip that pairs wonderfully, making each bite even more delightful.
- Nutty Trail Mix: A side of crunchy trail mix adds texture and a bit of wholesome energy, enhancing the snack adventure.
- Dark Chocolate Drizzle: Elevate your bars further by drizzling melted dark chocolate on top for a luxurious twist that’s sure to impress.
- Cold Brew Coffee: A rich coffee adds depth to your dessert experience, balancing the sweetness and bringing a delightful caffeine kick.
With these pairings, moments of joy and indulgence are just a few bites away!
How to Store and Freeze No-Bake Chocolate Peanut Butter Bars
Room Temperature: Keep the bars stored in a cool, dry place for up to 1 week. However, the chocolate may soften, so it’s best to refrigerate them for longer freshness.
Fridge: Place the bars in an airtight container in the refrigerator, where they will stay fresh for up to 2 weeks. This keeps them firm and ready to satisfy your cravings at any time.
Freezer: For longer storage, freeze the No-Bake Chocolate Peanut Butter Bars. Wrap each bar tightly in plastic wrap, then in aluminum foil, and they can last up to 3 months.
Reheating: If you prefer them soft, let the bars sit at room temperature for about 15 minutes before enjoying, or microwave for about 10-15 seconds to warm slightly.
No-Bake Chocolate Peanut Butter Bars Recipe FAQs
How do I choose the right peanut butter?
Absolutely! For the best flavor and texture, I recommend using natural, unsweetened peanut butter. Look for a brand that doesn’t contain added sugars or hydrogenated oils. When you stir it, the oil should settle on top—just mix it in before measuring. This enhances the creamy texture and lets the peanut flavor shine through.
What is the best way to store these bars?
Very! Store your No-Bake Chocolate Peanut Butter Bars in an airtight container in the refrigerator. They will stay fresh for up to 2 weeks. If you want to make a larger batch and enjoy them later, freezing is a great option!
Can I freeze No-Bake Chocolate Peanut Butter Bars?
Absolutely! To freeze, wrap each bar tightly in plastic wrap, then place them in a resealable freezer bag or aluminum foil. This prevents freezer burn and keeps them fresh for up to 3 months. When you’re ready to enjoy them, just let them sit at room temperature for about 15 minutes before indulging, or microwave for about 10-15 seconds to warm slightly.
What should I do if my bars are too soft?
If your bars appear too soft after chilling, don’t fret! Simply place them back in the refrigerator for an additional hour or two. This extra chilling time allows the bars to firm up properly. For a quicker fix, you can also try pressing the mixture more firmly into the baking dish before chilling.
Are there any allergy considerations for this recipe?
Yes! If you’re concerned about allergies, you can substitute almond butter or sunflower seed butter for the peanut butter; both options provide a high-protein alternative that also keeps the bars delicious. Always check the ingredient labels for potential cross-contamination if you’re preparing these for someone with a severe allergy.
Can I add other ingredients to the bars?
The more the merrier! Feel free to mix in chopped nuts, dried fruits like cranberries or raisins, or even mini chocolate chips for an extra flavor and texture boost. Just remember to adjust the ratios slightly to ensure the bars maintain their structure.
Flavor-Packed Chicken Torta Sandwich That Will Wow You
Ingredients
Equipment
Method
- In a large mixing bowl, combine 1 cup of creamy peanut butter, 1/2 cup of honey (or maple syrup), and 1 teaspoon of vanilla extract. Mix until smooth.
- Incorporate 1/3 cup of cocoa powder and a pinch of salt into the mixture, stirring well.
- Gradually fold in 1 cup of quick oats until fully combined.
- Line an 8x8-inch baking dish with parchment paper and press the mixture down evenly.
- Refrigerate the dish for at least 2 hours to allow the bars to firm up.
- Once set, cut into squares or rectangles and serve.
Leave a Reply